
If you’ve ever been burned by a flat, dense scone that tasted more like a hockey puck than afternoon tea heaven, you know the struggle is real. Forget those sad, crumbly attempts! I’m here to tell you that making truly magnificent, tall, and fluffy scones isn’t magic; it’s efficiency. Our founder, Leo, applied his project management brain to baking, stripping away the guesswork so you get reliable flavor every time. This is the definitive best scones recipe you’ll ever need for that perfect, tender bite.
- Why This Classic Buttermilk Scones Recipe Works Every Time
- Ingredients Needed for Perfect Scones from Scratch
- Step-by-Step Instructions: How to Make Perfect Scones
- Serving Suggestions for Your Homemade Scones
- Creative Variations on Classic Scones
- Storage and Reheating Instructions for Scones
- Troubleshooting Common Scone Issues
- Estimated Nutritional Data for Classic Scones
- Share Your Perfect Scones Experience
Why This Classic Buttermilk Scones Recipe Works Every Time
We aren’t messing around here. If you are looking for that elusive light and airy crumb, this is where you find it. We’ve optimized this process so your kitchen delivers bakery-quality results, fast. You get incredible flavor and texture with minimal fuss, perfect for a quick weekday breakfast or hosting brunch. Check out why these scones are foolproof:
- They deliver that signature fluffy buttermilk scones lift you crave.
- This is a quick recipe—we’re talking under an hour from start to serving!
- They stay wonderfully fresh, not dry, thanks to the buttermilk.
- It’s truly a no-fail scone recipe once you understand the cold science involved.
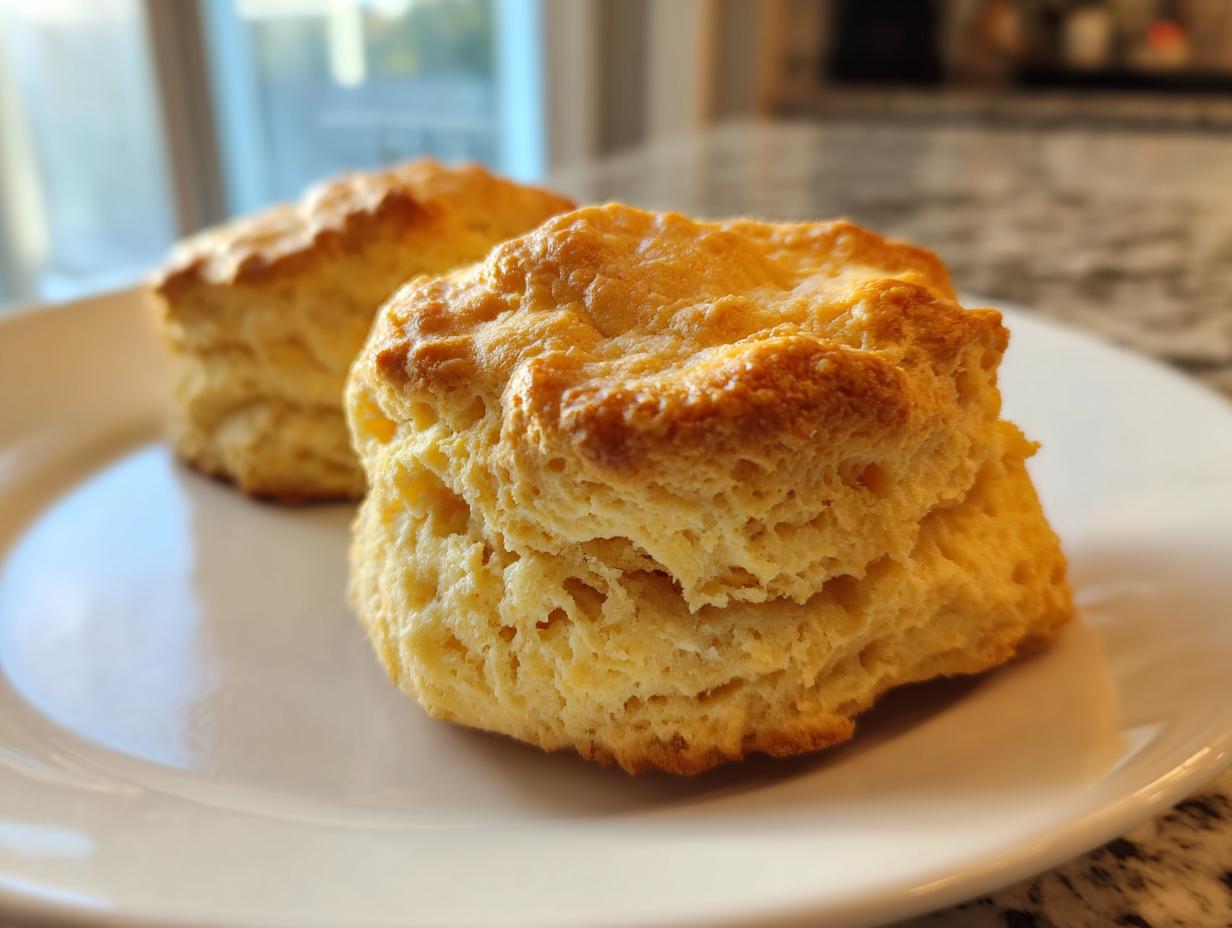
Achieving Tall Bakery Style Scones Texture
The secret to those gorgeous, towering tall bakery style scones? Temperature, temperature, temperature! We need the butter to be stone cold before it hits the dry mix. When that cold butter hits the hot oven, it creates little pockets of steam. Those pockets push the dough up, up, up, resulting in layers and that crumbly light scones finish we absolutely adore. Don’t skip chilling that buttermilk either; everything must be icy for the best rise!
Ingredients Needed for Perfect Scones from Scratch
Listen, if you want the best scones, you need to treat your ingredients right. This isn’t the place to bring out room-temperature butter; we are going for maximum lift here! Keep everything pictured below icy cold until the moment it goes into the bowl. Using good quality ingredients is how we build trust in this recipe—it really shows in the final crumb. For this simple batch, you’ll need the following basics you likely already have on hand.
- 2 cups all-purpose flour
- 1 tablespoon baking powder
- 1/2 teaspoon salt
- 1/4 cup granulated sugar
- 1/2 cup (1 stick) cold unsalted butter, cut into small cubes
- 3/4 cup cold buttermilk
- 1 large egg, beaten (for the wash)
- 1 tablespoon milk or cream (for the wash)
Ingredient Notes and Substitutions for Your Scones
I cannot stress this enough: the key to avoiding sad, flat cakes is making sure your butter is truly cold—like, right out of the freezer cold, cubed up small. If you grab your buttermilk and it’s warm, pop it in the freezer for ten minutes too! If you absolutely don’t have buttermilk on hand for these fluffy buttermilk scones, don’t panic. You can make a quick substitute by putting a tablespoon of white vinegar or lemon juice into your regular milk and letting it sit for five minutes until it curdles slightly. It works just as well to get that necessary tang and tender texture!
Step-by-Step Instructions: How to Make Perfect Scones
Okay, let’s get messy! We’re aiming for that amazing rise. Remember, this whole process takes barely 15 minutes of prep before they go into the oven for about 17 minutes. You’ll be enjoying these incredible homemade scones before you know it. First thing: crank that oven up to 400°F (200°C) and line a baking sheet with parchment paper. Trust me, kitchen cleanup is easier this way.
Next, whisk your flour, baking powder, salt, and sugar together. Then, it’s time for the cold butter cubes. Use a pastry blender or just your fingertips to work the butter into the flour until it looks like coarse crumbs. You want to see some pea-sized bits—those become steam pockets! Make a well in the middle and pour in that ice-cold buttermilk. Mix it with a fork until it just comes together. It’s going to look shaggy and weird; that’s exactly what we want for perfect scones from scratch!
The Essential Folding Technique for Fluffy Scones
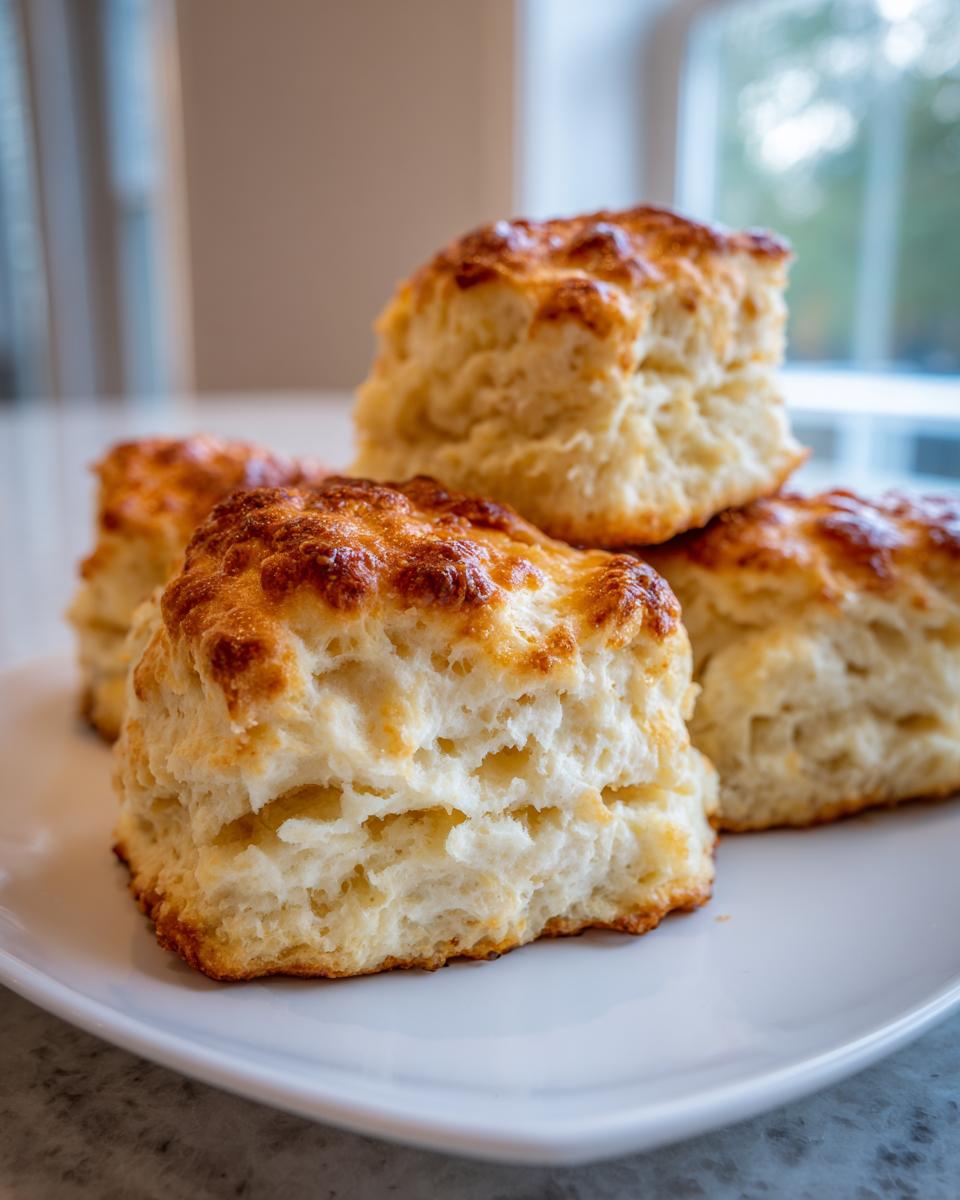
This is where we build the height! Turn that shaggy dough out onto a lightly floured counter. Gently pat it into a rough 1-inch thick rectangle. Now, this is key: fold it like you’re folding a business letter—left side over, then right side over. Turn the dough 90 degrees, and do it again! We are layering the butter inside the dough, creating walls that force the scone straight up as it bakes. These layers are what stop you from getting flat discs.
After that second fold, pat it out one last time to about an inch thick. Take your 2-inch biscuit cutter and press *straight down*. Do not twist! Twisting seals up the sides, and they won’t climb nicely. Cut your shapes and place them right next to each other on the baking sheet. They support each other as they bake, which helps keep them extra tall.
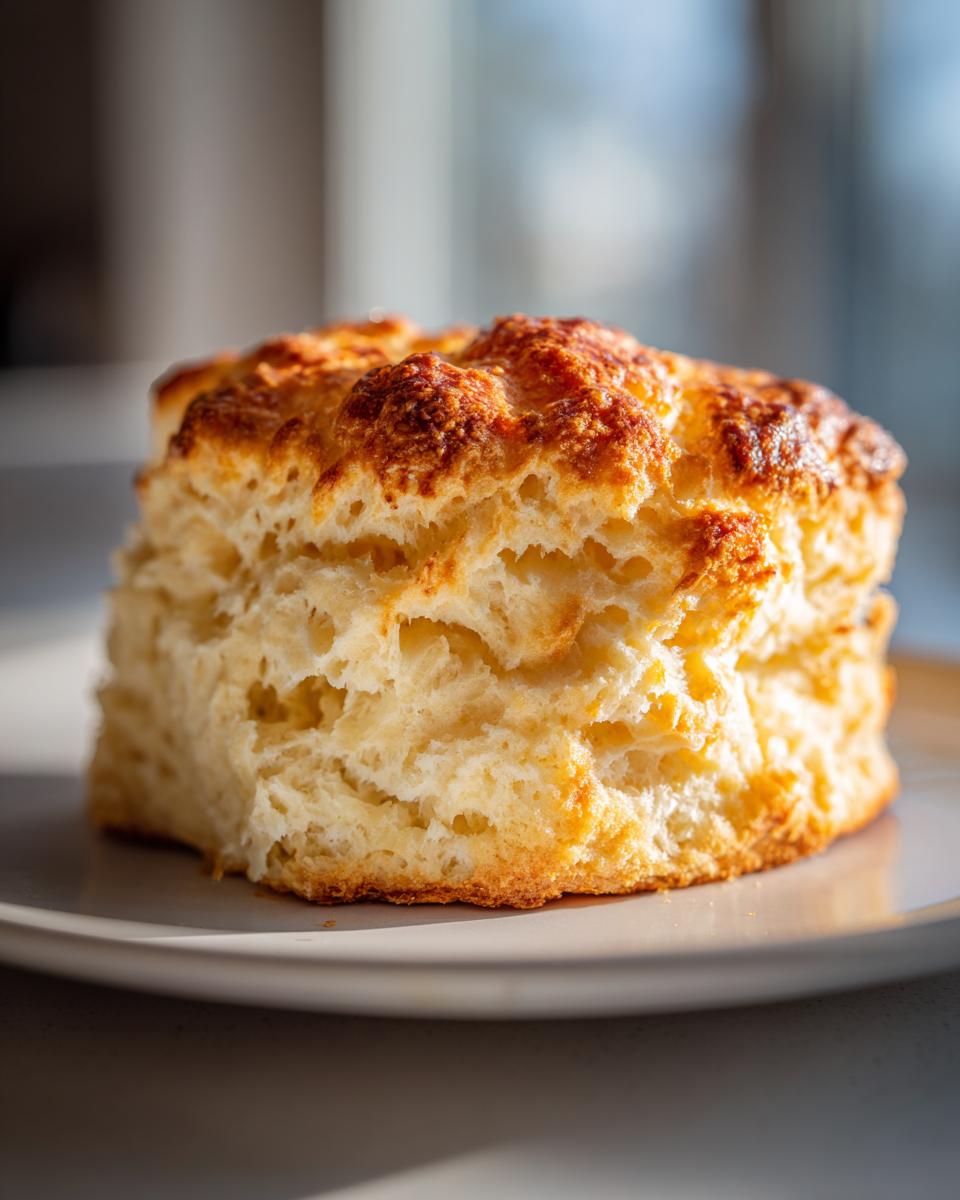
Baking and Achieving Golden Scones
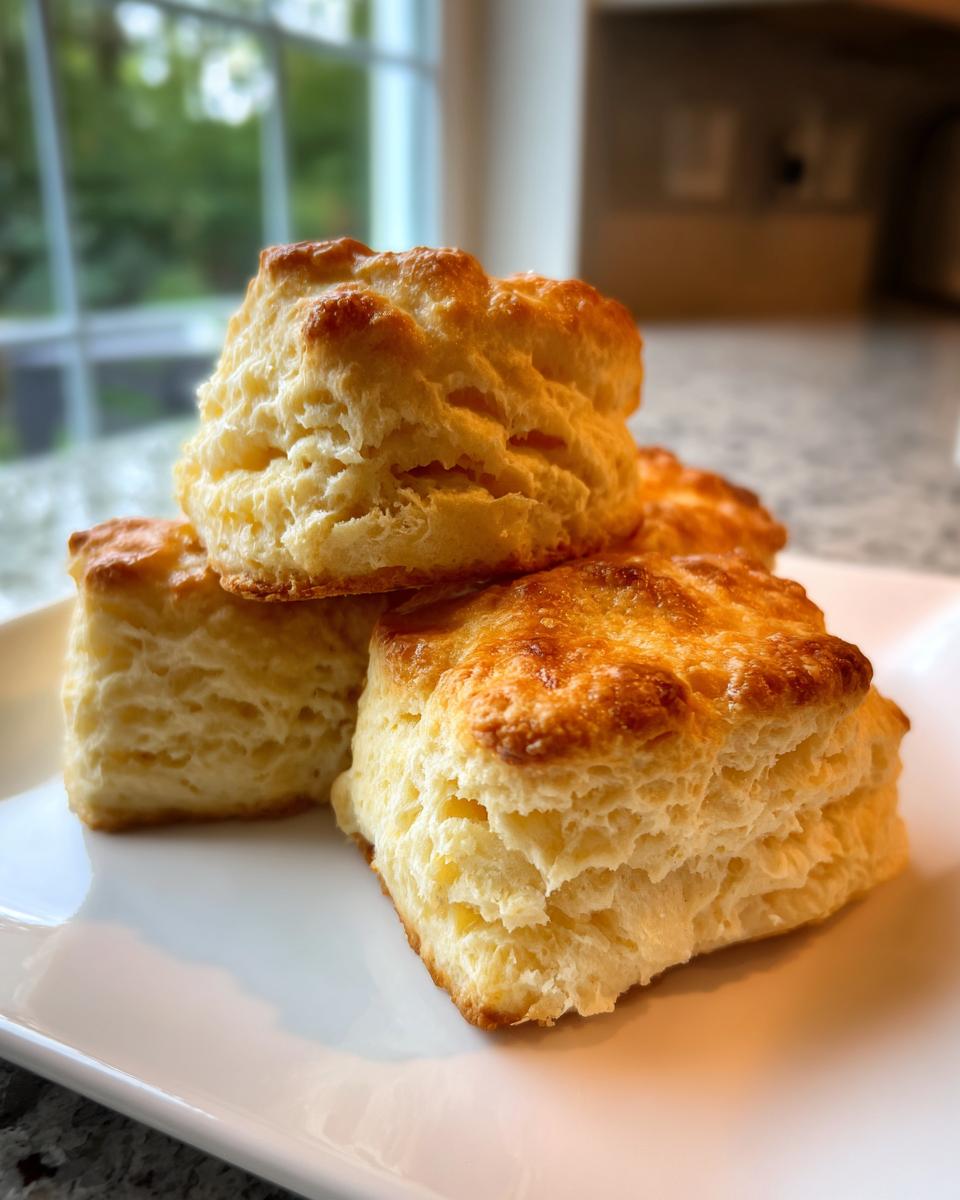
For that gorgeous, shiny finish that screams “I made these for afternoon tea,” whisk your egg and milk together to make a wash. Brush the tops lightly—don’t let it drip down the sides, or you’ll lose that rise we worked so hard for! Bake for about 14 to 17 minutes. You’re looking for a deep golden brown color on top. Once they are done, pull them out and let them sit on a wire rack to cool down just enough so you can handle them. Serve warm!
Serving Suggestions for Your Homemade Scones
Once those beautiful scones are out of the oven, the fun really begins! To honor the tradition of afternoon tea, you absolutely must serve them warm with clotted cream and your favorite jam—strawberry is classic perfection, if you ask me. But if you want that extra sweet touch, a drizzle makes them look totally professional.
Simple Scone Glaze Recipe Ideas
If plain is a little too plain for your taste, a quick scone glaze recipe takes five minutes. Just whisk 1 cup of powdered sugar with 2 tablespoons of milk or, even better, fresh lemon juice. You want it thick but pourable—if it’s too stiff, add milk a teaspoon at a time. Drizzle it over the tops while the scones are just warm, and that hint of sweetness really sets them off!
Creative Variations on Classic Scones
Okay, now that you have mastered the base recipe, the real fun begins! While the classic plain scones are amazing, this dough is the perfect canvas for practically anything you can dream up. Thinking about what flavors go well with cream and jam is half the battle. You can easily turn this into a breakfast staple or the perfect seasonal treat!
Seasonal Scones: Pumpkin Spice Scones and Christmas Scones Recipe
The holidays just scream for special baked goods, don’t they? For incredible Christmas scones recipe ideas, I usually fold in dried cranberries and maybe some orange zest right along with the dry ingredients. If you are feeling the crisp air fall vibes, you can turn these into amazing pumpkin spice scones. Just replace about 1/4 cup of the flour with pure pumpkin puree (make sure it’s the puree, not pie filling!) and replace the buttermilk with regular milk until the dough just comes together. The spices you already have for the base recipe do most of the heavy lifting!
Sweet Flavor Twists: Maple Pecan Scones Recipe
If you enjoy something rich and nutty, you need to try the maple pecan scones recipe version. This one brings in that deep, comforting sweetness. Right before you add the buttermilk, fold in about half a cup of toasted pecans. Then, instead of milk in your egg wash, use a tiny bit of maple extract mixed into the egg and milk. If you want to go all out, skip the egg wash entirely and use a maple glaze! It makes them taste decadent, like a proper, sweet bakery treat.
Storage and Reheating Instructions for Scones
So, you made too many perfect scones? Well, don’t you fret! The best way to keep these treats tasting fresh is airtight storage at room temperature. They’ll stay nice for about two days—any longer and they start losing that glorious fluffiness. Freeze the leftovers if you want them to last longer; they freeze beautifully!
When you’re ready to eat your stored scones, skip the microwave if you can help it. The microwave makes them spongy fast. Instead, wrap them loosely in foil and pop them into a 350°F (175°C) oven for about five to seven minutes. Heating them slowly brings back that fresh-baked outer crispness without drying out the crumb. That’s my expert tip for savoring them all week long!
Troubleshooting Common Scone Issues
Even with the best recipe, sometimes things go sideways in the kitchen. If you end up with something that feels more like a rock than a fluffy buttermilk scone, don’t toss it! Let’s troubleshoot this together so you can say goodbye to that sinking feeling. Having this knowledge is what moves you from just following a recipe to truly mastering it. I want everyone to have a no fail scone recipe, and that means knowing what to watch out for.
The biggest complaint I hear is that they come out dry. If your scones were dry, nine times out of ten the issue was overmixing. Once you add the buttermilk, you need to stop stirring the second you see the dry flour streaks disappear. If you keep going, you develop gluten, and gluten makes bread tough, not tender and crumbly light.
Flat scones usually point back to warm ingredients. Remember our big secret? If your butter melts into the flour before it hits the oven, there’s no steam explosion—no lift! Take out your ingredients right before you start, cut your butter into tiny, well-chilled cubes, and work fast with your hands. If they look flat even when you think they were cold, check your baking powder; it might be too old and lost its punch!
If you cut the scone shape and they spread out sideways during baking instead of rising tall, it means you twisted the cutter! Pressing straight down keeps the sides smooth and gives the dough something to push against as it climbs. Twist, and you create tiny, sealed edges that crack the dough open sideways instead of upwards.
Estimated Nutritional Data for Classic Scones
Now, I know some people count every little thing, and for those folks, here’s the nutritional breakdown for our basic, classic scones. Remember, this is based on the recipe using butter, sugar, and buttermilk, and doesn’t include the clotted cream or jam you pile on top—because nobody counts those when it comes to afternoon tea, right?
- Serving Size: 1 scone
- Calories: 280
- Fat: 15g (with 9g saturated fat)
- Carbohydrates: 32g
- Sugar: 6g
- Protein: 6g
- Sodium: 250mg
Just a quick note, because I’m all about being upfront: these numbers are my best estimates based on standard ingredient values. If you swap out buttermilk for heavy cream, or use brown sugar instead of white, the stats will shift a bit! This is meant to give you a general idea of what you’re enjoying when you bite into one of these perfectly fluffy buttermilk scones.
Share Your Perfect Scones Experience
Now comes the best part: eating them! But before you dive fork-first into that clotted cream, I honestly want to hear about your results. Did you nail that beautiful, tall bakery-style rise? Did you finally conquer that tricky process of keeping your ingredients cold? Don’t be shy!
Seriously, drop a comment below and let me know how many minutes it took you, or if you added any fun ingredients like white chocolate chips or a drizzle of lemon glaze. Your success stories—and even your little oopsies—help the next person who tries this no fail scone recipe. Seeing your gorgeous, fluffy buttermilk scones makes my day!
And if you snapped a picture of your spread—maybe you’re enjoying them for afternoon tea or brunch—tag us on social media! We absolutely love seeing these simple recipes shining in real kitchens. Happy baking, friends!
PrintPerfectly Tall and Fluffy Buttermilk Scones
Make bakery-style scones at home using cold ingredients and a simple folding technique. This recipe yields tender, light scones perfect for afternoon tea or breakfast.
- Prep Time: 15 min
- Cook Time: 17 min
- Total Time: 32 min
- Yield: 8 servings 1x
- Category: Breakfast
- Method: Baking
- Cuisine: American
- Diet: Vegetarian
Ingredients
- 2 cups all-purpose flour
- 1 tablespoon baking powder
- 1/2 teaspoon salt
- 1/4 cup granulated sugar
- 1/2 cup (1 stick) cold unsalted butter, cut into small cubes
- 3/4 cup cold buttermilk
- 1 large egg, beaten (for egg wash)
- 1 tablespoon milk or cream (for egg wash)
Instructions
- Preheat your oven to 400°F (200°C). Line a baking sheet with parchment paper.
- In a large bowl, whisk together the flour, baking powder, salt, and sugar.
- Add the cold butter cubes to the dry ingredients. Use a pastry blender or your fingertips to cut the butter into the flour until the mixture resembles coarse crumbs with some pea-sized pieces of butter remaining. This step is key for flakiness.
- Make a well in the center of the mixture and pour in the cold buttermilk. Use a fork to gently mix until just combined. Do not overmix; the dough will look shaggy.
- Turn the dough out onto a lightly floured surface. Gently pat the dough into a rough rectangle about 1 inch thick.
- Fold the dough in thirds, like a business letter. Turn the dough 90 degrees and repeat the folding process one more time. This layering builds height.
- Pat the dough out again to about 1 inch thick. Use a 2-inch round biscuit cutter to cut out the scones. Press the cutter straight down without twisting to keep the sides straight for a tall rise.
- Place the cut scones close together on the prepared baking sheet. For extra height, you can gently press them against each other.
- In a small bowl, whisk the egg and milk/cream together to create an egg wash. Brush the tops of the scones lightly with the wash.
- Bake for 14 to 17 minutes, or until the tops are golden brown and the scones are risen.
- Transfer the scones to a wire rack to cool slightly before serving. Serve warm with jam and clotted cream.
Notes
- Keep all wet and dry ingredients cold. Cold butter creates steam pockets, resulting in a tall, fluffy texture.
- When cutting the scones, press the cutter straight down. Twisting seals the edges and prevents a high rise.
- For a sweeter finish, drizzle with a simple glaze made from 1 cup powdered sugar mixed with 2 tablespoons of milk or lemon juice.
Nutrition
- Serving Size: 1 scone
- Calories: 280
- Sugar: 6
- Sodium: 250
- Fat: 15
- Saturated Fat: 9
- Unsaturated Fat: 6
- Trans Fat: 0
- Carbohydrates: 32
- Fiber: 1
- Protein: 6
- Cholesterol: 55