
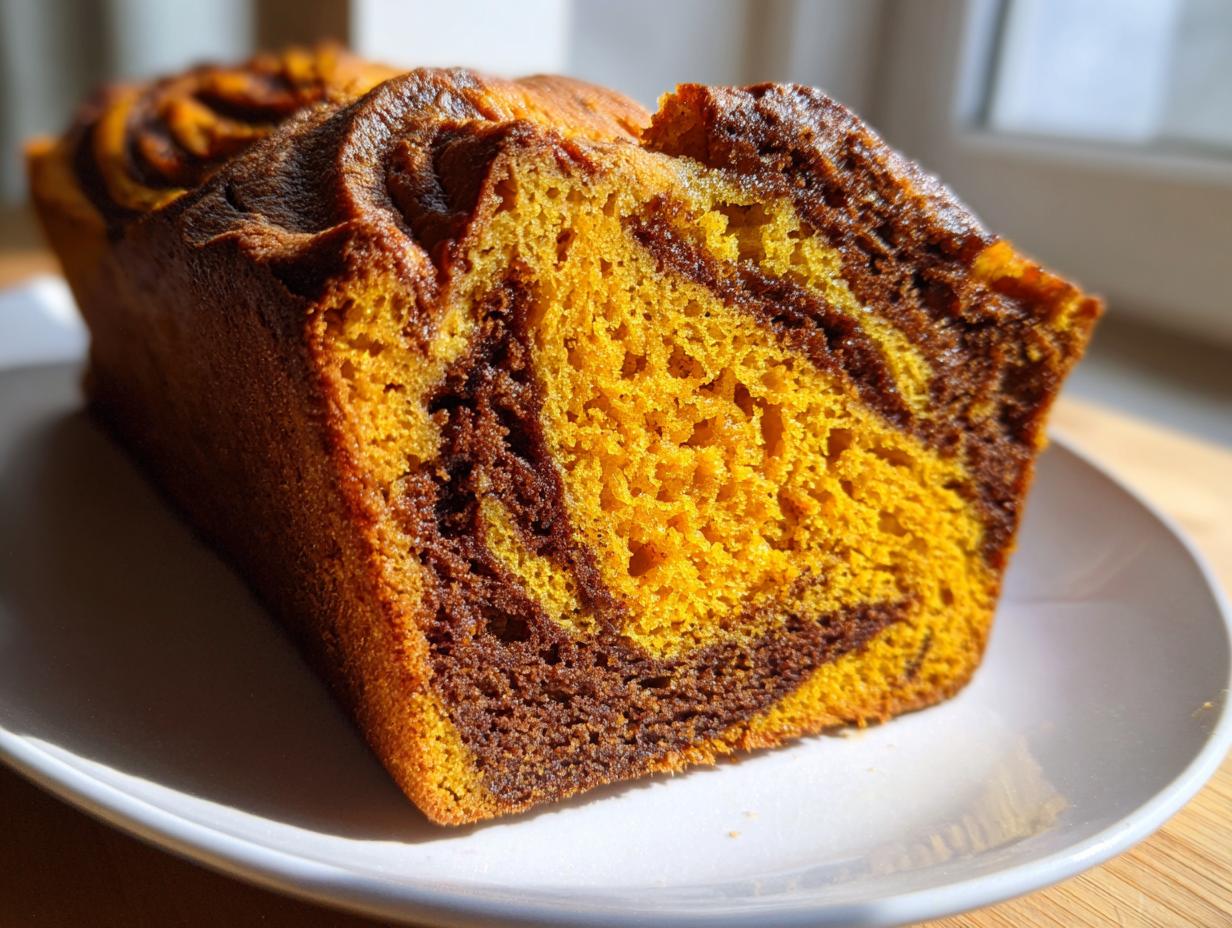
Look, the moment the air gets that crisp edge, you know it’s time. Forget the stress of fussy recipes; we are engineers in the kitchen, and our goal is maximum flavor output with minimum evening hassle. That’s why I took the challenge of making a truly indulgent **pumpkin sourdough** loaf, and I streamlined the entire process. This isn’t just bread; this is the centerpiece for your table—think soft, sweet, spiced, and perfectly tangy. It’s absolutely designed to be the star of your next holiday spread. We’re using an active starter here, and I’ve broken down the mixing and proofing into manageable project phases so you get that rustic loaf texture every time.
- Why This Sweet and Spiced Pumpkin Sourdough Loaf Works (E-E-A-T)
- Gathering Ingredients for Your Pumpkin Sourdough
- Step-by-Step Instructions for Perfect Pumpkin Sourdough
- Tips for Making Your Pumpkin Sourdough Extra Moist
- Storage and Keeping Your Pumpkin Sourdough Fresh
- Serving Suggestions for This Sweet and Spiced Bread
- Frequently Asked Questions About Pumpkin Sourdough Baking
- Estimated Nutrition for Your Pumpkin Sourdough Slice
- Share Your Fall Baking Recipes Success
Why This Sweet and Spiced Pumpkin Sourdough Loaf Works (E-E-A-T)
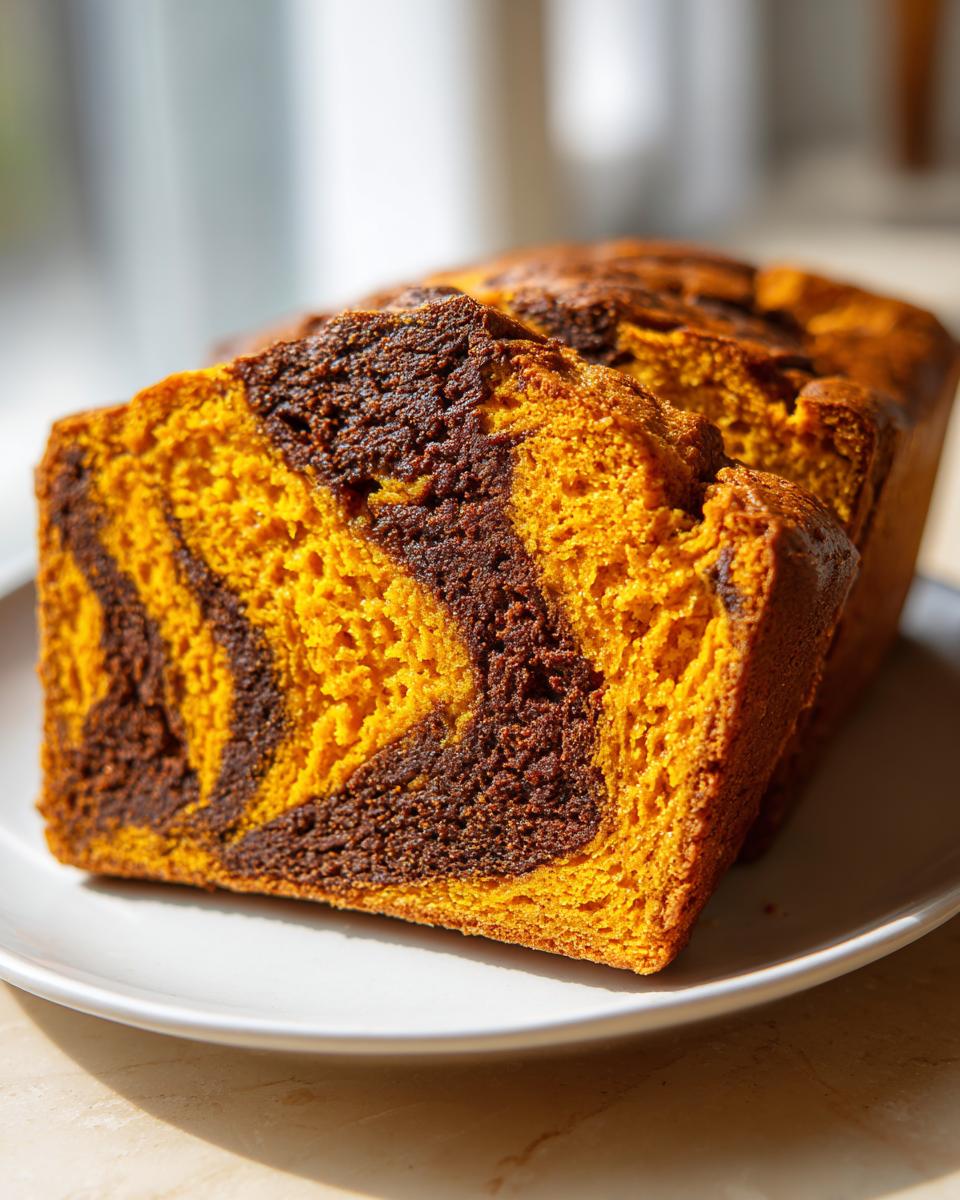
When you’re building a loaf—something with substance that needs to stand tall—you really need the lift that only an active, fed starter provides. While I adore sourdough discard recipes for pancakes or muffins, this enriched bread structure demands that extra power. We are layering sweetness from the sugar and puree against the natural tang of the starter, striking that perfect balance for your homemade sourdough bread.
Now, working with pumpkin puree throws the hydration off balance, as you might expect. I spent a couple of batches tweaking the water content because the dough felt too wet initially. Trust me, sticking to these measurements keeps the crumb open without turning your loaf into a pancake. It’s all about controlled moisture.
Gathering Ingredients for Your Pumpkin Sourdough
When you’re organizing your bake, think of this as setting up your project deployment. Having everything measured and ready means the actual mixing phase goes super smooth, which is key when dealing with this much moisture. Remember, we want a flavorful, slightly tangy loaf, not a dense brick! Make sure you grab 100% pure pumpkin puree—the pie filling already has sugar and spices, and that will throw our formula completely off. You can check out my tips on using different flours over at my article on whole wheat bread, but for this recipe, traditional bread flour gives us the best structure.
For the Pumpkin Sourdough Dough
- 100g active sourdough starter (it has to be 100% hydration!)
- 350g bread flour
- 150g pumpkin puree (absolutely must be pure pumpkin, not pie filling!)
- 75g warm water
- 50g granulated sugar
- 10g salt
- 5g pumpkin pie spice
- 1 large egg
For the Cinnamon Swirl Filling
- 50g brown sugar
- 1 teaspoon cinnamon
- 25g softened butter
When mixing the swirl ingredients, make sure that butter is truly soft—not melted, just easily mashed by a fork. This helps us create that perfect little crumbly texture we need before rolling it into the dough.
Step-by-Step Instructions for Perfect Pumpkin Sourdough
Okay, here is where we put the plan into action. As a project manager, I love seeing a process flow smoothly, and this recipe has very clear phases. We mix, we rest, we build strength, we swirl, and then we wait. Don’t skip the resting times! They might seem like wasted minutes, but they are crucial for gluten development, especially with the added moisture from that pumpkin puree. This is how we ensure we get a beautiful, open crumb in our final loaf.
Mixing and Building Dough Strength for Your Pumpkin Sourdough
First, get everything except the salt into a large bowl. Mix it by hand until it’s just shaggy and you don’t see any dry patches of flour left. Then, cover it up and let it sit quietly for 30 minutes. That’s your autolyse period—the flour is getting hydrated, and things are starting to relax. After that rest, it’s time for strength training, sourdough style! We’re going to do four rounds of stretch and folds. After each set, cover the bowl and wait exactly 30 minutes before you do the next set. You’re not kneading; you’re just gently stretching the dough up and folding it over itself until it feels stronger each time. This process builds the structure needed to support that cinnamon swirl later on.
Incorporating the Cinnamon Swirl into the Pumpkin Sourdough Loaf
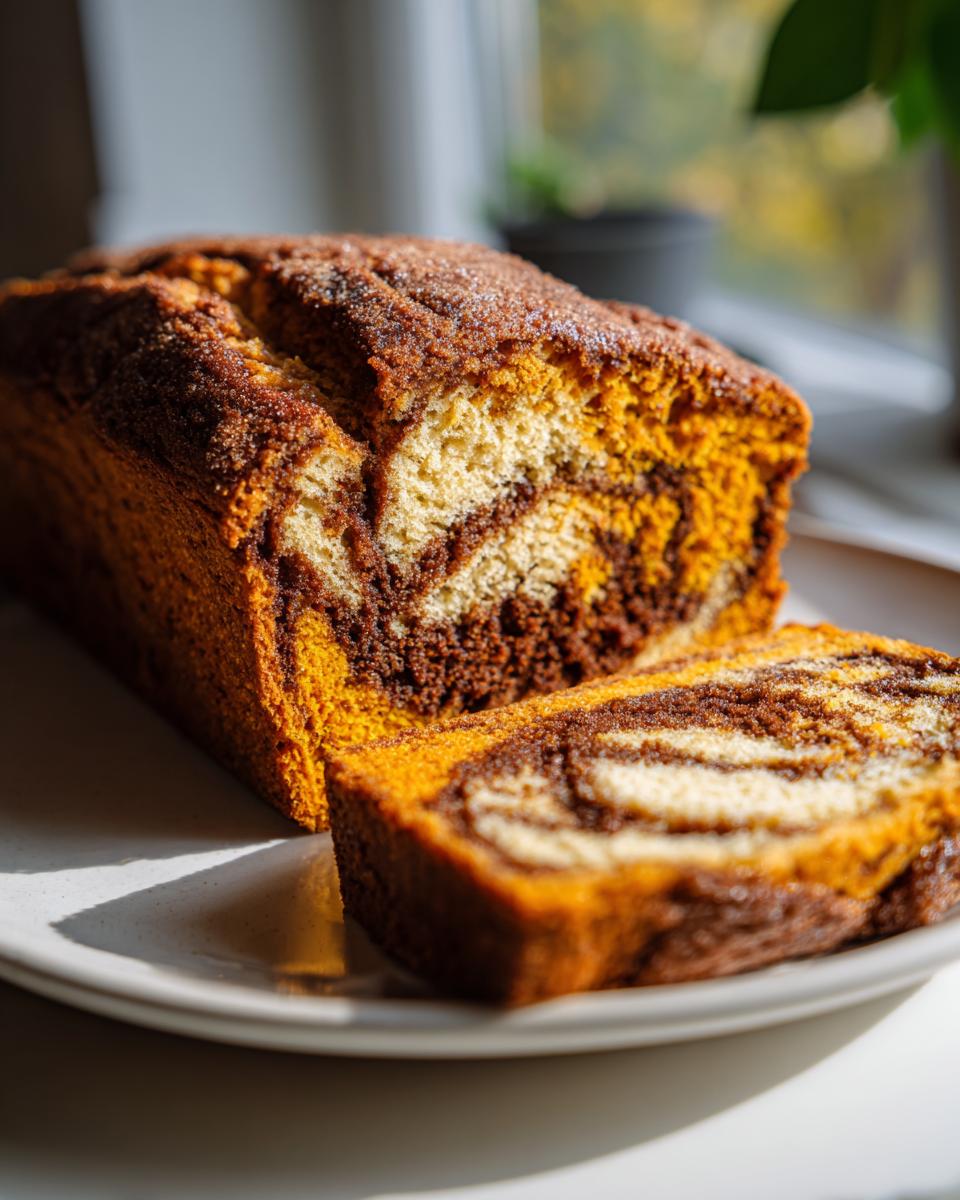
Once you finish that final set of stretches, it’s time for the fun part that makes this a true cinnamon swirl bread. Gently flatten your dough out on a lightly floured counter into a rough rectangle. Take that buttery brown sugar-cinnamon mix we made earlier and sprinkle it evenly across the surface. Now, this next part is important: roll the dough up tightly, just like you would a jelly roll, making sure you trap the filling inside. Pinch the seam shut really well! Then, shape it into the final boule or oblong shape you want and tuck it seam-side down into a well-floured proofing basket. This rolling action distributes that sweet spice beautifully throughout your loaf.
Proofing and Baking the Autumn Bread Ideas
Now for the waiting game—this is where the tang develops! Cover your basket and stick it in the fridge for a long, cold rest, aiming for anywhere between 12 and 18 hours. It needs that time to mature. When you’re ready to bake, crank your oven up! Preheat it to 500°F (260°C) with your Dutch oven inside for a full hour. Don’t rush the heat soak! Once it’s screaming hot, carefully flip your cold dough onto parchment paper, score it deeply so it knows where to expand, and lower it into the Dutch oven using the paper as a sling. Bake covered for 20 minutes at that high heat. Then, pull the lid off, drop the temperature way down to 450°F (232°C), and let it bake uncovered for another 20 to 25 minutes until you get that deep mahogany color we all chase.
Tips for Making Your Pumpkin Sourdough Extra Moist
We engineered this bread to be moist, but because we are dealing with a wet ingredient like pumpkin puree, a couple of extra steps can guarantee success. This is high-level efficiency right here—getting the best texture without complicating the main process we just mapped out.
The biggest secret is often just letting the dough control you, instead of trying to strictly control the dough. Since pumpkin puree is dense and adds a lot of water, you might feel like you need to add more flour during the stretch and folds. Resist that urge! If you add extra flour now, you end up with bread that tastes dry later, even though it started wet. Trust the process outlined in the instructions.
Another thing: high sugar content helps retain moisture, which is why we added sugar to the main dough and the swirl. This keeps the loaf soft even if you bake it just a tad too long. For recipes where you need maximum softness, I always bookmark my strategy for moist pistachio bread, and the principles for fat/sugar ratios are similar here.
If you find your final loaf is still not as moist as you’d like, or if you prefer a stronger tang, you can simply adjust the final proofing phase. Extend that cold proof in the refrigerator. Going from the standard 12-18 hours up to a full 24 hours really allows the bacteria to work their magic on the starches, which develops a deeper, more complex flavor without drying out the crumb, because the cold temperature slows everything down just enough.
Storage and Keeping Your Pumpkin Sourdough Fresh
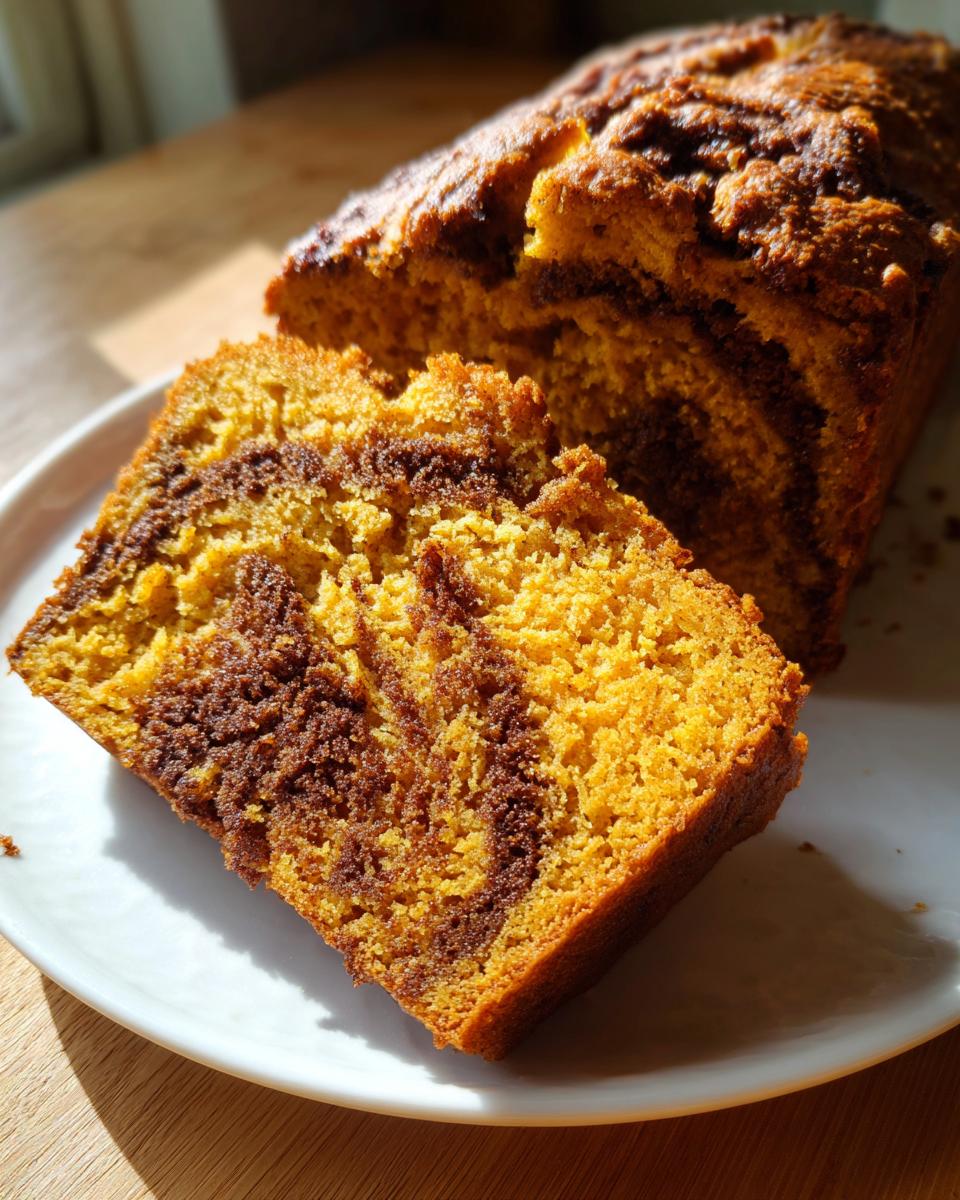
Alright, we finally achieved perfect structure and that incredible aroma. Now, the worst thing you can do is rush the cooling process. I know, waiting is the hardest part of bread baking, but you absolutely must let your **pumpkin sourdough** cool completely on a wire rack before you even think about slicing it. If you cut into it while it’s warm, I promise you’ll end up with a gummy, sticky texture inside. The internal structure hasn’t set yet, and that trapped steam needs to escape slowly.
Once it’s fully cooled—and I usually wait a good three or four hours just to be safe—storage is straightforward. Because this loaf has more moisture built in than a lean sourdough, it stays surprisingly soft. You want to prevent it from drying out but also avoid trapping too much surface moisture, which can lead to sogginess.
For the best results, wrap the cooled loaf tightly in plastic wrap or place it in an airtight container at room temperature. It should stay beautifully fresh, soft, and ready for toasting for three to four days. If you end up with leftovers, that’s where my strategy from my date nut bread recipe comes in handy—this keeps beautifully in the freezer. Just wrap individual slices well, and thaw them on the counter or pop them straight into the toaster when you want a quick slice of fall flavor.
Serving Suggestions for This Sweet and Spiced Bread
So, the ultimate test: how do you eat this masterpiece? Since we nailed that balance between the sourdough tang and true pumpkin sweetness, this bread can go in so many directions. It shines at breakfast, but it’s robust enough to stand up to dinner pairings, too. Think of this as your versatile autumn MVP.
For the ultimate cozy breakfast bake experience, you can’t beat a thick slice, lightly toasted, with just a smear of good quality, salted butter. The salt cuts through the sweetness of the swirl perfectly. Seriously, treat this loaf like the star it is.
If you’re serving this during brunch or as a snack, whipped cream cheese is amazing. If you want to elevate it, mix a little maple syrup into your cream cheese—it boosts that autumnal flavor profile beautifully. I keep a batch of my apple cinnamon oatmeal recipe handy for mornings when only warm, spiced carbs will do, and this bread fits right into that vibe.
Here are a few quick ways I’ve served it up lately:
- Morning Treat: Toasted with a thin layer of salted butter and a strong cup of coffee.
- Simple Dessert: Served next to a scoop of vanilla bean ice cream—the contrast of warm spice and cold cream is divine.
- Savory Pairing: Don’t knock it till you try it! A slightly sweeter loaf like this pairs surprisingly well with creamy soups, like butternut squash or a hearty lentil stew. The bread acts almost like a sweet crouton, adding texture and depth to the meal.
Honestly, if you let it cool completely and get that perfect crust, even eating it plain is an experience!
Frequently Asked Questions About Pumpkin Sourdough Baking
Even with a streamlined process, sometimes questions pop up when you’re baking something new, especially when blending sourdough tang with sweet fall flavors. That’s totally normal! I’ve definitely run into trial and error to nail this down, so let me give you the quick troubleshooting answers that will save you time.
Can I use sourdough discard instead of active starter for this pumpkin sourdough?
This is the classic question for any enriched sourdough bread! For this specific loaf, which is designed to rise high like a traditional bread, you really need the reliable lift from an active, recently fed starter. Discard is acidic and adds flavor, sure—and it’s fantastic for easier bakes like **sourdough discard recipes** for muffins or quick breads—but it often lacks the power needed to lift the extra weight of the pumpkin puree and sugar in a full loaf. If you try to substitute discard, you might end up with a very flat, dense result. Stick to the active starter here for that gorgeous oven spring!
How do I make this pumpkin spice sourdough less sweet?
If you prefer that sourdough tang to truly shine through the pumpkin spice, you have control over the sweetness level. I’d suggest tackling both sources of sugar. Try reducing the 50g of granulated sugar in the main dough by about 10 grams. Then, for the filling, pull back 10-20% of that brown sugar/cinnamon mix. You’ll still get that delightful swirl, but the final **tangy pumpkin loaf** flavor profile will be much more wine-like and balanced against the warm spices. You only need to do a minor adjustment to really shift the balance.
What is the best way to achieve a rustic sourdough loaf look with this recipe?
Achieving that beautiful, artisanal look is all about preparation right before the bake. First, make sure that proofing basket is heavily dusted, and I mean *heavily* dusted, with rice flour. Rice flour doesn’t absorb moisture like regular wheat flour, so it stops your moist dough from permanently gluing itself to the basket where you shaped it. Second, when you flip that cold dough onto your parchment paper, make a clean, decisive cut on the top—your score. A single deep slash, or even a simple cross cut, gives the loaf a pre-planned weak point to burst open beautifully, giving you that classic **rustic sourdough loaf** look without any fancy scoring tools.
If you have any other questions once you start baking, feel free to check out my other troubleshooting tips over on sourdough discard pie crust recipes, as the principles often overlap!
Estimated Nutrition for Your Pumpkin Sourdough Slice
As a home cook focused on smart, efficient recipes, I always include a quick look at the estimated nutrition for our bakes. Remember, since this is a homemade loaf with a cinnamon swirl, these numbers are high-level management estimates based on the recipe totals. They are not a substitute for professional nutritional analysis, but they give you a solid idea of what you are taking in. For a slice of this deeply flavorful loaf, here’s the breakdown:
It’s comforting to see that even with the added sugar in the swirl, the general makeup leans toward complex carbs and moderate calories, which is what we aim for in our well-rounded meals. Eating this with a side of protein, like eggs or a hearty lentil salad, makes for a fantastic, filling meal!
Here is the estimated breakdown per serving slice:
- Serving Size: 1 slice
- Calories: 280
- Total Fat: 5g (Saturated Fat: 2g)
- Carbohydrates: 50g (Fiber: 2g)
- Protein: 9g
- Sugar: 12g
- Sodium: 350mg
- Cholesterol: 30mg
The protein content is nicely boosted by using the active egg in the dough, which is a nice bonus when you’re planning out your daily intake!
Share Your Fall Baking Recipes Success
Alright, we’ve gone through the whole project plan—from mixing the starter to timing that final bake. Now comes my favorite part: seeing what you all create! I truly believe that the most important part of **fall baking recipes** isn’t just following the steps, but making the final product your own.
When you pull that beautiful, swirled, orange-hued loaf out of the oven, snap a picture! I want to see your crusts and those gorgeous cinnamon ribbons you managed to roll in there. Rate this recipe right here on the site if you loved it, and definitely drop a comment below letting me know how it turned out. Did you serve it toasted? Did you add pecans like one of the variations I mentioned?
We are building a library of recipes that just *work*, and user feedback is how we constantly improve our efficiency and flavor profiles. Share your photos of your **homemade sourdough bread** efforts on social media and tag us so I can cheer you on! If you want to dive straight into sharing feedback or asking a very specific question about the technique, you can always reach out directly via my contact page.
Happy baking! And if you’re already planning your next project, don’t forget to check out some of the amazing results others have had when baking that gorgeous loaf from Tasty at Home—they always nail the seasonal flavors!
PrintEasy Sweet Pumpkin Sourdough Loaf with Cinnamon Swirl

Create a moist, flavorful pumpkin sourdough loaf perfect for fall baking. This recipe uses your active sourdough starter and incorporates warm spices for a sweet, slightly tangy bread that is simple to make.
- Prep Time: 30 min
- Cook Time: 45 min
- Total Time: 13 hours 45 min
- Yield: 1 loaf 1x
- Category: Breakfast
- Method: Baking
- Cuisine: American
- Diet: Vegetarian
Ingredients
- 100g active sourdough starter (100% hydration)
- 350g bread flour
- 150g pumpkin puree (not pie filling)
- 75g warm water
- 50g granulated sugar
- 10g salt
- 5g pumpkin pie spice
- 1 large egg
- For the Swirl: 50g brown sugar, 1 teaspoon cinnamon, 25g softened butter
Instructions
- Mix the active starter, flour, pumpkin puree, warm water, sugar, salt, pumpkin pie spice, and egg in a large bowl until just combined into a shaggy dough.
- Cover the bowl and let the dough rest for 30 minutes (autolyse).
- Perform four sets of stretch and folds, spaced 30 minutes apart, to build strength.
- For the swirl, mix the brown sugar, cinnamon, and softened butter until crumbly.
- After the final set of folds, gently flatten the dough into a rectangle. Sprinkle the cinnamon sugar mixture evenly over the surface. Roll the dough up tightly like a jelly roll.
- Shape the dough into a loaf and place it into a proofing basket lined with rice flour.
- Cover the basket and cold proof in the refrigerator for 12 to 18 hours.
- Preheat your oven to 500°F (260°C) with a Dutch oven inside for one hour.
- Carefully turn the cold dough out onto parchment paper. Score the top of the loaf as desired.
- Lower the dough (using the parchment paper handles) into the hot Dutch oven. Cover and bake for 20 minutes.
- Remove the lid, reduce the oven temperature to 450°F (232°C), and continue baking for another 20-25 minutes until the crust is deep golden brown.
- Cool the loaf completely on a wire rack before slicing.
Notes
- Using pumpkin puree adds moisture, so the dough will feel slightly wetter than standard sourdough.
- If you prefer a tangier flavor, extend the cold proofing time up to 24 hours.
- This recipe works well for **Thanksgiving sourdough** spreads.
Nutrition
- Serving Size: 1 slice
- Calories: 280
- Sugar: 12
- Sodium: 350
- Fat: 5
- Saturated Fat: 2
- Unsaturated Fat: 3
- Trans Fat: 0
- Carbohydrates: 50
- Fiber: 2
- Protein: 9
- Cholesterol: 30