
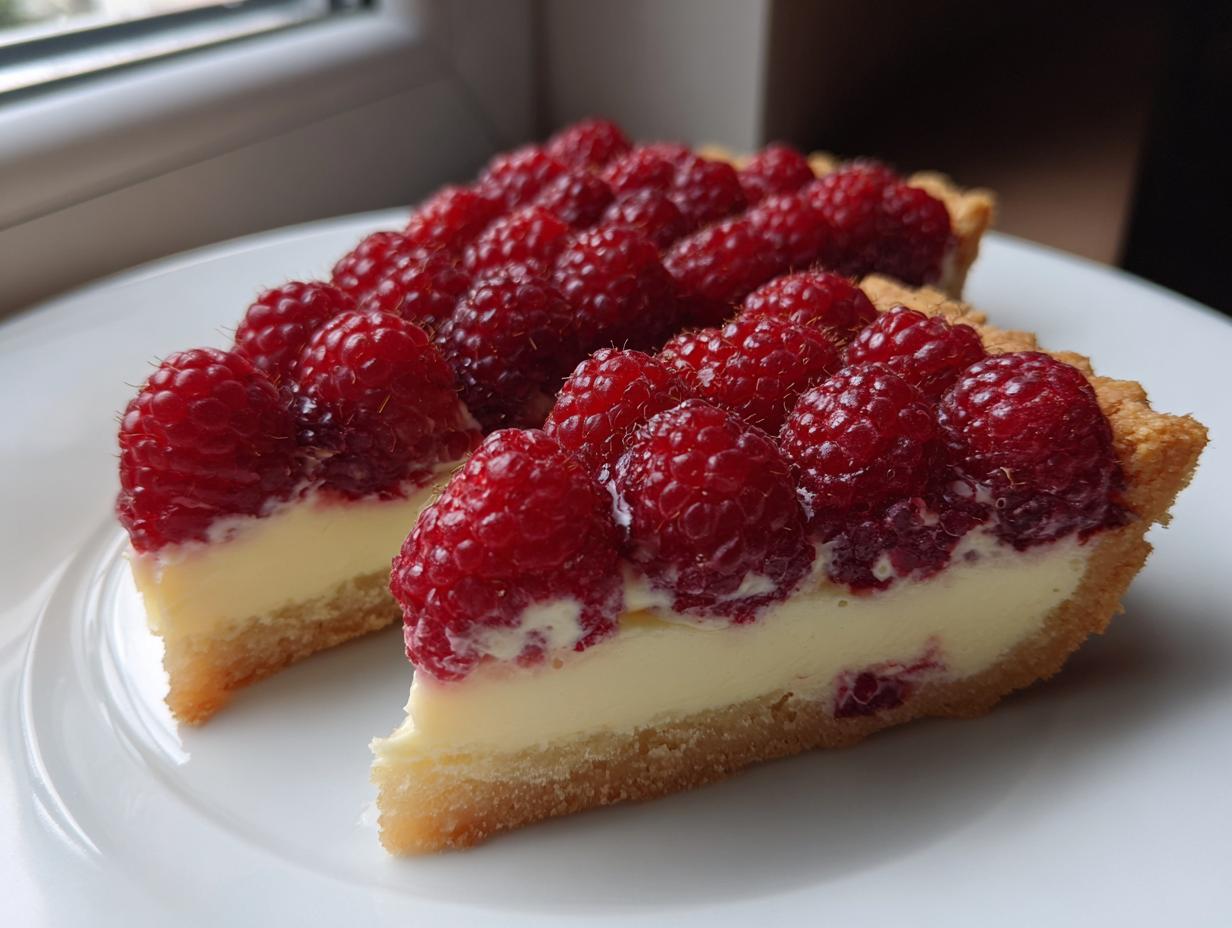
It’s finally here—that perfect moment when early-season berries signal the start of real spring flavors! If you’re like me, you’re absolutely ready to celebrate National Raspberry Tart Day with something bright and elegant. We want that gorgeous jewel-toned look, but let’s be real, nobody wants a recipe that takes all day. That’s where my project manager brain kicks in. I’ve streamlined this entire process so you get a show-stopping raspberry tart that expertly balances the sharp tartness of the fruit against a rich, buttery crust.
Forget the stress; this recipe is engineered for maximum flavor payoff with minimum fuss. We’re focusing on two parts that always deliver: a deeply flavorful shortbread crust and a lush pastry cream that holds everything together. Trust me, this is the best way to handle fresh fruit this season!
- Why This Raspberry Tart Recipe Works for Sunday Dinner
- Gathering Ingredients for Your Perfect Raspberry Tart
- Step-by-Step Instructions for the Shortbread Crust of Your Raspberry Tart
- Mastering the Pastry Cream for Your Easy Fruit Tart
- Assembling the Elegant Raspberry Tart
- Tips for the Best Raspberry Tart Every Time
- Ingredient Notes and Substitutions for Your Raspberry Dessert Recipes
- Storage and Serving Suggestions for Your Raspberry Tart
- Common Questions About Making a Homemade Fruit Tart
Why This Raspberry Tart Recipe Works for Sunday Dinner
When I design a recipe, I’m always asking: Does this fit a busy life while still making an impact? This raspberry tart absolutely passes the test. It looks like something you spent hours on, but the underlying steps are totally streamlined, which is my whole philosophy here at Dishicious.
It hits that sweet spot between impressive and achievable:
- The shortbread crust bakes up perfectly crisp—no soggy bottoms here.
- The pastry cream is smooth and stable, meaning you don’t have to rush to serve it immediately.
- The fresh berries offer that vibrant, jewel-toned look that screams ‘special occasion.’
It’s elegant, yes, but it stays efficiently on schedule. That’s efficiency I can get behind!
Gathering Ingredients for Your Perfect Raspberry Tart
Okay, for this project to go smoothly, we need to respect the ingredients list. I’ve broken everything down so you can shop efficiently and prep without any confusion. Remember, we are aiming for a buttery, crisp result, so pay attention to the temperature of that butter for the crust!
For the Shortbread Crust
This recipe relies on the magic of cold ingredients creating that fantastic crumb.
- 1 1/2 cups all-purpose flour
- 1/2 cup powdered sugar
- 1/4 teaspoon salt
- 1/2 cup (1 stick) cold unsalted butter, cubed (This has to be cold, trust me!)
- 1 large egg yolk
- 2 tablespoons ice water
For the Pastry Cream
This is the smooth layer that makes this pastry cream so luxurious.
- 1 1/2 cups whole milk
- 1/2 cup granulated sugar, divided
- 3 large egg yolks
- 1/4 cup cornstarch (Our reliable insurance policy against lumps!)
- 1 teaspoon vanilla extract
For the Fresh Raspberry Filling and Glaze
This is where the tartness balances out the sweetness. Don’t skimp on the fresh fruit!
- 2 cups fresh raspberries
- 1 tablespoon lemon juice
- 1 tablespoon apricot jam (for that beautiful shine)
Step-by-Step Instructions for the Shortbread Crust of Your Raspberry Tart
Alright, let’s tackle the base. The secret to that unbeatable, crisp shortbread crust isn’t kneading; it’s barely touching the dough! I always pull out the food processor for this step because it’s fast and prevents me from overworking the flour. Get your dry ingredients—the flour, powdered sugar, and salt—in there first.
Next, we add the cold, cubed butter. Pulse this until it looks like coarse sand or tiny peas. Don’t let it turn into paste! Now, you add the egg yolk and the ice water, just a little bit at a time. Pulse until it *barely* clumps together. If you see flour streaks, that’s actually perfect. If you keep going until it’s one smooth ball, you’ve already gone too far and you’ll end up with a tough crust. I learned that the hard way, believe me.
Mixing and Chilling the Dough
Quickly turn that crumbly mix out onto plastic wrap and press it into a flat disk. Don’t fuss with making it perfect—you’re just consolidating it. Wrap it tightly and shove it in the fridge for at least 30 minutes. That chilling time is non-negotiable; it lets the flour relax and keeps that butter super cold so we get flakiness, not toughness, when we bake.
Blind Baking for a Crisp Raspberry Tart Shell
Once chilled, roll it out and press it into your 9-inch tart pan. Remember to prick the bottom all over with a fork—that’s necessary venting! Line it with parchment paper and fill it up with pie weights or dried beans. We’re baking this blind to guarantee no soggy bottom for our beautiful fresh raspberry filling later.
Preheat your oven to 375 degrees F (190 degrees C). Bake it with the weights for 15 minutes. Then, carefully lift out the paper and weights. We want that light golden color, so pop it back in for another 5 to 7 minutes. Pull it out and let it cool completely. This structured approach ensures you have a solid foundation for the rest of your elegant dessert.
Mastering the Pastry Cream for Your Easy Fruit Tart
Now we move on to the truly smooth part of the project: the pastry cream. This is where many home cooks get hesitant, worrying about scrambling those egg yolks, but stick to the plan, and it’s super straightforward. First, warm your milk up until it’s just simmering. While that’s happening, you need to set up your egg/sugar/cornstarch mixture in a separate bowl. Whisk those yolks, sugar, and cornstarch until you have a light-colored, smooth paste.
The critical step here is tempering. You can’t just dump the hot milk into the yolks! That’s chaos. Slowly—and I mean slowly—stream ladlefuls of the hot milk into the egg mixture while whisking that egg bowl constantly. This gently raises the temperature of the eggs so they don’t panic and curdle. Once you’ve added about half the milk this way, you can pour the tempered mixture back into the saucepan with the remaining milk.
Cook that custard over medium heat, whisking without stopping. You’ll feel it get suddenly thick. It needs to bubble gently for a full minute once it’s thick—this cooks out the raw starch flavor. Pull it off the heat and stir in that vanilla extract. Here’s the pro move for any flawless custard: press plastic wrap right down onto the surface of the cream before chilling. If you leave a gap, you get skin, and we definitely don’t want that.
Assembling the Elegant Raspberry Tart
Okay, now for the payoff! Your crust is cool, and your pastry cream has chilled down perfectly. Before you spread it, you need to give that cream a good, vigorous whisk. It’s going to look stiff at first, like thick pudding, but keep whisking until it smooths out again. This brings back that luxurious texture we worked so hard for. Spread that silky layer evenly into your cooled tart shell. Don’t push too hard on the crust!
Next up are the stars of the show: the berries. Since we tossed them lightly with lemon juice, they are bright and ready to go. Take your time arranging them over the cream. I like to start in the outer ring and spiral inwards, making sure they are snug against each other to get that beautiful, jewel-toned dome effect. This arrangement really elevates this from just a dessert to an easy fruit tart centerpiece. Don’t forget that final chill; it locks everything in place for cleaner slices.
Finishing the Raspberry Tart with a Simple Glaze
We need shine to make those berries pop! Grab that apricot jam—it’s the best glaze because it melts so beautifully. Heat the jam gently with just a tiny splash of water until it’s runny. Use a pastry brush to gently flick or brush this over the top of all those gorgeous raspberries. The glaze traps the light and keeps the fruit looking fresh for hours.
Once glazed, the absolute final step in this whole project is another 30-minute chill in the fridge. This mandatory rest time lets the easy fruit tart firm up, especially around the edges of the cream, ensuring you get that clean slice we see in magazines. Patience pays off here!
Tips for the Best Raspberry Tart Every Time
Even with a streamlined approach, little things can throw off the project schedule. When I first tried this recipe years ago, I rushed the chilling time for the pastry cream because I was hungry! Big mistake. The cream was soft, and my beautiful arrangement of fresh raspberry filling slid right into the crust. It tasted fine, but it looked like a disaster.
So, here are my non-negotiable efficiencies for success:
- Make sure the shortbread crust is *completely* cool before the cream goes in. Even residual warmth will melt the base layer.
- When tempering the eggs, use a whisk handle, not the end of the spoon, for stirring the milk mixture. It’s faster and gives you better control.
- Seriously, honor the final 30-minute chill. It’s the difference between a neat slice and a beautiful mess on the plate.
If you follow these reliability checks, you’ll get a perfect raspberry tart that looks professional every time.
Ingredient Notes and Substitutions for Your Raspberry Dessert Recipes
We’re keeping this project approachable, meaning I try my best to avoid anything too crazy in the ingredient list. However, sometimes substitutions are necessary, especially with fresh fruit! If you can’t find perfect fresh raspberries, you *could* use high-quality frozen ones, but you must thaw them completely and drain them really well first, or the water will ruin your pastry cream. I really prefer using the apricot jam for the glaze; it gives the best professional sheen to those raspberry dessert recipes.
If you’re out of apricot, just melt a tablespoon of sugar with a teaspoon of water until clear—it acts exactly the same way! That’s smarter cooking, right?
Storage and Serving Suggestions for Your Raspberry Tart
Since this raspberry tart has a dairy-based filling, we need to handle storage smartly to maintain that crisp shortbread crust. Always store the finished tart covered loosely in the refrigerator. It holds up really well for about two days, but honestly, the crust starts to soften after the 24-hour mark, so try to plan your baking accordingly for Sunday dinner!
When it comes to serving, I find that taking it out of the fridge about 15 minutes before slicing is the perfect balance. That slight warming allows the pastry cream to soften just a touch, making it perfect alongside a cup of coffee. It’s simply the best way to enjoy those beautiful fresh raspberries.
Common Questions About Making a Homemade Fruit Tart
I know you might have a few final checks before you dive into this project, especially if you’re managing timing for a big meal. Don’t sweat it! Having reliable answers upfront guarantees success for your homemade fruit tart.
Can I use frozen raspberries instead of fresh?
I strongly recommend fresh fruit for the best visual impact and texture for that gorgeous fresh raspberry filling. If you *must* use frozen, thaw them completely and pat them bone-dry between paper towels. If they release water when you slice into them, your pastry cream layer will get watery fast.
How do I stop the shortbread crust from shrinking during blind baking?
This is a classic structure issue! The key is making sure your dough is very cold when it hits the hot oven. Also, be generous with your pie weights—fill that lined shell all the way to the top edge. If it still shrinks a tiny bit, don’t worry; it happens, and the filling will hide minor imperfections!
My pastry cream seems too thick after chilling. What gives?
That’s totally normal! That’s your cornstarch insurance kicking in. Before you spread it, take a rubber spatula and vigorously whisk the cream for about 30 seconds. It will smooth right out and become perfectly spreadable again for your final elegant layer.
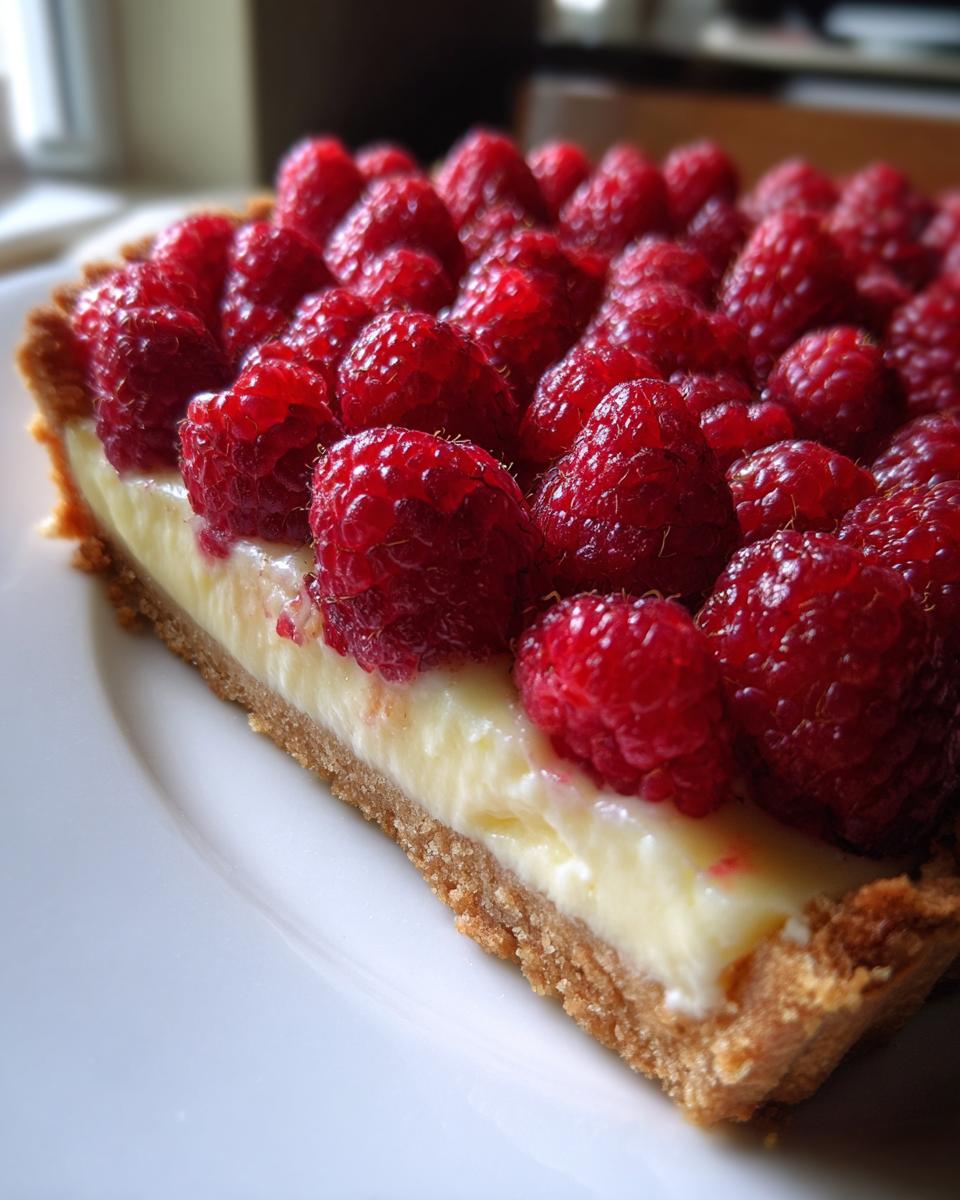
PrintSimple Raspberry Tart with Pastry Cream

Make an elegant fresh raspberry tart featuring a buttery shortbread crust and smooth pastry cream. This easy fruit tart balances berry tartness for a perfect weekend dessert.
- Prep Time: 35 min
- Cook Time: 25 min
- Total Time: 100 min
- Yield: 8 servings 1x
- Category: Dessert
- Method: Baking
- Cuisine: American
- Diet: Vegetarian
Ingredients
- 1 1/2 cups all-purpose flour
- 1/2 cup powdered sugar
- 1/4 teaspoon salt
- 1/2 cup (1 stick) cold unsalted butter, cubed
- 1 large egg yolk
- 2 tablespoons ice water
- 1 1/2 cups whole milk
- 1/2 cup granulated sugar, divided
- 3 large egg yolks
- 1/4 cup cornstarch
- 1 teaspoon vanilla extract
- 2 cups fresh raspberries
- 1 tablespoon lemon juice
- 1 tablespoon apricot jam (for glaze)
Instructions
- Prepare the Crust: In a food processor, pulse the flour, powdered sugar, and salt. Add the cold butter and pulse until the mixture resembles coarse crumbs. Add the egg yolk and ice water, pulsing until the dough just comes together. Do not overmix.
- Shape and Chill: Form the dough into a disk, wrap it in plastic, and chill for at least 30 minutes.
- Blind Bake: Preheat your oven to 375 degrees F (190 degrees C). Roll the dough out and fit it into a 9-inch tart pan with a removable bottom. Prick the bottom all over with a fork. Line the shell with parchment paper and fill with pie weights or dried beans. Bake for 15 minutes. Remove the weights and paper and bake for another 5-7 minutes until lightly golden. Cool completely.
- Make the Pastry Cream: Heat the milk in a saucepan until simmering. In a separate bowl, whisk the 1/2 cup granulated sugar, 3 egg yolks, and cornstarch until smooth. Slowly temper the hot milk into the egg mixture while whisking constantly.
- Cook the Cream: Return the mixture to the saucepan. Cook over medium heat, whisking constantly, until the cream thickens significantly and bubbles for one minute. Remove from heat, stir in the vanilla extract. Press plastic wrap directly onto the surface of the cream and chill for at least 2 hours.
- Prepare the Filling: Gently toss the fresh raspberries with the lemon juice.
- Assemble the Tart: Once the pastry cream is cold, whisk it briefly to smooth it out. Spread the pastry cream evenly into the cooled tart shell. Arrange the fresh raspberries decoratively over the cream.
- Glaze: Heat the apricot jam with 1 teaspoon of water until melted. Brush this glaze lightly over the raspberries for shine. Chill the finished raspberry tart for 30 minutes before serving.
Notes
- For a very crisp crust, use a tart pan with a removable bottom.
- If you do not have apricot jam, a simple sugar glaze made from powdered sugar and water works as a substitute.
- Chill the assembled tart for at least 30 minutes before slicing to help the pastry cream set firmly.
Nutrition
- Serving Size: 1 slice
- Calories: 350
- Sugar: 25
- Sodium: 120
- Fat: 18
- Saturated Fat: 11
- Unsaturated Fat: 7
- Trans Fat: 0
- Carbohydrates: 42
- Fiber: 2
- Protein: 6
- Cholesterol: 110