
When you need a dessert that looks completely glamorous but requires zero oven time, you call on the genius of the no-bake hack. Seriously, forget babysitting a cake! I designed this recipe for *red velvet cake balls* using that hyper-efficient, project-management mindset I bring everywhere. We’re taking shortcuts where they make sense—like using cake mix and pre-made frosting—to deliver intense, moist flavor without the fuss. These little crimson spheres, dipped in bright white chocolate, are the ultimate impressive, easy bite-sized dessert guaranteed to turn heads at any party. It’s smarter cooking, pure and simple, designed for your busy life.
- Why Our Easy No-Bake Red Velvet Cake Balls Are Your New Go-To Dessert
- Essential Ingredients for Perfect Red Velvet Cake Balls
- Step-by-Step Instructions for No Bake Red Velvet Cake Balls
- Tips for Making the Best Red Velvet Cake Balls
- Storage and Make-Ahead Tips for Red Velvet Cake Balls
- Variations on Red Velvet Truffles and Cheesecake Balls
- Serving Suggestions for Easy Bite Sized Desserts
- Frequently Asked Questions About Red Velvet Cake Balls
- Share Your Red Velvet Cake Balls Creation
Why Our Easy No-Bake Red Velvet Cake Balls Are Your New Go-To Dessert
We’re cutting out the tricky parts of baking so you can focus on the payoff. This approach gives you the rich flavor of a classic *red velvet dessert* without demanding hours of your time. It’s reliability engineered into a dessert format. That’s the Dishicious promise! If you love simple treats, check out our recipe for easy no-bake peanut butter bars too.
- Maximum Flavor with Minimal Effort: We skip the oven entirely! Using the cake mix hack gets you that perfect, moist cake base instantly. Honestly, this is the best of the *simple dessert hacks* out there.
- Perfectly Portioned Red Velvet Party Food: Because they are already perfectly rolled, there’s no slicing required when you serve these up. They are great for dessert tables or gifting when you need impressive *red velvet party food*.
Essential Ingredients for Perfect Red Velvet Cake Balls
When I map out a recipe project, the ingredient list has to be tight. No hunting down obscure items here! For these red velvet cake balls, we are focusing on three key pillars: the cake, the binder, and the shell. Keeping this structure clear lets us hit that perfect texture every time. If you want the best results, you might want to check out my guide on making smooth cream cheese frosting.
The Cake Base and Cream Cheese Frosting Treats
We start simple. Grab that box of red velvet cake mix—that’s our foundation for these amazing cream cheese frosting treats. You’ll combine the slightly dense, baked cake crumbs with a full 16-ounce container of frosting. Whether you use store-bought or whip up homemade, this is what holds our structure together. It’s non-negotiable for that classic flavor profile.
Coating for White Chocolate Dipped Treats
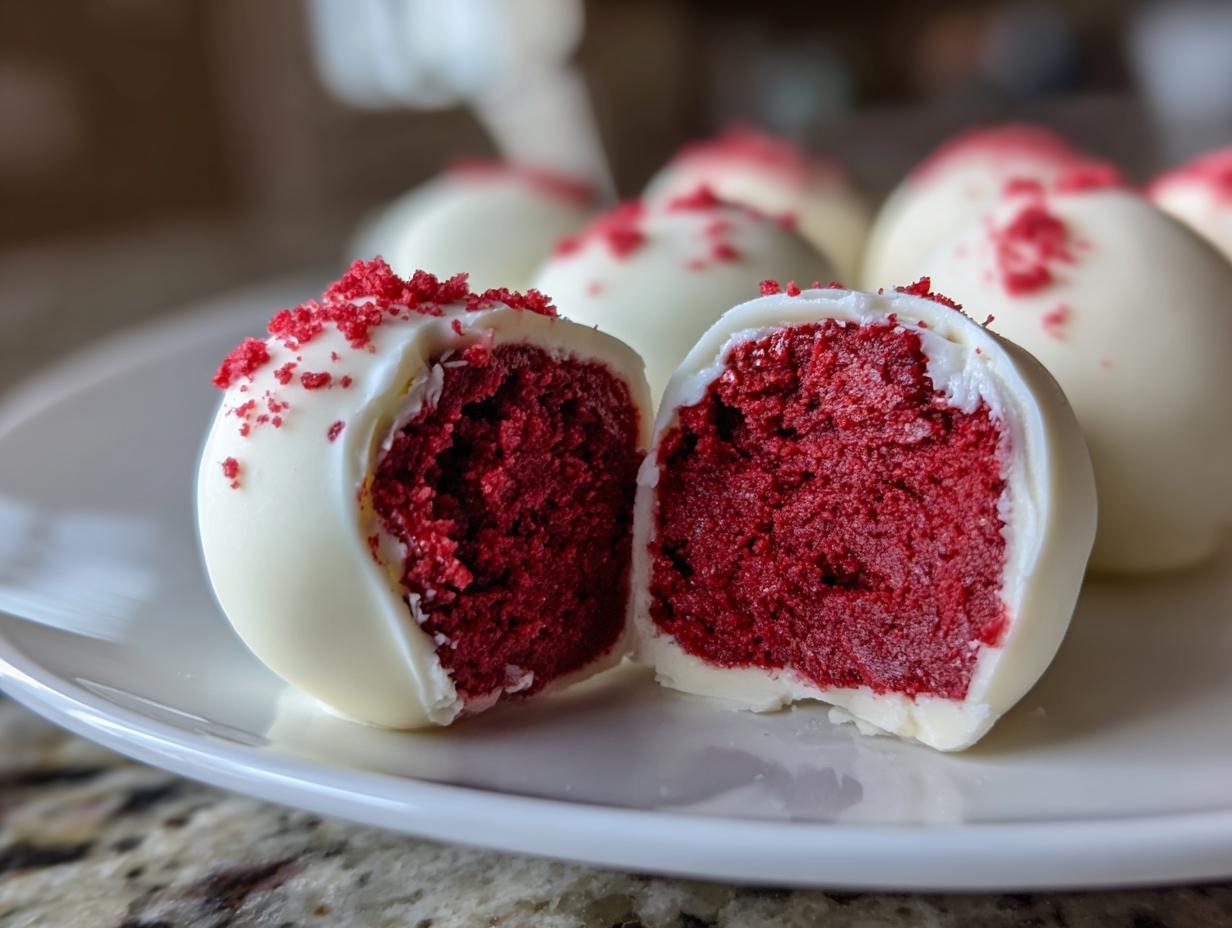
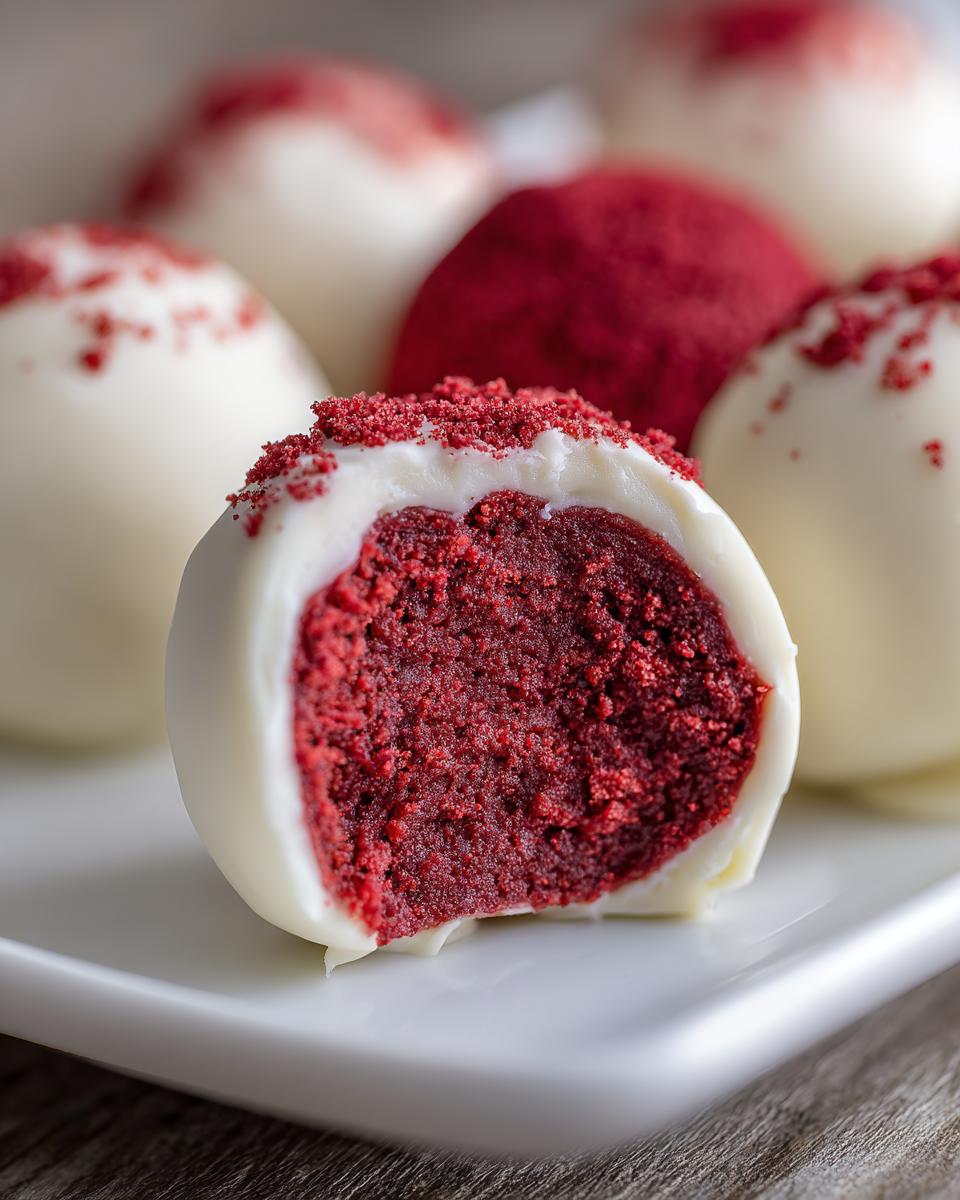
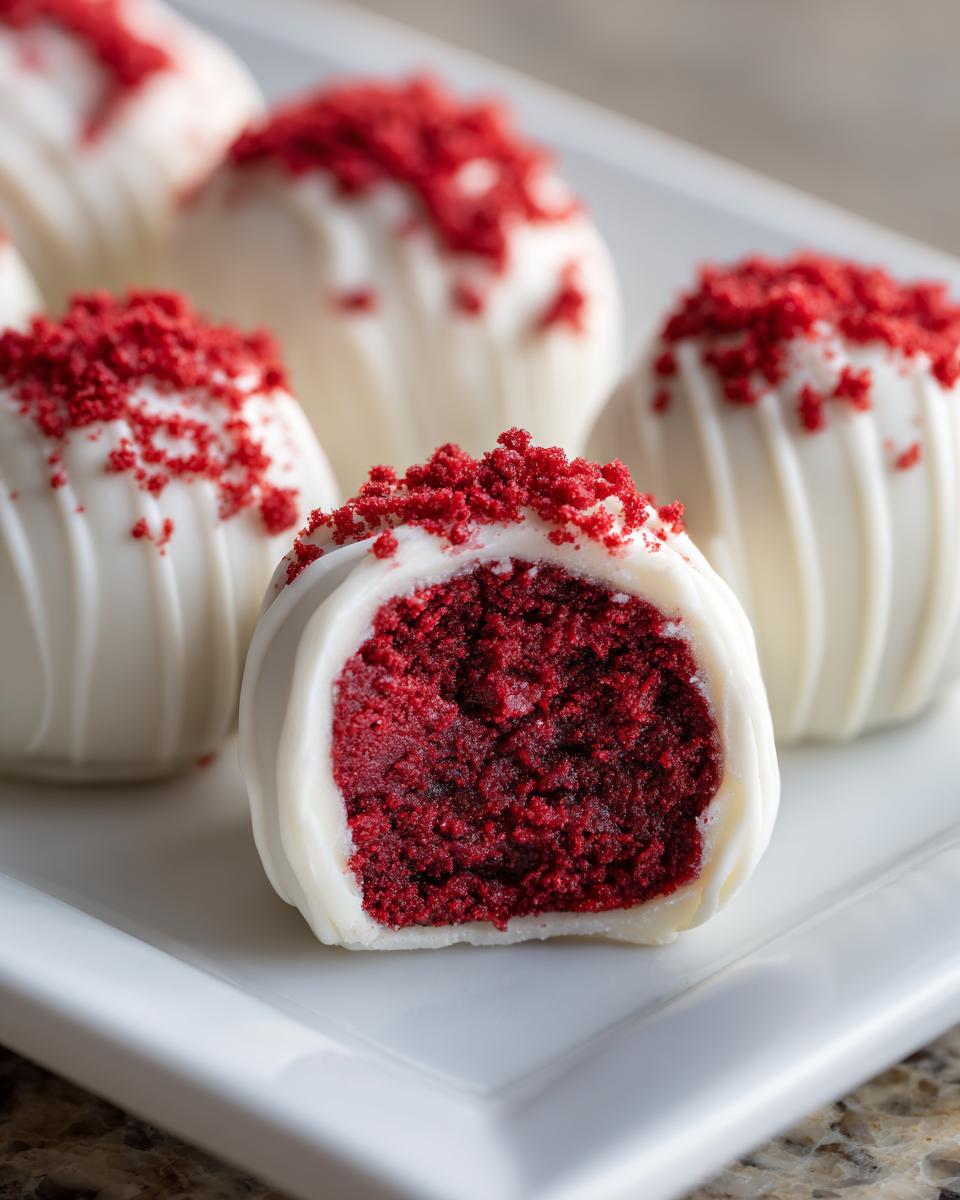
For the shell, you absolutely need white chocolate melting wafers or a candy coating. Standard chips can seize up on you, and we don’t have time for that drama! If your coating seems too stiff when melted—which happens sometimes—just stir in a tiny bit of vegetable shortening. That’s the trick to getting a beautiful, smooth coat on all your white chocolate dipped treats and keeping your red velvet cake balls looking professional.
Step-by-Step Instructions for No Bake Red Velvet Cake Balls
Okay, this is where we turn ingredients into a streamlined production line! Think of this as the execution phase of the project. Getting these steps right—especially the cooling times—is what separates a sticky mess from perfect, shiny red velvet cake balls. We’ll handle the crumbling, the mixing, and that essential chilling period.

Mixing the Moist Cake Bites Dough
First step: crumble that cake! You need fine, even crumbs. Discard any crusty, dark edges—we want pure softness for these moist cake bites. Next, dump in the whole container of frosting. I usually just dive in with a spatula or clean hands to mix. You’re mixing until there are absolutely no streaks left and you have a thick, uniform dough. If it feels too dry, add frosting a spoonful; too wet, add a few more crumbs if you have them extra.
Chilling and Preparing for Dipping
Crucial management step alert: You absolutely must take a break here. Roll your dough into consistent 1-inch balls and get them onto parchment paper. Now, chill them! I insist on at least 30 minutes in the fridge, but 45 is even better. If you try to dip them warm, they turn into sad, chocolate-covered puddles. Don’t skip this chilling window; it’s the key to successful coating on your red velvet cake balls.
Achieving a Flawless White Chocolate Dipped Treats Finish
While they chill, melt your white chocolate wafers. Remember, if it’s too stiff, stir in that tiny bit of shortening to thin it out for easy movement. Once chilled, dip each ball completely. Use a fork—it lets the excess drizzle right off. Lift, let it drip, and place it back on the parchment. If you’re adding sprinkles, do it immediately before the chocolate sets up! For more tips on getting coatings just right, check out this guide to no-bake peanut butter bars where we tackle similar chocolate dipping issues.

Tips for Making the Best Red Velvet Cake Balls
In my kitchen strategy, we anticipate failure points ahead of time. That’s the project management approach applied to baking! For these red velvet cake balls, the two biggest risks are crumbly centers or lumpy chocolate coatings. If you preemptively address these, you guarantee success. For other reliable recipes that use similar coating techniques, take a look at my approach for easy sugar cookie bars.
Controlling Dough Moisture for Rolled Red Velvet Cake Balls
The ideal mixture should feel like thick playdough—firm enough to roll without sticking terribly, but moist enough to hold together without cracking. If your dough feels too dry after mixing in the frosting, don’t panic! Add frosting one tablespoon at a time until it’s right. If it’s somehow too wet, you can always add a few extra dry cake crumbs. This fine-tuning right when you mix is essential for making sure your final *red velvet cake balls* roll perfectly.
Techniques for Smooth Coating on Chocolate Covered Balls
Once the balls are chilled and dipped, you need to clean up the edge. The goal is a smooth shell on your *chocolate covered balls*. When you lift the ball out of the melted chocolate using a fork, give the fork a very gentle tap against the side of the bowl. Don’t bang it aggressively! A light tap helps the dripping excess fall back into the bowl. Then, scrape the bottom of the fork lightly on the parchment paper’s edge as you transfer the ball. That little move helps snap off that messy chocolate foot.
Storage and Make-Ahead Tips for Red Velvet Cake Balls
One of the best parts about organizing dessert timing for a big event is knowing these red velvet cake balls can be made days in advance! Since we are skipping the oven, these act almost like a stable, *homemade candy alternative*. I keep mine stored in an airtight container in the fridge. They last really well for up to a week that way, which is fantastic for managing last-minute hosting stress.
If you need to stash them longer, you can absolutely freeze them! They freeze beautifully coated or uncoated. If you are looking for another make-ahead winner, you should check out my details on easy no-bake peanut butter bars—they follow a similar timeline for prep efficiency.
Variations on Red Velvet Truffles and Cheesecake Balls
Sometimes you need a slight pivot on a proven formula to keep things interesting, right? Since this base recipe is so solid, we can easily pivot into different formats. If you’re tired of the white chocolate, just swap it out! Dark or milk chocolate melt beautifully and give your red velvet cake balls a completely different, richer profile. Think of those as sophisticated *red velvet truffles*.
If you want to lean into the cheesecake flavor everyone loves, you can easily turn these into red velvet cheesecake balls. Just add 4 ounces of softened cream cheese to the initial crumb and frosting mix. It just amps up the tang factor! For other easy-to-switch ideas, you have to check out my recipe for red velvet cake mix cookies; it might give you new inspiration.
Serving Suggestions for Easy Bite Sized Desserts
These treats truly shine because of their size. They check every box: they’re beautiful, bite-sized, and require zero plates or forks. That makes them prime candidates for any gathering you’re planning. While they are absolutely incredible for holiday dessert boards, especially around Christmas or for Valentine’s Day sweets, they are perfect for casual get-togethers too.
Because they are essentially cake and frosting compressed, they feel indulgent. I always make sure I have a batch ready when I know friends are stopping by. They pair unbelievably well with a strong cup of coffee in the afternoon. Seriously, try one next to a hot drink! If you need something warm to go with them, you should look at my guide for making big-batch easy hot cocoa. These easy bite sized desserts are wonderful for letting guests graze without committing to a huge slice of something.
Frequently Asked Questions About Red Velvet Cake Balls
When I map out any recipe, I try to cover the tricky parts upfront, but I know questions always pop up! It’s all about streamlining the process so you have one less thing to worry about. Here are the most common things people ask me about perfecting these treats. If you need more efficiency tips, I’ve got a great post on easy blueberry protein muffins that you might find useful!
Can I make red velvet cake balls without baking cake first?
Yes, absolutely! That’s why I call this a no-bake recipe, even though we start with a cake mix. You bake the cake first (as directed by the box) and let it cool completely. Then, we use the crumbs and mix them with the frosting. So, *technically* baking happens once, but the assembly of the red velvet cake balls requires no additional oven time!
How long do these red velvet cake balls last in the refrigerator?
Because they are so rich and contain the cream cheese frosting binder, they do best when chilled. You can safely store your finished red velvet cake balls in an airtight container in the refrigerator for up to one week. If you really need to keep them longer, freezing them works great too!
What is the best chocolate to use for dipping red velvet cake balls?
Trust me on this one: skip the standard chocolate chips. They contain stabilizers that make them seize up when you try to make them smooth enough for dipping. You really want to use good quality melting wafers or candy coating. These are formulated to melt down perfectly smooth, giving you that fantastic shell on your red velvet cake balls without any lumpy headaches.
Share Your Red Velvet Cake Balls Creation
Alright, project completed! Now that you’ve seen how simple this process is, I really want to know how yours turned out. Did you go wild with the holiday sprinkles? Drop a rating below so I can see your results, and don’t forget to share photos of your successful batch of red velvet cake balls! If you need to reach me directly for troubleshooting or just want to say hello, you can always find my contact information right here. Happy treating!
PrintEasy No-Bake Red Velvet Cake Balls with Cream Cheese Center
Make these easy, no-bake red velvet cake balls using cake mix and cream cheese frosting. They are bite-sized, rich, and coated in smooth white chocolate for a perfect party treat.
- Prep Time: 25 min
- Cook Time: 0 min
- Total Time: 55 min
- Yield: 24 servings 1x
- Category: Dessert
- Method: No Bake
- Cuisine: American
- Diet: Vegetarian
Ingredients
- 1 box (15.25 oz) red velvet cake mix
- 1 container (16 oz) cream cheese frosting (store-bought or homemade)
- 1 pound white chocolate melting wafers or candy coating
- 1 tablespoon vegetable shortening (optional, for thinning chocolate)
- Red sprinkles (optional, for decoration)
Instructions
- Prepare the red velvet cake according to the package directions, but use only the amount of liquid specified for a very dense cake, or bake the cake and let it cool completely.
- Crumble the cooled red velvet cake into fine crumbs in a large bowl. Discard any hard edges or burnt pieces.
- Add the entire container of cream cheese frosting to the cake crumbs. Mix thoroughly with a spatula or clean hands until a uniform, thick dough forms.
- Roll the mixture into small, uniform balls, about 1 inch in diameter. Place the balls on a parchment-lined baking sheet.
- Chill the cake balls in the refrigerator for at least 30 minutes to firm them up. This step is crucial for easy dipping.
- Melt the white chocolate wafers according to package directions. If the chocolate is too thick, stir in the vegetable shortening one teaspoon at a time until the desired dipping consistency is reached.
- Dip each chilled cake ball into the melted white chocolate, ensuring it is fully coated. Use a fork or dipping tool to lift the ball out, allowing excess chocolate to drip off.
- Place the dipped cake balls back onto the parchment-lined sheet. Immediately add sprinkles, if using.
- Allow the chocolate coating to set completely at room temperature, or speed up the process by chilling them again briefly.
Notes
- For a richer flavor, use homemade cream cheese frosting instead of store-bought.
- You can substitute the white chocolate coating with milk or dark chocolate if preferred.
- Store finished red velvet cake balls in an airtight container in the refrigerator for up to one week.
- These are excellent as a homemade candy alternative for gifting.
Nutrition
- Serving Size: 1 ball
- Calories: 210
- Sugar: 22
- Sodium: 150
- Fat: 12
- Saturated Fat: 7
- Unsaturated Fat: 5
- Trans Fat: 0.1
- Carbohydrates: 25
- Fiber: 0.5
- Protein: 2
- Cholesterol: 25