
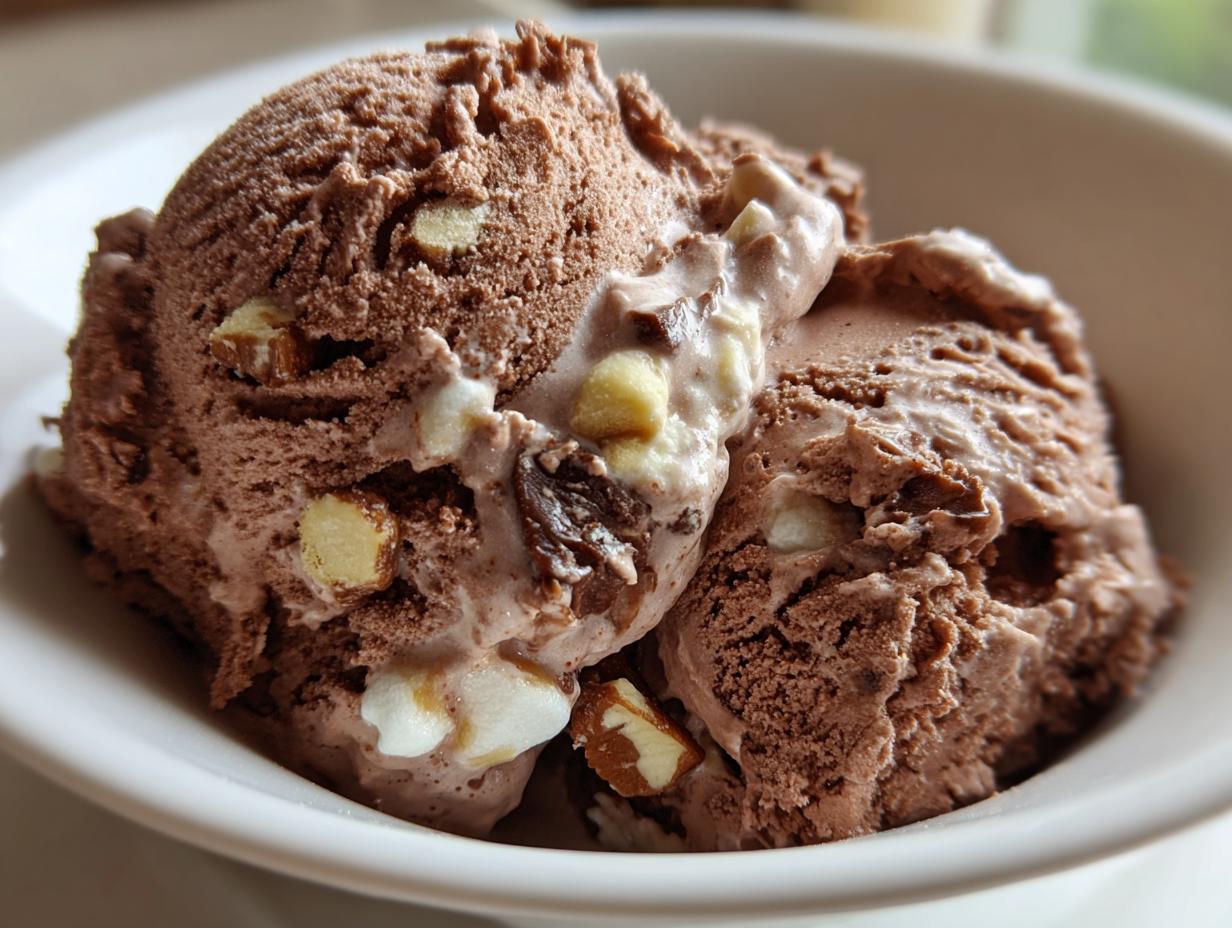
Is there anything that screams pure, unadulterated summer freedom like a scoop of thick, rich ice cream? Especially when that ice cream is Rocky Road! National Rocky Road Day deserves the best possible tribute, and trust me, we’re skipping the weak stuff. I spent ages trying to figure out how to get that perfect, dense texture you usually only find in the best shops, and that’s where the Dishicious philosophy really shines.
As founder Leo Grant, I approach recipes like a project: streamline the complex parts, maximize the flavor payoff. This recipe for rocky road ice cream cuts out all the fluff. We’re using a straightforward base that guarantees you get that incredible balance of intense chocolate, soft marshmallows, and crunchy nuts in every single bite. Get your churner ready; we’re locking in that ultimate creamy texture today.
- Why This Rocky Road Ice Cream Recipe Works for Busy Cooks
- Ingredients for Your Thick and Creamy Rocky Road Ice Cream
- Step-by-Step Instructions to Make Rocky Road Ice Cream
- Tips for Perfect Homemade Ice Cream Success
- Serving Suggestions for Your Rocky Road Ice Cream
- Storage and Freezing Instructions for Rocky Road Ice Cream
- Troubleshooting Common Rocky Road Ice Cream Issues
- Frequently Asked Questions About Rocky Road Ice Cream
- Estimated Nutritional Profile for Rocky Road Ice Cream
Why This Rocky Road Ice Cream Recipe Works for Busy Cooks
When I designed this recipe, I wasn’t trying to make pâtisserie; I was solving a problem—how to get show-stopping summer treats without spending all day in the kitchen. This rocky road ice cream recipe is built for reliability. You’ll get that thick, fantastic texture every single time, no guesswork involved.
- No tempering eggs needed! We use a cooked custard base that just needs to be dissolved, not managed.
- The chilling time is non-negotiable, but it’s hands-off time—perfect for planning dinner.
- It delivers that satisfying, dense mouthfeel that separates great homemade ice cream from the icy stuff.
- We keep the mix-ins simple, so folding them in takes about two minutes flat. Check out all my reliable go-to dessert recipes for more simple wins!
Achieving Thick Homemade Ice Cream Texture
Here’s the secret project management tip for ice cream: time management. You absolutely must chill your base for a minimum of four hours, but honestly, overnight is the gold standard. Cooling that chocolate mixture until it’s near-freezing before it hits the churner is what stops the ice crystals from forming. That deep chill is the difference between a soupy mess and proper, thick rocky road ice cream.
Simple Ingredients for Classic Rocky Road Ice Cream
You won’t need to hunt down specialty shops for this. We are sticking to high-impact ingredients you can grab easily. Rich cocoa powder, real cream, and simple sugar provide the foundation. This ensures the final product tastes authentically classic, justifying its spot as the ultimate cool-down on a hot day.
Ingredients for Your Thick and Creamy Rocky Road Ice Cream
When I design a recipe for Dishicious, I always optimize the ingredient list. We aren’t complicating things here. Everything you need for unbelievable rocky road ice cream should be available at your local standard grocery store. We need the liquids, the sugar, the chocolate punch, and then—the rocky parts!
For the base, you’ll start with two cups of heavy cream and one cup of whole milk. Make sure those are cold when you start heating them up. We measure out exactly three-quarters of a cup of granulated sugar to balance the bitterness of the chocolate. For that deep, rich flavor, grab a quarter cup of unsweetened cocoa powder, a teaspoon of vanilla extract, and just a tiny pinch of salt to make all those flavors pop.
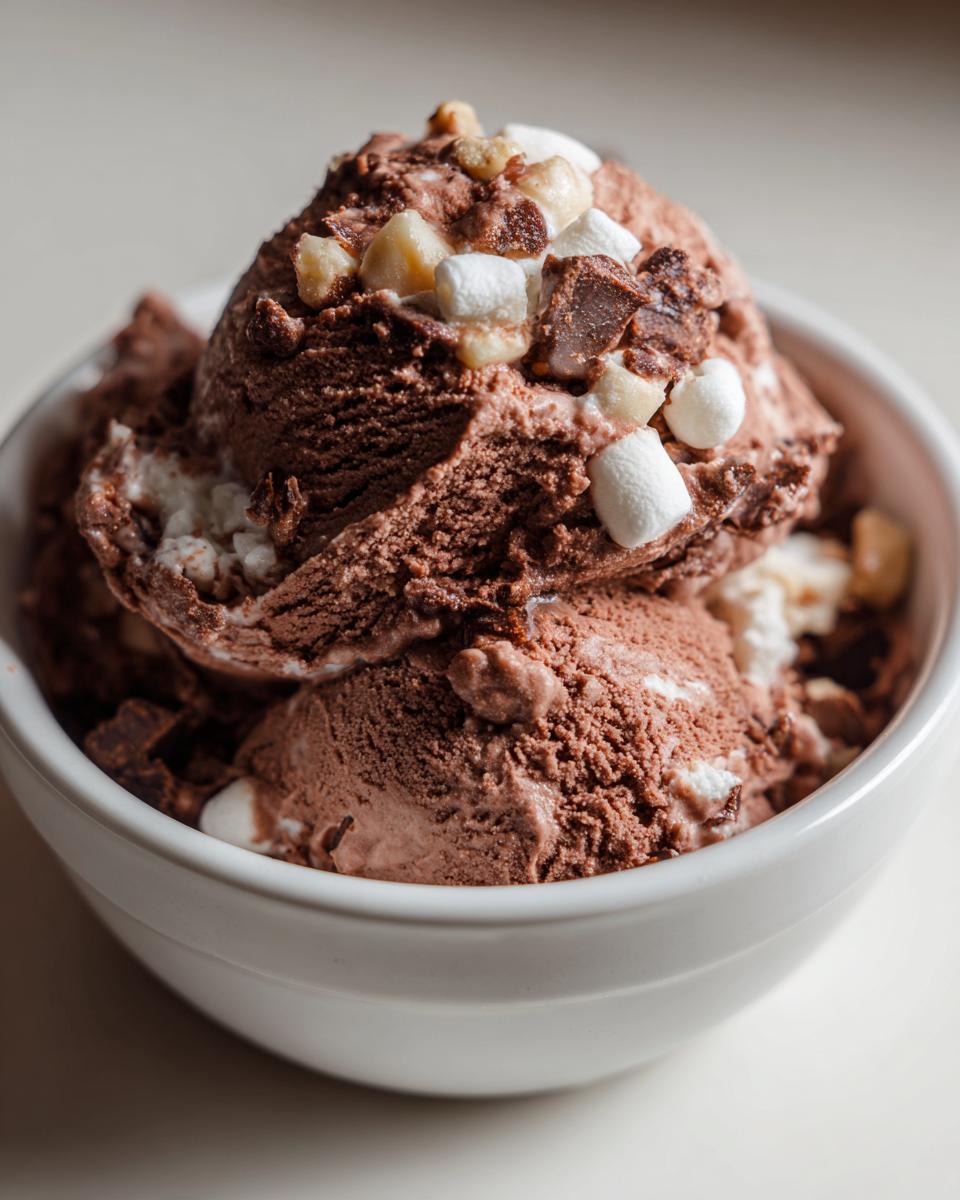
Now for the fun stuff! You need one whole cup of the smallest marshmallows you can find—mini, please! And for the crunch, grab half a cup of your choice of chopped almonds or walnuts. I usually go for walnuts because they have a slightly softer bite, but whatever you like works for these summer treats.
Ingredient Notes and Substitutions for Rocky Road Ice Cream
A quick note from my project management approach: consistency matters. If you want a truly professional-tasting chocolate ice cream, skip the regular cocoa powder and grab the Dutch-process version. It gives you a much richer, darker flavor payoff without needing extra steps, which is perfect for our style of cooking here.
As for the nuts, this is where you can customize. Almonds give you a sharper snap, but walnuts mix in a bit smoother once they set up in the freezer. And a quick tip on marshmallows: they can sometimes get rock-hard in homemade ice cream. If you’re worried about that, try stirring in only half the marshmallows before churning and save the rest to fold in right at the very end.
Step-by-Step Instructions to Make Rocky Road Ice Cream
Okay, we have all the pieces ready for assembly—time to execute the plan! Making this rich chocolate ice cream base is simple saucepan work. This process is engineered to build flavor without requiring constant attention. If you’ve ever had your efforts ruined by scorched milk, don’t worry; we stick to medium heat and constant vigilance until the sugar is gone. Remember, efficiency doesn’t mean cutting corners on chemistry!
If you need something fast during the week, remember that checking out my guides on quick easy dinners can free up your evening to focus on weekend projects like this incredible rocky road ice cream.
Preparing the Chocolate Ice Cream Base
You’re going to combine your heavy cream, milk, sugar, cocoa powder, and salt in a saucepan. Put it over medium heat. Your only job here is to whisk gently and constantly until that sugar completely dissolves and the mixture looks perfectly smooth. I’m stressing this: under no circumstances should this mixture boil. Boiling changes the structure of the dairy and we absolutely do not want that. Once it’s smooth, pull it right off the heat and stir in that vanilla extract.
Chilling and Final Mix-Ins for Rocky Road Ice Cream
Now comes the most critical step for a truly thick, creamy result: chilling. Step three is non-negotiable for this homemade ice cream project. Transfer the base to the fridge for a minimum of four hours, but I’ve learned that chilling it overnight just delivers superior performance. Once it’s fridge-cold, churn it in your ice cream maker until it looks exactly like soft-serve ice cream ready to be eaten straight from the machine.
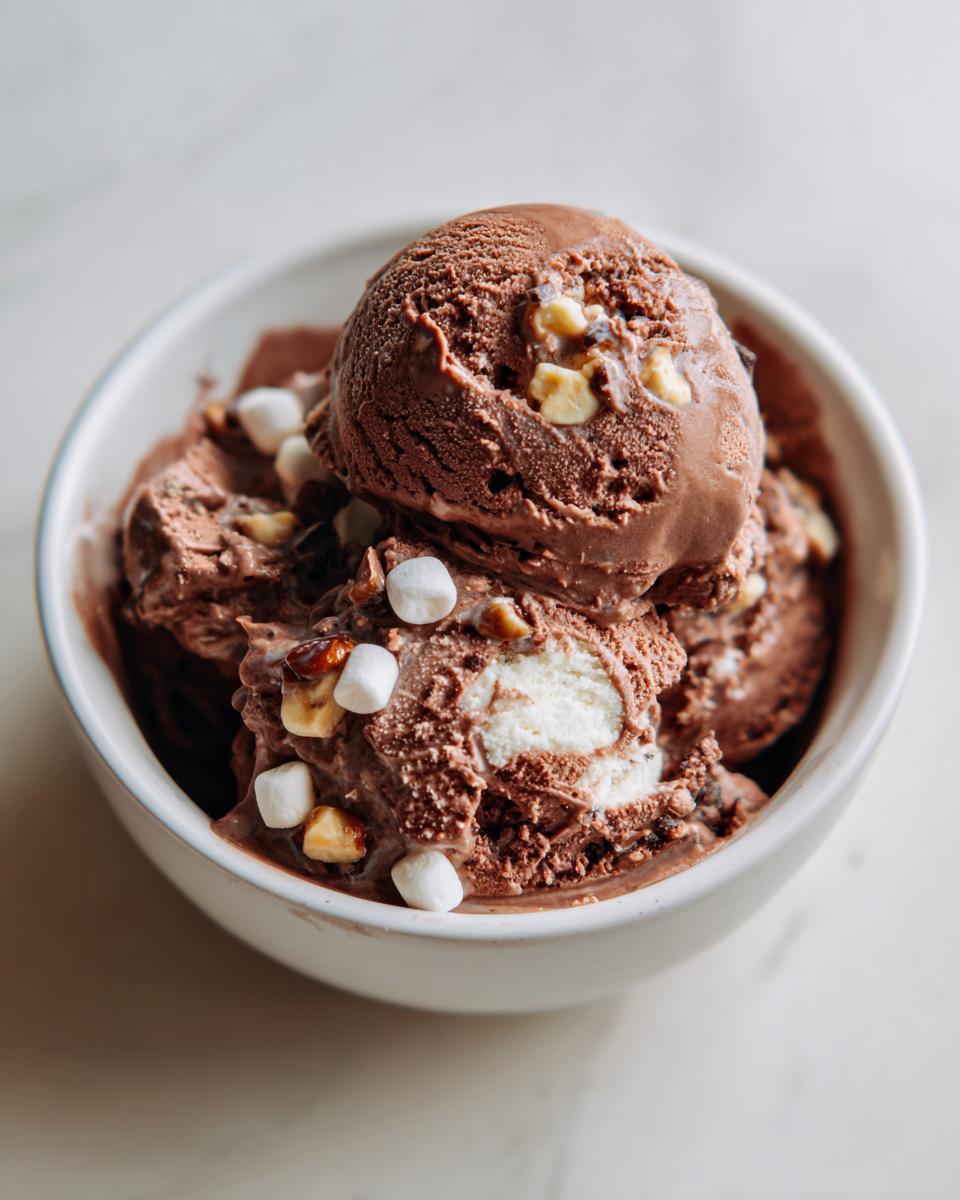
Transfer that slightly soft ice cream into a freezer container. Now, gently fold in those marshmallows and nuts. Don’t overmix! We want pockets of deliciousness. You need to pop it back into the freezer for two to four more hours so it firms up into that scoopable, classic texture. Patience earns you the best summer treats, trust me!
Tips for Perfect Homemade Ice Cream Success
I know we’re aiming for efficiency, but a couple of small optimizations can make this homemade ice cream truly world-class. Dealing with the quirks of your machine and freezer setup guarantees success. We want this rocky road ice cream to be perfect for National Rocky Road Day, right?
First up: the machine bowl. If you use a freezer-bowl style maker, pull that bowl out of the deepest part of your freezer about an hour before you plan to churn. It needs to be absolutely solid ice. If it’s only half-frozen, your churning time triples, and the texture suffers. This is a small prep step Leo insists on for any ice cream project.
If you decide to use the Dutch-process cocoa powder—which you absolutely should for intense flavor—just remember that it naturally makes the final product slightly less sweet. This is a simple adjustment, but one you should know about going in.
Here’s the crucial finishing tip, especially if your freezer runs super cold. When you take your hardened marshmallow dessert out to serve, don’t try to attack it with the scoop immediately. Let it sit on the counter for five to ten minutes. This slight tempering—just enough to soften the edges—makes scooping much easier and prevents breaking the structure. It ensures every serving looks as good as the one before it. For more foolproof dessert ideas, check out my main dessert recipes collection!
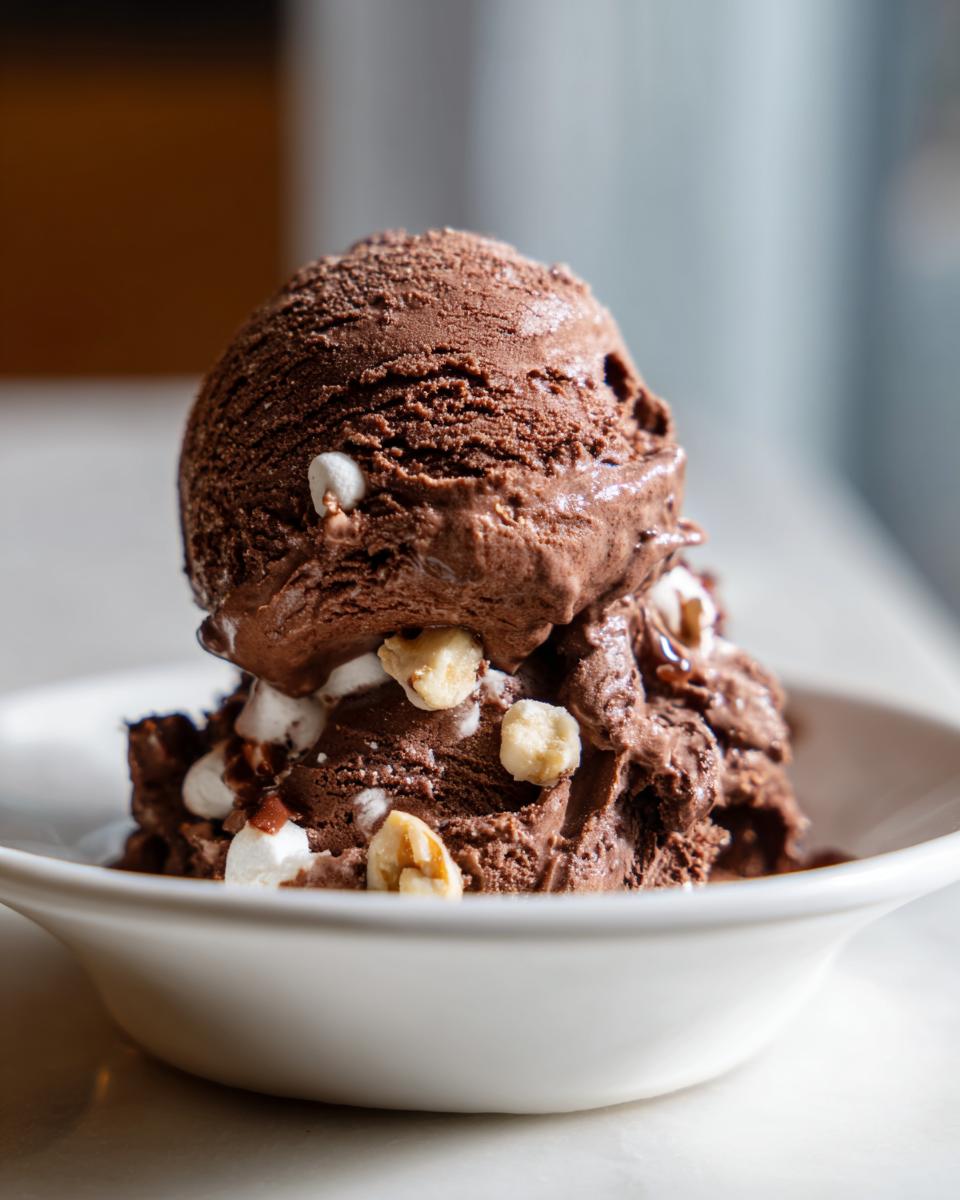
Serving Suggestions for Your Rocky Road Ice Cream
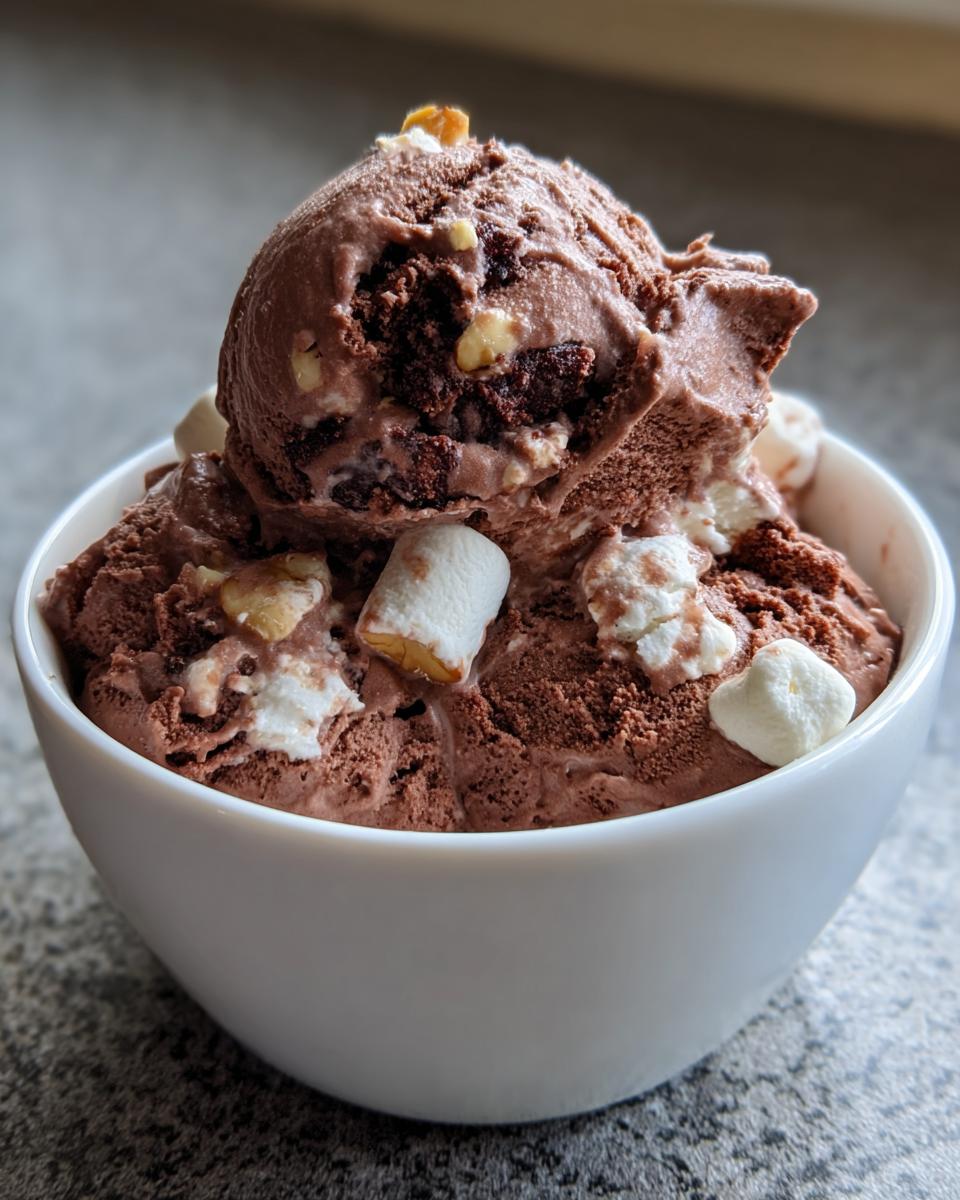
Now that you’ve engineered the perfect scoop of creamy, chilly goodness for National Rocky Road Day, we have to talk about presentation. Since this dessert is so rich and loaded already, you don’t need much else, but a few simple additions can seriously elevate the experience. Remember, every project needs a great final reveal!
If you want to lean into the chocolate richness, a drizzle of warm fudge sauce right over the top is always a winner. It melts slightly into the cold base, and honestly, who can say no to that? For something lighter, a quick dusting of powdered sugar just before serving adds a lovely visual contrast, making those dark chocolate chunks pop.
If you’re feeling fancy, try serving a scoop alongside something warm and spicy to bring out the nuttiness—have you ever made my ultimate classic deep-fried recipe? Those warm apple fritters with a scoop of this cold, rocky goodness on top? Total game changer. It’s that mix of hot and cold, soft and crunchy, that makes summer desserts so much fun to tackle.
Storage and Freezing Instructions for Rocky Road Ice Cream
We put in the hard work to get this premium rocky road ice cream texture, so we absolutely must protect it from freezer burn! Once the ice cream is firm after that final freeze, transfer it immediately into a sturdy, airtight container. I find a shallow, wide container works better than a deep one because you minimize the air pocket sitting on top.
Press a layer of plastic wrap right onto the surface of the ice cream before sealing the lid completely. This little barrier stops those annoying ice crystals from forming. If you follow these steps, this beautiful marshmallow dessert stays perfect for weeks, ready for whenever a craving hits!
Troubleshooting Common Rocky Road Ice Cream Issues
So you’ve followed the steps, you’ve churned it, and now you’re facing a slight hiccup. Every project has its sticking points, right? When I first started optimizing homemade ice cream recipes, I ran into a few issues that I’ve since figured out how to project-manage right out of the process. Don’t let a little texture problem stop you from enjoying these perfect summer treats!
The number one complaint I hear about this recipe comes *after* it’s frozen solid: the marshmallows become little pebbles. This happens because the sugar in the marshmallows freezes hard. To combat this, remember what I said about folding them in right at the end, *after* churning. If they still feel too hard when you eat it, you might need to increase the amount of corn syrup or invert sugar you use next time—but for this recipe, just let it sit on the counter a little longer before scooping!
Another issue is if your final product is too soft, even after the final set time. This usually means your ice cream maker bowl wasn’t cold enough, or you churned it too briefly. The machine needs that base to be close to freezing to whip the air in correctly. If it’s too soft, just pop it back in the freezer, but add that layer of plastic wrap on top to lock in the quality.
Why is my Rocky Road Ice Cream base not chilling fast enough?
This is usually a freezer temperature issue. If your freezer isn’t set to at least 0°F, that base is going to take ages to get cold enough, and you risk forming those nasty ice crystals. Also, don’t try to chill the base in a huge, deep stock pot; use a wide, shallow container. Spreading the liquid out exposes more surface area to the cold, making the process way faster. That’s smart project management in the kitchen!
Frequently Asked Questions About Rocky Road Ice Cream
It’s smart to ask questions before you dive into a new recipe, especially when you’re trying to nail that perfect texture for homemade ice cream. I get tons of emails asking for clarification on the finer points of getting these summer treats just right. Here are the main hurdles people run into when mastering this rocky road!
Can I skip the ice cream maker when making rocky road ice cream?
If you skip the machine, you are skipping what makes this specific recipe work! The churning process is essential because it constantly scrapes the freezing mixture while simultaneously whipping air into it. That air is what keeps the final product creamy, light, and non-icy. If you tried to freeze this base solid in a container without churning, you’d end up with an extremely hard, dense block of frozen chocolate—not scoopable ice cream. For this premium result, the churner is a required piece of equipment. Check out all my other reliable dessert recipes for other techniques!
What nuts work best in this chocolate ice cream recipe?
The beauty of this chocolate ice cream is that you get to choose your crunch level. I designed it to work beautifully with either chopped walnuts or almonds. The key isn’t so much the type of nut but the size. You want them roughly chopped—not powdered, but definitely smaller than whole pieces. This ensures you get that satisfying *rocky* texture without biting into a chunk that’s too hard to chew against the creamy base. If you decide to use pecans, they’re great too, but often slightly softer once frozen.
Why did my marshmallows freeze rock hard?
I mentioned this in troubleshooting, but it’s so important it deserves another mention! Marshmallows are mostly sugar, and when frozen near absolute zero, they seize up. The secret to preventing this hard candy effect is timing. You must wait until the base is already churned into soft-serve consistency before you gently fold in the marshmallows—and I mean gently! If you add them too early, they embed into the frozen matrix and become like little rocks. Don’t let them mix in during the churning phase!
Is this recipe significantly different from traditional Rocky Road?
It is, and that’s what makes it so good for busy cooks! Traditional rocky road often involves making a separate tempered chocolate coating or melting chocolate into the custard, which adds complexity. My approach here streamlines that by dissolving high-quality cocoa powder right into the dairy base before chilling. This gives us all the intense chocolate flavor for our rocky road ice cream base without extra melting steps—more efficient, fewer dishes! We engineered flavor with reliability in mind.
Estimated Nutritional Profile for Rocky Road Ice Cream
Okay, let’s talk about the payoff—because we all know incredible desserts come with a little indulgence! When you’re planning your perfect gathering or just making a necessary batch of rocky road ice cream, it’s good to have the numbers handy, even if we aren’t agonizing over every single macro.
Since we are using real heavy cream and sugar to achieve that wonderfully thick texture, this is definitely a treat, not an everyday diet staple. Remember, Leo designed this to be simply delicious, and sometimes simple deliciousness requires a bit more richness! These values are based on the standard ratios in the recipe, but your actual results might vary slightly depending on the brands of cream, cocoa, or nuts you choose to use.
For an estimated serving size of about half a cup, here is what we are generally looking at:
- Calories: About 350
- Sugar: Roughly 30 grams
- Total Fat: Around 24 grams (which is why it’s so satisfyingly creamy!)
- Protein: About 5 grams
We are keeping the sodium nice and low, around 45mg, thanks to just a tiny pinch of salt added for flavor enhancement. Enjoy this scoop of classic summer perfection knowing that you made the best homemade ice cream possible!
PrintThick and Creamy Homemade Rocky Road Ice Cream

Make the perfect summer treat with this straightforward recipe for thick, creamy rocky road ice cream, balancing rich chocolate, soft marshmallows, and crunchy nuts.
- Prep Time: 20 min
- Cook Time: 10 min
- Total Time: 4 hr 30 min
- Yield: About 1 quart 1x
- Category: Dessert
- Method: Churning
- Cuisine: American
- Diet: Vegetarian
Ingredients
- 2 cups heavy cream
- 1 cup whole milk
- 3/4 cup granulated sugar
- 1/4 cup unsweetened cocoa powder
- 1 teaspoon vanilla extract
- Pinch of salt
- 1 cup mini marshmallows
- 1/2 cup chopped almonds or walnuts
Instructions
- In a medium saucepan, whisk together the heavy cream, milk, sugar, cocoa powder, and salt over medium heat until the sugar dissolves and the mixture is smooth. Do not boil.
- Remove the mixture from the heat and stir in the vanilla extract.
- Chill the ice cream base completely in the refrigerator for at least 4 hours, or preferably overnight. This step is key for thick ice cream.
- Churn the chilled base in your ice cream maker according to the manufacturer’s directions until it reaches a soft-serve consistency.
- Transfer the churned ice cream to a freezer-safe container.
- Gently fold in the mini marshmallows and chopped nuts.
- Freeze for an additional 2 to 4 hours to allow the ice cream to firm up to a scoopable texture.
Notes
- For the thickest results, chill your ice cream maker bowl for the time specified by the manufacturer before churning.
- If you prefer a deeper chocolate flavor, use Dutch-process cocoa powder.
- Let the ice cream sit on the counter for 5 to 10 minutes before scooping if it freezes very hard.
Nutrition
- Serving Size: 1/2 cup
- Calories: 350
- Sugar: 30
- Sodium: 45
- Fat: 24
- Saturated Fat: 15
- Unsaturated Fat: 9
- Trans Fat: 0.5
- Carbohydrates: 32
- Fiber: 2
- Protein: 5
- Cholesterol: 75