
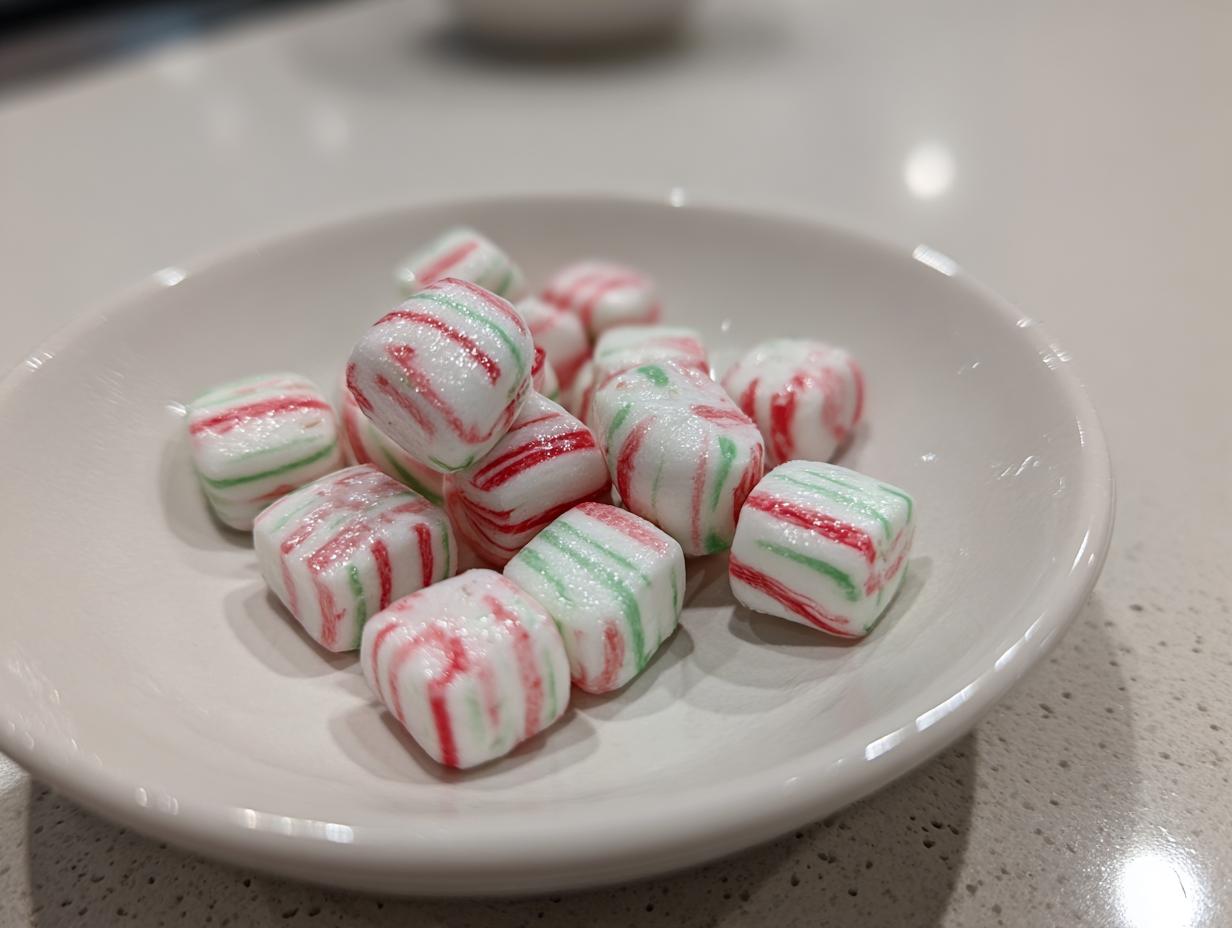
There’s just something about the holidays that makes me want to whip up a batch of old-fashioned comfort. You know, the kind of treats that smell like pure Christmas magic and instantly bring back memories of cozy kitchens and family gatherings. That’s exactly the feeling I get when I make these soft Christmas peppermints. They’re so incredibly easy, definitely no-bake, and absolutely perfect for tucking into little gift bags or arranging on a festive treat board. Honestly, they remind me of the candies my grandma used to buy from the local bakery, but making them myself feels so much more special. It’s all about that simple, delicious approach we love here at Dishicious, just like how our founder Leo Grant believes we can create amazing food without the fuss. These little candies are proof that anyone can nail a classic holiday treat!
- Why You'll Love These Soft Christmas Peppermints
- Gather Your Ingredients for Soft Christmas Peppermints
- Crafting Your Old Fashioned Butter Mints
- Tips for Perfect Soft Christmas Peppermints
- Make Ahead and Storage for Holiday Candy Gifts
- Frequently Asked Questions about Soft Christmas Peppermints
- Estimated Nutritional Information
- Share Your Festive Candy Creations!
Why You’ll Love These Soft Christmas Peppermints
Seriously, if you’re looking for a no-fuss holiday treat that tastes like homemade heaven, you’ve found it! Here’s why these will become your go-to:
- Super Easy to Make: No baking involved, which means less stress and more fun! They come together in minutes.
- Festive & Pretty: That classic peppermint swirl just screams holiday cheer. Add red or green, and you’ve got yourself little jewels for any treat board.
- Perfect for Gifting: Package them up in little tins or bags, and you’ve got an instant, heartfelt holiday gift that anyone would adore.
- That Classic Taste: It’s that nostalgic, melt-in-your-mouth peppermint flavor that we all love. Pure comfort!
Gather Your Ingredients for Soft Christmas Peppermints
Alright, let’s get our ingredients lined up! This recipe is wonderfully simple, which is exactly what we love for busy holiday seasons. You probably have most of this in your pantry already, which is even better!
- 1 cup powdered sugar (sifting it first is my little secret for extra smooth mints!)
- 1/4 cup unsalted butter, softened (make sure it’s not too melty, just soft enough to press a finger into!)
- 2 tablespoons light corn syrup (this gives us that lovely chewy texture and helps everything come together)
- 1/2 teaspoon peppermint extract (use good quality stuff for the best flavor!)
- Red or green food coloring (optional, but totally makes them festive!)
Crafting Your Old Fashioned Butter Mints
Okay, let’s get our hands a little messy and make some magic happen! This is where the fun really begins, and remember, the best part is there’s zero baking required. Seriously, if you can stir and roll, you can totally nail these soft Christmas peppermints. We’re talking about a total prep time of just about 15 minutes, and then they just need a little time to firm up. It’s a much simpler process than, say, making no-bake trail mix bars, but just as rewarding!
Mixing the Peppermint Base
First things first, grab a medium bowl. Pop in your softened butter and the sifted powdered sugar. Give it a good mix until it’s sort of combined – it might look a little crumbly at first, and that’s totally okay! Then, pour in your light corn syrup and that wonderful peppermint extract. Now, beat it all together until it’s wonderfully smooth and creamy. It should look pretty, almost like thick frosting. It really is that simple to get the base going, much like when we start a caramel cookie trifle!
Adding Festive Color to Your Soft Christmas Peppermints
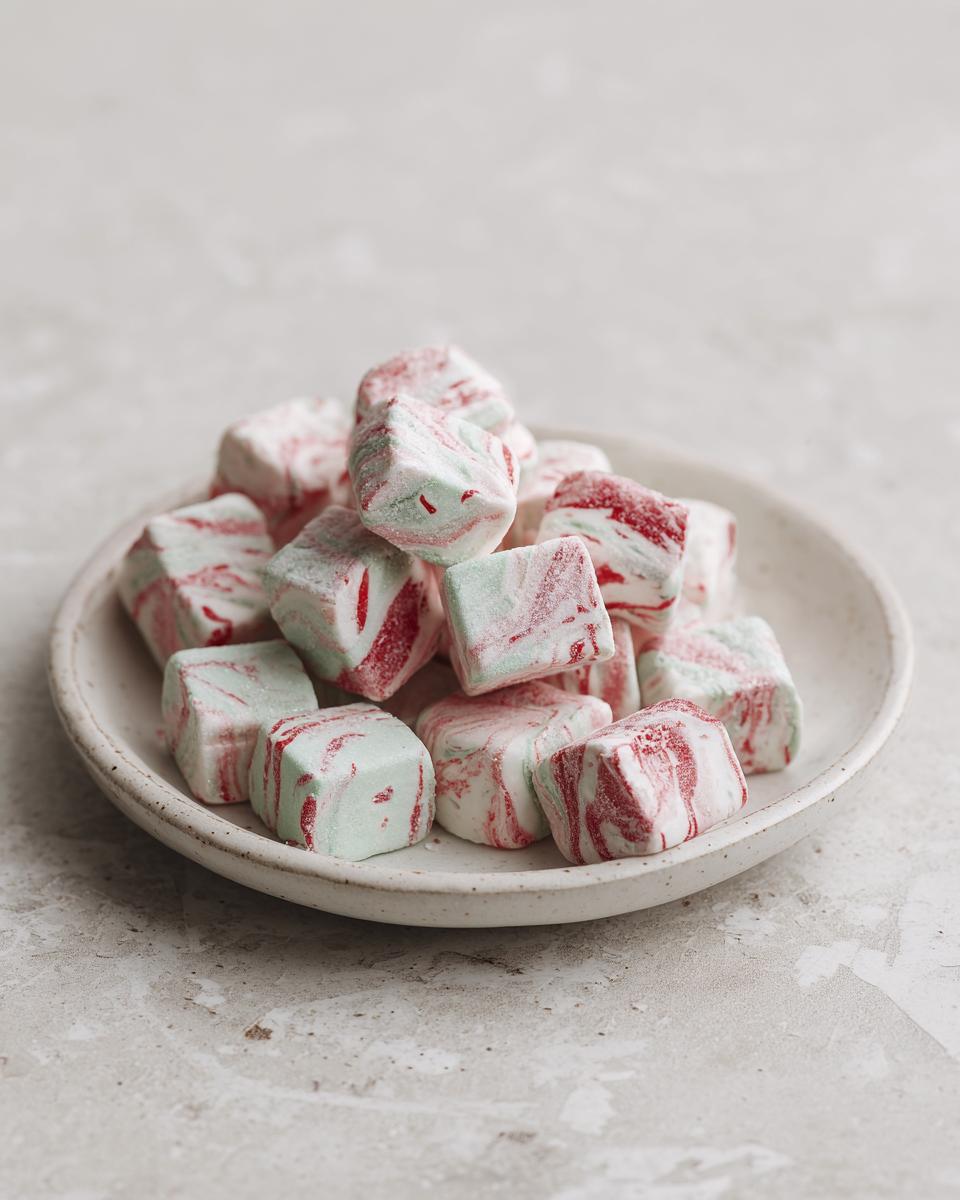
This is where we make them festive! If you’re going for that classic red and green look, grab another bowl and split your peppermint mixture about in half. Add just a drop or two of red food coloring to one half and green to the other. Mix each one until the color is evenly distributed and nice and bright. Trust me, seeing those two colors come to life is a happy moment! For an extra special touch, you can gently swirl the colors together before you shape them, creating a pretty marbled effect.
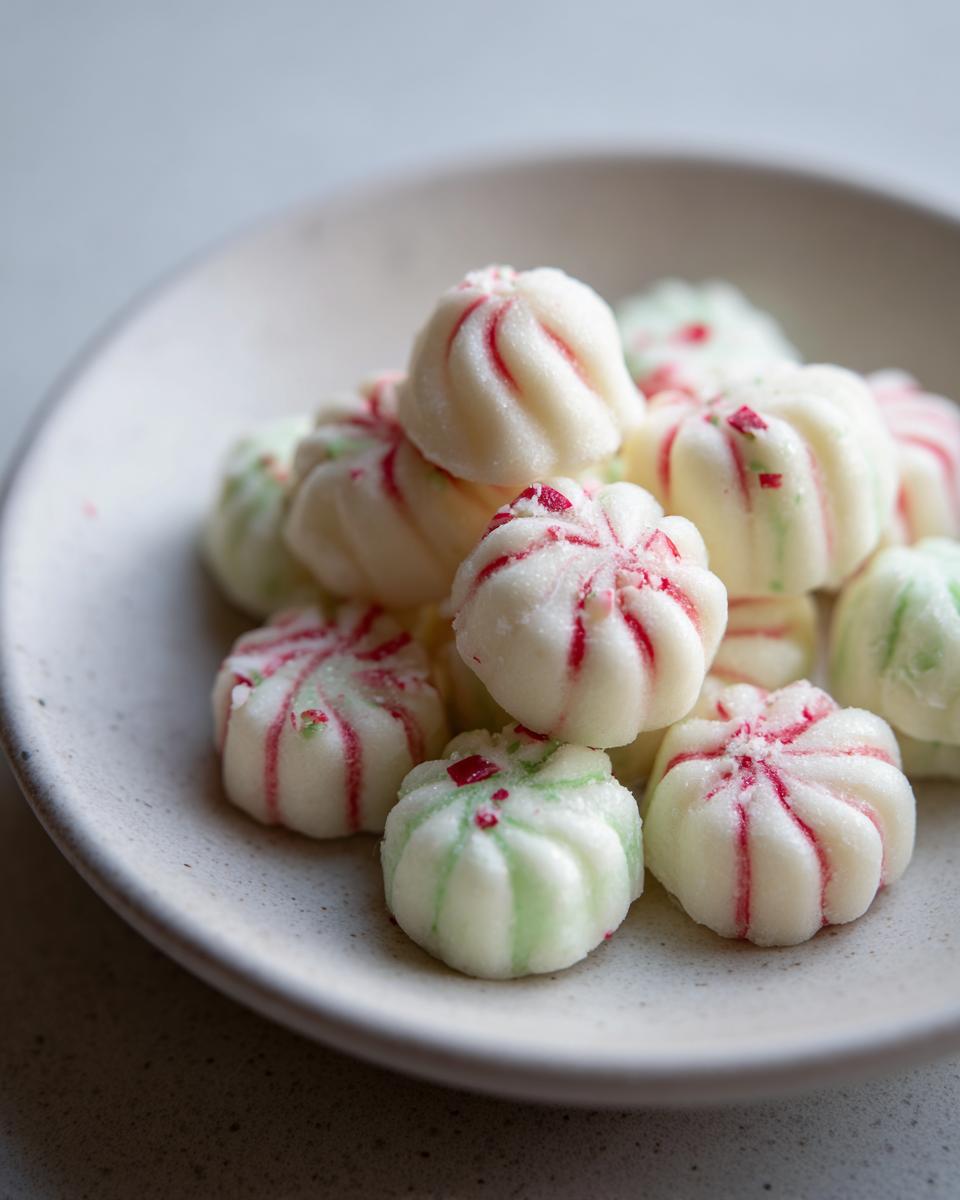
Shaping and Drying Your Homemade Peppermint Candies
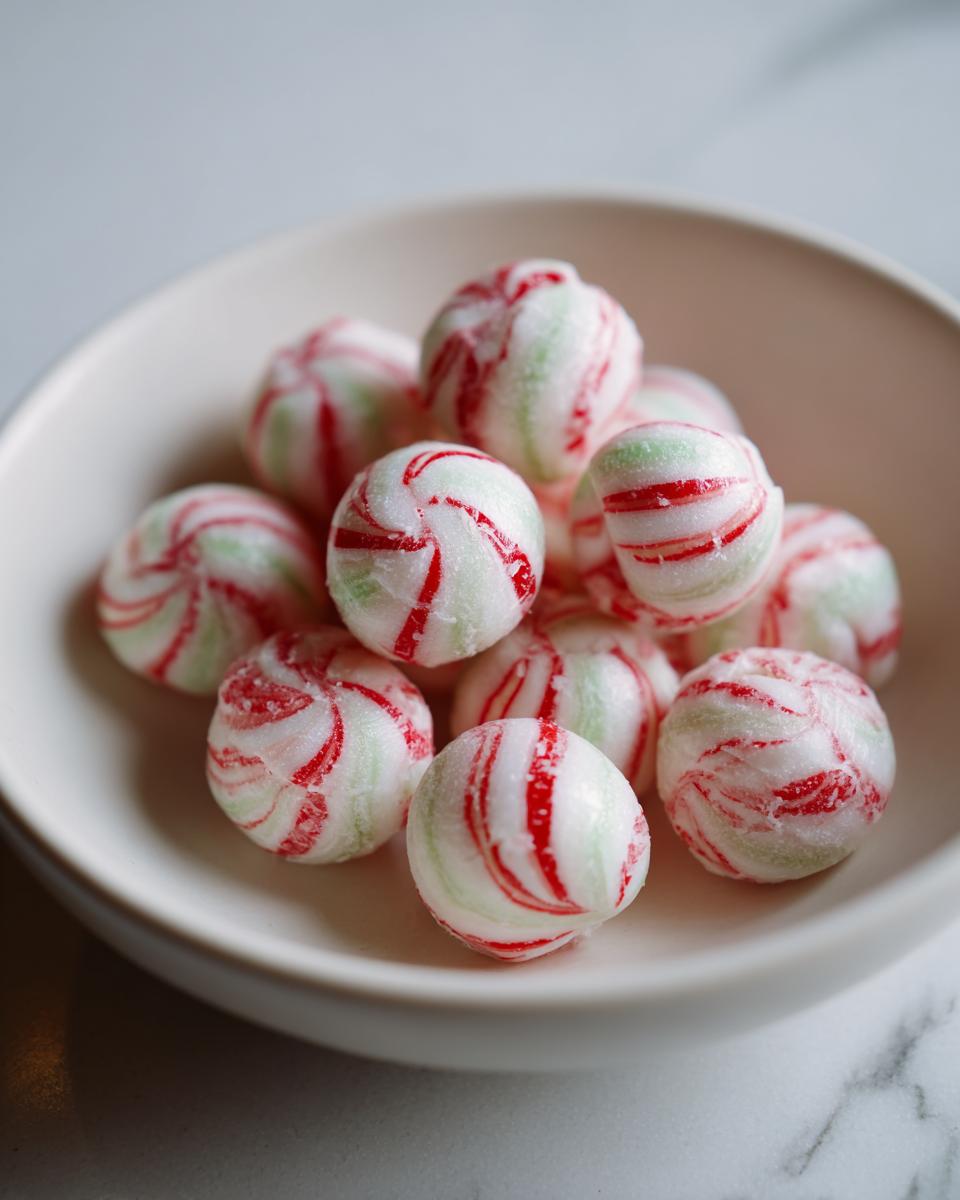
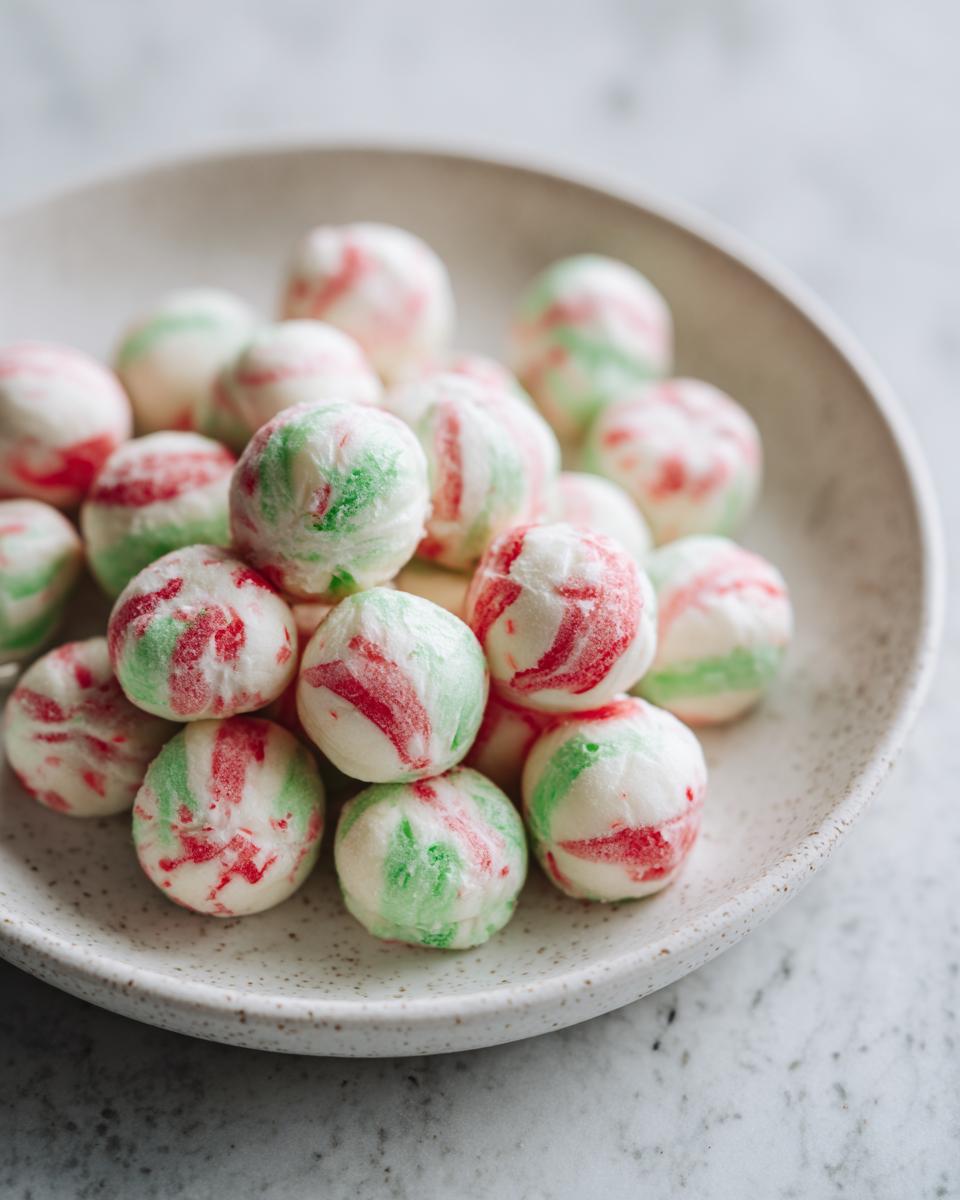
Now for the shaping! Grab a small scoop or just use your hands to roll the mixture into little balls, about half an inch big – think the size of a small gumball. If you swirled your colors, try to keep those swirls intact as you roll! Place all your little peppermint balls onto a baking sheet that you’ve lined with parchment paper. This is crucial so they don’t stick! Let them sit there at room temperature for at least 2 to 4 hours. They just need to dry out a bit so they aren’t sticky and hold their shape nicely. It’s kind of like magic!
Tips for Perfect Soft Christmas Peppermints
You know, getting these little guys just right is all about a few simple tricks. We want that perfect balance – soft and melt-in-your-mouth, but not sticky! It’s like when I make my homemade granola; a little attention to detail makes all the difference.
Achieving the Right Texture
For that super smooth, no-stick texture, definitely sift your powdered sugar. And make sure that butter is just softened, not melted! If it’s too warm, the whole mixture can get a bit too soft. Just a gentle finger-press should leave an indent. That’s the sweet spot!
Creative Swirling Techniques
Want your soft Christmas peppermints to really pop on a holiday platter? After you’ve got your red and green mixtures, gently press them together into a flatish shape. Then, lightly drag a toothpick through the colors to create a swirled effect before you roll them into balls. You can also just gently press blobs of each color side-by-side and then roll, letting the colors mingle as you go. They always look so pretty!
Make Ahead and Storage for Holiday Candy Gifts
Okay, so one of the best things about these soft Christmas peppermints is how perfect they are for getting ahead of the holiday rush. You can totally make them way before you need them! Once they’ve dried out completely on the parchment paper – usually after a few hours – just pop them into an airtight container. I like to put a little parchment paper between layers if I’m stacking them, just to make sure they don’t stick together. They’ll stay yummy at room temperature for about a week or two. They make the cutest little part of a Christmas jam gift basket or a lovely addition to your holiday treat boards. Just layer them up in cute tins, cellophane bags tied with festive ribbon, or even little paper cups for a sweet, homemade touch!
Frequently Asked Questions about Soft Christmas Peppermints
Got questions about making these festive little candies? We’ve got you covered!
Can I use different extracts in these butter mints?
You totally can! While peppermint is classic, you could try spearmint or even a little wintergreen for a different twist. Just be mindful that some extracts are stronger than others, so you might need to adjust the amount a bit.
How long do these homemade peppermint candies last?
Stored properly in an airtight container at room temperature, these homemade peppermint candies are best enjoyed within about 1 to 2 weeks. They’re perfect for making ahead of time for any holiday party!
What if my peppermint mixture is too sticky?
Oh, that can happen! If your mixture feels too sticky to roll, just try working in a tiny bit more sifted powdered sugar, a teaspoon at a time, until it’s easier to handle. Sometimes, a quick chill in the fridge for about 10 minutes can also work wonders to firm it up!
Estimated Nutritional Information
Here’s a rough idea of what you’re getting in each of these yummy soft Christmas peppermints. Remember, these are just estimates and can vary a bit depending on the exact ingredients and brands you use!
- Serving Size: 1 mint
- Calories: About 30
- Fat: 1g
- Carbohydrates: 5g
- Sugar: 6g
- Protein: 0g
Share Your Festive Candy Creations!
Alright, now you’ve got all the secrets to making these delightful soft Christmas peppermints! I really hope you give them a try this holiday season. When you do, come on back and tell me all about it in the comments below! I’d love to hear how they turned out and see your pretty pictures. If you enjoyed them, please give them a star rating – it really helps us out! And if you have any questions or want to share more holiday baking adventures, feel free to get in touch!
PrintSoft Christmas Peppermints

Create old-fashioned, no-bake butter mints perfect for holiday gifting and festive treat boards.
- Prep Time: 15 min
- Cook Time: 0 min
- Total Time: 4 hours 15 min
- Yield: About 30 mints 1x
- Category: Desserts
- Method: No-Bake
- Cuisine: American
- Diet: Vegetarian
Ingredients
- 1 cup powdered sugar
- 1/4 cup unsalted butter, softened
- 2 tablespoons light corn syrup
- 1/2 teaspoon peppermint extract
- Red or green food coloring (optional)
Instructions
- In a medium bowl, beat together powdered sugar and softened butter until combined.
- Add corn syrup and peppermint extract. Beat until smooth and creamy.
- If desired, divide the mixture in half. Tint one half with red food coloring and the other half with green food coloring.
- Roll the peppermint mixture into small balls, about 1/2 inch in diameter.
- If you colored the mixture, gently swirl the two colors together before rolling into balls.
- Place the peppermint balls on a parchment-lined baking sheet.
- Let the mints dry at room temperature for at least 2-4 hours, or until firm.
- Store in an airtight container at room temperature.
Notes
- For a smoother texture, sift the powdered sugar before mixing.
- You can also press the mixture into a small pan and cut into squares or rectangles.
- These mints are best enjoyed within 1-2 weeks.
- Package in festive tins or cellophane bags for easy holiday gifts.
Nutrition
- Serving Size: 1 mint
- Calories: 30
- Sugar: 6g
- Sodium: 5mg
- Fat: 1g
- Saturated Fat: 1g
- Unsaturated Fat: 0g
- Trans Fat: 0g
- Carbohydrates: 5g
- Fiber: 0g
- Protein: 0g
- Cholesterol: 3mg