
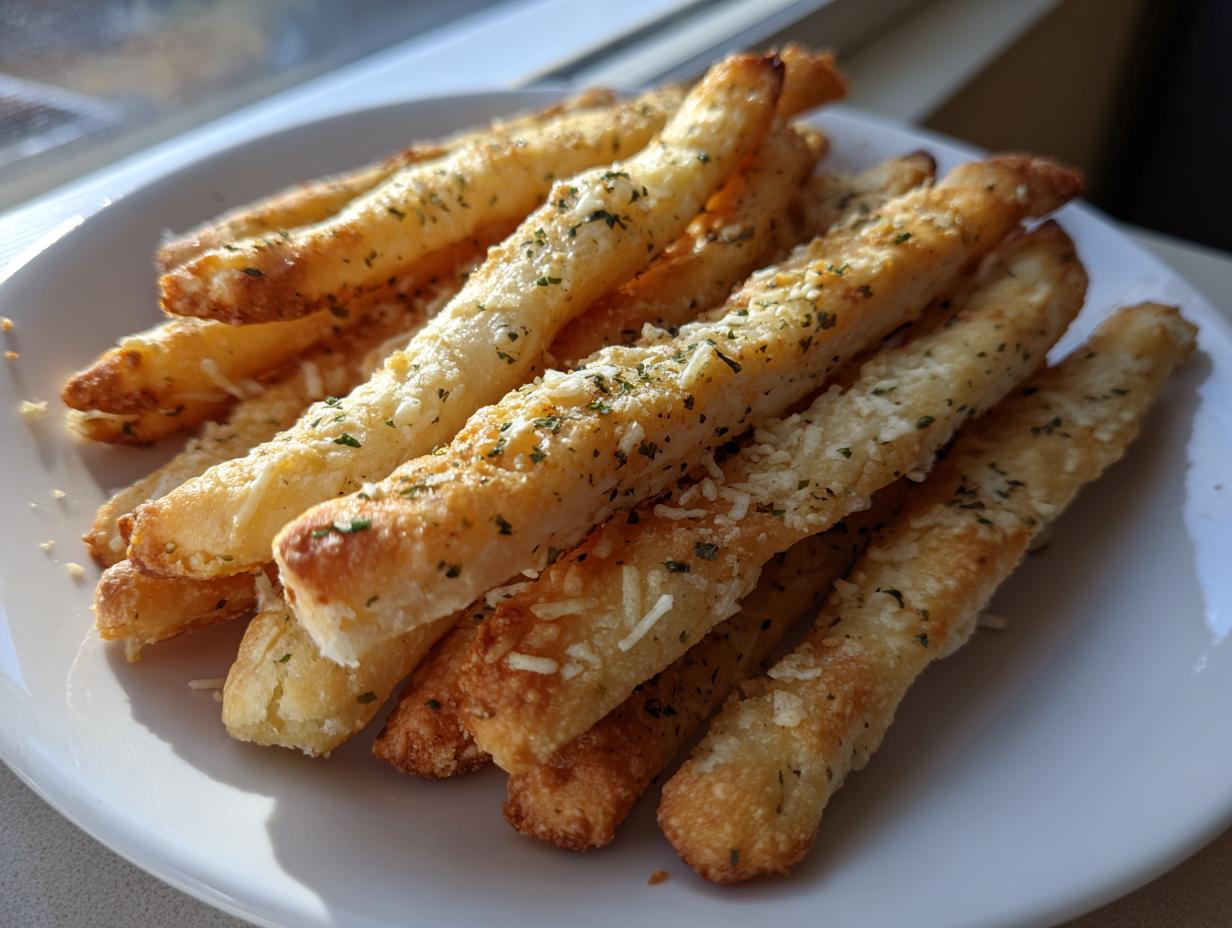
Let’s talk about kitchen efficiency for a second. If you’ve got a bubbling jar of sourdough starter, you know the struggle of what to do with that leftover discard every time you feed it. That bowl of active starter shouldn’t just go down the drain—that’s wasted potential! That’s where the project manager in me shines. I engineered a way to turn what’s usually scrap into something incredibly delicious and fast. Forget long fermentation processes; we’re optimizing for speed and flavor right now. These sourdough discard breadsticks are the perfect solution for using up that starter waste without waiting around all day. They crisp up beautifully and pack a savory punch! If you’re new to the starter game, you can always check out my guide on getting a starter going from scratch, but for today, we’re focusing on the leftovers.
- Why This Recipe for Sourdough Discard Breadsticks Works (No Extra Yeast)
- Gathering Ingredients for Your Homemade Breadsticks Baking
- The Step-by-Step Method for Perfect Sourdough Discard Breadsticks
- Flavor Variations for Savory Sourdough Bakes
- Tips for Crispy Breadsticks Tutorial and Soft Interior Breadsticks
- Serving Suggestions for Sourdough Appetizer Ideas
- Storage and Reheating Instructions for Leftover Sourdough Discard Breadsticks
- Frequently Asked Questions About Sourdough Discard Breadsticks
- Estimated Nutritional Data for Sourdough Discard Breadsticks
Why This Recipe for Sourdough Discard Breadsticks Works (No Extra Yeast)
When I design a recipe, efficiency is key. Traditional bread takes hours because yeast needs time to work its magic. But with these sourdough discard breadsticks, we skip that wait entirely! We are relying on the magic of baking powder to give us that immediate lift we need for a quick snack. This means you get that wonderful, slightly fermented flavor from the discard without committing to a long, overnight proof. Seriously, they taste like they took hours, but they don’t! If you’re interested in breads that do use commercial yeast, check out my guide on easy yeast bread for beginners, but today we stick to the scrap.
- They use simple pantry staples alongside your starter scrap.
- No waiting around for the dough to double in size—it’s ready nearly right away!
- The structure stays light enough to bake up crispy.
Quick Prep Time for Your Sourdough Discard Breadsticks
This is why I love them for weeknights. We are looking at about 15 minutes of actual hands-on prep time. That’s faster than ordering delivery, honestly. Because we’re cutting out the yeast rise, these become the ultimate quick sourdough snack when you need something savory right now. You just mix, roll, top, and bake. Perfect for unexpected guests or when that afternoon craving hits hard.
Gathering Ingredients for Your Homemade Breadsticks Baking
Alright, let’s get organized. As a project manager, I always start with a clean mise en place. You’ll need exactly one cup of your sourdough starter discard—make sure it’s straight from the fridge, unfed, so it has that nice, developed flavor but no vigorous activity. We’re using baking powder here for lift, not the starter itself, so keep that separate. Everything else is super standard. We’re making homemade breadsticks baking incredibly simple, I promise. Check out this easy breadstick recipe if you ever want to make the non-sourdough version!
Ingredient Notes and Substitutions for Sourdough Discard Breadsticks
That one cup of discard has to be unfed, like I said. If you use recently fed starter, your breadsticks will deflate because the baking powder will fight the natural activity already present. For the Parmesan? If you need to swap it out for dietary reasons, go ahead and use nutritional yeast—it still brings that great savory note that helps with overall flavor balance. This is the best way to ensure you’re effectively using up sourdough starter without wasting any effort.
The Step-by-Step Method for Perfect Sourdough Discard Breadsticks
Okay, now that we have our ingredients lined up, it’s time to execute the project! When dealing with starter, the dough is naturally wetter than your standard flour-and-water dough. Don’t panic if it looks a little rough; that’s normal when you are working with sourdough discard breadsticks. We are aiming for efficiency here, not a perfect, super-elastic bread dough. We treat this more like a thick cookie dough that we coax into a cohesive ball.
Mixing the Dough and Handling Sticky Sourdough Discard Recipes
First, dump the dry ingredients—flour, baking powder, and salt—into a bowl and give them a quick whisk. Then add the sticky discard and the olive oil. Start bringing it together with your hands or a sturdy spatula. You’ll notice it’s shaggy and might not want to combine right away. This is where you patiently add water, just a tablespoon at a time. Remember, you are working with sourdough discard recipes, which means the hydration level can change based on how wet your discard was to begin with. Stop adding water the second it barely holds together. Resist the urge to knead this aggressively; we just need it cohesive. If you’re ever struggling with hydration in other quick bakes, check out how I manage moisture in my sourdough cornbread.
Rolling and Cutting Your Sourdough Discard Breadsticks
Once you have a rough ball, dust your counter lightly and give it one minute of gentle kneading just to smooth the surface. Now, remember the oven needs to be at 400°F (200°C) before you even start rolling, so get that preheated now! Divide your dough in half for easier management. Roll the first half out super thin—I mean 1/8-inch thin if you want them crispy edge-to-edge. Then, grab your pizza cutter and slice them into thin strips. These are your sourdough discard breadsticks ready for flavor!
Flavor Variations for Savory Sourdough Bakes
The base recipe is fantastic, but sometimes you want to mix things up, right? Since these are so quick to assemble, playing with toppings is the perfect way to boost the flavor profile of these savory sourdough bakes. We are not adding extra mixing time, just topping right before they go into the oven. Trust me, you’ll want to try these additions, especially if you’re planning a big spread of appetizers.
Here are three simple, high-impact ideas I often rotate through:
- Cheesy Crunch: Swap out the Parmesan in the topping mix for finely shredded sharp cheddar, or combine the Parmesan with a little smoked paprika before brushing on the butter wash.
- Everything But the Bagel: Skip the garlic powder and oregano entirely. Instead, brush with olive oil (no butter wash needed) and liberally coat both sides with Everything Bagel Seasoning. It adds texture and tons of flavor.
- Spicy Kick: If you like a little heat, mix a pinch of cayenne pepper into the melted butter/garlic topping. Start small—a tiny bit goes a long way when you’re baking these crispy snacks!
If you enjoy that cheesy, savory bite, you absolutely have to check out my recipe for crispy cheese straws next time you’re in the mood for a snack!
Tips for Crispy Breadsticks Tutorial and Soft Interior Breadsticks
Okay, texture is everything, right? We’re aiming for that perfect contrast here: an aggressively crispy exterior that shatters just a little, giving way to a surprisingly soft, chewy interior. The biggest engineering lever you get to pull here is the thickness of your dough when you roll it out. This is crucial for these crispy breadsticks tutorial.
If you want that super savory, cracker-like crunch—the one that’s perfect for just standing over the sink and eating—you need to roll that dough down to 1/8-inch. Seriously thin. Roll it until you can practically read a menu through it. That thinness means less time in the oven and very little internal moisture left, resulting in maximum crispness.
Now, if you’re planning on dipping these into a big bowl of marinara or hearty soup, you might prefer a little more chew. For that soft interior breadsticks effect, keep the dough thickness closer to 1/4-inch. You’ll need to knock 2 or 3 minutes off the bake time, though, because they’ll cook faster than a paper-thin stick.
Here’s a little trick I picked up managing airflow in my oven back in Chicago: air circulation is your friend when you want crispness. I always use the middle rack for these. But if your oven has hot spots, or if you notice one side browning way faster than the other, this is what I do: halfway through baking, I actually rotate the pan 180 degrees, AND I swap the pan to an upper rack for the final few minutes. This flash of direct heat helps lock in the crisp without burning the toppings. It’s a small adjustment, but it makes a huge difference in even cooking, especially since these are so thin. If you’re looking for other ways to maximize crispness without deep frying, you should look at my air fryer chicken wings recipe—the principles are very similar!
Serving Suggestions for Sourdough Appetizer Ideas
You’ve just successfully used up your starter scraps and created something amazing! Now, what do you serve them with? Honestly, these breadsticks are fantastic purely on their own, especially when they’re still warm from the oven. But if you’re planning a party or just want a satisfying snack, dipping is mandatory. Marinara sauce is the classic choice, obviously. They are amazing for swiping up the last bits of sauce from your pasta.
I also love pairing them with something creamy. If you need a quick dip, try mixing some high-quality olive oil with a dash of balsamic vinegar and dried herbs. Or, whip up a batch of homemade aioli—check out my quick recipe for homemade mayonnaise; you can transform that into a garlicky dip in seconds! They aren’t just for Italian food either; these are solid dipping sticks for your next big pot of chili or vegetable soup.
Storage and Reheating Instructions for Leftover Sourdough Discard Breadsticks
So you made a huge batch because, naturally, you should always double this recipe, right? Sometimes life gets in the way, and you don’t finish them all in one sitting. That’s fine, but we need a plan for leftovers, especially since these are best when they snap! The main goal here is preserving that crispness we worked so hard to achieve. If you’re not eating them immediately, make sure everything is completely cool first. Putting warm food into a storage container seals in steam, and steam is the mortal enemy of crispy texture.
For storage, keep them at room temperature. Don’t put them in the fridge! The fridge humidity will make your crunchy sourdough discard breadsticks go soft faster than you can say “baking powder.” Store them in an airtight container—I prefer a thick Ziploc bag with the air squeezed out or a nice glass container with a tight lid.
If you happen to have bread bowls leftover from a soup night, my recipe for easy homemade bread bowls works amazingly well, but these breadsticks need dry storage!
How to Reheat for Maximum Crispness
If they’ve gone a little limp overnight, it’s not a disaster. Microwaving is tempting, I know, because it’s fast. But please, for the integrity of your bake, avoid the microwave for these. It turns them rubbery instantly. We need dry heat to wake up that crisp texture again, so the oven is really the only way to go.
Preheat your oven (or toaster oven) to about 350°F (175°C). Lay the breadsticks out in a single layer directly on the oven rack. This allows air to circulate underneath them, which is way more effective than using a baking sheet. Let them heat up for about 5 to 7 minutes. Watch them closely after the 5-minute mark—they go from slightly chewy back to perfectly crisp very fast!
Flavor Retention in Sourdough Discard Breadsticks
The flavor of these sourdough discard breadsticks holds up incredibly well for two or three days, thanks to the baking powder acting as the main leavening agent rather than relying solely on the starter’s acidic environment. If you topped yours with garlic or cheese, the flavor will still be strong on day two. If you kept them dry, you should have zero issues enjoying the leftovers just as much as the fresh batch!
Frequently Asked Questions About Sourdough Discard Breadsticks
I know you might have some lingering questions, especially if you’re new to working with sourdough starter discard recipes. That’s totally fine! When I started optimizing my cooking process, I had tons of questions too. Here are a few of the most common ones I hear about turning those kitchen scraps into these perfect little savory bakes. If you want a deeper dive into general discard techniques, I laid out everything I know over on my guide on how to bake with starter discard.
Will my sourdough discard breadsticks taste sour?
That’s a great question that pops up a lot when people explore fermented dough snacks. The short answer is: maybe a little, but probably not overwhelmingly so! The tanginess is entirely dependent on how old your discard is. If you just scooped it out after taking what you needed for your regular feed, it will have a very mild, pleasant tang. If you let that discard hang out in the fridge for a week before using it for these breadsticks, you will definitely get a stronger, more pronounced sour note, which I personally love! It’s a flexible recipe that lets you control the level of complexity.
Can I use fed starter instead of discard for these breadsticks?
You absolutely can, but you have to treat it differently, and frankly, it defeats the purpose of making best sourdough discard uses recipe! This recipe is engineered specifically for the unfed, slightly more acidic discard. If you use a fully active, recently fed starter, you’re introducing a lot of extra air and yeast activity that we are trying to avoid by using the baking powder. If you must substitute, you’d probably need to measure out 1/2 cup of fed starter and add about 1/4 cup more flour to try and dry the mix out, but honestly, stick to the discard. We’re trying to use up the leftovers here, not start a whole new fermentation project!
What is the best way to ensure I get a strong garlic flavor?
Since we are using garlic powder in the butter wash, the key here isn’t just dumping it in the dough—you want that robust flavor right on the surface where it crisps up! I find the best trick for really intense flavor is slightly blooming the powder. Mix your garlic powder with your melted butter and let it sit for about five minutes before you brush it on. That little bit of warmth opens up the flavor molecules, making your garlic breadsticks from scratch taste like they’ve been baking for hours longer. A really heavy hand with that garlic powder right before baking does wonders!
Is there a way to make these vegan or dairy-free?
Definitely! This recipe is already mostly vegetarian, but those little bits of cheese and butter can be swapped out easily. For the butter topping, just use straight olive oil, or better yet, melted vegan butter spread. If you were using Parmesan in the dough or on top, swap it for nutritional yeast, as I mentioned earlier. It gives you that savory, rich flavor without any dairy at all. They still crisp up beautifully, making them a great option if you’re looking for kitchen scraps baking that is adaptable for various dietary needs.
Estimated Nutritional Data for Sourdough Discard Breadsticks
When I’m building optimized recipes, I always make sure to give you a ballpark idea of what you’re consuming, even though I’m definitely not a registered dietitian! Since these are made with simple ingredients, they track pretty cleanly. Remember, these numbers are based on the recipe provided and will shift slightly depending on the exact oil you use, the amount of Parmesan cheese, or if you swap out the flour. Think of this as management data for your next weekend baking project!
For reference, here is the estimated breakdown per serving (about 12 sticks):
- Serving Size: 1 serving (approx. 12 sticks)
- Calories: 280
- Fat: 12g
- Saturated Fat: 3g
- Carbohydrates: 38g
- Fiber: 2g
- Protein: 7g
- Sodium: 350mg
- Sugar: 1g
Because we are focused on fast results, we end up with a snack that is relatively low in sugar compared to commercially prepared items. The fat content comes mostly from the olive oil and butter topping, which gives our homemade breadsticks baking that satisfying richness. If you’re looking for other quick, nutrient-conscious ideas, I’ve got a great guide on making easy banana ice cream if you need a simple dessert!
PrintSimple Sourdough Discard Breadsticks (No Extra Yeast Needed)
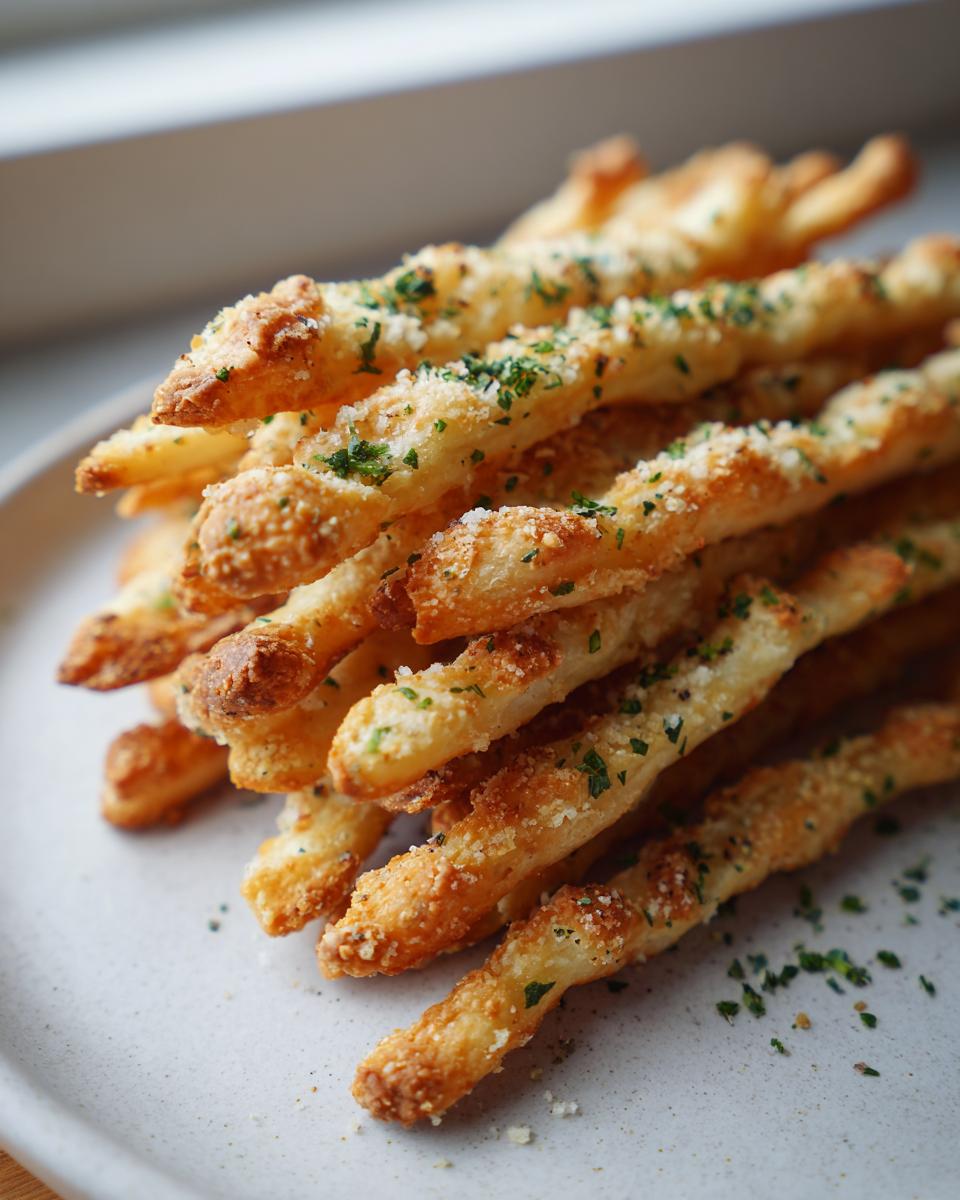
Make crispy, flavorful breadsticks using your leftover sourdough starter discard. This recipe is straightforward and perfect for using up scraps without needing extra yeast.
- Prep Time: 15 min
- Cook Time: 14 min
- Total Time: 29 min
- Yield: 4 servings 1x
- Category: Appetizer
- Method: Baking
- Cuisine: American
- Diet: Vegetarian
Ingredients
- 1 cup active sourdough starter discard (unfed)
- 1 cup all-purpose flour
- 1 teaspoon baking powder
- 1/2 teaspoon salt
- 2 tablespoons olive oil, plus more for brushing
- 1/4 cup water (or as needed)
- 1 tablespoon melted butter
- 1 teaspoon garlic powder
- 1/2 teaspoon dried oregano
- 1/4 cup grated Parmesan cheese (optional)
Instructions
- Combine the sourdough discard, flour, baking powder, and salt in a medium bowl. Mix until a shaggy dough forms.
- Add the 2 tablespoons of olive oil and start mixing by hand. Add water one tablespoon at a time until the dough comes together. The dough will be sticky due to the discard; do not over-knead.
- Turn the dough out onto a lightly floured surface. Knead briefly, about 1 minute, just until it forms a cohesive ball.
- Preheat your oven to 400°F (200°C). Line a baking sheet with parchment paper.
- Divide the dough in half. On a lightly floured surface, roll out one half of the dough very thinly, aiming for about 1/8-inch thickness.
- Use a pizza cutter or knife to cut the dough into strips about 1/2-inch wide.
- Transfer the strips to the prepared baking sheet, spacing them slightly apart.
- In a small bowl, mix the melted butter, garlic powder, and oregano. Brush this mixture evenly over the breadsticks. If using, sprinkle with Parmesan cheese now.
- Bake for 10 to 14 minutes, rotating the pan halfway through, until the breadsticks are golden brown and crisp. Baking time depends on thickness.
- Remove from the oven and let cool slightly before serving. These are excellent for dipping.
Notes
- The tanginess of the breadsticks depends on the age of your discard; older discard yields a stronger flavor.
- For a chewier interior, roll the dough slightly thicker (about 1/4-inch) and reduce the baking time by 2-3 minutes.
- If you prefer a softer breadstick, brush lightly with olive oil instead of butter before baking.
- This recipe works well for quick sourdough snacks; no long proofing time is required because the baking powder provides lift.
Nutrition
- Serving Size: 1 serving (approx. 12 sticks)
- Calories: 280
- Sugar: 1
- Sodium: 350
- Fat: 12
- Saturated Fat: 3
- Unsaturated Fat: 9
- Trans Fat: 0
- Carbohydrates: 38
- Fiber: 2
- Protein: 7
- Cholesterol: 10