
If you’ve ever stared into your oven at a tray of sad, flat, oily puddings when you were expecting towering, crispy edifices for your roast beef, you know the frustration. For years, making the perfect yorkshire pudding felt like a cruel culinary lottery. But I approached this like any other process that needed streamlining. I didn’t want guesswork; I wanted guaranteed performance. That’s why I developed this foolproof recipe. We strip away the guesswork by focusing intensely on three critical elements—temperature, consistency, and rest time—so you end up with those iconic, gravity-defying puffs every single time. This isn’t just a recipe; it’s an optimized build plan for dinner success.
- Why This is the Guaranteed Perfect yorkshire pudding Recipe
- Simple Ingredients for Authentic yorkshire pudding
- The Best yorkshire pudding Batter Secrets: Mixing and Resting
- How to Make Tall yorkshire puddings Using the Hot Fat Method
- Serving Suggestions for your Traditional British Side Dish
- Storage and Make Ahead yorkshire puddings Tips
- Troubleshooting Common yorkshire pudding Issues
- Frequently Asked Questions About yorkshire pudding
- Estimated Nutritional Data for yorkshire pudding
Why This is the Guaranteed Perfect yorkshire pudding Recipe
So, why does this method replace kitchen chaos with culinary certainty? Because I managed this recipe like a project—every variable is locked down. Most recipes fail because they leave success up to chance; ours demands it. We eliminate guesswork by hitting those non-negotiables: bone-dry batter, smoking hot fat, and zero peek time.
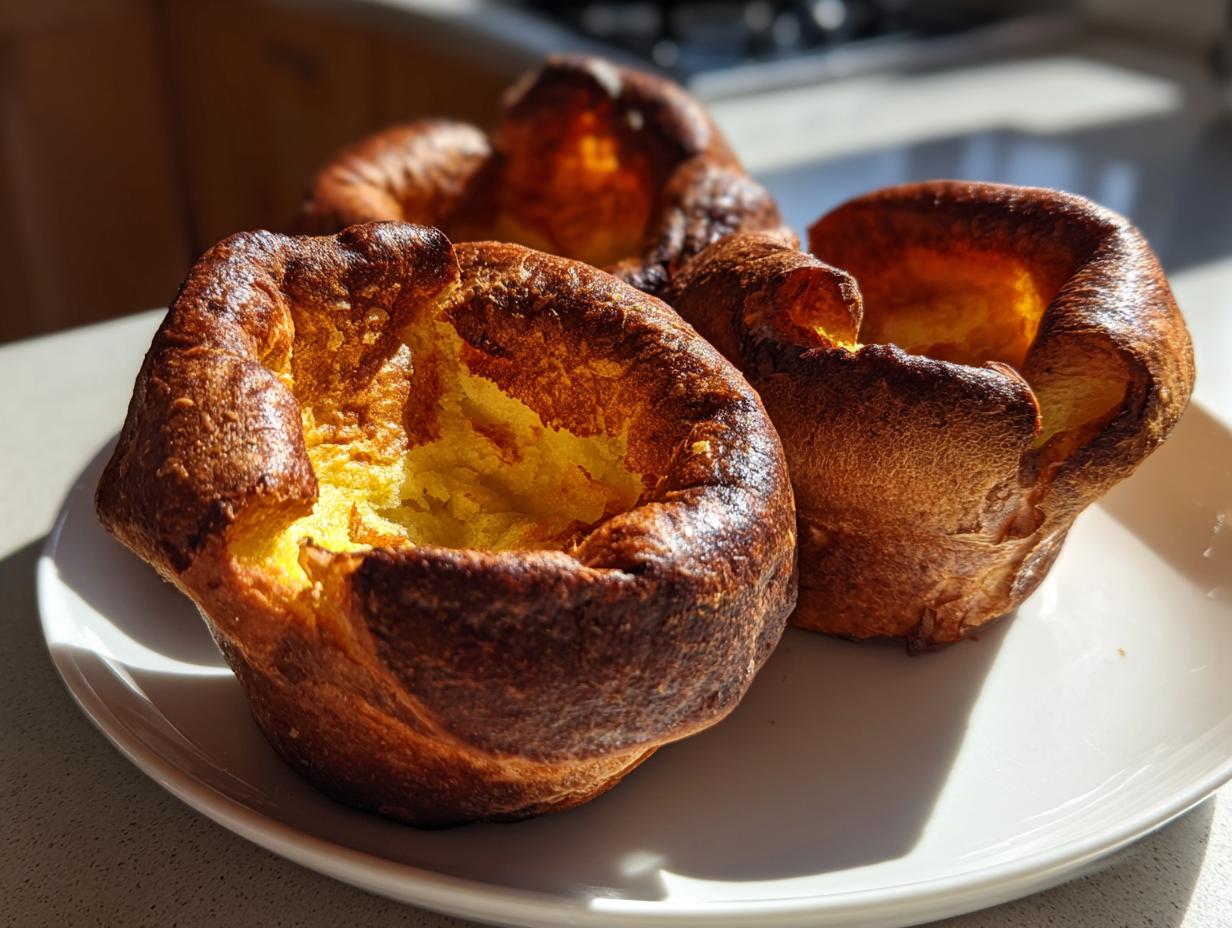
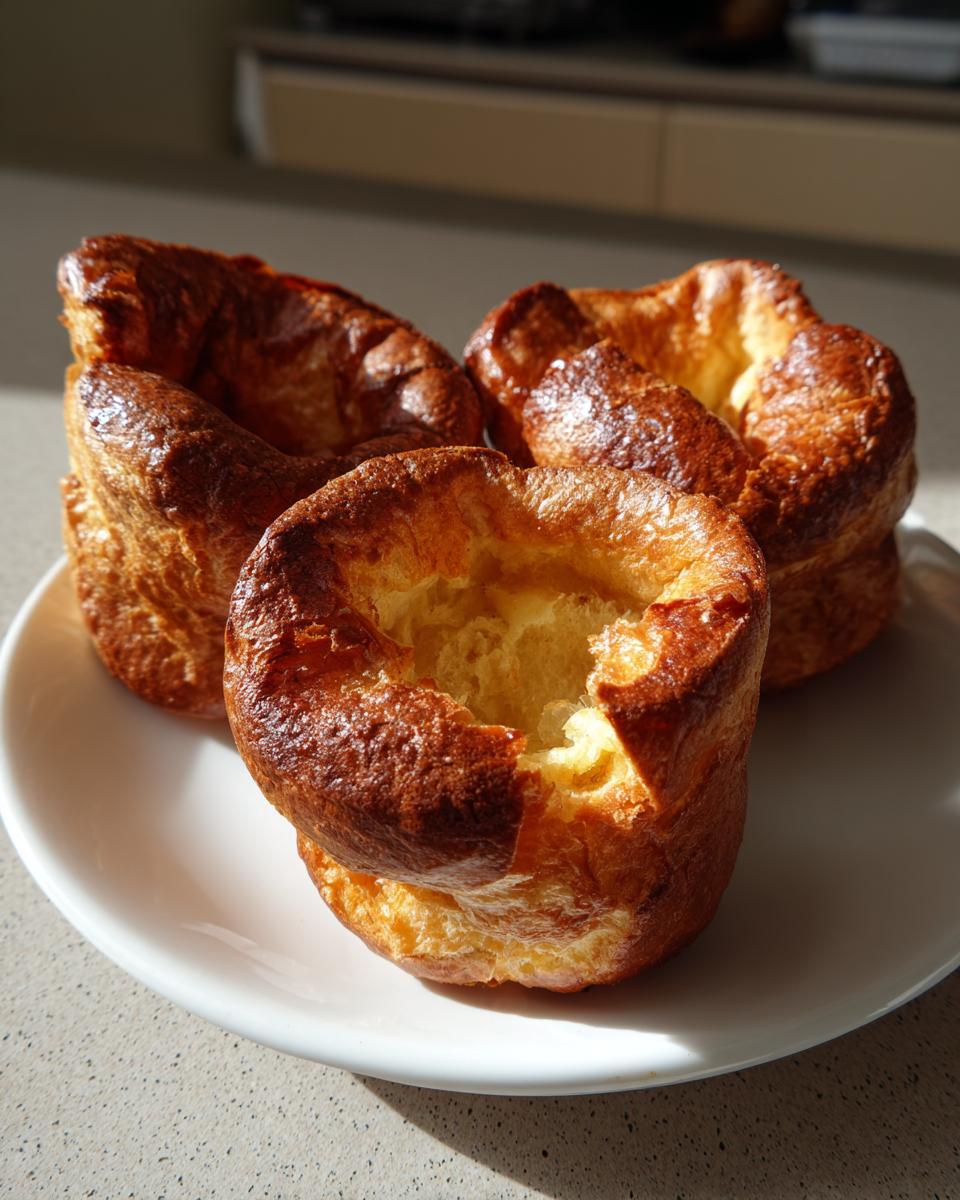
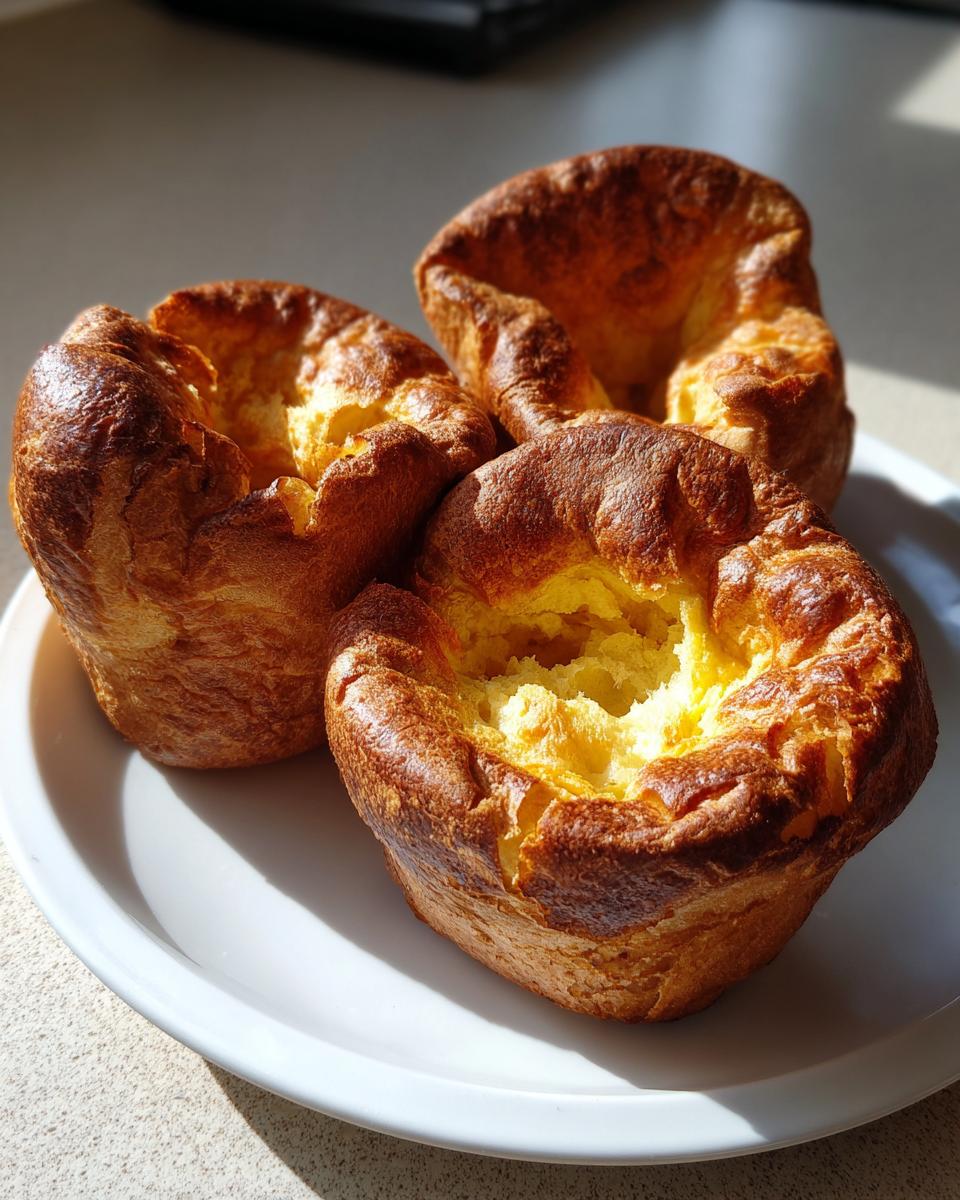
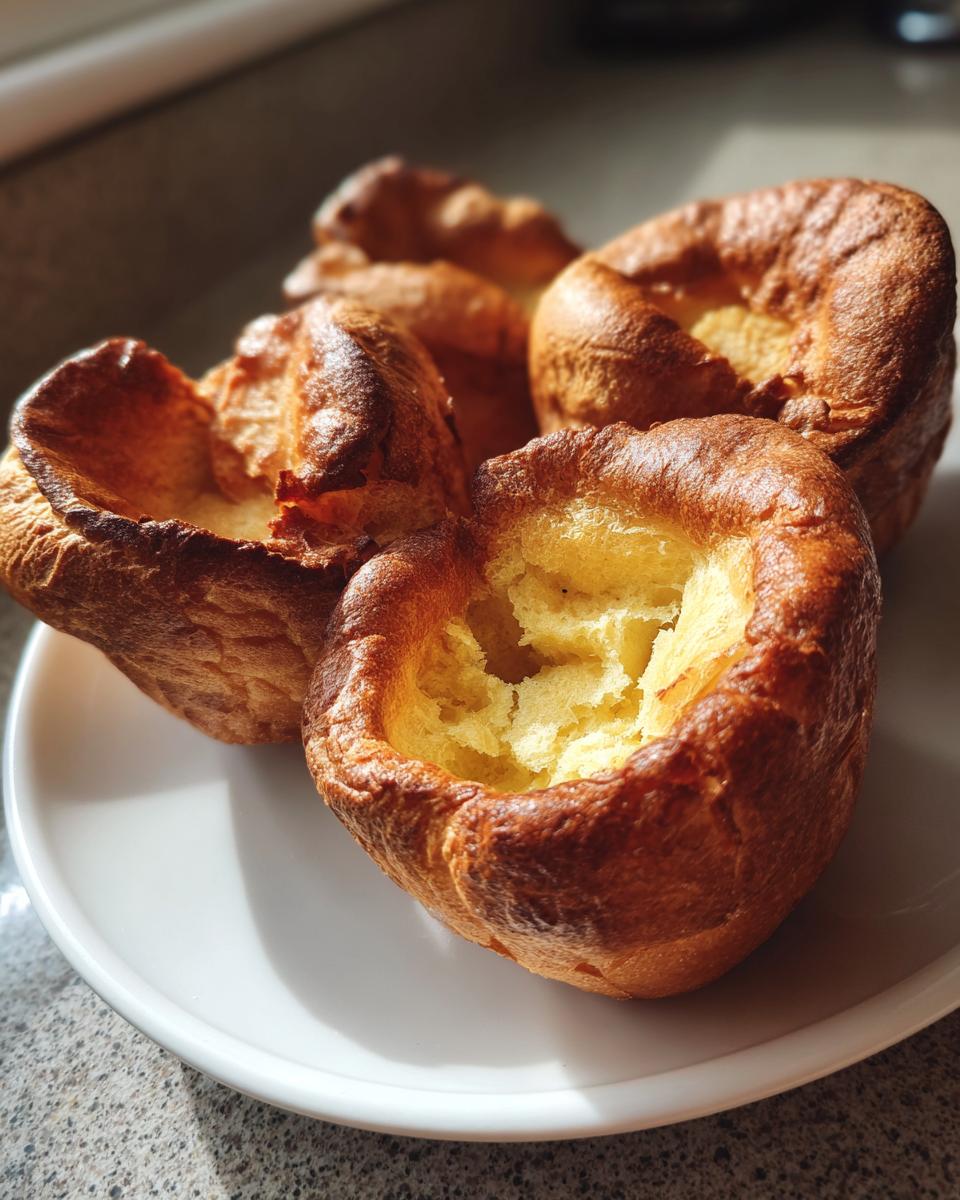
This isn’t some vague suggestion; it’s an engineered process for Foolproof Yorkshire Puddings. You get those tall structures and that amazing contrast—the Crispy Edges Light Center Pudding you see in pictures. If you follow these exact steps, especially regarding temperature, you eliminate the variables that cause flat failures. It’s about reliable output, not hopeful effort.
If you want to see how others have locked in this success, check out this great guide, though I personally find my technique is the most streamlined foolproof recipe for crispy fluffy puddings.
Simple Ingredients for Authentic yorkshire pudding
The beauty of an authentic Yorkshire pudding is that it demands almost nothing from your pantry. We aren’t looking for exotic additions; we need reliable building blocks. You’ll need 140g of plain flour, 4 large eggs, 200ml of whole milk, 200ml of cold water, half a teaspoon of salt, and for the crucial part, beef drippings or a neutral oil.
I insist on whole milk here. It carries higher fat content than skimmed, which prevents the structure from collapsing when it hits that searing heat. Keeping the milk and water cold—that’s important, trust me on this—helps create a perfect thermal shock when hitting the hot tin.
Ingredient Notes and Substitutions
Let’s talk fat, because this step is make-or-break. Nothing beats proper beef drippings from a roast. That flavor is legendary! If you don’t have any, use a good quality neutral oil like sunflower or vegetable oil. Do not use olive oil; it smokes too easily at the high temperature we need.
Keep the milk and water refrigerated until the absolute last second. The batter needs to be ready to go cold when the fat is screaming hot. That temperature differential is what gives you the *explosion* of rise you’re looking for. It’s simple science, really, just applied to dinner!
The Best yorkshire pudding Batter Secrets: Mixing and Resting
Alright, let’s get this batter right, because this is where the magic starts to hide. If you mess up the mix, you’ll never get that glorious lift. First thing: sift your flour and salt together. I always do this right into the bowl. Think of sifting as pre-processing—it breaks up any lumps before the liquid even shows up. Don’t skip it.
Next, make a well right in the middle. Drop your four large eggs right in there. Now, this is where management comes in: incorporate the flour slowly from the sides. You want to get a thick paste first. If you dump all the liquids in at once, you’ll end up with a separated, lumpy mess, and we can’t have that for our Best Yorkshire Pudding Batter Secrets.
Once that thick paste is smooth, slowly whisk in the milk until it loosens up, and finally, add the cold water until the batter is thin—I mean thin, like cream. Then you stop. Seriously, stop whisking immediately. Overmixing develops gluten, and gluten makes chewy, flat puddings instead of those big, beautiful, Fluffy Golden Puffs Recipe we are aiming for.
The final step before cooking is the mandatory rest. You have to let this batter sit. At least 30 minutes on the counter is fine, but honestly? If you can plan ahead, let it chill in the fridge for four to twelve hours. I highly recommend reading up on techniques for setting up your day, just like you would for any other process. I found this guide that walks through some great resting tips here if you want another perspective on streamlining your timeline.
Why Resting the yorkshire pudding Batter is Non-Negotiable
Resting isn’t optional; it’s foundational engineering for texture. When you mix flour and liquid, you wake up the gluten strands, making the batter tight and elastic. If you bake it right away, that tension will fight the oven heat, and your pudding will struggle to puff up properly. We want the opposite!
Giving the batter time, room temperature or cold, lets those gluten structures relax and unwind. When the heat hits the relaxed batter, it expands freely and dramatically. This relaxation is the express ticket to those light, airy interiors you truly want in your Fluffy Golden Puffs Recipe. If you skip this, you’re sacrificing height, plain and simple.
How to Make Tall yorkshire puddings Using the Hot Fat Method
Now we get to the real execution phase—the moment of truth. This recipe hinges entirely on one thing: using fat that is absolutely, searingly, wickedly hot. This is the famous Hot Fat yorkshire pudding Method, and I treat it with the respect it deserves. You need your oven fully preheated to 220°C (425°F), and that fat needs to be in the tin, heating up in there, for a good ten minutes while the oven gets to temp.
When I first started doing these, I got impatient. I poured the batter in when the fat was just hot, maybe ‘shimmering’ hot. Big mistake. The result? They melted into oily puddles. No rise, just sad grease. Learn from my failed project management! That fat needs to be smoking when the batter hits it. That extreme thermal shock is what forces the How to Make Tall Yorkshire Puddings we are after.
When it’s ready, you have maybe three seconds of real time. Pull the tin out, work quickly—don’t let the heat escape! Pour that chilled batter evenly into the cups, filling them only about one-third full. Immediately, and I mean immediately, slide that tin back into the scorching oven. You are physically locking in the expansion.
If you’re curious about how the experts handle this crucial phase, Gordon Ramsay has some strong thoughts on getting that puff, which you can check out here: Gordon Ramsay-Inspired Yorkshire Pudding.
Baking Time and Temperature for yorkshire pudding Success
Once that tin is back inside, you have to trust the system. This is where most people sabotage their efforts by peeking. Don’t open the door. I cannot stress this enough. If you open the door in those first twenty minutes, the cold blast of air will cause an immediate collapse. You’ve built a beautiful structure; don’t knock the scaffolding out!
Keep the oven closed for at least 20 full minutes. After that, they should look beautifully puffed and golden. Bake them for a total of 20 to 25 minutes. You’re looking for a deep golden colour and defined crispy edges. If they look done enough, they probably are. Resist the urge to prod or gauge—if they look tall and brown, you’ve achieved guaranteed perfect yorkshire pudding success.
Serving Suggestions for your Traditional British Side Dish
The moment those yorkshire puddings come out of the oven, you need to move fast. They are not really a dish you save for later; they are an immediate experience, especially when you’re building the perfect Sunday Roast. The absolute classic pairing, the reason we go through all this trouble, is thick, savory gravy and a beautiful roast beef.
You need to have your gravy simmering and ready to go right beside the oven. The goal is to get the pudding onto the plate and have the hot gravy poured directly into that light, fluffy center before the steam dies down. That moment when the gravy sinks into the soft core, turning it moist and savory? That’s the payoff for all your careful heat management.
I love keeping things traditional, but if you’re looking for other main courses that deserve this incredible Traditional British Side Dish, they are fantastic alongside slowly roasted chicken or even hearty pork tenderloin. If you’re planning a big spread and need inspiration for the centerpiece, check out my recipe for juicy herb butter turkey roast—it pairs beautifully.
Basically, treat them like edible cups designed specifically to hold rich, beautiful gravy. Don’t let them get cold!
Storage and Make Ahead yorkshire puddings Tips
Look, even with a foolproof recipe, sometimes you just make too many, or maybe you’re planning ahead for a massive roast dinner marathon—I get it. We need a system for Make Ahead Yorkshire Puddings, right? That’s good project management.
For leftover batter, I actually prefer saving it. Cover that bowl tightly and stick it straight into the fridge. Cold batter is actually a huge plus for the next batch as it allows the gluten to relax even more deeply overnight. It’s ready to go when you are! Just take it out about 30 minutes before you plan on using it so it warms up slightly—you don’t want it ice-cold hitting smoking fat.
What about the ones you already baked? Cooked puddings can definitely be saved. Let them cool completely on a wire rack first; never store them warm in a sealed container, or they’ll trap steam and turn soggy instantly. Once fully cool, they will last covered at room temperature for about 12 hours, or in the fridge for two days.
You absolutely need to reheat them properly to restore that crisp edge. Set your oven back up high—200°C (400°F) is usually enough. Pop the cold puddings directly onto the oven rack (don’t put them on a tray) and bake them for about 5 to 7 minutes. They firm right up, get crispy again, and you’re back in business. It’s the best way to salvage leftovers!
Troubleshooting Common yorkshire pudding Issues
Even with a rigorous process, sometimes things don’t go to plan. That’s okay! In my world of optimizing processes, failure just means we need to review the critical control points and adjust the parameters. Don’t panic or throw the tray out; we can usually diagnose the issue quickly.
Here are the three main flags I see when the results aren’t sky-high, presented as simple checks for your next batch.
Flat Puddings—The Great Disaster
If your yorkshire pudding comes out looking more like a pancake, 99% of the time, the problem is heat management. The fat simply wasn’t hot enough. Remember, we are looking for smoking fat. If it’s just shimmering, the batter cools it down immediately, and you lose that initial explosive rise. You need that thermal shock to create the lift! Check your oven thermometer; sometimes they lie about the actual temperature.
Soggy Bottoms and Collapsed Sides
This is usually a failure of commitment during the baking phase. If the bottoms turn out permanently heavy or the rise holds for a minute and then slowly deflates, you peeked too soon. Seriously, keep that door shut tight for the first 20 minutes. Every time you open the door, you crash the internal temperature, and that delicate steam structure collapses like a house of cards. It’s about process adherence here.
Uneven Rise or Weird Shapes
If one side is massive and the other is tiny, or if the batter pulls away unevenly, this usually points back to batter consistency or pouring accuracy. Did you overmix the batter? That causes elasticity, leading to a lumpy, uneven spread. Also, double-check that you poured the batter into the cups quickly and evenly while the fat was still smoking hot. A slow pour gives the fat time to cool down unevenly in the tin.
Frequently Asked Questions About yorkshire pudding
I get asked these questions all the time once people see the results from this recipe. Since I treat cooking like project management, I like to cover all the potential points of failure upfront so you don’t have to troubleshoot later. Getting the right answers here ensures you get those beautiful, tall puffs every time you host your Sunday Roast.
Can I use a different fat than beef drippings?
Absolutely, though I’ll always advocate for the flavor beef dripping brings! If you aren’t making roast beef, or if you need a vegetarian-friendly option, a high-smoke-point neutral oil is the substitute. Think refined sunflower oil, vegetable oil, or even clarified butter (ghee). The key thing is that whatever you use, it *must* be smoking hot before the batter goes in. If you want to make Easy Homemade Yorkshire Puddings that everyone can enjoy, vegetable/sunflower oil works perfectly for a meat-free version.
Can I use cold batter straight from the fridge?
This is one of the great debates, but based on my testing, the answer is yes, you absolutely can! I mentioned above that resting the batter is crucial for relaxing the gluten, and chilling it works brilliantly for that. However—and this is a big ‘however’—you must let the tin and the fat get smoking hot because that temperature difference is what forces the rise. If you pour cold batter into lukewarm fat, you’ll get sad puddles every time. Ensure your fat is blazing hot, and the cold batter will shock perfectly into shape to become a Guaranteed Perfect Yorkshire Pudding.
How do I make these vegetarian or vegan?
Making vegetarian Yorkshire Puddings is simple! You just substitute the fat for a high-smoke-point vegetable oil, like sunflower oil, and switch the whole milk for an unsweetened, full-fat plant-based milk alternative. Soy or oat milk tends to work the best because they have a higher protein and fat content than almond milk, which helps hold the structure. Skip the beef drippings entirely, use your preferred oil, and you’ve got a great side for any vegetarian roast.
What makes this method the best way to achieve the best rise?
It comes down to controlling the variables we discussed. We enforce a minimum 30-minute batter rest to relax the gluten, combine milk and water for the right viscosity, and, most importantly, we use extreme heat—smoking hot fat. This combination is what produces those dramatic lifts and those Fluffy Golden Puffs Recipe results. It’s consistency in execution that separates the great recipes from the mediocre ones, and that’s what we focus on here at Dishicious. You can check out our tips on making other reliable batter recipes, like these copycat breadsticks, which also rely on precise mixing.
Estimated Nutritional Data for yorkshire pudding
Because I’m a firm believer in knowing what goes into your food—it’s all about clear data for efficient planning!—here is the estimated nutritional breakdown for one of these beautiful, tall puddings. Please remember this is crucial for any project: these numbers are estimates based on general ingredient quantities and standard brands. Your exact results might vary slightly based on the size of your eggs or the fat you choose to use.
We are focusing on the core pudding structure here, not including any added gravy or beef.
- Serving Size: 1 pudding (based on 12 yield)
- Calories: Approximately 120 kcal
- Fat: Around 6g
- Protein: About 4g
- Carbohydrates: Approximately 14g
- Sugar: Roughly 1g
- Sodium: About 150mg
See? Simple, clean ingredients that deliver incredible results without packing on unnecessary extras. Knowing these basics helps when planning your full Sunday Roast Essentials spread!
PrintThe Best Foolproof Yorkshire Pudding Recipe for a Perfect Rise

Make tall, crispy Yorkshire puddings with light, airy centers every time. This simple recipe uses basic ingredients and the hot fat technique for guaranteed success, perfect for your Sunday Roast.
- Prep Time: 10 min
- Cook Time: 25 min
- Total Time: 35 min
- Yield: 12 small puddings 1x
- Category: Side Dish
- Method: Baking
- Cuisine: British
- Diet: Vegetarian
Ingredients
- 140 g plain flour
- 4 large eggs
- 200 ml whole milk
- 200 ml cold water
- 1/2 tsp salt
- Beef drippings or neutral oil for the tins
Instructions
- Place your Yorkshire pudding tin in the oven. Add about 1 teaspoon of beef drippings or oil to each cup. Preheat the oven to 220°C (425°F).
- In a large bowl, sift the plain flour and salt together.
- Make a well in the center of the flour. Add the eggs to the well.
- Whisk the eggs, gradually incorporating the flour from the sides until you have a thick paste.
- Slowly whisk in the milk until the batter is smooth. Then, whisk in the cold water until the batter is the consistency of thin cream. Do not overmix.
- Let the batter rest at room temperature for at least 30 minutes, or chill it in the refrigerator for up to 12 hours.
- Once the oven is fully preheated, carefully remove the hot tin from the oven. The fat must be smoking hot.
- Quickly and carefully pour the batter evenly into the hot fat, filling each cup about one-third full.
- Immediately place the tin back into the hot oven. Do not open the oven door for the first 20 minutes of cooking.
- Bake for 20 to 25 minutes, or until the puddings are well-risen, golden brown, and crispy.
- Serve immediately with roast beef and gravy.
Notes
- For the best rise, ensure your fat is smoking hot before adding the batter. This is the secret to tall Yorkshire puddings.
- Use whole milk for richer flavor and better structure.
- Resting the batter is key; it allows the gluten to relax, resulting in a lighter texture.
Nutrition
- Serving Size: 1 pudding
- Calories: 120
- Sugar: 1
- Sodium: 150
- Fat: 6
- Saturated Fat: 2
- Unsaturated Fat: 4
- Trans Fat: 0
- Carbohydrates: 14
- Fiber: 1
- Protein: 4
- Cholesterol: 75