
The holidays should be about joy, not kitchen anxiety, right? But walking into Thanksgiving week, you’re facing down a mountain of classic side dishes, and the one centerpiece everyone truly cares about is the stuffing. Forget the dry, crumbly stuff that tastes like disappointment. I engineered this recipe precisely for those of us who want maximum traditional flavor without all the fuss. As a reformed project manager, I’ve boiled this down to the essentials: simple ingredients, straightforward steps, and a guaranteed outcome. This is the best, easy, homemade stuffing you’ll ever make, delivering that perfect balance of moist interior and that crispy, golden top we all hunt for every year. Trust me, this traditional holiday side makes holiday meal planning so much easier.
- Why This Classic Stuffing Recipe Is Your Holiday MVP
- Gather Your Ingredients for Perfect Homemade Stuffing
- Step-by-Step Instructions for Classic Stuffing Recipe
- Tips for the Best Homemade Stuffing Every Time
- Make Ahead Stuffing and Storage Instructions
- Serving Suggestions for This Traditional Holiday Side
- Frequently Asked Questions About Making Stuffing
- Nutritional Estimates for Your Classic Stuffing Recipe
- Share Your Perfect Homemade Stuffing Experience
Why This Classic Stuffing Recipe Is Your Holiday MVP
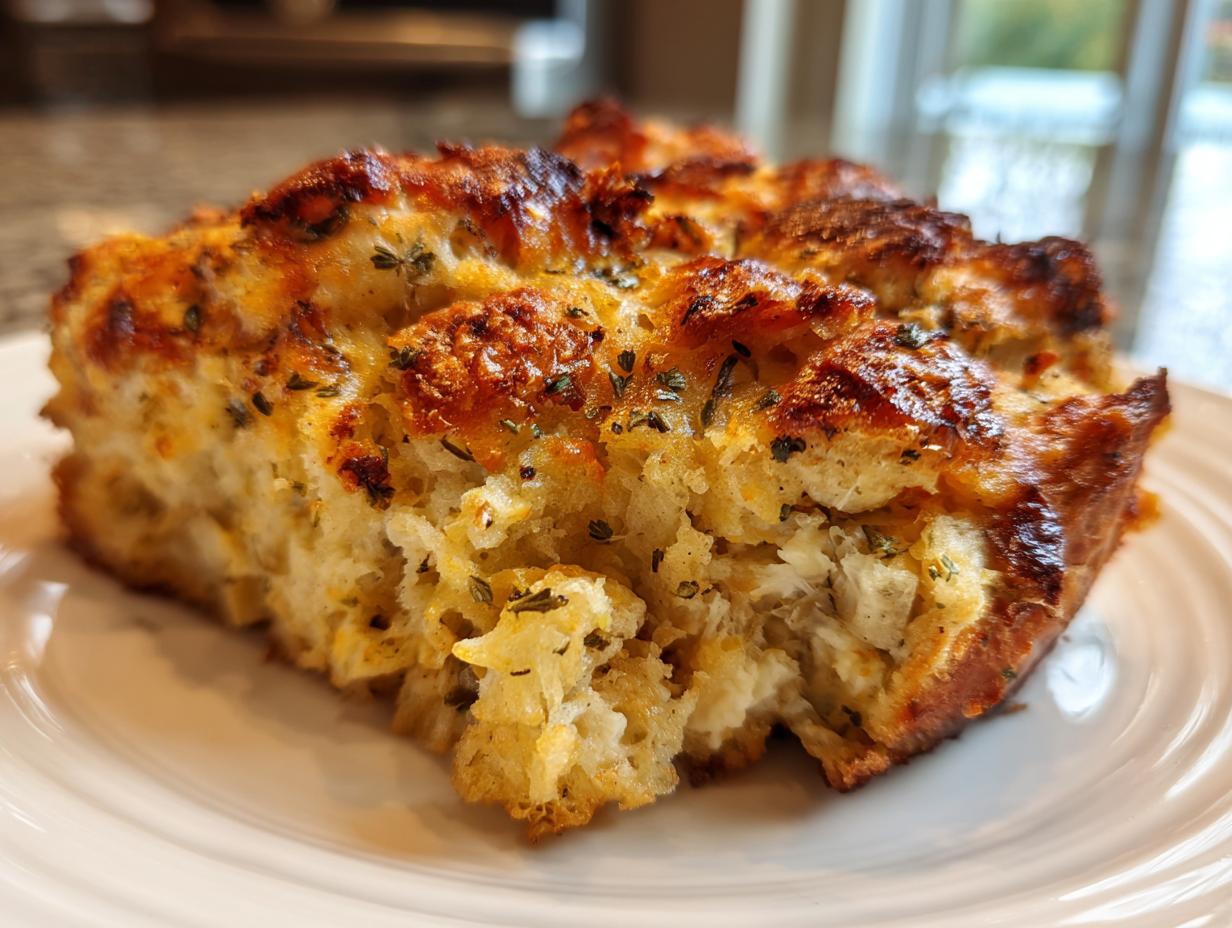
When I optimize a recipe, I strip it down to what really matters. For stuffing, what matters is the texture contrast—that buttery, crispy top giving way to a soft, savory interior. This isn’t just another side dish; it’s the one everyone keeps coming back for, and it works flawlessly baked outside the bird, turning it into an easy dressing recipe. If you’re doing a full spread, this pairs perfectly with something like my easy prime rib recipe.
- It guarantees that moist and crispy stuffing texture everybody dreams about.
- The flavor is pure nostalgia—it tastes exactly like the best homemade stuffing your Grandma used to serve.
- It’s built for efficiency: 20 minutes of prep, 50 minutes in the oven, and it’s the perfect easy side dish for turkey.
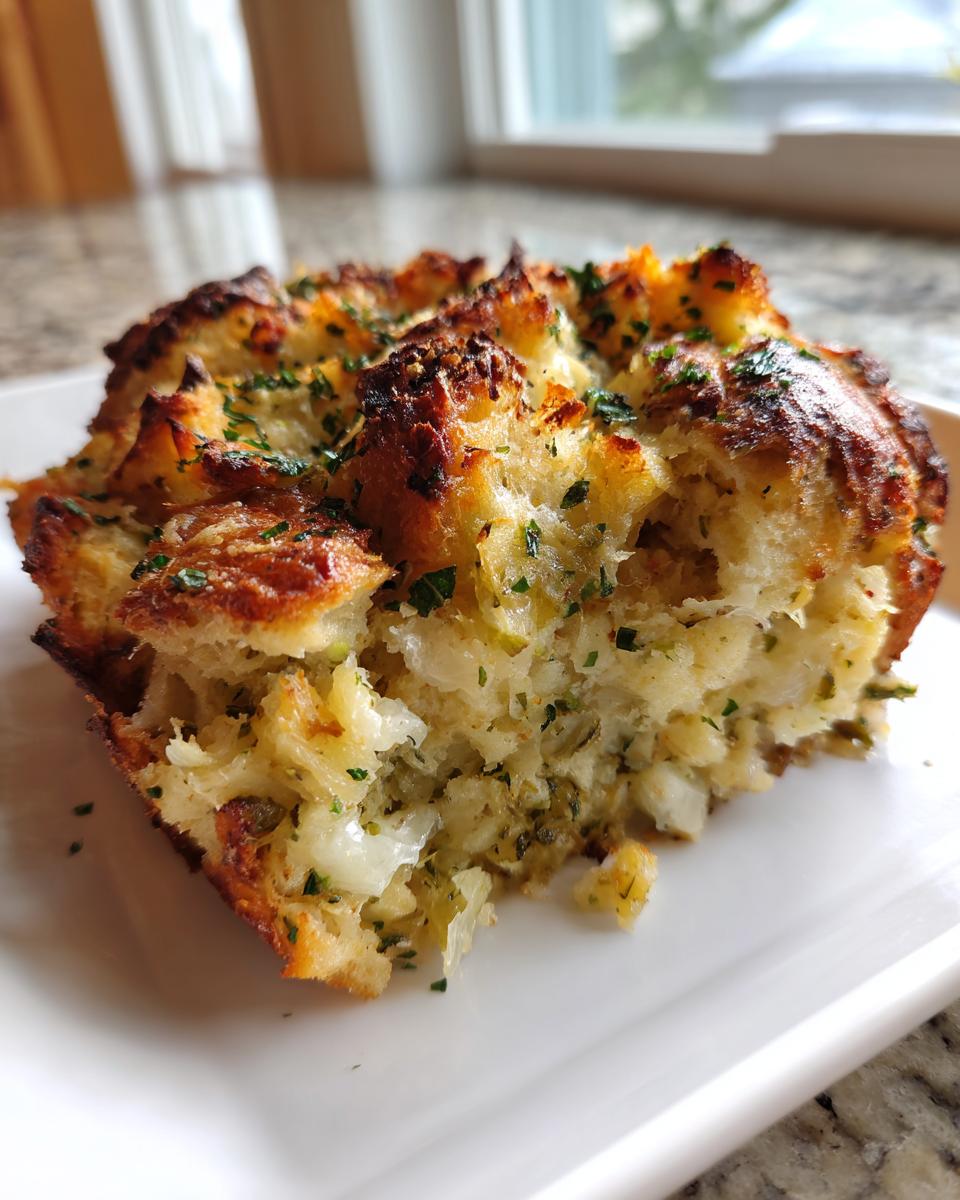
Achieving Moist and Crispy Stuffing Texture
The secret to that crunch isn’t high magic; it’s liquid control. We bake this as a dressing in a large dish, which gives more surface area for crisping compared to stuffing it inside the turkey. Also, we use dried bread cubes. If you skip drying them, they’ll soak up too much of that wonderful broth and turn gummy. We only moisten the bread, we don’t drown it. That’s the key to textural success here!
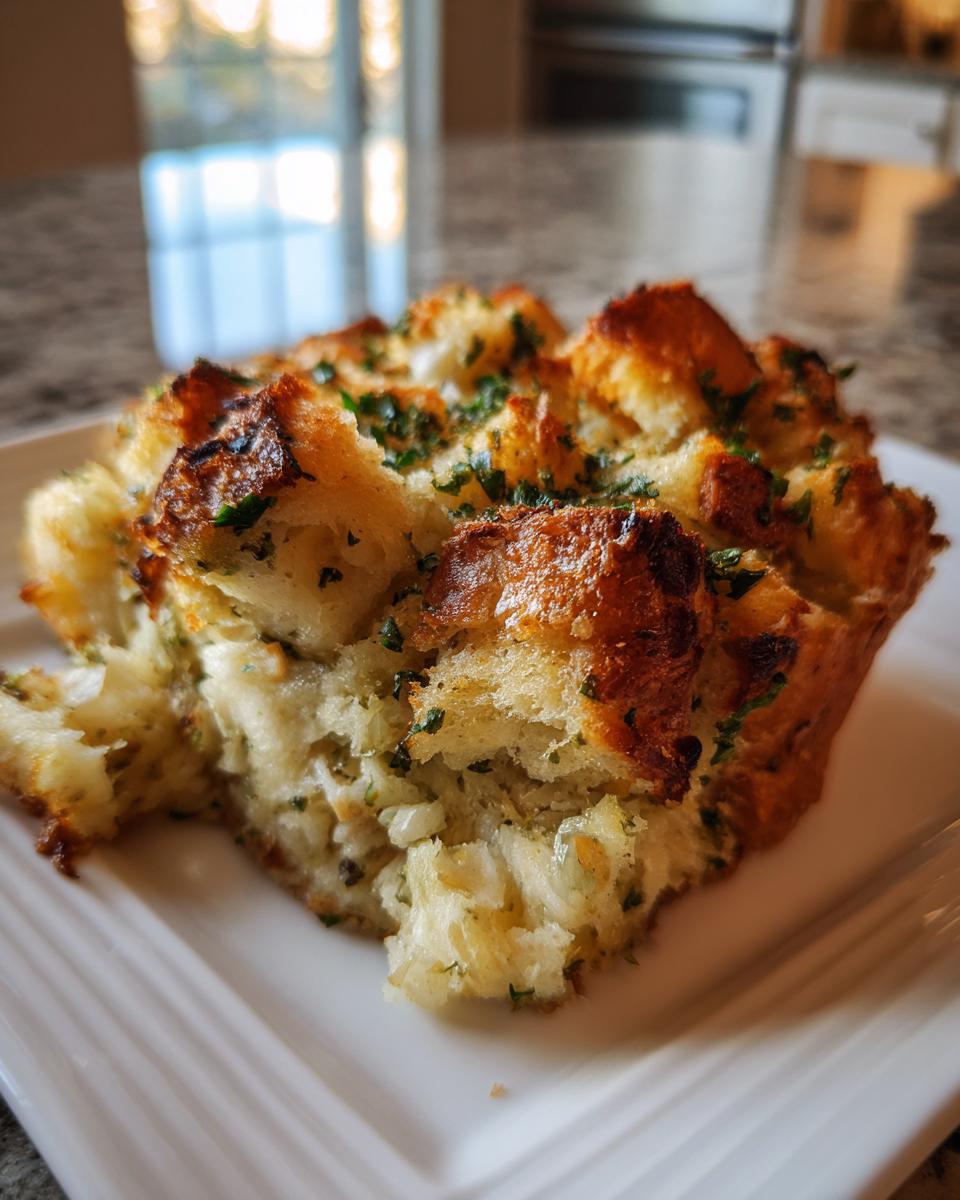
The Savory Herb Stuffing Flavor Profile
You cannot have a classic stuffing recipe without real herbs. We go heavy on fresh sage—it’s non-negotiable! It blends beautifully with dried thyme and rosemary, which bloom perfectly when sautéed in the butter with the onions and celery. That savory mix is what puts this dish squarely in the comfort food recipes category. It’s the aroma that tells everyone the main event is ready.
Gather Your Ingredients for Perfect Homemade Stuffing
When I plan out holiday prep, the ingredient list needs to be totally clear—no guesswork allowed! For this homemade stuffing, you’re using straightforward components that pack a massive flavor punch when combined correctly. We need to make sure every measurement is precise so your final product isn’t sitting in a pool of liquid. Grab everything listed below so we can move right into our cooking phase!
- 1 pound dried bread cubes (that’s about 10 cups, folks!)
- 1 cup unsalted butter
- 2 cups chopped celery
- 2 cups chopped yellow onion
- 1 tablespoon fresh sage, chopped
- 1 teaspoon dried thyme
- 1 teaspoon dried rosemary
- 1 teaspoon salt
- 1/2 teaspoon black pepper
- 2 large eggs, lightly beaten
- 2 cups chicken or vegetable broth
Ingredient Notes and Substitution Tips
A quick note from my Chicago kitchen on two vital components. First, you really need those dried bread cubes. If you use soft, fresh bread, you’ll need to bake this way longer, and the texture won’t be the same. Second, when it comes to broth—I default to chicken broth for the depth, but if you’re keeping this vegetarian, vegetable broth works perfectly well. Remember, the broth, along with those eggs, is what binds this whole thing together and keeps the interior wonderfully tender. If you’re looking for a good bread project instead, check out my easy homemade naan bread recipe!
Step-by-Step Instructions for Classic Stuffing Recipe
Okay, time to implement the plan! Making this classic stuffing recipe is like running a small, delicious project. We move efficiently from preparation to execution to ensure maximum flavor extraction and perfect texture. Remember, we’re aiming for that wonderful, melt-in-your-mouth center with a great crust on top. If you’re setting up your spread, this goes great alongside other fantastic recipes, like my guide for an easy side dish for turkey.
Sautéing Aromatics for the Stuffing Base
First things first: Preheat the oven to 350°F (175°C) and get that 9×13 dish ready by greasing it well. Now, in a large skillet over medium heat, we melt all that glorious butter. Toss in your chopped celery and onion. You want these to soften up nicely, which usually takes about 8 minutes on the stove. Once they look tender, add your herbs—sage, thyme, rosemary—plus the salt and pepper. Stir that around for just one minute until your kitchen smells like pure holiday tradition! That fragrance alone is worth the effort.
Combining and Moistening the Stuffing Mixture
Transfer your dried bread cubes into a really large bowl. Pour that hot, aromatic veggie mix right over the top. Give it a gentle toss so everything gets coated. Now for the binding agent: In a smaller bowl, whisk your eggs and broth together. Here’s the critical checkpoint: pour this liquid mix evenly over the bread. You only toss lightly until the bread is *just* moistened. Don’t beat it up! Overmixing means you develop gluten and end up with heavy, gummy stuffing instead of light, savory goodness.
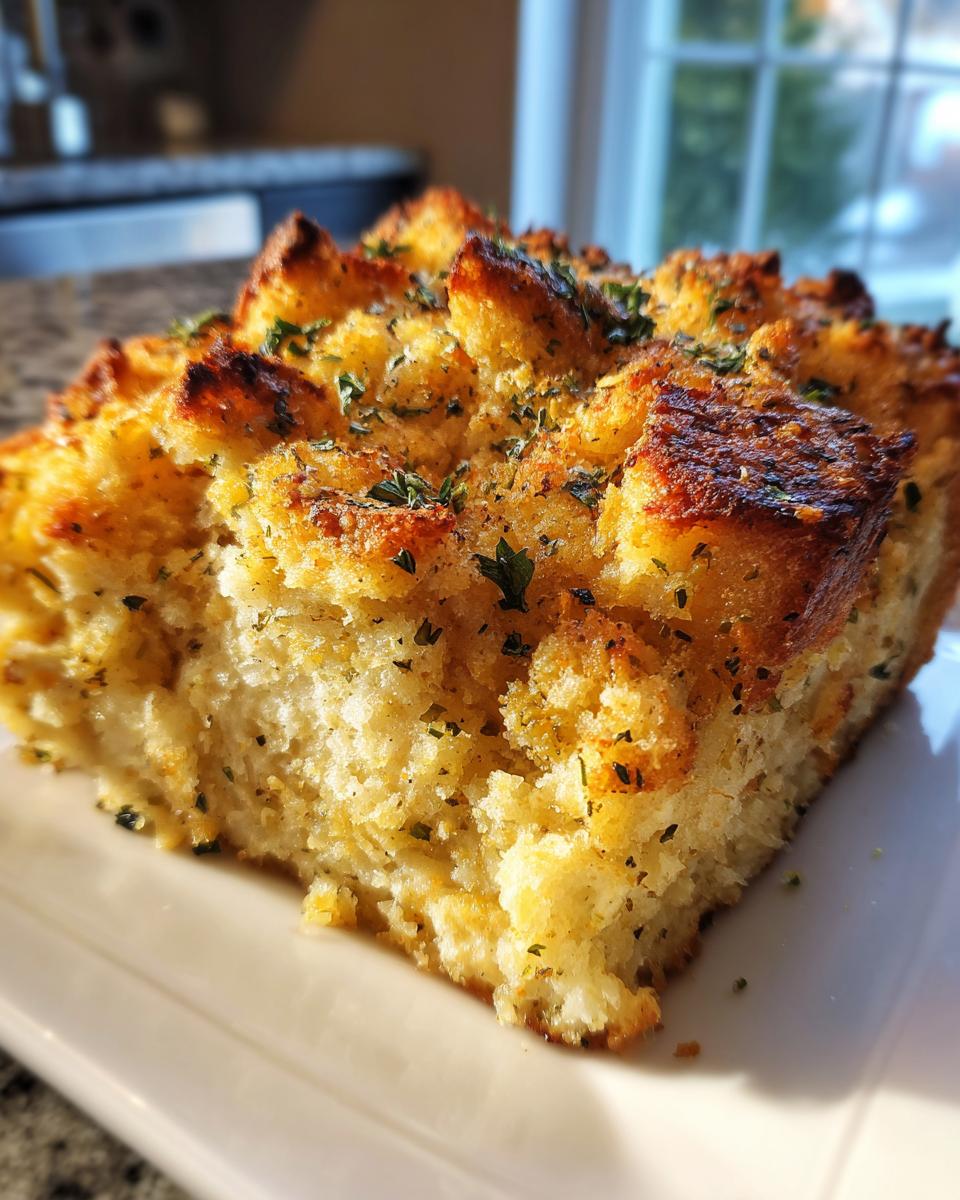
Baking for Golden-Brown Perfection
Once the bread is perfectly damp, transfer the entire mixture to your prepared baking dish and spread it out into one even layer. This even distribution is key for that perfect bake. Slide it into the preheated oven for 40 to 50 minutes. You are looking for that beautiful visual indicator: a top layer that is deeply golden brown and crispy, confirming the center is heated all the way through. Don’t forget the crucial final step: let it rest for 10 minutes before serving. That little bit of time lets the texture set up exactly how we want it!
Tips for the Best Homemade Stuffing Every Time
Even with a solid plan, sometimes you need a tweak to elevate something this important. As a home cook focused on results, I always keep a few backup moves in my back pocket to ensure this savory stuffing shines. This isn’t about making it complicated; it’s about making sure our Thanksgiving side dishes are foolproof. We want reliability, especially when the pressure is high!
Bread Selection for Superior Stuffing
I mentioned using dried bread cubes, but let’s get specific about *what* bread. You want something sturdy—think sourdough, French bread, or challah. You absolutely want to avoid soft sandwich bread or anything overly enriched like brioche; those fall apart too fast and turn into mush when you add the broth. The best approach? Buy yours a week early and let it sit on a cookie sheet on the counter, turning occasionally. If you’re in a pinch, you can always toast cubed bread in a 300°F oven until it’s dry all the way through. That structure is the foundation for that ideal moist and crispy stuffing. If you are looking for something cheesy and comforting, you might also enjoy my easy cheesy twice-baked potatoes while planning your sides!
If you want to see how another great cook handles this essential holiday item, check out this amazing piece on Thanksgiving stuffing. It shows how versatile this classic can be, even when we stick to simple ingredients.
Make Ahead Stuffing and Storage Instructions
This is where the ‘project manager’ in me really shines—we maximize efficiency by prepping this ahead of time! You absolutely can treat this homemade stuffing as a make ahead stuffing dish for your big day, which takes huge pressure off the actual recipe day. The process is simple: you can complete steps 1 through 5—that is, mixing the bread, the sautéed vegetables, and pouring over the egg/broth mixture—then cover the whole thing tightly.
You can keep that covered mixture in the fridge for up to 24 hours. Just one critical point here for everyone planning their holiday meal planning: when you pull it out of the fridge on Thanksgiving morning, the bread will be colder and slightly more set. You need to add about an extra 1/4 cup of chicken or vegetable broth right before you toss it one last time. This ensures the liquid distribution is perfect and keeps that interior nice and moist.
When it’s time to bake, follow the regular time, though it might take 5 to 10 minutes longer since it starts cold. If you have leftovers (which I honestly doubt, because it’s that good!), store any remaining stuffing in an airtight container in the fridge for about four days. To reheat, I always prefer sprinkling a tiny bit of extra broth or a dab of butter on top, covering it with foil, and baking it at 350°F until it’s hot all the way through. Then, pull the foil off for the last five minutes if you want to bring back some of that crispy crust. It really works for keeping those easy holiday recipes stress-free!
Serving Suggestions for This Traditional Holiday Side
So, you nailed the perfect savory stuffing—amazing! Now, we need to position it correctly on the table, right? This traditional holiday side shouldn’t stand alone; it needs its companions to create that ultimate comfort food spread we look forward to all year. Because this recipe is so robust and deeply herby, it pairs brilliantly with dishes that offer a little tartness or creaminess.
When I’m planning my ultimate holiday plate, this stuffing is the anchor. You need something to cut through that richness. Think bright green beans tossed with toasted almonds, or maybe my creamy bacon and chive mashed potatoes—a true crowd-pleaser. A tart cranberry relish is also a must-have next to this bread stuffing recipe to balance out the savory notes.
And, of course, whatever you chose for your main protein, this stuffing is the ultimate sidekick. If you are branching out from turkey, this preparation also goes swimmingly well alongside a beautiful roast, like the one detailed in my guide for an easy prime rib recipe. It’s all about building a complete, balanced, and delicious plate!
Frequently Asked Questions About Making Stuffing
I know when you’re trying out a tried-and-true classic stuffing recipe for the first time, you’re going to have questions. It’s smart planning! Dealing with holiday cooking stress means anticipating any potential hiccups before they happen. I want to make sure your experience with this recipe is smooth sailing. Here are the top things I get asked about turning out the best homemade stuffing.
Can I use fresh bread instead of dried bread cubes for this stuffing?
Look, I get it—sometimes you’re in a hurry, and you don’t have time to leave bread out for two days. But for this recipe, using soft, fresh bread is tricky. Fresh bread already has too much moisture built-in. If you use it, you’ll end up needing way less broth, and even then, the final texture tends to collapse into something more like bread pudding. You’ll lose that light, airy separation we love between the herbs and veggies. If you absolutely must use fresh bread, you need to toast it first. Spread it thinly on baking sheets and bake at 300°F until completely dry to the touch. Then, treat it exactly like dried bread cubes in the rest of the recipe.
What is the difference between stuffing and dressing recipe?
This is a classic regional debate, honestly! Traditionally, if you bake it inside the bird, it’s called stuffing. If you bake it separately in a casserole dish (which is what we are doing because it’s safer and gets a crispier top!), it’s called dressing. Since this recipe is baked outside the bird for maximum textural results, you could correctly call it a dressing recipe. Either way—stuffing or dressing—the flavor profile from our sautéed onions, celery, and sage is pure comfort food magic. Because this recipe is baked in a dish, it makes it one of the best, easy holiday recipes to manage for a massive crowd!
If you need more ideas for streamlining your other holiday components, check out my general list of easy holiday recipes!
Nutritional Estimates for Your Classic Stuffing Recipe
Alright, let’s talk efficiency one last time—that means understanding what’s going into your plate! When I build a go-to meal, especially for a heavy holiday like Thanksgiving, I need to plot out the whole spread, and that includes knowing the basic numbers. I’ve run the totals for this classic stuffing recipe based on standard portion sizing (which comes out to about one cup per serving). Remember, these are estimates based on the ingredients listed; if you decide to sneak in sausage or use a different kind of broth, those numbers will shift!
This table gives you a snapshot of what you’ll find in one standard serving of this delicious homemade stuffing:
- Serving Size: 1 cup
- Calories: 350
- Fat: 18g (10g Saturated Fat)
- Carbohydrates: 40g
- Fiber: 2g
- Sugar: 3g
- Protein: 7g
- Cholesterol: 55mg
It’s good to have this data handy, especially when trying to balance out a big meal featuring a big bird! We focus on flavor first, but knowing the basics helps you plan the rest of your Thanksgiving side dishes successfully.
Share Your Perfect Homemade Stuffing Experience
So, that’s the blueprint for what I think is the absolute best, foolproof homemade stuffing recipe out there! I’ve optimized the process so you get that perfect blend of savory herbs and that fantastic crackly top every single time you make this traditional holiday side. Now that you’ve got the directions, I really want to know what you thought!
Did this turn out to be your new favorite easy holiday recipe? Did the celery and onion combination give you that nostalgic comfort food feeling? Don’t keep your success a secret! Let me know in the comments below how it worked out for your holiday table. If you tried this version and loved how easy it was to manage, send me a picture—I love seeing your culinary projects come to life!
If you want to check out another really reliable favorite from my collection, make sure you look over my guide for the best homemade stuffing guide while you’re here. Happy cooking, and enjoy the applause when you bring that golden dish to the table!
PrintClassic Homemade Stuffing: The Best Easy Thanksgiving Side Dish

This classic homemade stuffing recipe delivers the savory, herb-packed flavor you expect from a holiday feast. Achieve a moist interior and a crispy, golden-brown top using simple ingredients and straightforward steps. This is the foolproof side dish your table needs.
- Prep Time: 20 min
- Cook Time: 50 min
- Total Time: 1 hour 10 min
- Yield: 8 servings 1x
- Category: Side Dish
- Method: Baking
- Cuisine: American
- Diet: Vegetarian
Ingredients
- 1 pound dried bread cubes (about 10 cups)
- 1 cup unsalted butter
- 2 cups chopped celery
- 2 cups chopped yellow onion
- 1 tablespoon fresh sage, chopped
- 1 teaspoon dried thyme
- 1 teaspoon dried rosemary
- 1 teaspoon salt
- 1/2 teaspoon black pepper
- 2 large eggs, lightly beaten
- 2 cups chicken or vegetable broth
Instructions
- Preheat your oven to 350°F (175°C). Lightly grease a 9×13 inch baking dish.
- In a large skillet over medium heat, melt the butter. Add the chopped celery and onion. Cook until softened, about 8 minutes.
- Stir in the fresh sage, dried thyme, dried rosemary, salt, and pepper into the skillet. Cook for 1 minute until fragrant.
- Place the dried bread cubes in a very large bowl. Pour the cooked vegetable and herb mixture over the bread cubes. Toss gently to combine.
- In a separate small bowl, whisk together the eggs and the broth. Pour this liquid mixture evenly over the bread mixture. Toss everything lightly until the bread is just moistened. Do not overmix.
- Transfer the stuffing mixture to the prepared baking dish. Spread it into an even layer.
- Bake for 40 to 50 minutes, or until the top is golden brown and the center is heated through.
- Let the stuffing rest for 10 minutes before serving. This allows the texture to set for that perfect moist and crispy result.
Notes
- For make-ahead stuffing, prepare the mixture completely (steps 1 through 5), cover, and refrigerate for up to 24 hours. Add 1/4 cup extra broth before baking if baking directly from the refrigerator.
- If you prefer a crispier top, uncover the dish for the last 15 minutes of baking.
- This recipe works well as a dressing baked outside the bird, which is simpler and safer for cooking consistency.
Nutrition
- Serving Size: 1 cup
- Calories: 350
- Sugar: 3
- Sodium: 450
- Fat: 18
- Saturated Fat: 10
- Unsaturated Fat: 8
- Trans Fat: 0
- Carbohydrates: 40
- Fiber: 2
- Protein: 7
- Cholesterol: 55