
I don’t know about you, but sometimes only satisfying, savory Tex-Mex will do the trick. When that craving hits, you picture something rich, cheesy, and wonderfully crunchy. The problem? Authentic deep-fried Chimichangas mean a huge mess and a lot of oil, which frankly, doesn’t fit into my schedule. That’s where my project manager brain kicks in. I looked at the goal—maximum flavor, zero fuss—and engineered a solution. We’re ditching the fryer and nailing the texture in the oven. Trust me, these Crispy Baked Beef and Cheese Chimichangas are fast, reliable, and deliver that satisfying crunch you absolutely need for a weeknight dinner.
- Why You Will Make These Baked Beef Chimichangas Every Week
- Gathering Ingredients for Your Homemade Chimichangas
- Step-by-Step Instructions for Crispy Chimichangas
- Tips for Perfect Baked Chimichangas Every Time
- Serving Suggestions and Toppings Guide
- Storage and Reheating Instructions for Leftover Chimichangas
- Frequently Asked Questions About Making Chimichangas
- Nutritional Estimate for These Beef Chimichangas
- Share Your Homemade Chimichangas Experience
Why You Will Make These Baked Beef Chimichangas Every Week
When I optimize a recipe, I’m aiming for consistency and speed. These oven-baked Chimichangas aren’t just a substitute; they are superior for busy weeknights because they actually simplify the process. You get all the flavor without the cleanup hassle associated with deep frying. It’s efficiency meets comfort food.
- They are ready in right around 35 minutes total, making this the ultimate Quick Tex Mex Dinner idea.
- The cleanup is unbelievably light—just a single baking sheet to wash when you’re done!
- We use straightforward ingredients you likely already have stocked, cutting down on grocery runs.
- The beef filling is perfectly seasoned and balanced with two types of cheese, ensuring every bite is rich and satisfying.
- You get that sought-after crispy shell without dirtying a pot with oil. That’s a win in my book every single time.
Gathering Ingredients for Your Homemade Chimichangas
When starting any cooking project, organization is key. Getting everything measured and prepped before you start cooking means there are no interruptions later, especially when you’re trying to move fast. For these homemade Chimichangas, we stuck to the essentials—beef, cheese, seasoning, and tortillas. I ran the ingredient list through my efficiency filter, and this is the simplest setup that still delivers massive flavor.
Ingredient Clarity and Preparation Notes
Because our goal here is speed and reliability, I want to be hyper-clear about what you need and why. If you’re looking for an Easy Chimichanga Recipe, we don’t want any surprises during assembly!
- Ground Beef: One pound, nothing fancy. You’ll brown this first, so we need to make sure we drain every bit of fat off afterward.
- Taco Seasoning: Use one standard packet; this saves you measuring a dozen different spices. Check your pantry first!
- Water: Just a half cup to help the seasoning coat the beef nicely.
- Shredded Cheddar Cheese & Shredded Monterey Jack Cheese: I call for one cup of each. Look, I know some purists insist on grating your own cheese, but we are aiming for efficiency here. Pre-shredded is totally fine! We need that melty, stretchy quality that only these cheeses deliver in the center.
- Large Flour Tortillas: You need the big ones, the 10-inch or burrito-sized ones. They need enough surface area to hold the filling and fold up securely.
- Olive Oil or Cooking Spray: This is what replaces the deep fryer for us! We brush the tops lightly—using spray is even more efficient if you have it. Don’t skip this step; this is how we get those Crispy Chimichangas when baking.
Once you have all these items sitting on your counter, assembly moves surprisingly fast. It’s all about having your components ready to go.
Step-by-Step Instructions for Crispy Chimichangas
Okay, now we get down to the execution phase. This is where my project management approach truly shines because we tackle this in three distinct phases: filling prep, assembly, and baking. If you have your ingredients ready from the last section, you’ll find these Homemade Chimichangas come together quicker than you think. Follow these steps precisely, and you’ll have perfect Chimichangas on the table in under an hour.
Preparing the Best Chimichanga Filling
First things first, we need high-impact flavor, but we want the final product to be clean—no greasy tortillas when baking. Start by putting your oven on to preheat to 400°F (200°C). That multitasking pays off later!
- Get your ground beef into a skillet over medium heat. Cook it until it’s fully browned. This usually takes about 8 minutes, depending on your stove speed.
- This next part is non-negotiable for non-fried versions: drain off every ounce of excess fat. Tilt the pan and try to blot any remaining grease with a paper towel if you need to be extra sure. Less fat equals a crispier, less soggy turn out.
- Deseason the beef by stirring in the packet of taco seasoning and the half cup of water. Bring it to a simmer and let it cook down just until that liquid reduces a bit. We don’t want soup in our tortillas!
- Crucially, pull the skillet off the heat. Let this seasoned beef mixture cool down for a solid five minutes. If you mix hot beef with cold cheese, your cheese will slide right out when you try to roll, making a terrible mess.
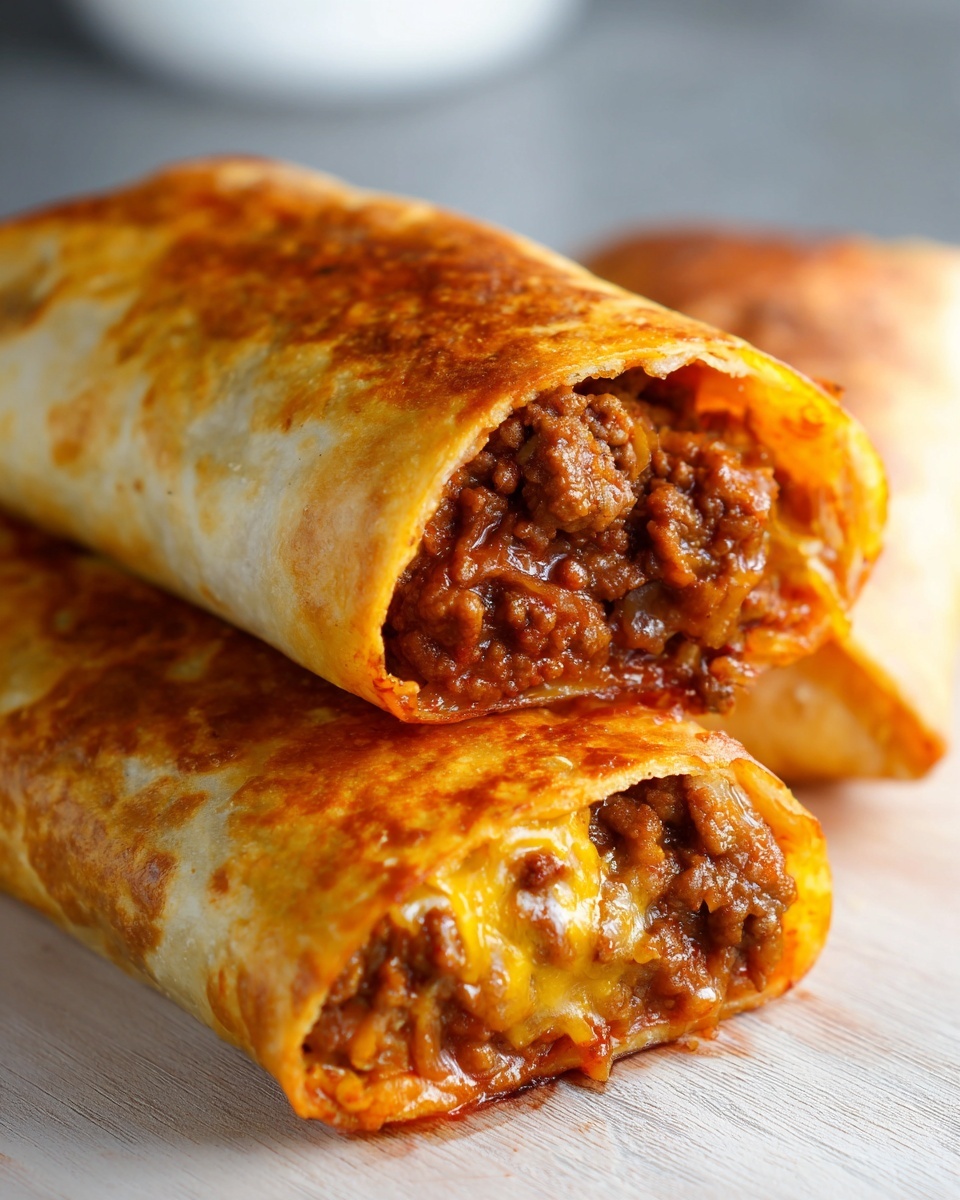
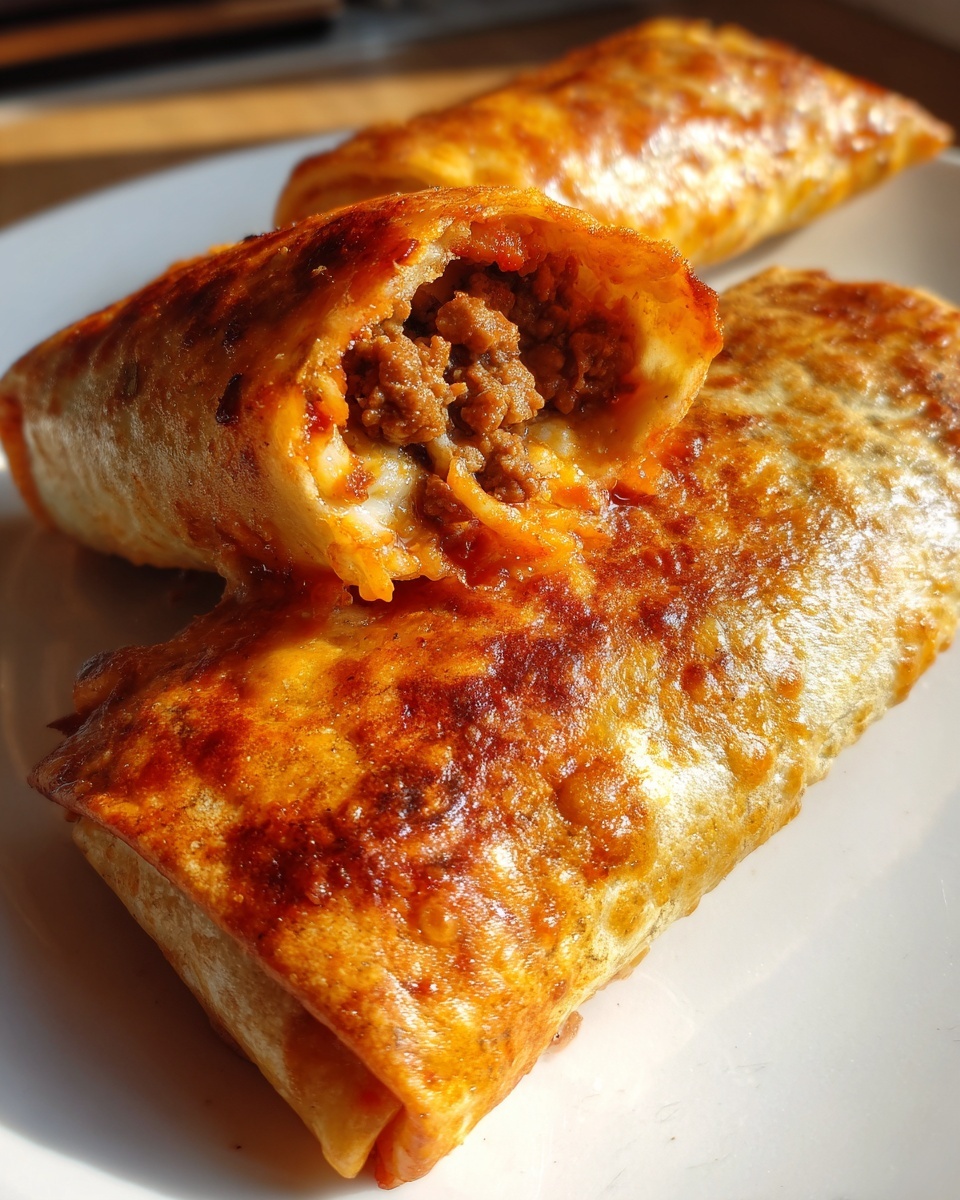
- Once slightly cooled, stir in both cups of shredded cheese until it’s perfectly mingled with the meat. That’s your delicious, cheesy filling ready to go!
Rolling and Sealing Your Chimichangas
Folding is the most crucial part of the assembly process. If you don’t seal them tight, they’ll unroll the second they hit the heat. We want tight little beef pillows, not messy spills!
- Lay out one of your large flour tortillas on a clean workspace. Spoon about 1/4 cup of that beef and cheese filling right in the center—don’t overstuff them, or they won’t seal cleanly.
- Use the classic folding method. First, fold the two sides (left and right) inward neatly over the filling.
- Next, grab the bottom edge and roll it up tightly over the folded sides, creating a sealed burrito shape. Tuck that edge in firmly as you go.
- If you find your tortillas are just a little too floppy or you’re making these ahead of time, secure the seam with a toothpick. They keep their shape perfectly during baking this way.
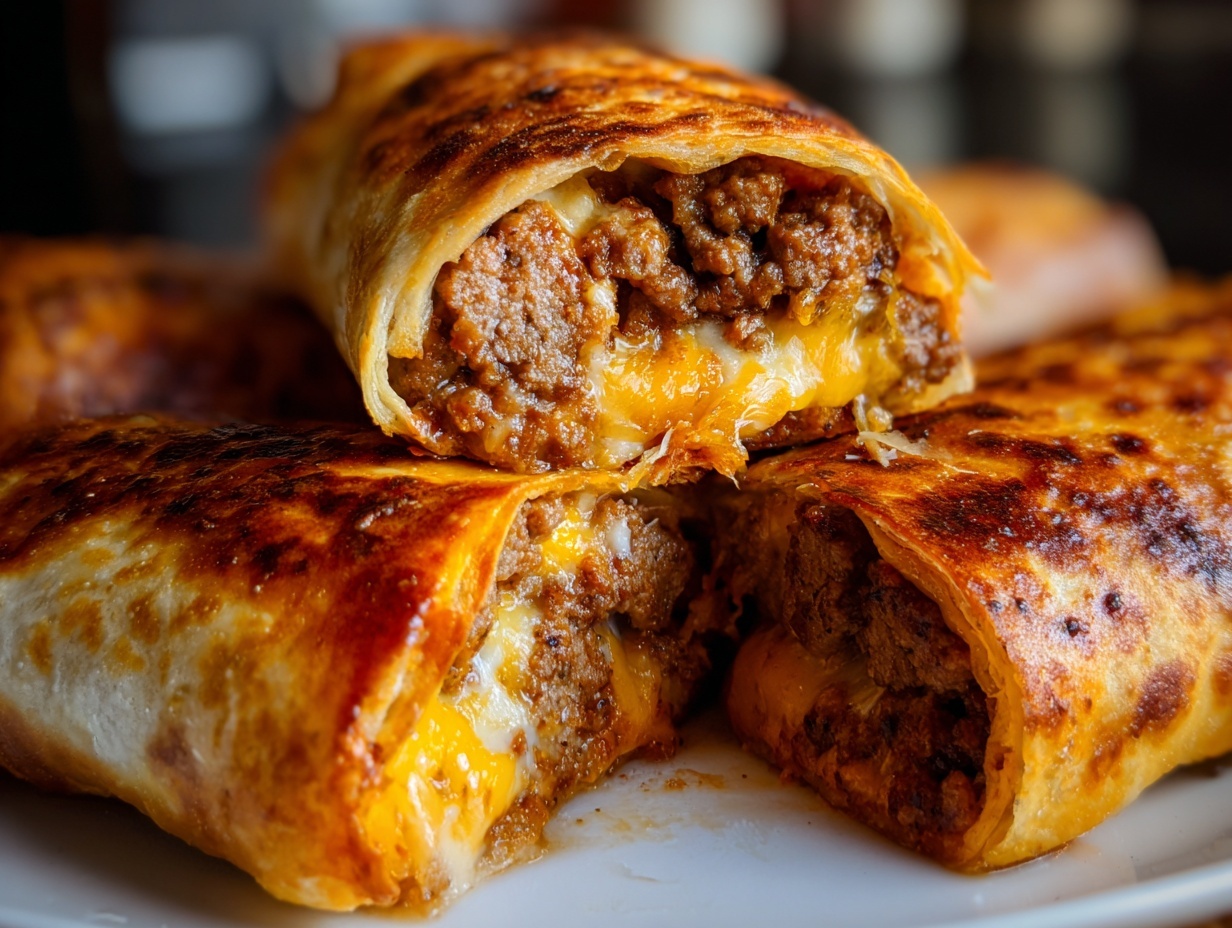
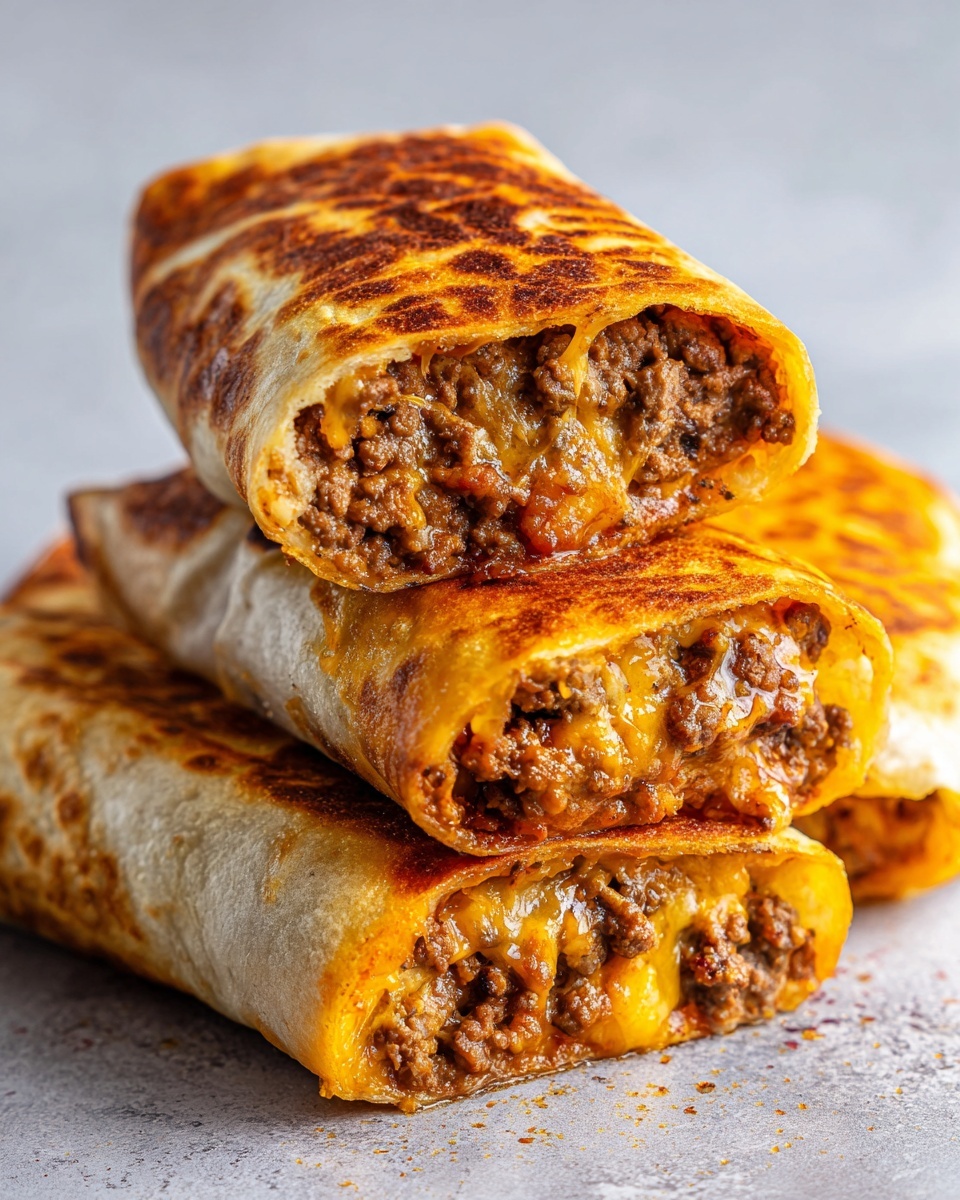
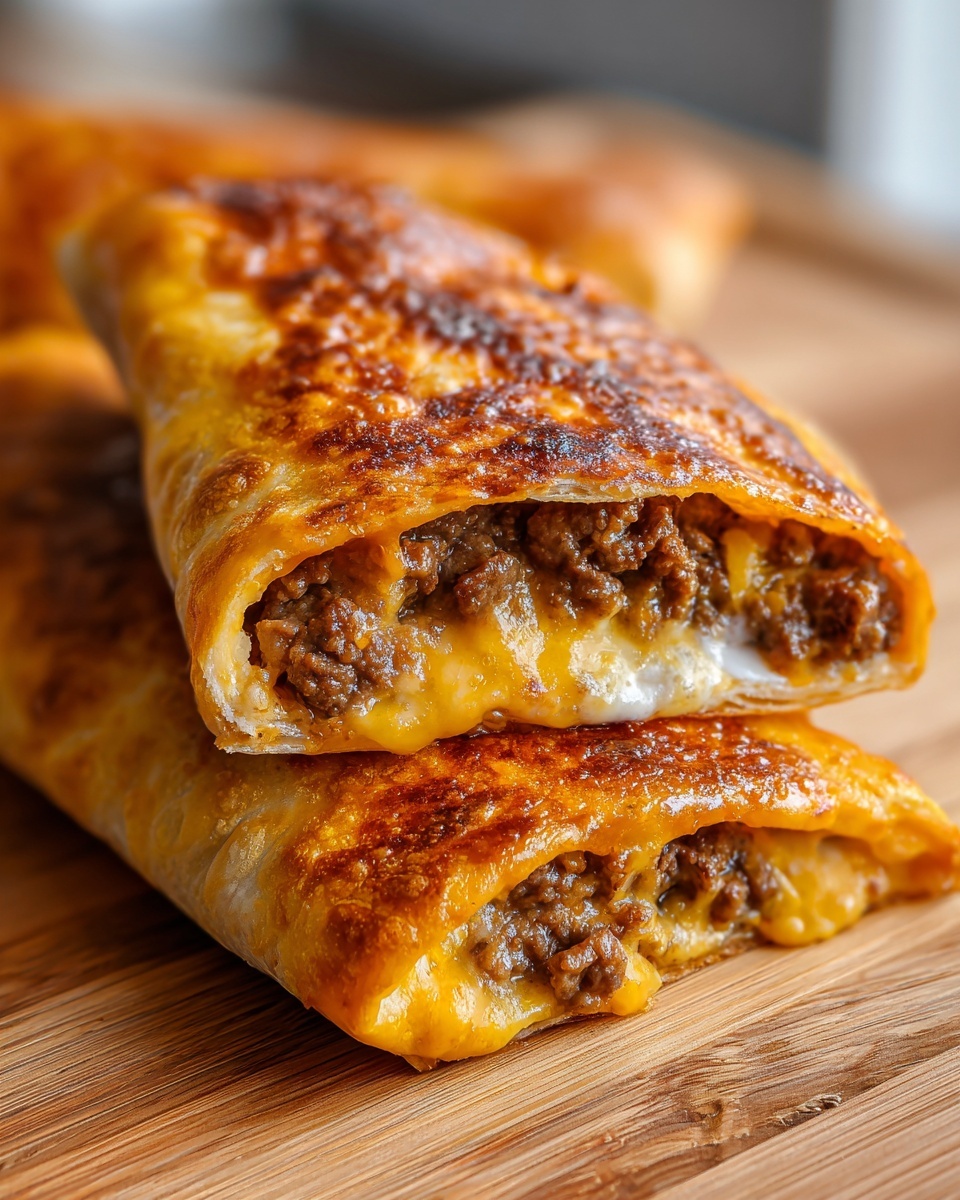
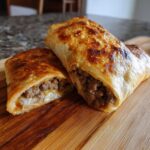
Achieving Golden, Crispy Chimichangas in the Oven
We are using the oven to mimic deep frying, and it works surprisingly well when we give the exterior the right treatment. Grab that baking sheet you prepared earlier.
- Set your rolled Chimichangas seam-side down on the sheet. Yes, the seam goes against the pan!
- Now, brush the tops lightly with olive oil or give them a thorough spray of cooking spray. Surface tension is everything here to get that beautiful golden finish.
- Bake them for 15 to 20 minutes total. The key: you must flip them halfway through the cooking time. This ensures both sides get that stunning, golden-brown crunch.
- When they come out, they should look puffed up and crispy. Remember to carefully remove any toothpicks before you serve them hot!
Tips for Perfect Baked Chimichangas Every Time
Look, baking is great, but I know sometimes you want that extra texture bump that only high-speed air circulation can deliver. As someone who tests every angle of efficiency, I’ve found a few ways to tweak this recipe depending on what your kitchen setup looks like. Getting perfectly crispy Chimichangas is always the goal, whether we are using the oven or the air fryer. These tips ensure reliability, which is what Dishicious is all about.
Air Fryer Chimichangas Instructions
If you’ve invested in an air fryer, you absolutely should use it for this! It’s hands-down the fastest way to get a great crust. When you use this method, you’re basically giving the tortillas super-convection power, which fries them gently with minimal surface fat.
You’ll want to set your air fryer temperature to 375°F (190°C). Once you have your chimichangas brushed or sprayed with oil, place them in the basket in a single layer—don’t stack them up, or they won’t crisp evenly! Cook them for about 8 to 10 minutes total. Crucially, you need to flip them halfway through the cook time. This gets both sides golden brown without burning the edges first.
Make Ahead Chimichangas Prep Strategy
This is my favorite efficiency hack for busy nights. If you are planning to serve these for a genuine 30 Minute Chimichanga Dinner on Thursday, do the prep work on Sunday or Wednesday. The secret here is making the filling ahead of time.
Cook the beef, add the seasoning, drain it, and mix in the cheese. Once cooled completely, store that mixture in an airtight container in the fridge. It stays delicious for up to three days! When Thursday rolls around, all you have to do is assemble the tortillas, brush them with oil, and bake. You cut your prep time down from 15 minutes to about 5 minutes. That’s how you manage dinner like a project manager!
Serving Suggestions and Toppings Guide
We’ve put in the work to get these beef and cheese bites perfectly crispy on the outside, so we need to treat them right when it comes to serving! A pile of golden, cheesy rolls dumped onto a plate just doesn’t cut it in my kitchen. We need cool, fresh elements to balance out all that savory richness. This is Mexican comfort food at its best, and it comes alive with the right accompaniments.
Think about temperature and texture contrast. Since these are hot and crunchy, you want cold, creamy, and maybe something acidic to cut through the fat from the cheese. I always make sure I have at least two or three things ready to go on the side.
Here are the absolute keepers that belong on the table:
- The Green Must-Have: You absolutely have to serve these with a fresh dollop of guacamole. It adds healthy fat and a smooth texture that is divine next to the crunch. You can find my foolproof recipe for homemade guacamole right here—it only takes about five minutes to whip up.
- The Cream Factor: Sour cream is non-negotiable for me. It cools the palate instantly. I usually just grab a tub of the full-fat version; we’re making these baked for ease, so we can enjoy the cream!
- Salsa Showdown: Have a couple of options if you can. A fresh pico de gallo brings acidity and brightness. If you want something smoky, a dash of your favorite bottled salsa works wonderfully, too.
- Lettuce/Cabbage Crunch: If you are trying to make this meal stretch for more people, topping the plate with a bed of shredded lettuce or thinly sliced cabbage adds volume, freshness, and a needed textural snap against the warm filling.
If you are cooking for a crowd or serving these as an appetizer rather than a main dish, skip the individual toppings and go straight for a showstopper like my ultimate seven-layer taco dip. Everyone can just dip their golden rolls right into the goodness. It keeps the process easy and maximizes the flavor party!
Storage and Reheating Instructions for Leftover Chimichangas
One of the biggest benefits of testing efficient recipes is that they usually lend themselves well to leftovers, and these Chimichangas are no exception! While they are obviously best served immediately after baking when they are piping hot and incredibly crispy, sometimes you just can’t finish eight rolls in one go. Luckily for us, the beef and cheese filling holds up really well.
We absolutely want to preserve that crunch we worked so hard for in the oven or air fryer. That means the microwave is a definite no-go zone if you want your Chimichangas to taste anything like they did the first time around. If you’re planning ahead, this recipe is fantastic for creating Freezer Friendly Meals Tex Mex options for future hectic nights.
Here is the strategy I use for keeping leftover magic alive:
- Refrigeration: Once they are completely cooled down to room temperature, place the leftover Chimichangas in an airtight container. They should last safely in the fridge for about three days. Don’t stack them too tightly, or they might release steam and get soggy on the sides that are touching.
- Freezing for Later: If you made extras specifically for future dinners, cool them completely, wrap each individual roll tightly in plastic wrap first, and then place them all into a large freezer bag. Label the bag with the date and contents. They can hang out in the freezer for up to two months.
Reheating for Maximum Crispiness
The goal when reheating any baked or fried item is to re-dry the exterior without overcooking the center. Because we baked these the first time, the oven or air fryer is your best friend here. This brings them right back to that satisfying texture.
For refrigerated leftovers, pop them back into a 375°F oven, or the air fryer set to the same temperature, for about 6 to 8 minutes. You don’t need to brush them with more oil unless they look completely dry. Just heat them until they are warmed through and you hear that nice little crackle when you squeeze them gently.
If you are reheating from frozen, the cook time extends, but the method stays the same. I usually add about 5 more minutes to the oven time or about 4 minutes to the air fryer time. You just need to make sure the cheese inside is fully melted again. Honestly, having these ready to reheat makes them probably my favorite quick Tex Mex dinner option!
Frequently Asked Questions About Making Chimichangas
When you streamline a recipe like this, you naturally get questions about customizations or comparisons to the original versions. My goal is to make sure these instructions work for your pantry and your schedule. Here are the most common queries I get about perfecting these Chimichangas at home.
Can I substitute the beef for a Chicken Chimichanga Recipe?
Absolutely! You can easily make a fantastic Chicken Chimichanga Recipe instead of beef. The process is almost identical. Instead of browning ground beef, you’ll want to use about a pound of cooked, shredded chicken—rotisserie chicken works wonders here for maximum speed. Mix that shredded chicken right in with the taco seasoning and water, let it simmer briefly until coated, cool it down, and then mix in your cheeses. It moves just as fast as the beef version!
What is the difference between a burrito and chimichangas?
This is a classic question, and it all comes down to the ending! A standard burrito is served soft. It’s warm, pliable, and rolled up tight. A chimichanga, on the other hand, is essentially a deep-fried or, in our case, oven-baked burrito. The cooking method is what defines it; that final crisping step is what transforms a simple rolled tortilla into that beautifully crunchy Mexican comfort food.
It’s honestly the best of both worlds when you use the Oven Baked Chimichangas Instructions. You get the classic texture without standing over a vat of hot oil—that’s optimizing dinner right there.
Nutritional Estimate for These Beef Chimichangas
As someone who approaches cooking like a project, I always want to know the final specs. Knowing the nutritional profile helps me fit these amazing, crispy rolls into our meal planning for the week. Remember, because we are baking them instead of deep frying, we are already seeing a massive reduction in unnecessary oils, keeping these lighter than traditional versions.
The values listed below are estimates based on the ingredients used in this specific recipe (8 servings). Keep in mind these aren’t laboratory-tested figures—they are calculated estimates, and your own brands of ground beef, cheese, and tortillas will cause slight variations. But this gives you a solid baseline for planning your weeknight Mexican dinner ideas.
| Metric | Value Per Serving (1 Chimichanga) |
|---|---|
| Calories | 380 |
| Fat | 18g |
| Saturated Fat | 8g |
| Trans Fat | 0g |
| Cholesterol | 65mg |
| Sodium | 550mg |
| Carbohydrates | 35g |
| Fiber | 3g |
| Sugar | 3g |
| Protein | 20g |
See? That protein content is fantastic for keeping you full and satisfied long after you finish, which is exactly what I aim for when putting together a reliable format for dinner!
Share Your Homemade Chimichangas Experience
If you followed along, you should now have an oven sheet full of golden, crispy, cheesy goodness! That’s what I love most about this streamlined process for making Chimichangas—it works reliably every single time, whether you’re making them for yourself or a massive game-day spread. Leo Grant’s approach is all about providing you with solutions that fit into real life, and this recipe proves you don’t need to spend hours messing with hot oil to get that perfect crunch.
Now, it’s your turn to be the project manager in your kitchen! I genuinely want to know how these turned out for you. Did you use the air fryer trick? Did you sneak some extra jalapenos into the filling? Don’t just walk away—come back and tell me about it! Drop a star rating for the recipe right at the top so others know how reliable this baked method is.
Seeing your results and hearing your feedback helps me keep improving the content here at Dishicious. Head over to the comments section below and share a photo if you took one while assembling or serving. If you’re new here and curious about how I engineer my meals, you can read a bit more about my philosophy over on the About page. Happy cooking, and may your Chimichangas always be crispy!
PrintCrispy Baked Beef and Cheese Chimichangas
Make satisfying, crispy beef and cheese chimichangas in the oven. This recipe delivers the flavor of classic fried burritos with less oil, perfect for a quick weeknight Mexican dinner.
- Prep Time: 15 min
- Cook Time: 20 min
- Total Time: 35 min
- Yield: 8 servings 1x
- Category: Dinner
- Method: Baking
- Cuisine: Tex-Mex
- Diet: Vegetarian
Ingredients
- 1 lb ground beef
- 1 packet taco seasoning
- 1/2 cup water
- 1 cup shredded cheddar cheese
- 1 cup shredded Monterey Jack cheese
- 8 large flour tortillas
- 2 tablespoons olive oil or cooking spray
Instructions
- Preheat your oven to 400°F (200°C). Lightly grease a baking sheet.
- In a skillet over medium heat, cook the ground beef until browned. Drain any excess fat.
- Stir in the taco seasoning and water according to package directions. Simmer until the liquid reduces slightly. Remove from heat and let cool for 5 minutes.
- Mix the cheddar and Monterey Jack cheeses into the seasoned beef mixture.
- Place about 1/4 cup of the beef and cheese filling onto the center of each tortilla.
- Fold the sides of the tortilla inward, then tightly roll the tortilla from the bottom up, creating a sealed burrito shape. Secure with a toothpick if necessary.
- Place the rolled chimichangas seam-side down on the prepared baking sheet.
- Brush the tops of the chimichangas lightly with olive oil or spray them thoroughly with cooking spray for crispiness.
- Bake for 15 to 20 minutes, flipping halfway through, until the tortillas are golden brown and crispy.
- Remove toothpicks before serving hot with your favorite toppings.
Notes
- For an even crispier texture, you can use an air fryer set to 375°F (190°C) for 8-10 minutes, turning halfway.
- Prepare the filling ahead of time and store it in the refrigerator for up to 3 days to make this a quick weeknight Mexican dinner idea.
- Serve with sour cream, salsa, guacamole, or shredded lettuce for a complete meal.
Nutrition
- Serving Size: 1 chimichanga
- Calories: 380
- Sugar: 3
- Sodium: 550
- Fat: 18
- Saturated Fat: 8
- Unsaturated Fat: 10
- Trans Fat: 0
- Carbohydrates: 35
- Fiber: 3
- Protein: 20
- Cholesterol: 65