
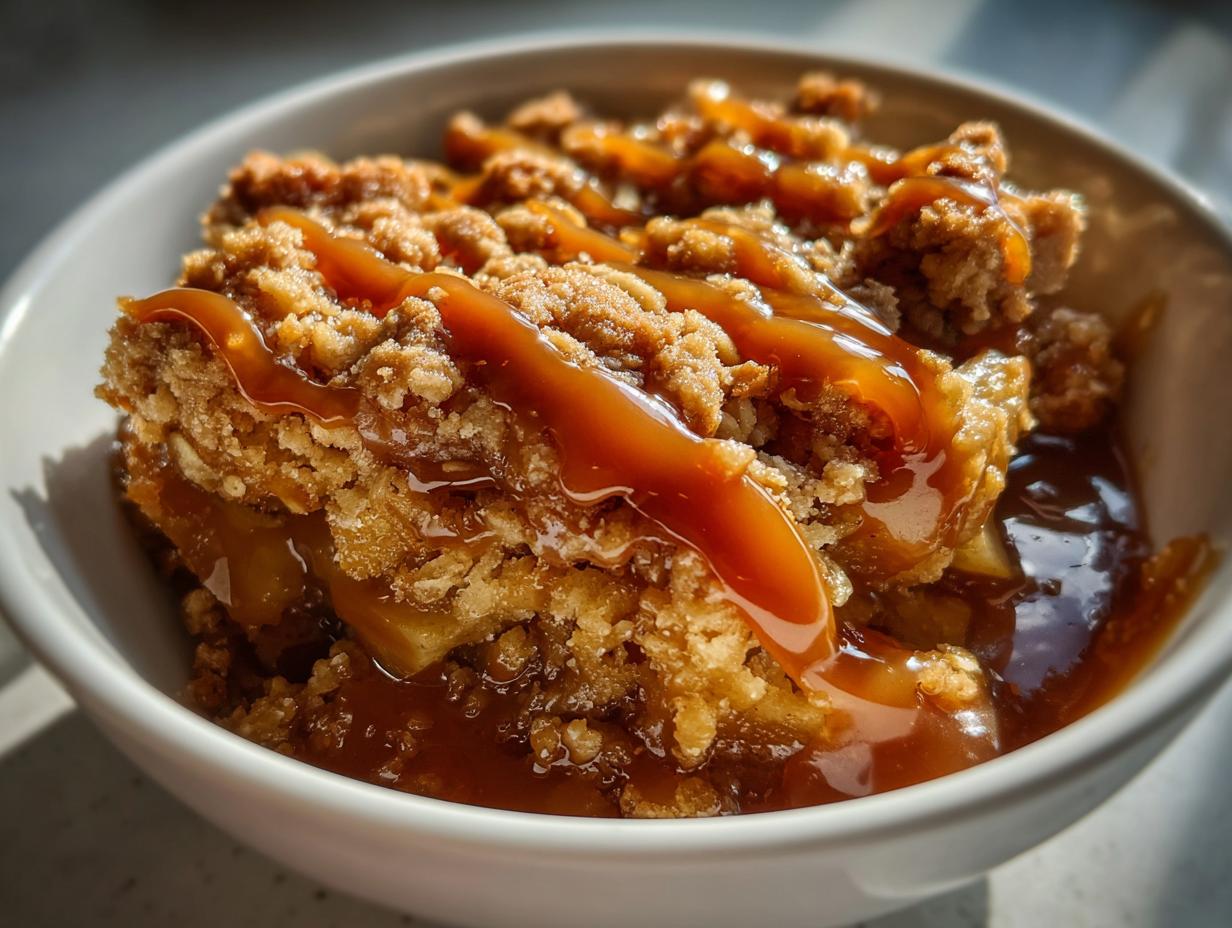
We all love classic comfort food, that deep sense of satisfaction a simple dessert brings. But sometimes, “simple” needs an upgrade, right? That’s where I come in. I took the standard apple crisp and treated it like a project—streamlining the process but maximizing the payoff. The secret sauce isn’t the crunchy topping this time; it’s the decadent layer of rich, homemade apple crisp with salted caramel woven right through the filling.
This method is engineered for maximum flavor delivery with minimal fuss. I spent a whole weekend testing apple combinations—leaning heavily toward the Granny Smith/Honeycrisp mix for that perfect sweet-tart balance that holds up during baking. Trust me, this isn’t your grandma’s plain crisp anymore; it’s a gourmet experience delivered on your busiest weeknight, and it works every time. If you’re looking for other ways to elevate fruit desserts, check out my guide on the ultimate classic deep-fried apple fritter recipe, but for now, let’s stick to the crisp.
- Why This apple crisp with salted caramel Recipe Works Every Time
- Ingredients for Your apple crisp with salted caramel
- Ingredient Notes and Homemade Salted Caramel Sauce Recipe
- How to Prepare the Ultimate apple crisp with salted caramel
- Tips for a Bakery Style apple crisp with salted caramel Topping
- Serving Suggestions for this Warm apple Dessert with Caramel
- Storage and Reheating Instructions
- Frequently Asked Questions about apple crisp with salted caramel
- Estimated Nutritional Information
Why This apple crisp with salted caramel Recipe Works Every Time
My goal is always efficiency paired with phenomenal results. When you look at this apple crisp with salted caramel recipe, you see simplicity, but underneath it’s engineered to deliver. You don’t get lucky with desserts this good; you plan for it.
- Guaranteed Texture: The topping relies on cold butter cut in just right, ensuring a true crispy oat topping rather than a soggy mess.
- Flavor Depth: Integrating the salted caramel both under and over the apples caramelizes the fruit naturally, elevating the entire dish.
- Reliable Baking: This dessert hits the sweet spot between tender apples and crunchy topping in under 45 minutes. You can stop worrying about over-baking! Learn more about my general approach in my guide on the best apple crisp—a foolproof and comforting recipe.
Ingredients for Your apple crisp with salted caramel
When you’re managing a recipe, clarity in the ingredient list is mission-critical. I’ve broken this down exactly how I organize it in my kitchen layout. We need three components ready to go: the filling, the topping, and the caramel that ties it all together. Don’t worry about buying special caramel; the notes section will show you how to whip up a quick foolproof chewy caramel fix if you need it.
For the Caramelized Apple Filling
- 6 medium baking apples (I insist on a mix of Granny Smith for tartness and Honeycrisp for sweetness—that combination really nails the flavor balance for this apple crisp with salted caramel).
- 1/4 cup granulated sugar for apples
- 1 tablespoon all-purpose flour for apples (this thickens the juices beautifully!)
- 1 teaspoon ground cinnamon
- 1/4 teaspoon ground nutmeg
- 1/4 cup salted caramel sauce (this is layered between the apples, trust me on this).
For the Crispy Oat Topping Recipe
- 1 cup all-purpose flour
- 1 cup rolled oats (Make sure these are old-fashioned rolled oats, not the instant kind. We need structure here!)
- 1/2 cup packed light brown sugar for topping
- 1/2 teaspoon salt (This is non-negotiable for bringing that salty edge to our sweet crisp)
- 1/2 cup (1 stick) cold unsalted butter, cut into small cubes (Keep it cold!)
Ingredient Notes and Homemade Salted Caramel Sauce Recipe
Choosing the right ingredients is like setting up the project plan; if the foundation is weak, the final product suffers. For this apple crisp with salted caramel, the apple choice is crucial. I tested six different varieties before settling on the Granny Smith/Honeycrisp duo. That blend ensures the apples soften perfectly without turning to complete mush, which is non-negotiable for a bakery style experience.
Now, let’s talk caramel. While you can certainly grab a jar, making your own small batch yields unbeatable flavor. This is the simple method I use to create that incredible topping for our dessert:
- In a saucepan, combine 1 cup of sugar with 1/4 cup of butter and cook until melted and amber.
- Take it off the heat quickly and carefully whisk in 1/2 cup of warmed heavy cream (warming the cream stops the sugar from seizing up immediately—trust me, this small step saves headaches!).
- Stir in 1 teaspoon of good sea salt until smooth. Let it cool slightly before drizzling it into the apples and over the topping.
If you love this balance of sweet and salty, you have to try it in my easy salted caramel cheesecake recipe sometime!
How to Prepare the Ultimate apple crisp with salted caramel
Okay, this is where the project management really pays off. We’re moving from planning to execution for our apple crisp with salted caramel. The steps are designed to keep everything moving smoothly so you aren’t rushing the most delicate parts, like getting that topping texture just right. Don’t worry about timing; just follow the sequence!
Step 1: Prep Apples and Oven
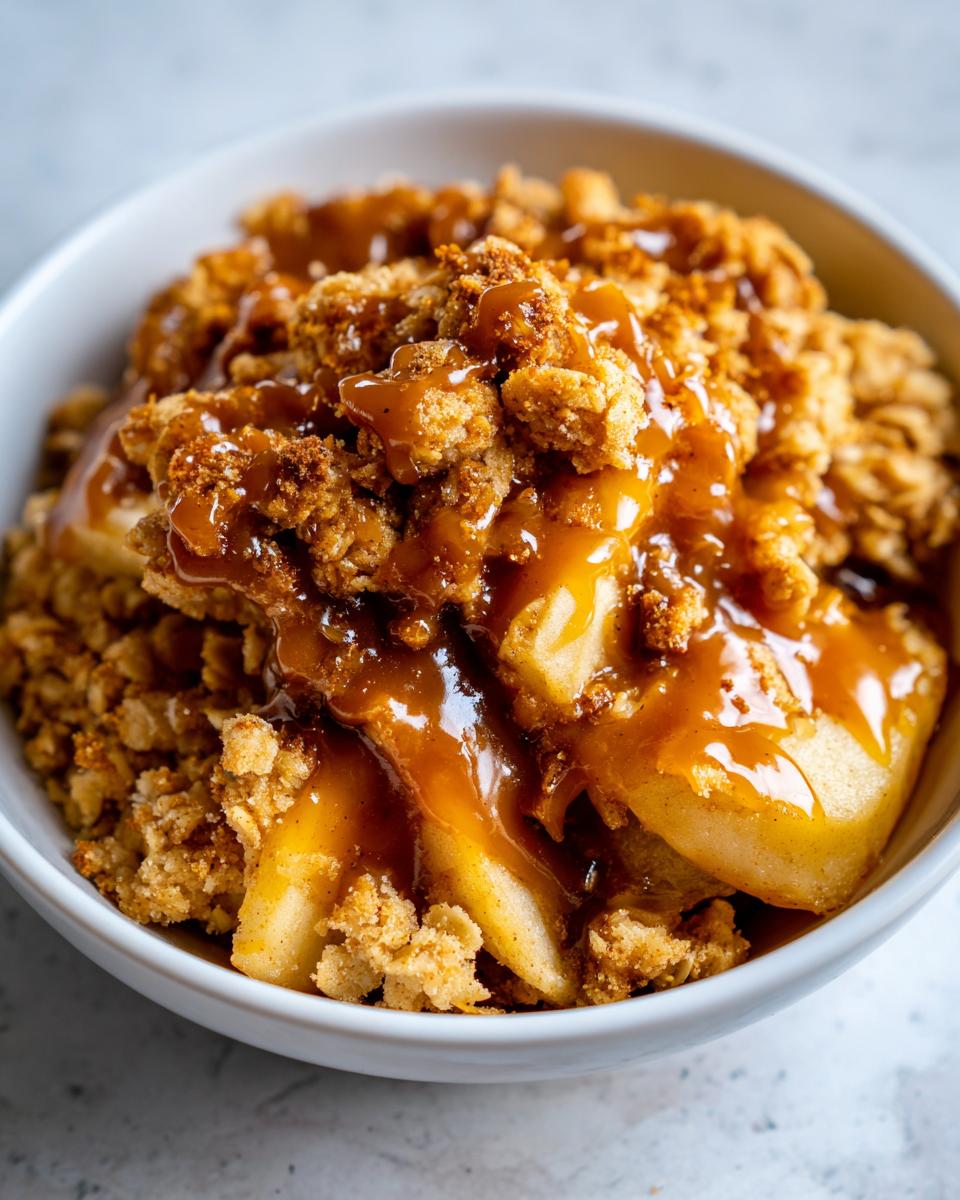
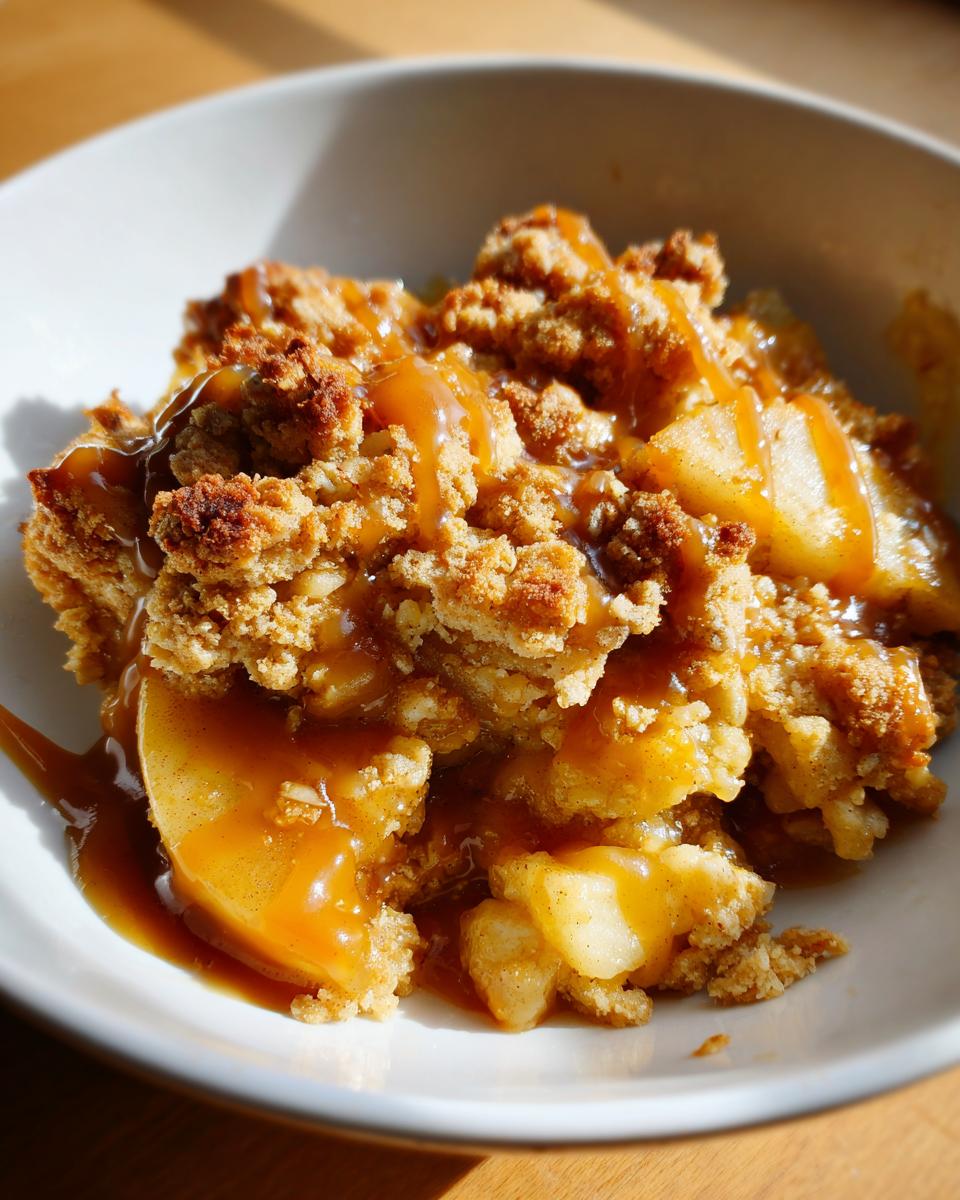
First things first, get that oven warming up to 375 degrees Fahrenheit. While it heats, lightly grease your 8×8 inch baking dish—a little spray or buttering is all it takes. Now, grab your seasoned apples. In a large bowl, toss those magnificent slices with the granulated sugar, the tablespoon of flour, cinnamon, and nutmeg until every slice looks coated. Pour this apple mixture evenly into your prepared dish. That’s the base layer complete!
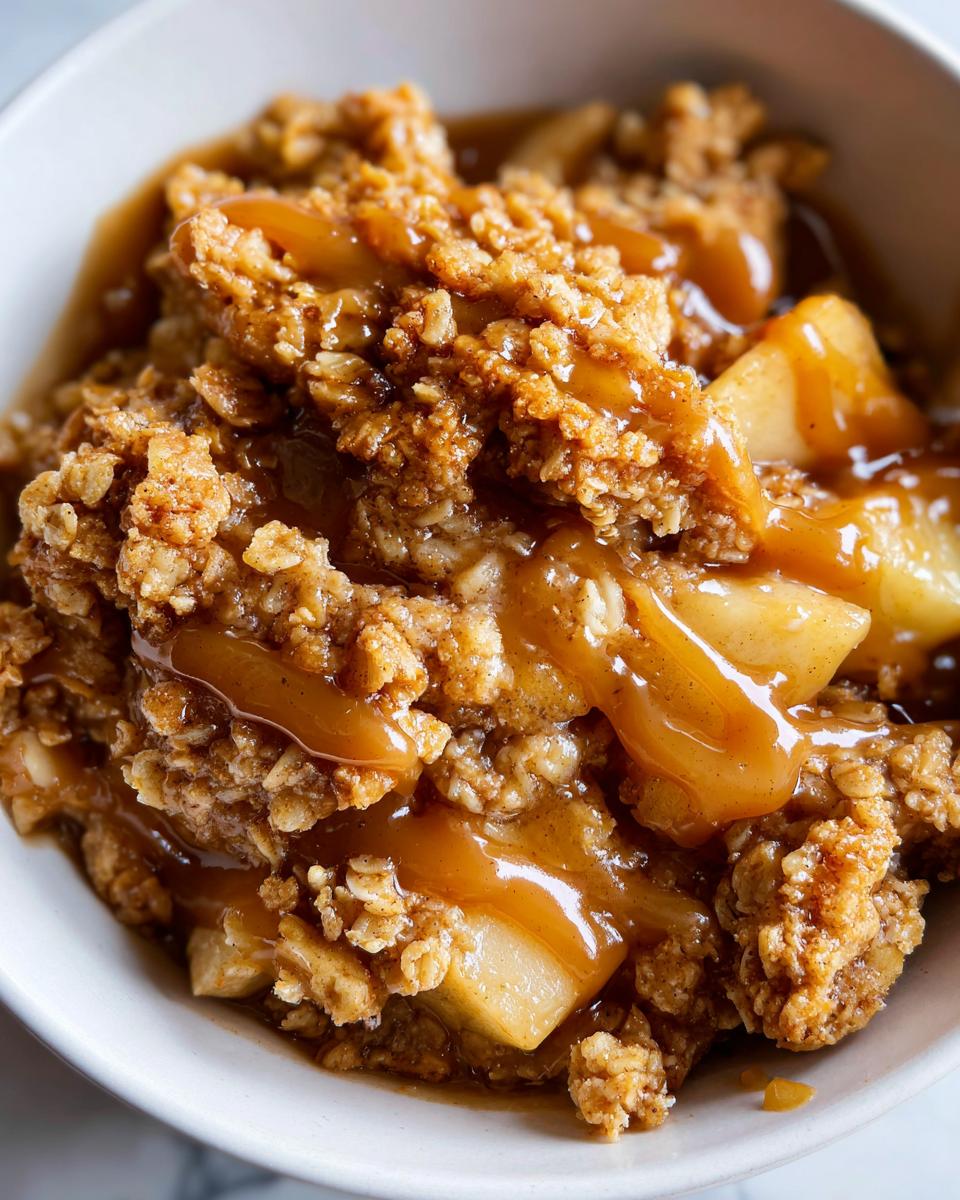
Step 2: Assembling the apple crisp with salted caramel Layers
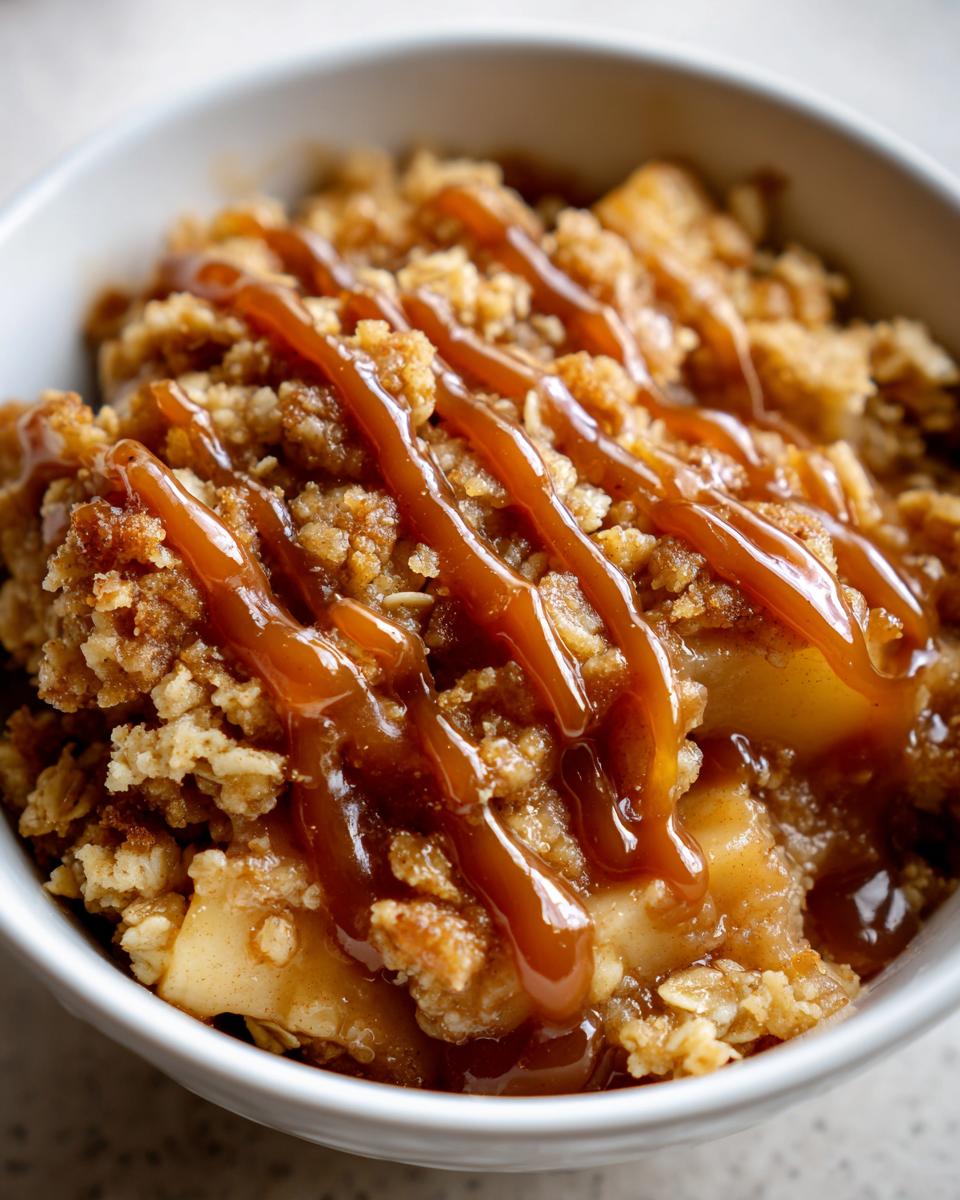
This is the flavor bomb step. Take 1/4 cup of your salted caramel sauce—this is the secret layer—and drizzle it right over those seasoned apples. Next, switch gears to the topping. Whisk the flour, oats, brown sugar, and salt together in a separate bowl. Now, throw in the cold, cubed butter. Use your fingers or a pastry blender to work that butter in until you have coarse crumbs. If you end up with some pea-sized butter lumps, you nailed it! Seriously, don’t overwork it. Sprinkle that crumbly topping over the apples you just drizzled. Finally, take that last 1/4 cup of salted caramel and drizzle it over the top of the crumbs for maximum caramelization before baking. You’ll be amazed how this makes your apple crisp with salted caramel look before it even hits the oven.
Step 3: Baking and Resting
Time to bake for 40 to 45 minutes. You’re looking for two things: the topping must be deep golden brown, and when you peek at the edges, the apple filling needs to be visibly bubbly. If you can sneak a fork in, test an apple slice—it should be tender. Crucially, once it’s out, put it on a wire rack and let it rest for a mandatory 15 minutes. This lets those heavenly caramel juices settle and thicken up. If you slice too early, your beautiful layers will run all over the plate. If you need more tips on getting that topping perfectly crunchy, I cover my best techniques in my guide on the best salted caramel topping for crisp.
Tips for a Bakery Style apple crisp with salted caramel Topping
If you want that coveted bakery style texture on your apple crisp with salted caramel, the topping needs serious attention. My biggest early failure taught me everything. I once used softened butter—thinking it would mix faster—and the result was a sad, dense dough, not a crumb. Never again! The butter MUST be cold, almost icy, when you mix it in.
To keep it crispy, cut that butter into small, pebble-sized pieces. Those cold pockets create steam as they bake, which pushes the topping up and keeps the dreaded soggy bottom away from your delicious apples. Also, remember that final drizzle of salted caramel over the top before baking? That slight stickiness helps the oats brown beautifully without burning. For more details on optimizing this crunchy layer, check out my dedicated post on the crispy oat topping recipe. It solves every texture issue!
Serving Suggestions for this Warm apple Dessert with Caramel
So, your apple crisp with salted caramel is out of the oven, it smells incredible, and those caramel rivulets are just begging to be added to. Now you have to serve it, right? This dessert is naturally decadent, but the right pairing can take it from great to truly show-stopping. Honestly, I approach serving dessert like I approach project closeout—it needs the perfect final presentation.
Because we already nailed that sweet and salty balance in the crisp itself, you want toppings that either cool the heat or gently enhance the richness. Nothing complicated here; we’re keeping it simple but effective.
- The Classic: Vanilla Ice Cream. This is the non-negotiable standard for any warm fruit dessert. The cold, creamy vanilla melts right into the caramel pockets. If you want to go one step further, instead of store-bought vanilla, try making a batch of fluffy, stable vanilla buttercream and just serving a dollop of that instead of actual ice cream—it melts beautifully but stays richer.
- A Lighter Touch: Fresh Whipped Cream. If you want to cut some of the density from the caramel, skip the ice cream and whip up some heavy cream with just a tiny bit of powdered sugar. The lightness contrasts perfectly with the dense, buttery topping.
- The Morning After Treat: Coffee Companion. If you’re lucky enough to have leftovers (which I often struggle with, admittedly), this crisp is fantastic warmed up slightly the next morning alongside a strong cup of black coffee or an espresso. The slight bitterness of the coffee balances the deep molasses flavor from the brown sugar and caramel perfectly.
The key takeaway? Don’t overthink the topping. Let the beautiful caramelization shining through that buttery topping do most of the heavy lifting!
Storage and Reheating Instructions
Even though this apple crisp with salted caramel is engineered to be spectacular right out of the oven, sometimes you have leftovers. And trust me, you want leftovers because this dessert tastes fantastic the next day, but only if you handle the storage and reheating correctly. We need to protect that crispy topping from turning soggy, which is the number one enemy of any good crisp.
First, don’t cover it as soon as it comes out of the oven! Let it cool completely, preferably on the counter until it reaches room temperature. Once totally cool, cover the entire baking dish tightly with plastic wrap or foil. You can certainly keep it on the counter for a few hours if your kitchen isn’t too hot, but for next-day leftovers, I recommend the fridge. It will keep well in the refrigerator for up to three or four days.
Now for reheating—this is critical to restoring that *bakery style* crunch. The microwave is tempting, I know, but it’s a texture killer. It heats everything unevenly and, worse, steams the topping. You have two much better options:
- The Oven Method (Recommended): This is the best for full-pan reheating or if it was refrigerated. Cover the dish loosely with foil and bake at 350°F for about 15 to 20 minutes, or until it’s heated through and bubbly again. Take the foil off for the last five minutes if you want to ensure maximum crispiness!
- The Air Fryer Shortcut: If you only have a small portion left, the air fryer is phenomenal for reheating! Set it to 325°F for about 6 to 8 minutes. It gets the topping perfectly crisp without requiring you to heat up the whole oven.
If you’re looking for other easy make-ahead meals that save you time later, you should check out my easy make-ahead egg muffin recipe. It’s all about pre-planning for delicious results!
Frequently Asked Questions about apple crisp with salted caramel
When you’re tackling a recipe upgrade like this apple crisp with salted caramel, sometimes the questions crop up after the main instructions are done. That’s totally fine! I build my recipes to be resilient, but it’s smart to know how to troubleshoot or adapt. Think of this as the final project review before you serve up what is essentially a Gourmet Apple Crisp Dessert.
Can I use different fruit besides apples in this recipe?
Absolutely, you can adapt this beautifully! The structure of the topping and the caramel is sturdy enough for other firm fruits. Pears work wonderfully—slice them about the same thickness as the apples. If you’re using softer berries, like blueberries or blackberries, I really recommend cutting back on your initial caramel drizzle in the filling by about half, and maybe adding the extra 1/4 cup of caramel right over the top before baking instead. You might also want to add an extra teaspoon of flour to the filling mixture just to help those juices thicken up since berries release more liquid than apples.
How do I prevent the topping from burning before the apples are soft?
This is a classic baking challenge, especially when you have a luscious layer of salted caramel sauce like we do here. If you notice the oat topping is getting too dark—a deep, worrying brown instead of that perfect golden hue—before the apples underneath are even close to tender, it’s time to intervene. The fix is simple project management: grab a sheet of aluminum foil and gently tent it loosely over the baking dish. This reflects the heat away from the top layer so the apples can steam and soften in the caramel without scorching the oats. Just remember to pull the foil off for the last 5 or 10 minutes if you want to ensure maximum crispiness!
If you ever need a good base for another fruit dessert, don’t forget to check out my easy pear crisp recipe; it uses similar principles.
Estimated Nutritional Information
Okay, before we wrap this up and you rush off to bake, let’s talk numbers. As a project manager, I believe in having all the data upfront, even when it comes to dessert. This nutritional breakdown for the apple crisp with salted caramel is based on standard ingredient measurements as listed in the recipe, divided across six servings. Remember, this is an estimate—what you use (like the fat content in your butter or the exact size of your apples) will cause slight variations, but it gives you a solid baseline.
This hit of sweet and salty flavor is worth every calorie, but here’s what you’re looking at per serving:
- Calories: 410
- Fat: 20g (This comes mostly from that amazing buttery topping and the caramel!)
- Saturated Fat: 12g
- Carbohydrates: 58g
- Fiber: 5g
- Sugar: 45g (Hey, it’s a dessert!)
- Protein: 5g
- Sodium: 280mg (That’s the crucial dash of salt balancing all that sweetness.)
If you happen to have leftovers and want something slightly less indulgent that still offers a great protein boost for the next day, you should look over my notes for the easy blueberry protein muffin recipe. But for now, focus on enjoying this incredible crisp!
PrintApple Crisp with Homemade Salted Caramel Sauce

A straightforward recipe for a classic apple crisp featuring a buttery oat topping and a rich, homemade salted caramel sauce layered throughout the filling.
- Prep Time: 20 min
- Cook Time: 45 min
- Total Time: 65 min
- Yield: 6 servings 1x
- Category: Dessert
- Method: Baking
- Cuisine: American
- Diet: Vegetarian
Ingredients
- 6 medium baking apples (Granny Smith or Honeycrisp), peeled, cored, and sliced 1/4 inch thick
- 1/4 cup granulated sugar for apples
- 1 tablespoon all-purpose flour for apples
- 1 teaspoon ground cinnamon
- 1/4 teaspoon ground nutmeg
- 1/4 cup salted caramel sauce (homemade or store-bought)
- 1 cup all-purpose flour for topping
- 1 cup rolled oats (not instant)
- 1/2 cup packed light brown sugar for topping
- 1/2 teaspoon salt
- 1/2 cup (1 stick) cold unsalted butter, cut into small cubes
- 1/4 cup salted caramel sauce for drizzling over the top before baking
Instructions
- Preheat your oven to 375 degrees Fahrenheit. Lightly grease an 8×8 inch baking dish.
- In a large bowl, combine the sliced apples, 1/4 cup granulated sugar, 1 tablespoon flour, cinnamon, and nutmeg. Toss until the apples are evenly coated.
- Pour the seasoned apple mixture into the prepared baking dish. Drizzle 1/4 cup of the salted caramel sauce evenly over the apples.
- Prepare the crisp topping: In a separate medium bowl, whisk together the 1 cup flour, rolled oats, brown sugar, and salt.
- Cut in the cold butter using a pastry blender or your fingertips until the mixture resembles coarse crumbs with some pea-sized pieces remaining. Do not overmix.
- Sprinkle the topping evenly over the apple layer. Drizzle the remaining 1/4 cup of salted caramel sauce over the topping.
- Bake for 40 to 45 minutes, or until the topping is golden brown and the apple filling is bubbly and tender when pierced with a fork.
- Let the apple crisp cool on a wire rack for at least 15 minutes before serving. Serve warm with extra salted caramel sauce or vanilla ice cream.
Notes
- For the best texture, use a mix of tart and sweet apples, such as Granny Smith and Honeycrisp.
- If you prefer a chewier topping, use slightly less butter. For a crunchier topping, ensure the butter pieces are small and well distributed.
- To make the homemade salted caramel sauce, combine 1 cup sugar, 1/2 cup heavy cream (warmed), 1/4 cup butter, and 1 teaspoon sea salt in a saucepan and cook until thickened.
Nutrition
- Serving Size: 1 serving
- Calories: 410
- Sugar: 45g
- Sodium: 280mg
- Fat: 20g
- Saturated Fat: 12g
- Unsaturated Fat: 8g
- Trans Fat: 0g
- Carbohydrates: 58g
- Fiber: 5g
- Protein: 5g
- Cholesterol: 45mg