
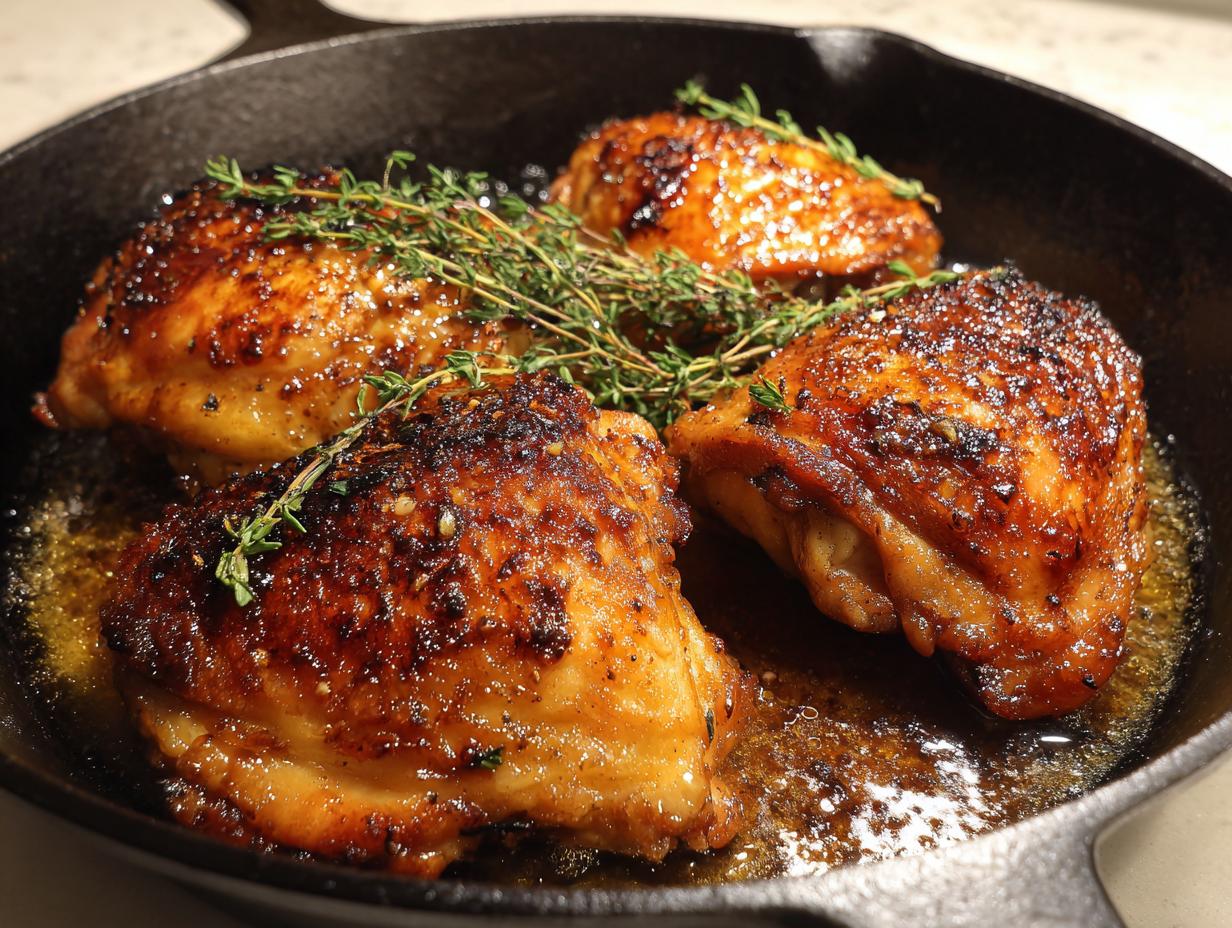
If you’ve ever wrestled with chicken—thrashing between rubbery breasts and skin that just won’t crisp up—then I want you to stop what you’re doing. I engineered this recipe specifically to solve that exact problem. My goal at Dishicious has always been optimization, turning kitchen chaos into a streamlined win. This method for **cast iron skillet chicken** thighs delivers that restaurant-quality golden, shatteringly crisp skin paired with meat so juicy it practically melts. By combining a quick stovetop sear with an oven finish, we get the best of both worlds without needing fancy techniques. This stove-to-oven chicken recipe is literally my blueprint for a perfect, low-effort weeknight dinner.
- Why This Cast Iron Skillet Chicken Recipe Works Every Time
- Essential Ingredients for Perfect Cast Iron Skillet Chicken
- How to Cook Chicken in Cast Iron Skillet: Step-by-Step Instructions
- Tips for Success with Your Cast Iron Skillet Chicken
- Making This an Easy Weeknight Chicken Skillet Meal
- Caring for Your Skillet After Cooking Cast Iron Skillet Chicken
- Variations on Garlic Butter Cast Iron Chicken
- Frequently Asked Questions About Cast Iron Chicken
- Nutritional Estimates for This Simple Cast Iron Meal
Why This Cast Iron Skillet Chicken Recipe Works Every Time
Look, I manage complex projects every day, and cooking should be no different. When you understand *why* a technique works, you build confidence. This particular approach to **crispy skin chicken thighs cast iron** isn’t magic; it’s just smart heat management. It’s about isolating the different cooking phases—the intense sear versus the gentle roast—and using the right tool for each job. If you ever struggle with bone-in cuts, check out my guide on getting unbelievably tender baked chicken breast recipes; the principles are similar!
- The initial dry-out and sear ensure that crackly crust you usually only get from deep frying.
- The move to the oven, which keeps the internal temperature steady, guarantees that juicy interior you’re really after.
Achieving Crispy Skin Chicken Thighs Cast Iron
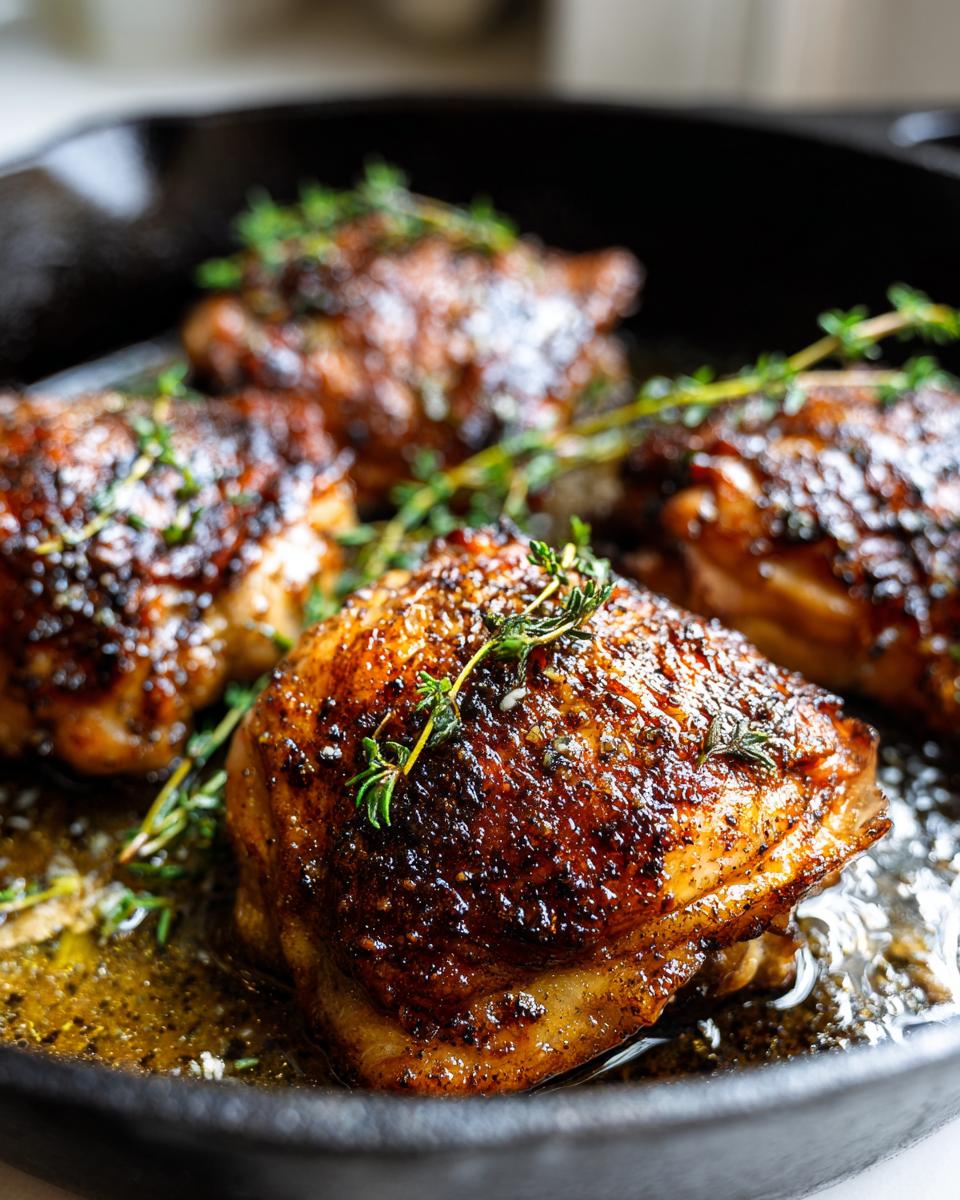
It all starts with dry skin. Seriously, pat your chicken thighs dry like you’re trying to absorb every drop of water from them. Any surface moisture turns into steam, and steam equals soggy skin. We need that initial burst of high heat on the stovetop, skin-side down, to render the fat and make the skin crisp. This method is the foundation of our reliable stove-to-oven chicken recipe.
The Power of the Cast Iron Skillet Chicken Searing Guide
Why cast iron? Because cheap pans lose heat the second you place cold chicken in them. My general searing guide emphasizes that cast iron has superb heat retention. It holds onto that high temperature, meaning when those thighs hit the skillet, they immediately start developing that deep, gorgeous crust instead of just slowly steaming in their own juices. It’s the most effective way to build flavor fast.
Essential Ingredients for Perfect Cast Iron Skillet Chicken
When we talk about building flavor, we need to start with the right raw materials. This isn’t the moment to start cutting corners, but thankfully, the ingredient list for this **best cast iron chicken recipe** is incredibly simple. We are working with four thighs, oil, salt, pepper, paprika, garlic powder, butter, and thyme. That’s it! Because we aren’t hiding the chicken under a ton of sauce, every single element matters. If you are looking for a way to incorporate these rich flavors into a whole meal, check out my recipe for garlic parmesan pasta; it pairs beautifully.
The success here relies on the fat content and the bone-in structure. Since we are relying on that initial stovetop searing, the skin-on texture is non-negotiable for that perfect crust. We need that fat barrier to protect the meat while the heat does its job rendering out the delicious flavor into the pan.
Ingredient Notes and Substitutions
I call for bone-in, skin-on chicken thighs specifically because they are super forgiving. They have more intramuscular fat, making it nearly impossible to dry them out, even if your oven runs a little hot. They are the ultimate choice for **perfectly cooked chicken thighs** in this method.
Now, about the fresh thyme; if you happen to be out, don’t panic! You can absolutely swap that out for about a half teaspoon of dried rosemary or even a pinch of dried sage. It will give the crust a slightly different profile, but it will still be fantastic. Just remember, when using dried herbs, you always need less than you think you do!
How to Cook Chicken in Cast Iron Skillet: Step-by-Step Instructions
Alright, this is where we execute the plan. We are following a clear, three-stage process here: Prep, Sear, and Roast. Don’t rush any of these stages! If you follow the timing I give you, you’ll have the absolute best results in under 40 minutes total. This is the ultimate guide for **how to cook chicken in cast iron skillet** and guarantee success every time you try one of my skillet chicken recipes for dinner. Remember, precision beats complexity, always.
Prep Work: Seasoning and Drying for Best Cast Iron Skillet Chicken
First things first: get your oven preheated to 400 degrees Fahrenheit. Now, grab those thighs. You need paper towels—lots of them. Pat the skin totally dry. I mean bone-dry. This is non-negotiable for that crispy skin. Next, mix up your dry seasoning blend: salt, pepper, paprika, and garlic powder. Rub that mix all over the chicken. Don’t be shy! Make sure you get some spice blend underneath the skin flaps if you can manage it.
Stovetop Searing and Basting for Perfectly Cooked Chicken Thighs
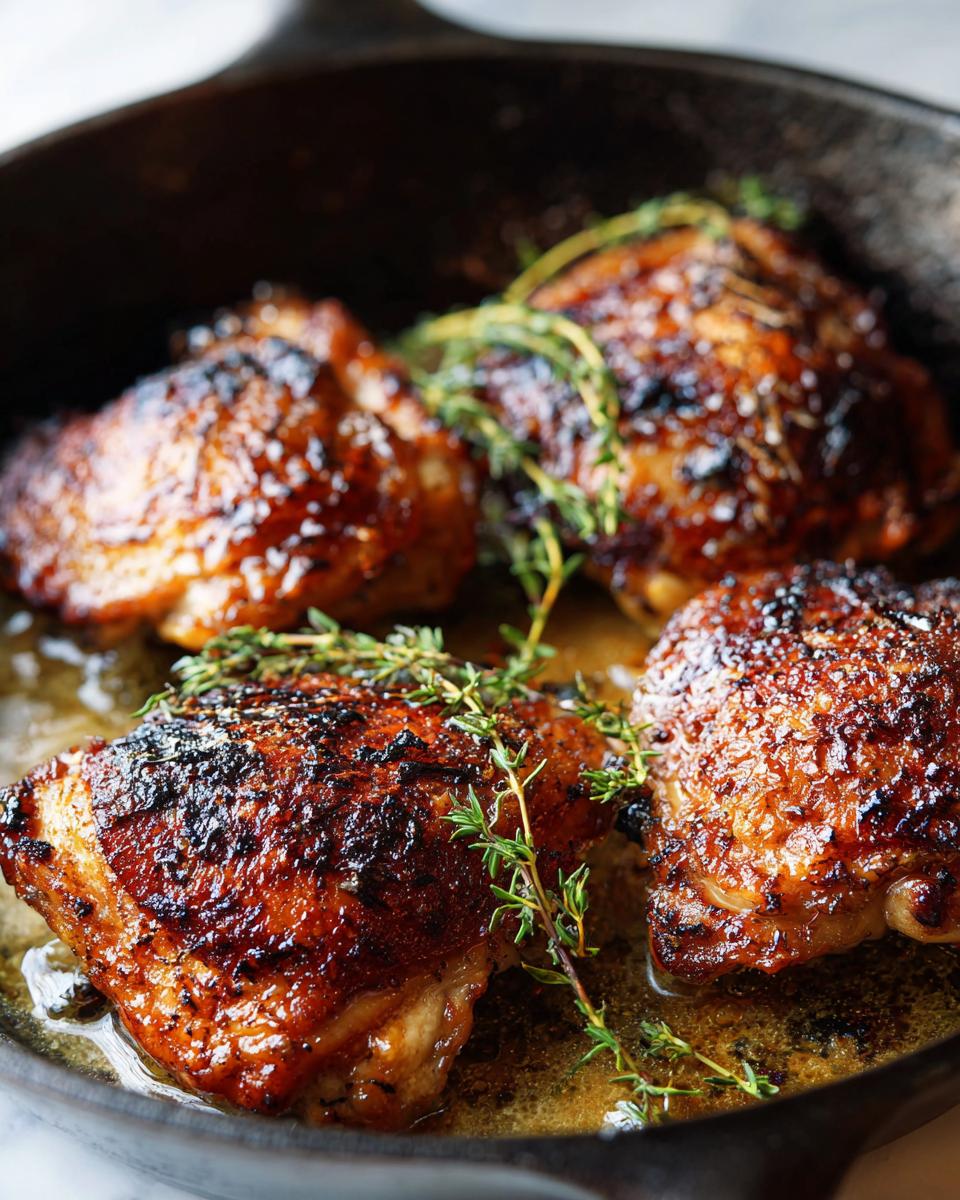
Time to bring the heat! Set your skillet on the stovetop over medium-high heat and add just a thin coat of olive oil. You’ll know it’s ready when that oil starts to shimmer slightly. Carefully place the thighs skin-side down. Don’t crowd the pan; give them space! Let them sear for a solid 6 to 8 minutes. You cannot touch them during this time—resist the urge! After that crust is established, drop the butter and thyme into the pan around the chicken. Tilt the skillet and spoon that lovely melting herb butter right over the top of the skin for about 60 seconds. That basting builds flavor fast. This specific method is detailed further in my general searing chicken in cast iron guide because the technique is so crucial.
Finishing the Cast Iron Chicken in the Oven
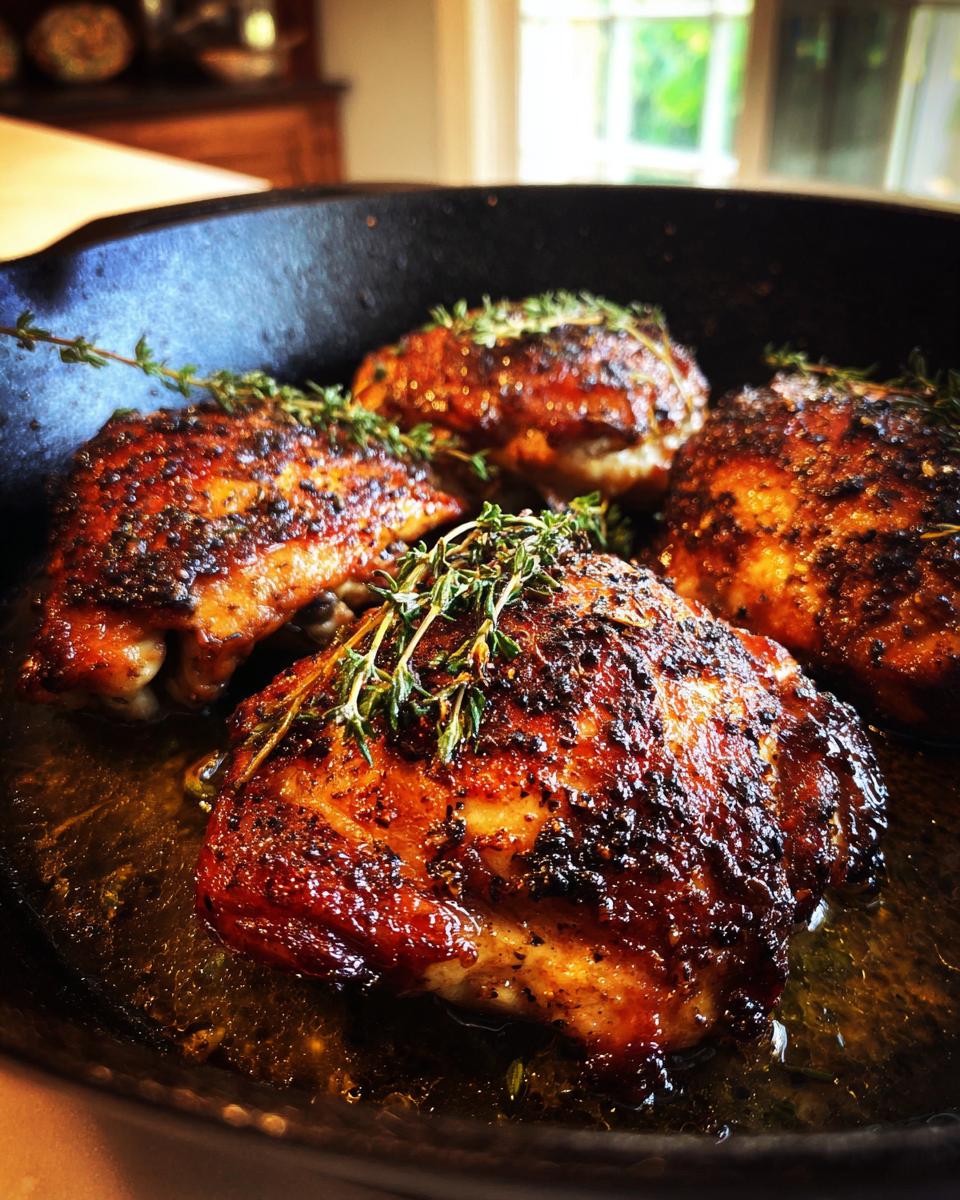
Okay, the sear is done. Carefully move the entire cast iron skillet straight into that hot 400-degree oven. Roast for about 15 to 20 minutes. This part is pure autopilot. The only thing you absolutely must confirm is the internal temperature, which should hit 165 degrees Fahrenheit right in the thickest part of the thigh. Once you pull the skillet out—be careful, it’s metal!—you must let the chicken rest in the pan for five minutes before you serve it. That resting time lets the juices redistribute. If you’re looking for a breakdown on temperatures, don’t miss the FAQ section!
Tips for Success with Your Cast Iron Skillet Chicken
We’ve nailed the basic steps, but high-level cooking—the stuff that separates a good dinner from a *great* dinner—comes down to handling your equipment right. Mastering your cast iron skillet, especially when dealing with something as temperamental as chicken skin, is all about respecting the metal. I’ve found that focusing on two areas—preheating and temperature confirmation—is the secret weapon for reliable results. If you love this style of cooking but need a lower-carb option next time, you might enjoy my keto chicken parmesan idea where we use the skillet for searing too.
If you follow these optimization tips, you’ll never have to worry about a partially melted, stuck-on piece of chicken again. Think of this as optimizing your cooking project for maximum return on effort.
Here are the small tweaks that make a huge difference when you’re aiming for that perfect sear every time:
- Preheat Is Everything: Seriously, I can’t shout this loud enough. That note about the skillet needing to be fully preheated before the oil goes in? That’s my golden rule for non-stick searing. If the pan isn’t hot enough, the oil won’t stop the chicken from bonding to the iron. Give the empty skillet 5 to 10 minutes over medium-high heat before you even think about adding the oil.
- Don’t Move It (Until It’s Ready): When you initially place the skin-side down, you have to trust the process the full six to eight minutes. If you try to peek or wiggle the chicken after two minutes, you’re tearing away the crust that is actively forming. The skin will naturally release from the pan when it’s properly seared and browned.
- Thermometers Are Your Friend: I love intuition, but when it comes to food safety and perfectly juicy meat, there is no substitute for a reliable instant-read thermometer. Cooking chicken consistently to 165°F internally prevents both dryness (overcooking) and unsafe undercooked spots. It’s the single best investment you can make in your kitchen efficiency.
- Temperature Control Check: After the bake, if you notice the thighs look done but the skin isn’t quite dark enough, you can switch your oven to the broiler for just 1 to 2 minutes. Watch it like a hawk, though! Cast iron gets incredibly hot, and broilers are fierce—you only want to color the skin, not incinerate it.
Making This an Easy Weeknight Chicken Skillet Meal
When I first started optimizing my weeknight cooking, the main goal was speed without sacrificing flavor. This recipe is the definition of an **easy weeknight chicken skillet meal**. Since we are using one primary piece of equipment—the cast iron skillet—cleanup is almost embarrassingly simple once you know the trick. But we can take the efficiency even further by making this a true one-pan skillet chicken dinner. Why dirty a second sheet pan when the skillet is going into the oven anyway?
The key here is timing the vegetables correctly so they finish cooking at the same time as the chicken thighs. If you throw them in too early, they’ll burn by the time the chicken hits 165°F. We want everything ready to go from the skillet to the table in under 40 minutes.
Serving Suggestions for Your Skillet Roasted Chicken
If you want to turn this into a complete, streamlined meal, the best strategy is to add hardy vegetables to the skillet during that final oven roast. Aim for things that don’t take much longer than 20 minutes to soften.
- Potatoes and Carrots: If you use small cubed potatoes or carrots, toss them in oil and seasoning, and add them to the pan *before* you start searing the chicken. They will roast nicely underneath the chicken while you sear the skin, and finish up in the oven.
- Broccoli or Asparagus: These cook faster, so wait until the chicken has been in the oven for about 10 minutes. Then, quickly pull the skillet out, toss the veggies around the chicken thighs, and slide it back in for the remaining time. A simple garlic herb roasted veggies mix works perfectly here.
- Simple Grains: If cooked grains aren’t adding extra dishes to your cleanup pile (think pre-cooked rice or quinoa), serving the plated chicken over a scoop of those is a great way to absorb all those lovely butter and thyme drippings left in the bottom of the pan. It keeps the focus entirely on the skillet effort.
Caring for Your Skillet After Cooking Cast Iron Skillet Chicken
This is one of those steps people often skip, but if you want your cast iron to perform flawlessly next time—especially when searing delicate chicken skin—you have to treat it right. Good cast iron etiquette is simple; it’s just about managing residue and protecting that seasoning layer. If you neglect this part, you’ll end up with sticky spots that absolutely ruin your next attempt at **cast iron chicken breast searing**.
I know cleaning cast iron can seem intimidating, but honestly, it’s faster than scrubbing a sticky stainless steel pan if you do it right away. My rule is: clean it while it’s still warm—not scorching hot, but warm enough that the grease hasn’t solidified into concrete.
The Quick Clean-Up Process I Use
Forget the soap if you can! The instructions in the recipe notes are my go-to method for **cast iron skillet maintenance after cooking**. First, while the skillet is just warm to the touch, I use a paper towel to wipe out the bulk of that rendered chicken fat and butter. Don’t pour that grease down the sink—save it for cooking potatoes later!
If there are any stubborn bits stuck from the sear, I run the skillet under hot water and use a stiff nylon brush or a dedicated scraper. I avoid steel wool because that is just too aggressive for everyday cleaning. It heats up fast, so once it’s scrubbed clean, I immediately dry it off completely. I never let it air dry; water equals rust, and rust is the enemy of happy cooking.
Immediate Drying and Oiling for Seasoning Protection
Here’s the crucial step that guarantees you have a ready-to-go pan next week: immediate drying. I place the clean, rinsed skillet back on the stove burner and turn the heat on low for about two minutes. You’re essentially baking off any residual moisture. You’ll see the color change slightly as it dries completely.
Once it’s dry and still warm, I take a small dab of neutral cooking oil—maybe a teaspoon—and wipe it all over the interior surface using a clean paper towel or a designated oil rag. You rub it in, then use another fresh towel to wipe off the excess until the pan looks dry, not greasy. That thin protective layer of oil keeps your seasoning locked in and ready for the next **skillet roasted chicken** adventure. Trust me, this simple routine is the secret to making your cast iron last forever.
Variations on Garlic Butter Cast Iron Chicken
The beauty of mastering one solid technique—like searing bone-in thighs and finishing them in the oven—is that you can endlessly remix the flavor profile without re-engineering the entire project. My **garlic butter cast iron chicken** foundation is rock-solid, but sometimes you just need a little variety in your weeknight rotation. Because we’ve already perfected the temperature control and the sear, these flavor swaps are incredibly easy additions. If you want to try a totally different, but equally amazing, creamy skillet meal, you absolutely must check out my recipe for marry me chicken.
Here are three quick adjustments you can make to this recipe next time you pull out that skillet. They all keep that perfect 165°F internal temperature target, so you know they’ll work perfectly.
Citrus Brightness: Lemon & Rosemary Thighs
This variation totally lifts the richness of the dark meat, making it feel brighter and perfect for spring or summer cooking. It’s a simple swap, but the results are dramatic.
- The Swap: Skip the fresh thyme entirely.
- The Addition: When you add the butter for basting (Step 6 on the stovetop), toss in two thin slices of fresh lemon and two sprigs of fresh rosemary instead.
- The Finish: Right after you pull the skillet out of the oven, squeeze the juice of half a fresh lemon over the resting chicken. The acidity cuts through the richness of the skin fat beautifully. The rosemary infuses the butter with a piney note that pairs surprisingly well with savory paprika.
A Spicy Kick: Smoked Paprika and Cayenne
If you like a little heat with your crispy skin, this is the easiest adjustment you can make without changing any cooking steps at all. This variation focuses purely on adjusting the dry spice rub.
- The Swap: When mixing your seasoning blend, keep the salt, pepper, and garlic powder the same.
- The Addition: Replace the standard paprika with *smoked* paprika (this adds depth!) and add about 1/4 teaspoon of cayenne pepper. You can always increase this to 1/2 teaspoon if you’re brave!
- The Result: You get a smokier, slightly spicy crust that works incredibly well, especially if you’re serving the **cast iron skillet chicken** with something cool like coleslaw or yogurt sauce.
Herb Swap: Savory Sage and Garlic Oil Sear
Sometimes you want an earthier, less overtly herbaceous flavor than thyme provides. Sage is fantastic with chicken, especially when combined with the garlic powder already in the rub.
- The Swap: Instead of using butter and thyme for basting, use three tablespoons of good quality olive oil mixed with 1 teaspoon of dried rubbed sage.
- The Sear Base: For the initial stovetop sear, use just this sage-infused oil instead of plain olive oil. This allows those sage notes to hit the hot iron and bloom right at the beginning of the cooking process.
- Tip: If you happen to have fresh sage, use two whole leaves in the oil instead of dried herbs for an even more intense flavor. This keeps the entire **skillet roasted chicken** process streamlined and delicious.
Frequently Asked Questions About Cast Iron Chicken
I get tons of questions constantly about how to adapt recipes or what pitfalls to avoid. Dealing with cast iron and chicken moisture is probably the number one thing people ask me about. We’ve designed this recipe to be incredibly reliable, but I know you’ll probably want to tweak it for your next meal. Since precision is my jam, let’s nail down some of the most common variations you might try with this basic template for **skillet chicken recipes for dinner**.
If you are looking for another reliably juicy chicken option that uses the oven, don’t miss my directions for baked ranch chicken; it’s a totally different flavor profile but uses the same focus on internal temperature!
What is the safest cast iron chicken cooking temperature?
Safety first, always. For poultry, the United States Department of Agriculture (USDA) mandates that chicken must reach a minimum internal temperature of 165 degrees Fahrenheit. This is the number one rule in my kitchen for any **cast iron chicken cooking temperature** question. You absolutely need an instant-read thermometer for this part. Don’t guess by color or by cutting into it! Stick the thermometer into the thickest part of the meat, making sure you aren’t touching the bone, because the bone will read hotter and lie to you. Hit 165°F, pull it out, let it rest for five minutes, and you’ve got perfectly safe, perfectly juicy chicken every single time.
Can I use boneless chicken breast for this cast iron chicken recipe?
You can, but you need to adjust your engineering plan! Boneless, skinless chicken breasts are much thinner and cook significantly faster than bone-in thighs. They also don’t have that protective fat layer, so they dry out way quicker. If you try to use breasts with this exact recipe, here’s what I recommend for our **stove to oven chicken recipe** structure:
- Sear Time: Reduce the stovetop sear time to about 4 minutes per side max, just enough to get color and render surface fat (if using skin-on breasts).
- Oven Time: Instead of 15–20 minutes, check them after 10 minutes. Breasts often only need 12 to 15 minutes total in the oven, depending on thickness.
- The Goal: Pull the breasts out the moment they hit 165°F. Don’t leave them in longer, or you’ll lose that juiciness that makes this **cast iron chicken breast searing** method so appealing. I find that breasts are best served immediately after resting, rather than thighs, which benefit from a longer rest.
Nutritional Estimates for This Simple Cast Iron Meal
As a home cook focused on optimization, I know that tracking nutrition is part of streamlining your eating plan. Remember, these numbers are based on the recipe breakdown for four servings using bone-in, skin-on thighs, and they are estimates only. The final count can change based on the exact size of your chicken and how much residual butter you use for basting. If you’re planning out your week and looking for other quick, reliable options, check out my collection of healthy lunch ideas that keep cleanup minimal.
Here is the projected nutritional breakdown per single chicken thigh serving:
- Calories: 380
- Protein: 30g
- Fat: 28g
- Saturated Fat: 9g
- Carbohydrates: 1g
- Fiber: 0.2g
- Sugar: 0.5g
- Sodium: 450mg
- Cholesterol: 105mg
This recipe leans heavily into protein and healthy fats, which makes it a fantastic, satisfying **healthy cast iron chicken idea** that keeps you full throughout the evening without loading up on unnecessary carbs. It’s simple, clean eating done right in the cast iron skillet!
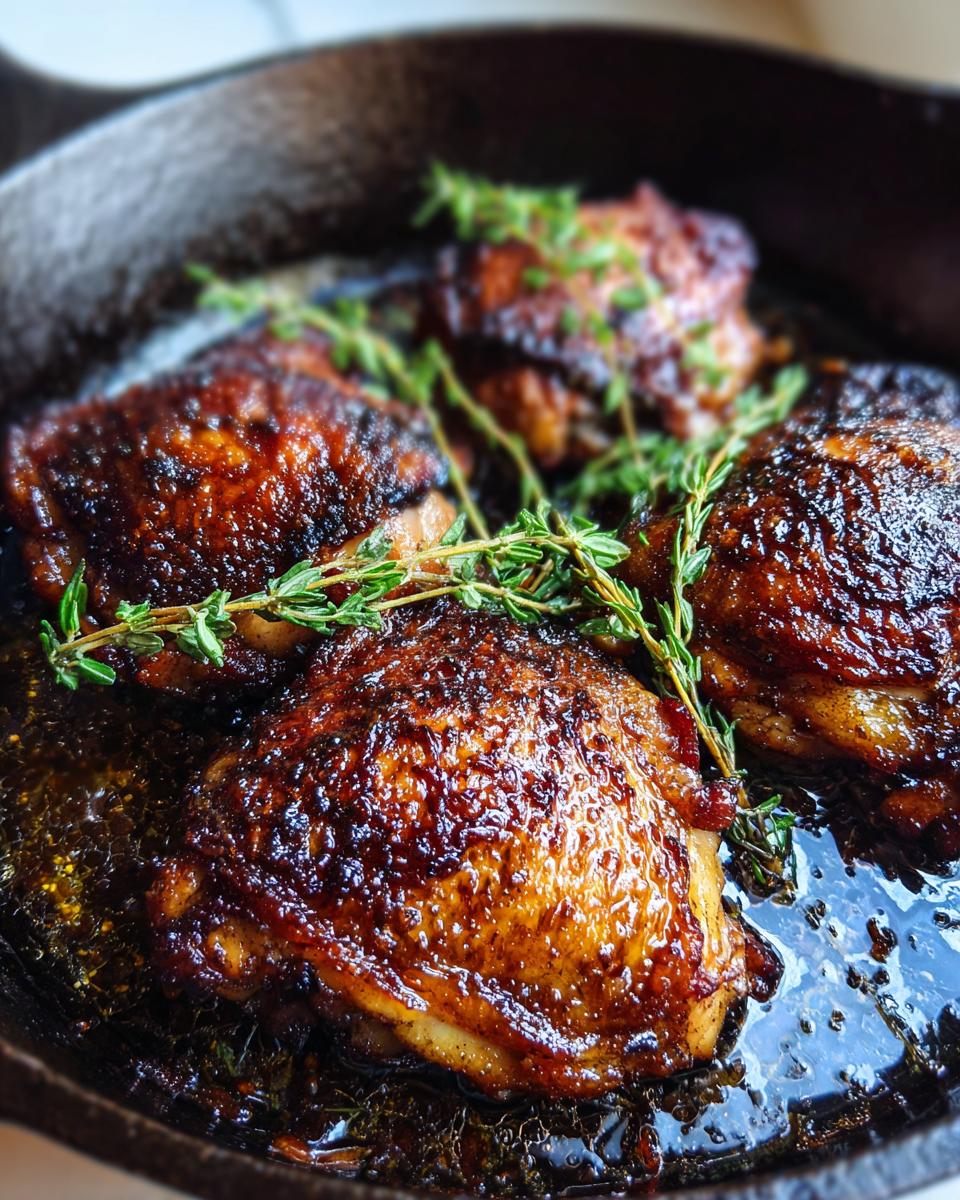
PrintPerfectly Seared Cast Iron Skillet Chicken Thighs

Learn how to cook chicken thighs in a cast iron skillet to achieve crispy skin and juicy meat using a simple stove-to-oven method. This is an easy weeknight chicken skillet meal.
- Prep Time: 10 min
- Cook Time: 30 min
- Total Time: 40 min
- Yield: 4 servings 1x
- Category: Dinner
- Method: Stove to Oven
- Cuisine: American
- Diet: Low Fat
Ingredients
- 4 bone-in, skin-on chicken thighs
- 1 tablespoon olive oil
- 1 teaspoon kosher salt
- 1/2 teaspoon black pepper
- 1 teaspoon paprika
- 1/2 teaspoon garlic powder
- 2 tablespoons unsalted butter
- 2 sprigs fresh thyme
Instructions
- Preheat your oven to 400 degrees Fahrenheit.
- Pat the chicken thighs completely dry using paper towels. This step is key for crispy skin.
- In a small bowl, mix together the salt, pepper, paprika, and garlic powder. Rub this seasoning mix evenly over the chicken thighs, focusing on getting some under the skin if possible.
- Place your cast iron skillet over medium-high heat on the stovetop. Add the olive oil. Wait until the oil shimmers slightly.
- Carefully place the chicken thighs skin-side down in the hot skillet. Do not overcrowd the pan. Sear for 6 to 8 minutes without moving them until the skin is deep golden brown and crispy.
- Reduce the heat to medium-low. Add the butter and thyme sprigs to the skillet around the chicken. Tilt the pan and use a spoon to baste the melting butter over the chicken skin for about 1 minute.
- Transfer the entire cast iron skillet to the preheated oven.
- Roast for 15 to 20 minutes, or until the internal temperature of the chicken reaches 165 degrees Fahrenheit when checked with a meat thermometer in the thickest part of the thigh.
- Remove the skillet from the oven. Let the chicken rest in the skillet for 5 minutes before serving.
Notes
- For best results when searing, ensure your cast iron skillet is fully preheated before adding the oil and chicken.
- To clean your cast iron skillet after cooking, wipe out excess grease while warm. Scrub with hot water and a stiff brush. Dry immediately on the stovetop over low heat and apply a thin layer of cooking oil for maintenance.
- This stove to oven chicken recipe works well with bone-in breasts, but adjust the oven time based on thickness.
Nutrition
- Serving Size: 1 thigh
- Calories: 380
- Sugar: 0.5
- Sodium: 450
- Fat: 28
- Saturated Fat: 9
- Unsaturated Fat: 19
- Trans Fat: 0.1
- Carbohydrates: 1
- Fiber: 0.2
- Protein: 30
- Cholesterol: 105