

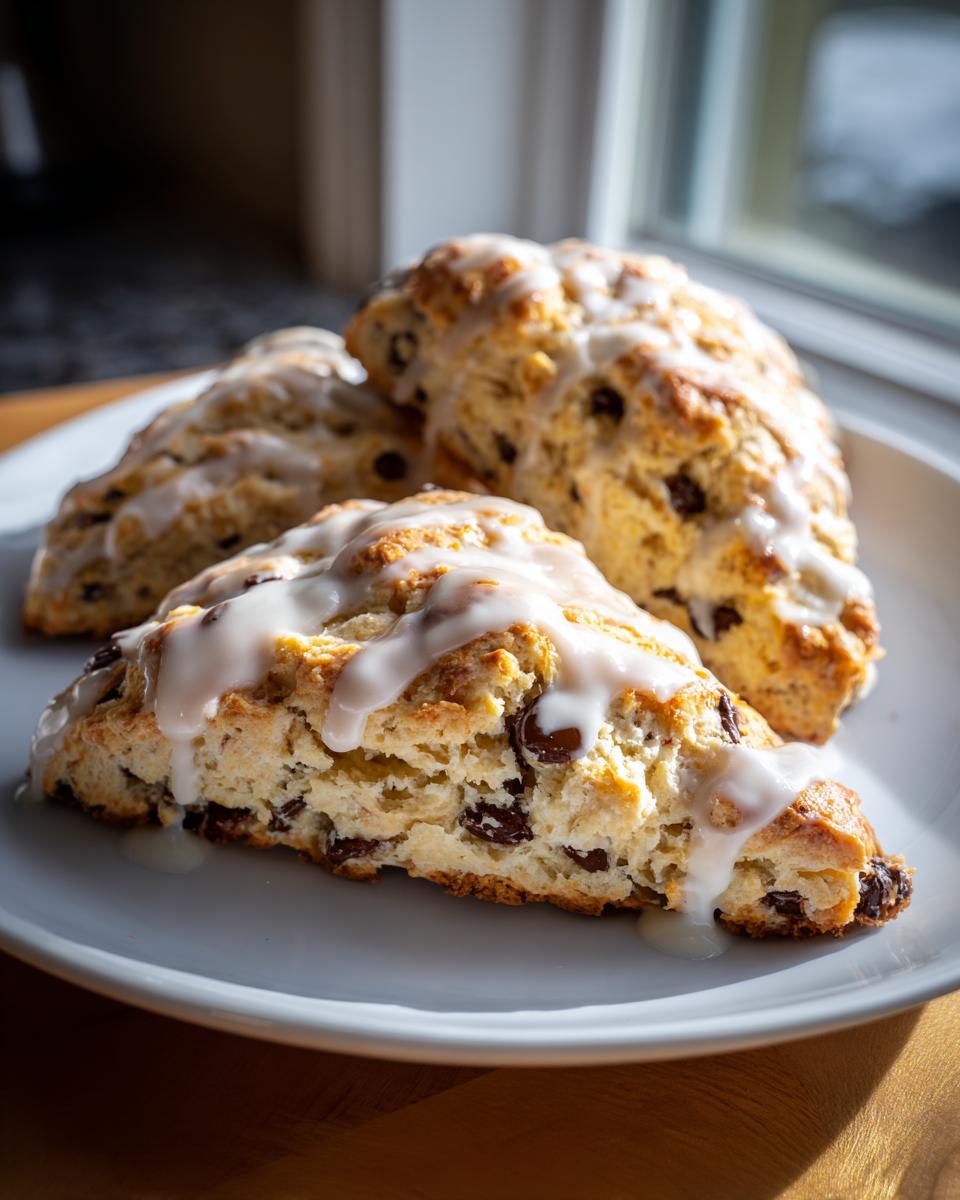
You know that moment? You’re staring out the window, maybe grabbing that second cup of coffee, and suddenly you have this intense craving for something flaky, buttery, and loaded with warm chocolate—the kind of perfect **chocolate chip scones** you usually only find behind glass at that expensive coffee shop.
I’ve been there. When I started Dishicious, my goal was eliminating that gap between wanting great food and having the time to make it. This recipe for bakery-style scones is the result of treating baking like a smart project. We’ve streamlined every single step, cutting out the fuss but keeping 100% of the incredible flavor and that coveted tender texture. Trust me, getting flaky chocolate chip scones with that sweet vanilla glaze finisher done in under 40 minutes is completely achievable when you work smarter, not harder.
- Why These Are the Best Chocolate Chip Scones Recipe You Will Make
- Equipment Needed for Bakery Style Scones at Home
- Ingredients for Perfect Chocolate Chip Scones
- Step-by-Step Instructions for Tender Buttery Scones
- Tips for How to Make Perfect Scones Every Time
- Make Ahead Scones and Storage Instructions
- Serving Suggestions for These Sweet Breakfast Treats
- Frequently Asked Questions About Chocolate Chip Scones
- Share Your Homemade Chocolate Chip Scones Experience
Why These Are the Best Chocolate Chip Scones Recipe You Will Make
When I engineer a recipe, I focus on the payoff. Why waste time on complicated steps if the result is mediocre? These **chocolate chip scones** deliver maximum bakery quality without the wait. If you are looking for an **easy homemade scones** recipe that genuinely works on the first try, this is it.
We aren’t just making scones here; we are creating perfectly structured pastries. When you follow this process, you get:
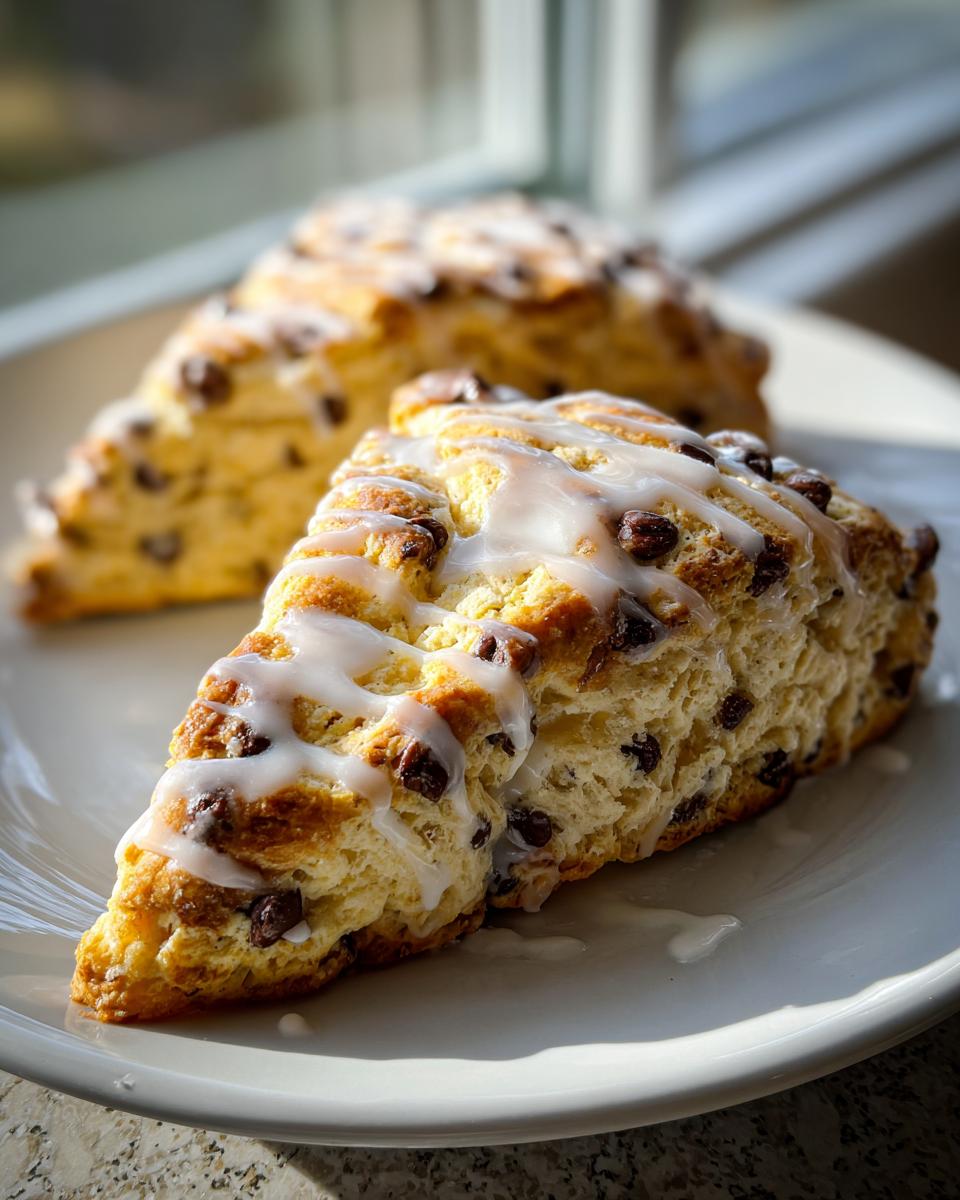
- Incredibly **tender buttery scones** that practically melt in your mouth.
- That desired tall, **flaky chocolate chip scones** texture you usually only see in coffee shops.
- A ridiculously fast turnaround time, making them perfect for a spontaneous weekend brunch or a quick morning indulgence.
Achieving Flaky Chocolate Chip Scones Texture
The secret to any truly great scone—the flakiness—boils down to cold, cold ingredients. I can’t stress this enough. Think of it like this: we’re creating tiny pockets of ice (the butter) inside the dough structure. When these hit that hot 400-degree oven, the water in the butter steams instantly, forcing the layers apart. That steamy burst creates those beautiful, airy flakes.
When you’re cutting in that butter, you must keep your hands moving fast, or use a pastry blender. If the butter melts even a little, you start mixing it into the flour instead of keeping it separate. That just turns your pastry tough, not flaky.
Quick Scone Recipe Timeline
Look, time is money, right? This entire process, from pulling ingredients out to sliding them onto the cooling rack, is mapped out for peak efficiency. We are talking about a total time commitment of about 33 minutes! That makes this lean and mean: an **easy scone recipe under 1 hour**, easily.
Since this is such a **quick scone recipe**, it’s perfect when you need a sweet breakfast fix without committing an entire morning to baking. It’s the ultimate setup for nailing those **copycat coffee shop scones** before heading out the door.
Equipment Needed for Bakery Style Scones at Home
When I approach baking, I start by listing only the necessary operational tools. No fancy gadgets or attachments needed here. We are keeping this project lean, efficient, and straightforward. Honestly, a good set of hands works just as well as any specialized tool, but having a few basics handy speeds things up considerably.
For these **chocolate chip scones**, here’s my essential equipment list. If you have these things on hand, you are good to go:
- A large mixing bowl for bringing the structure together.
- A baking sheet and parchment paper—you absolutely need that parchment barrier to manage cleanup and ensure easy release.
- A pastry blender or, if you prefer to work manually, just your clean fingertips. This is crucial for integrating the butter correctly.
- A sharp knife or bench scraper for cleanly slicing the dough into wedges.
- A wire cooling rack. You need air circulation under those scones so the bottoms don’t get soggy while that glaze sets up later.
See? Simple. We focus on the methodology, not the machinery. You don’t need a stand mixer for this **easy homemade scones** recipe; just efficient movement and cold ingredients!
Ingredients for Perfect Chocolate Chip Scones
Okay, now we get strategic with our component list. Like any good project plan, we break the ingredients down by function. This eliminates that frantic searching halfway through mixing. For these **chocolate chip scones**, the main architecture relies on everything being COLD. I mean refrigerator-cold for the butter and the heavy cream. This is non-negotiable if we want those signature flaky layers we talked about.
We’ve got two distinct parts here: the dough itself and the sweet topping that really finishes the job. Here’s what you need lined up on your counter before you turn the oven on.
For the Tender Buttery Scones
This is the heart of the bake—where great structure comes from. Remember that butter has to be cut up small, like little dice, and kept chilled right until the moment it hits the flour mixture. Don’t let it sit out while you measure everything else!
- 2 1/4 cups all-purpose flour (the workhorse!)
- 1/2 cup granulated sugar (just enough sweetness built into the structure)
- 1 tablespoon baking powder (we need that lift!)
- 1/2 teaspoon salt (flavor balance, always)
- 1/2 cup (1 stick) unsalted butter, cold and cubed into small pieces (Seriously, keep this on ice!)
- 1 cup semi-sweet chocolate chips (You can use chunks, but chips distribute better sometimes.)
- 3/4 cup cold heavy cream (This is critical for moisture and texture—don’t water it down!)
For the Vanilla Glaze Finish
This glaze is totally optional, but honestly, why skip the fun part? It pushes these **tender buttery scones** right into that dreamy, bakery-style territory. It adds a smooth, sweet contrast to the slightly crisp edges we create in the oven.
- 1 cup powdered sugar (sifted if yours is clumpy)
- 2 tablespoons milk or cream (for drizzling consistency)
- 1/2 teaspoon vanilla extract (Use the good stuff here; it really shines in a simple glaze.)
Also, make sure you have an egg and a tablespoon of milk set aside on the side for the egg wash. That little coating is what gives these **easy homemade scones** that beautiful golden-brown top layer.
Step-by-Step Instructions for Tender Buttery Scones
Alright, let’s put this little project into action. Since we are aiming for **bakery style scones at home**, we need to move efficiently, but never rush the mixing. Rushing equals gluten development, and gluten equals tough scones, which is the opposite of what we want.
Here is the optimized workflow to get these incredible **chocolate chip scones** baked in under 20 minutes. Remember, efficiency is key when you’re looking for a quick scone recipe that feels gourmet!
- First things first: Get that oven preheated to 400°F (200°C). Line a baking sheet with parchment paper now so it’s ready to hold your wedges.
- In your big bowl, you’ll whisk together all the dry stuff: the flour, the sugar, the baking powder, and the salt. Just get these married up nicely.
- Next, drop in that super cold, cubed butter. This is where we ‘cut in’ the butter. Use your pastry blender—or your ice-cold fingertips if you’re feeling brave!—and work quickly until the mix looks like coarse sand with some larger, pea-sized pieces of butter still visible. Those little bits are your secret weapon for flakiness!
- Toss in the chocolate chips and mix them in so they are evenly spread around the coarse crumbs.
- Now, pour in the cold heavy cream. Use a fork and mix just until the dough starts clinging together. It should look shaggy and messy, not smooth. If you mix until it’s perfectly smooth, you’ve gone too far!
Mixing the Dough and Shaping the Chocolate Chip Scones
Take that shaggy mess and gently turn it out onto a lightly floured counter. We are going to handle this dough as little as possible. Just 3 or 4 gentle kneads—literally just folding it over itself—is enough to bring it into a single unit. Pat that dough into a uniform circle, about 3/4 of an inch thick. Remember what I said about busy mornings? Don’t overwork it!
Use a sharp knife to slice that circle into 8 equal wedges, like you’re cutting a pizza. Separate those wedges slightly on your prepared baking sheet. Now, grab your egg wash (one egg whisked with 1 tablespoon of milk) and brush the tops lightly. This gives it that professional sheen. These are now ready for the oven!
Baking and Applying the Vanilla Glaze
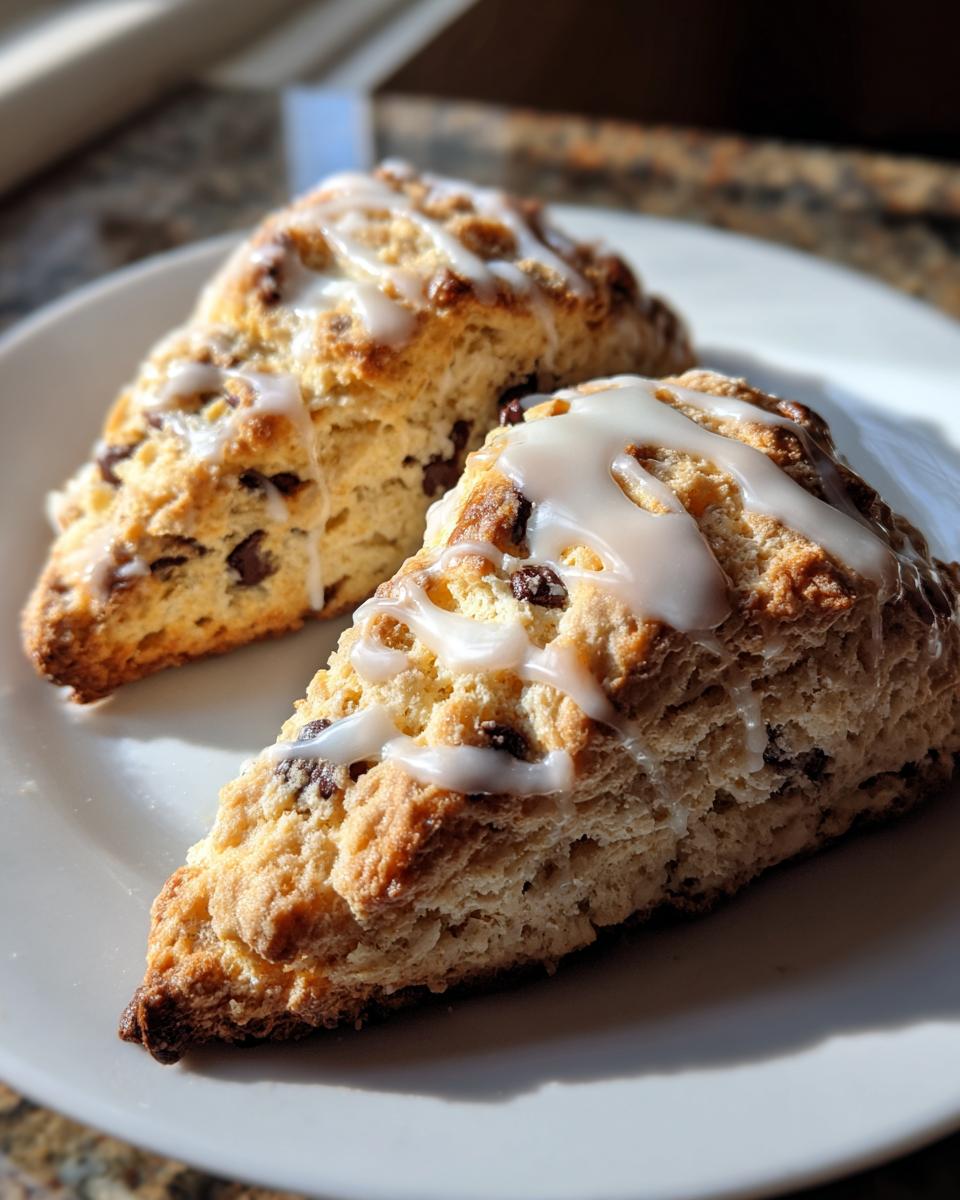
Bake these beauties for 15 to 18 minutes, watching until they are nicely golden brown on top. Once they come out, let them sit on that hot pan for about 5 minutes—this finishes the baking process gently—then move them to a wire rack to cool down completely. Don’t even think about glazing them warm, or you’ll get melted chocolate puddles instead of a sharp, crisp glaze drizzle!
While they cool, whisk your glaze ingredients (powdered sugar, milk, vanilla) until smooth. Once the scones are totally cool, drizzle that sweet vanilla finish right over the tops. Instant gratification!
Tips for How to Make Perfect Scones Every Time
Now that you’ve seen the core workflow, let me give you the inside track—the optimization details that take these **chocolate chip scones** from ‘good’ to ‘must-make-again.’ As someone who approaches cooking like a project manager, I know that anticipating failure points is the fastest way to guarantee success. These little pointers are what ensure you get those **tender buttery scones** every time, not flat, dense hockey pucks.
The goal for these **sweet breakfast treats** is maximum lift and maximum tenderness. We are trying to mimic that beautiful lamination you see in professional pastries, and that all comes down to physics and temperature control.
Troubleshooting Common Issues with Chocolate Chip Scones
Most problems with scones come down to one thing: heat. We’re working against melted butter, so beware of anything that warms up your dough!
- If your scones are tough or chewy: You overmixed. That’s it. Once that heavy cream hits the flour, your job is to combine, not blend. If you mix past the shaggy stage, you’re developing gluten, which results in a bread-like texture rather than a light, flaky one. Next time, stop stirring the second you see no more dry flour streaks.
- If your scones look flat or dense: Your ingredients weren’t cold enough. The butter melted into the flour, and when it hit the heat, there was no steam explosion to puff up those layers. Make sure your cream is straight from the coldest part of the fridge. Seriously, I keep my butter in the freezer for 10 minutes right before I cube it!
- Want them taller? Try the ‘Lamination Trick’: If you want them even taller and more dramatic, like some professional bakery versions, try this: After patting your dough into the circle, make one fold—fold a third over the middle, then fold the other third over that, like folding a letter. Immediately flatten and proceed to slice into wedges. This quick fold builds extra layers. For more on managing ingredients efficiently, check out these tips for homemade bread bowls; the core principle of fast handling applies everywhere.
If you’re thinking about making mini chocolate chip scones, just pat the dough thinner (maybe 1/2 inch) and use a biscuit cutter instead of slicing wedges. They bake faster, so watch them closely—maybe pull them a minute or two early!
Make Ahead Scones and Storage Instructions
This is where this **quick scone recipe** really shines for busy people like us. Baking is fun, but sometimes you need the results faster than the 33-minute prep/bake time allows. The good news? Scones are fantastic for making ahead of time, which is perfect for serving up easy brunch!
You have two main options for prepping ahead. Both options rely on keeping that structure locked in so your scones stay flaky when it’s time to bake.
Option 1: Freeze Before Baking
If you want to save time on a Sunday morning, this is the way to go. After you cut your dough into wedges (Step 6 in the instructions) and place them on the parchment-lined sheet, put the entire tray right into the freezer for about an hour, or until they are rock solid. Once they are completely frozen, transfer those frozen wedges into a heavy-duty zip-top bag or an airtight container.
When you’re ready to bake, pull them out of the freezer, place them on a new parchment-lined sheet, and brush with the egg wash. You might need to add 3 to 5 extra minutes to the baking time since they are starting frosty cold. They bake perfectly right from frozen, giving you fresh **bakery style scones at home** with zero morning effort!
Option 2: Storing Baked Chocolate Chip Scones
Let’s say you made a double batch, or you just couldn’t help yourself and ate one immediately (I know the feeling!). Storing baked **chocolate chip scones** requires one major consideration: they need to be completely cooled before they touch any container, especially if they have that lovely vanilla glaze on top. If you seal them warm, all that trapped steam turns into condensation, and say goodbye to flaky texture.
Once they are stone cold, put them in an airtight container. They will happily hang out on the counter for about 2 days. If you need longer, the fridge works, but they might dry out a bit faster.
Reheating for That Fresh-From-the-Oven Experience
If your scones have been sitting around for a day or two, they deserve a quick refresh. You want that butter inside to soften back up and bring back the tenderness. Forget the microwave; microwaves are the enemy of flaky pastry!
Instead, wrap your scone loosely in foil and warm it in a 300°F oven for about 5 to 8 minutes until it’s just warmed through. If you’re reheating the unbaked frozen ones, that’s covered in Option 1. For storing those make-ahead egg muffins, I usually recommend a similar warming process in foil to keep them tender—you can check out my notes on make ahead egg muffins for more on meal prepping efficiency!
Serving Suggestions for These Sweet Breakfast Treats
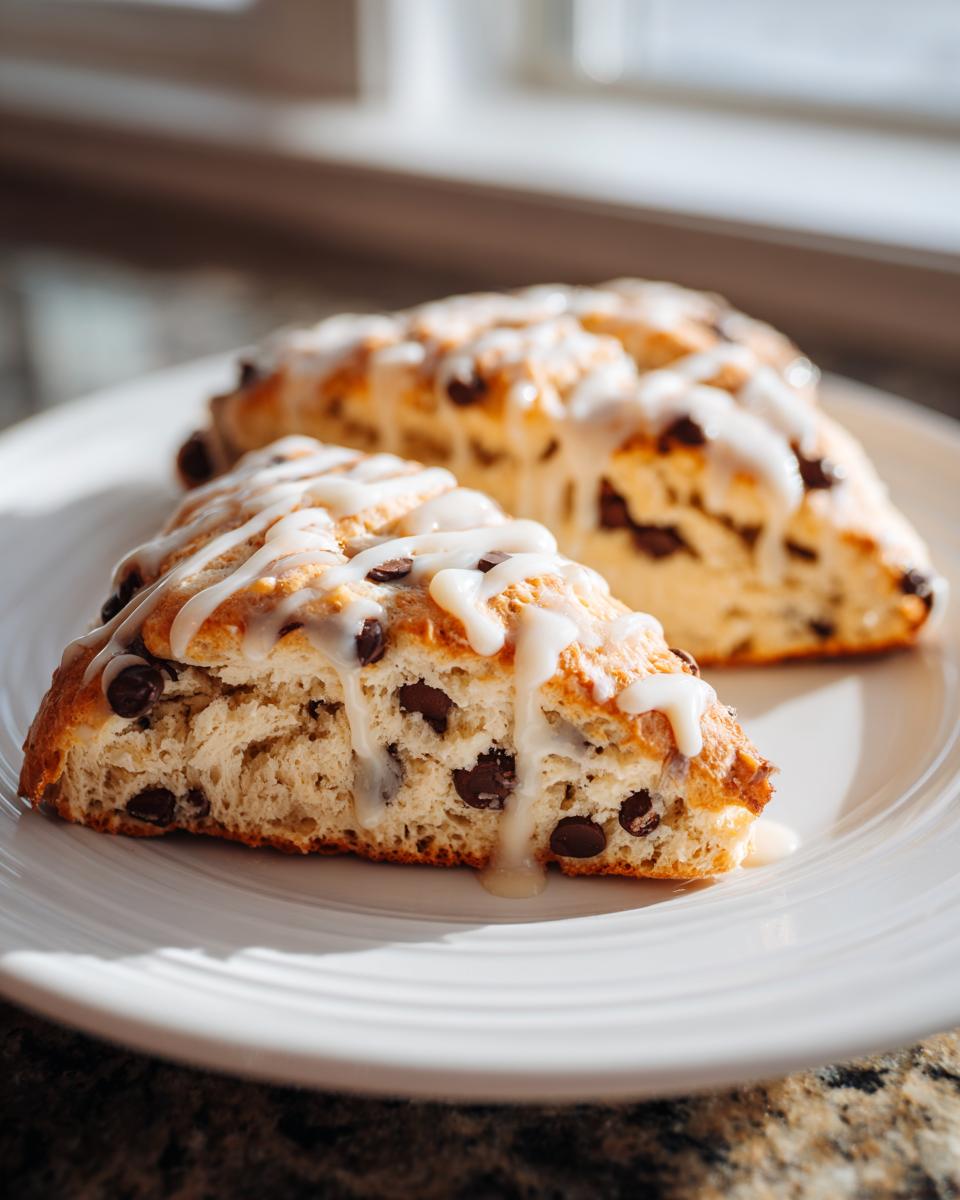
So, you’ve got these perfect, **flaky chocolate chip scones** cooling on the rack, dripping with vanilla glaze. Fantastic! But what’s the next step in enjoying this triumph of efficient baking? It’s all about the pairing, right?
These aren’t just a random baked good; they are substantial enough to anchor a proper morning spread or be the star of an afternoon break. We’re talking about elevating this from a quick grab to a proper moment. These scream **brunch scones recipe** material, even if you’re just having them solo!
Here are my favorite ways to enjoy these **tender buttery scones**—ways that maximize the morning’s potential:
- The Coffee Companion: Honestly, this is the default setting for me back here in Chicago. The richness of the chocolate and the slight sweetness of the glaze are just engineered to pair perfectly with a strong, slightly bitter cup of coffee. Think less sugary latte, more quality dark roast if you want the scone flavor to genuinely shine. As many find, these are the ultimate scones paired with coffee.
- The Traditional Touch: If you want to lean into that slightly British feel, you can’t go wrong with good quality butter, served aside. If you’re feeling extra fancy, a smear of raspberry jam cuts through the chocolate nicely, or serve a small bowl of clotted cream—though I prefer to keep things simple with these rich **chocolate chip scones**!
- Elevating Brunch: For a proper brunch setup, serve these alongside fresh, brightly acidic fruit. Think sliced oranges, grapefruit, or even a simple bowl of mixed berries. The lightness of the fruit balances out the buttery richness of the pastry perfectly.
Since these are already packed with chocolate and topped with that sweet glaze, they stand up powerfully on their own. They are the main event, not just a side dish!
Frequently Asked Questions About Chocolate Chip Scones
When you’re aiming for that perfect, reliable result, it’s natural to have a few quick operational questions pop up. I’ve boiled down the most common things I hear about this recipe, focusing on how we maintain that incredible texture while keeping the process easy. If you’re new to this, remember, these are great scone recipes for beginners because they are engineered to be foolproof!
Can I substitute the heavy cream in this chocolate chip scones recipe?
That’s the million-dollar question! The heavy cream is used because its high fat content ensures those **tender buttery scones** stay rich and don’t dry out. If you absolutely have to swap it for something more accessible, I’d suggest using buttermilk. If you use buttermilk, your scones might be slightly tangier and potentially a tiny bit denser, but still delicious. You could also use half-and-half, but again, the high fat in the cream is what really contributes to that premium, **copycat coffee shop scones** texture. Try to keep it as rich as possible!
What is the secret to making moist chocolate chip scones?
There isn’t just one secret, it’s a system! But the most important rule is keeping everything cold—the butter and the cream. Cold ingredients ensure that when the dough hits the heat, those layers puff up instead of melting together. The second most critical part is mixing minimally. We want to combine just enough so there are no flour clouds remaining, but we stop before we start developing structure (gluten). Rough mixing equals flaky moistness; mixing too long equals tough dryness. It’s all about efficiency in handling the dough! For more insight on getting that perfect texture, you can always check out fantastic resources like Sally’s Baking Addiction.
How long can I store these easy homemade scones?
If you manage to not eat them all on the day you bake them (which is tough, I know!), they store really well. Once they are completely cool—and I mean room temperature cool, especially if you glazed them—place them in a single layer in an airtight container. They generally stay fantastic for a good two days on the counter. If you need to keep them longer, they freeze beautifully, baked or unbaked. Just remember to reheat the baked ones gently in the oven to bring that flakiness back!
Can I use chocolate chunks instead of chips?
Oh, absolutely! Using chocolate chunks is a fantastic idea, especially if you love those pockets of intensely melted chocolate. Sometimes, standard chips are designed to hold their shape better. Chunks will give you bigger pools of gooey chocolate, which is amazing. If you decide to use chunks, just make sure they are relatively the same size as your chocolate chips were intended to be. I often find myself chopping up a big bar of quality chocolate to get irregular chunks for a better payoff!
Share Your Homemade Chocolate Chip Scones Experience
So, that’s the whole streamlined project—the blueprint for getting amazing, flaky, **chocolate chip scones** on your table in under an hour. Now that I’ve optimized the process for you, I really want to see what you create! When you nail that perfect crumbly edge and that gorgeous vanilla glaze drizzle, you need to share the results.
Baking is so much more fun when we can celebrate the wins together. If you tried this recipe, please take a moment to leave a star rating right at the top of the page. Your feedback tells me exactly where this process is working perfectly and helps other busy cooks trust the method.
And if you snapped a picture of your beautiful bakery-style treats? I want to see them! Tag me on social media or send a photo over via the contact page. Let me know how your timing went, what kind of coffee you paired them with, or if you tried different mix-ins. Creating these **easy homemade scones** should feel rewarding, and your success stories fuel the next optimized recipe I share here on Dishicious. Happy baking!
PrintBakery-Style Chocolate Chip Scones with Vanilla Glaze

Make tender, buttery chocolate chip scones that taste like they came from a coffee shop. This easy recipe delivers flaky results quickly, topped with a simple vanilla glaze.
- Prep Time: 15 min
- Cook Time: 18 min
- Total Time: 33 min
- Yield: 8 servings 1x
- Category: Breakfast
- Method: Baking
- Cuisine: American
- Diet: Vegetarian
Ingredients
- 2 1/4 cups all-purpose flour
- 1/2 cup granulated sugar
- 1 tablespoon baking powder
- 1/2 teaspoon salt
- 1/2 cup (1 stick) cold unsalted butter, cut into small pieces
- 1 cup semi-sweet chocolate chips
- 3/4 cup cold heavy cream
- 1 large egg, lightly beaten (for egg wash)
- 1 tablespoon milk (for egg wash)
- 1 cup powdered sugar
- 2 tablespoons milk or cream (for glaze)
- 1/2 teaspoon vanilla extract
Instructions
- Preheat your oven to 400°F (200°C). Line a baking sheet with parchment paper.
- In a large bowl, whisk together the flour, granulated sugar, baking powder, and salt.
- Add the cold, cubed butter to the dry ingredients. Use a pastry blender or your fingertips to cut the butter into the flour mixture until it resembles coarse crumbs with some pea-sized pieces remaining.
- Stir in the chocolate chips until they are evenly distributed.
- Pour in the cold heavy cream. Mix gently with a fork until the dough just comes together. Do not overmix; the dough should look shaggy.
- Turn the dough out onto a lightly floured surface. Gently knead it 3 or 4 times until it holds together. Pat the dough into a 3/4-inch thick circle.
- Cut the circle into 8 equal wedges, like a pizza. Place the wedges onto the prepared baking sheet, leaving about 1 inch between them.
- In a small bowl, whisk together the egg and 1 tablespoon of milk for the egg wash. Brush the tops of the scones lightly with the egg wash.
- Bake for 15 to 18 minutes, or until the tops are golden brown. Let the scones cool on the baking sheet for 5 minutes before transferring them to a wire rack to cool completely.
- While the scones cool, prepare the vanilla glaze. Whisk together the powdered sugar, 2 tablespoons of milk, and vanilla extract until smooth. Add more milk, a half teaspoon at a time, if the glaze is too thick.
- Drizzle the vanilla glaze over the cooled scones before serving.
Notes
- For the flakiest results, keep your butter and cream very cold.
- If you prefer larger scones, pat the dough into a 1-inch thick circle and cut into 6 wedges instead of 8.
- These scones pair perfectly with your morning coffee or tea.
Nutrition
- Serving Size: 1 scone
- Calories: 350
- Sugar: 18g
- Sodium: 250mg
- Fat: 18g
- Saturated Fat: 11g
- Unsaturated Fat: 7g
- Trans Fat: 0g
- Carbohydrates: 42g
- Fiber: 1g
- Protein: 4g
- Cholesterol: 60mg