
The holidays hit, and suddenly everyone expects twelve different kinds of elaborate cookies on their plate. If you’re like me, you look at those perfectly shaped, hand-decorated cut-outs and think, “Absolutely not. Not this year.” That’s where my project management mindset kicks in. I engineered these christmas sugar cookie bars to solve that exact problem. You get that intensely buttery, sweet flavor you crave, the festive sprinkles built right in, but you skip 90% of the rolling and cutting drama. This is the ultimate time-saver for your Holiday Baking Recipes, delivering maximum holiday impact with minimum stress. Trust me, this one-pan method works.
- Why Our christmas sugar cookie bars Are Your New Holiday Staple
- Gathering Ingredients for Your christmas sugar cookie bars
- Step-by-Step Instructions for christmas sugar cookie bars
- Tips for Success with Your Festive Sweets
- Storage & Reheating Instructions for christmas sugar cookie bars
- Ingredient Notes and Substitutions
- Frequently Asked Questions About christmas sugar cookie bars
- Estimated Nutritional Data for This Holiday Treat Idea
- Share Your Baking Results
Why Our christmas sugar cookie bars Are Your New Holiday Staple
Look, I’m all about efficiency, and these bars are the definition of a culinary win-win. We take everything you love about those fussy cut-out shapes—the pure buttery flavor, the melt-in-your-mouth structure—and put it into one glorious sheet pan. You’re getting a true Cut Out Cookie Alternative, but without the stress of scraping dough off your counter at 11 PM.
These are engineered to be Soft Baked Bars. I’ve tested this formula dozens of times because I need my Holiday Treat Ideas to perform reliably. Because we’re using the bar format, the whole baking process is streamlined; it’s truly One Pan Holiday Baking, which means cleanup is almost nonexistent.
The Convenience of Easy Cookie Bars
Why waste time rolling and cutting when you can just press and bake? This method instantly cuts the active time down by half, which is essential during the chaotic holiday season. You can tackle other projects, or honestly, just sit down for five minutes. It’s that simple to execute.
Achieving That Perfect Buttery Cookie Recipe Texture
The secret to keeping these ultra-soft lies in the creaming step. When you properly whip that softened butter and sugar together (we talk more about that later!), you’re injecting microscopic air bubbles. Those bubbles are what keep the final product tender and prevent it from turning into a hard brick. If you want amazing flavor and texture without the fuss of traditional methods, you need to try our core soft sugar cookie recipe foundation here.
Gathering Ingredients for Your christmas sugar cookie bars
Okay, let’s get down to the supply list. As a project manager, I hate wasting time running to the store mid-bake, so I always make sure everything is staged before I even turn the oven on. For these bars, we’re keeping things straightforward but ensuring we nail the classic flavor notes. That means using proper measurements—no eyeballing allowed when we’re aiming for that perfect soft texture.
The list is broken into two manageable chunks: the bar base itself and the necessary Vanilla Buttercream Frosting. I want you to look closely at the almond extract down below. I know it seems weird next to the vanilla, but that tiny touch pushes these bars right into that nostalgic, perfectly flavored sugar cookie territory. Seriously, don’t skip it if you want that classic taste!
For the Soft Buttery Cookie Base
- 1 cup unsalted butter, softened (Make sure it’s actually soft, not melted!)
- 1 cup granulated sugar (We’ll rely on the creaming step for fluffiness.)
- 2 large eggs
- 1 teaspoon vanilla extract
- 3 cups all-purpose flour
- 1 teaspoon baking powder
- 1/2 teaspoon salt
- 1/4 teaspoon almond extract (This is the secret weapon for classic flavor.)
- 1/2 cup festive sprinkles (Go wild with your Christmas colors for the dough!)
For the Vanilla Buttercream Frosting
This is non-negotiable for a rich topping. For the best results, check out my guide on keeping your buttercream fluffy and stable, but the simplified list is here:
- 1 cup unsalted butter, softened
- 3 cups powdered sugar, sifted (Don’t skip the sifting—it prevents lumps!)
- 1 teaspoon vanilla extract (Yes, more vanilla for good measure.)
- 2-4 tablespoons milk or heavy cream (We use this to adjust the consistency.)
- Extra festive sprinkles (For decoration on top, naturally.)
Step-by-Step Instructions for christmas sugar cookie bars
This is where the project management comes in handy—we run a tight ship so everything flows perfectly from prep to plate. Remember, precision here guarantees those beautiful, soft, buttery results everyone is expecting. Don’t rush the cooling; that step is the true key to success for these Sheet Pan Cookies.
Preparing the Pan and Mixing the Dough
First things first, let’s get organized. Preheat your oven to 350°F (175°C). Next, line that 9×13 inch baking pan with parchment paper, making sure you leave an overhang on the sides—that’s your handle for easily lifting the entire baked block out later. Now, grab your mixer. Cream that 1 cup of softened butter with the granulated sugar until it gets genuinely light and fluffy. This takes a minute or two, but it matters! Beat in your eggs one at a time, followed by your vanilla and optional almond extract. In a separate dish, whisk your flour, baking powder, and salt. Add the dry mixture into the wet ingredients gradually, mixing on the low setting. Stop as soon as you see the flour disappear. I mean it—stop mixing! Overmixing develops gluten, and we want soft, not tough!
Baking and Cooling the Sheet Pan Cookies
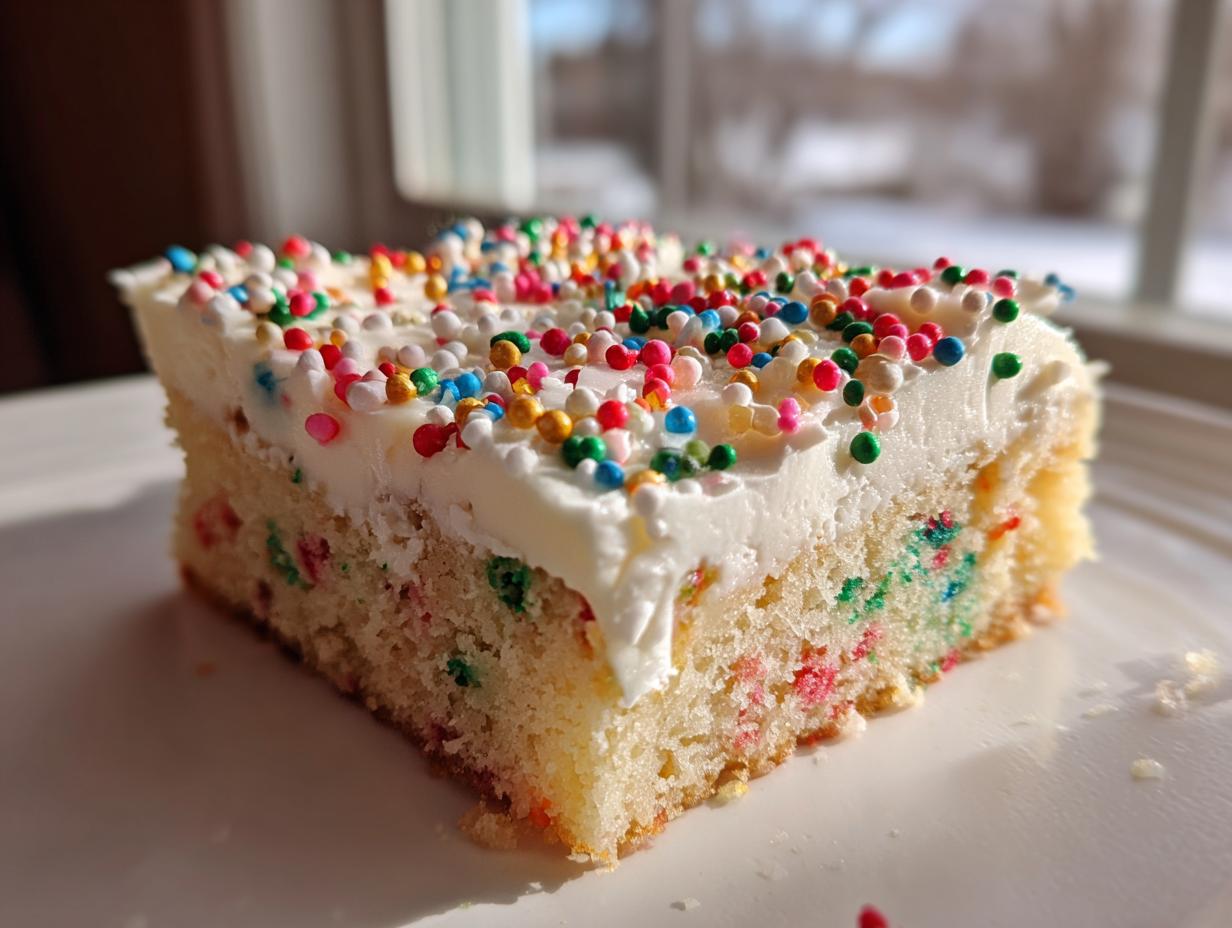
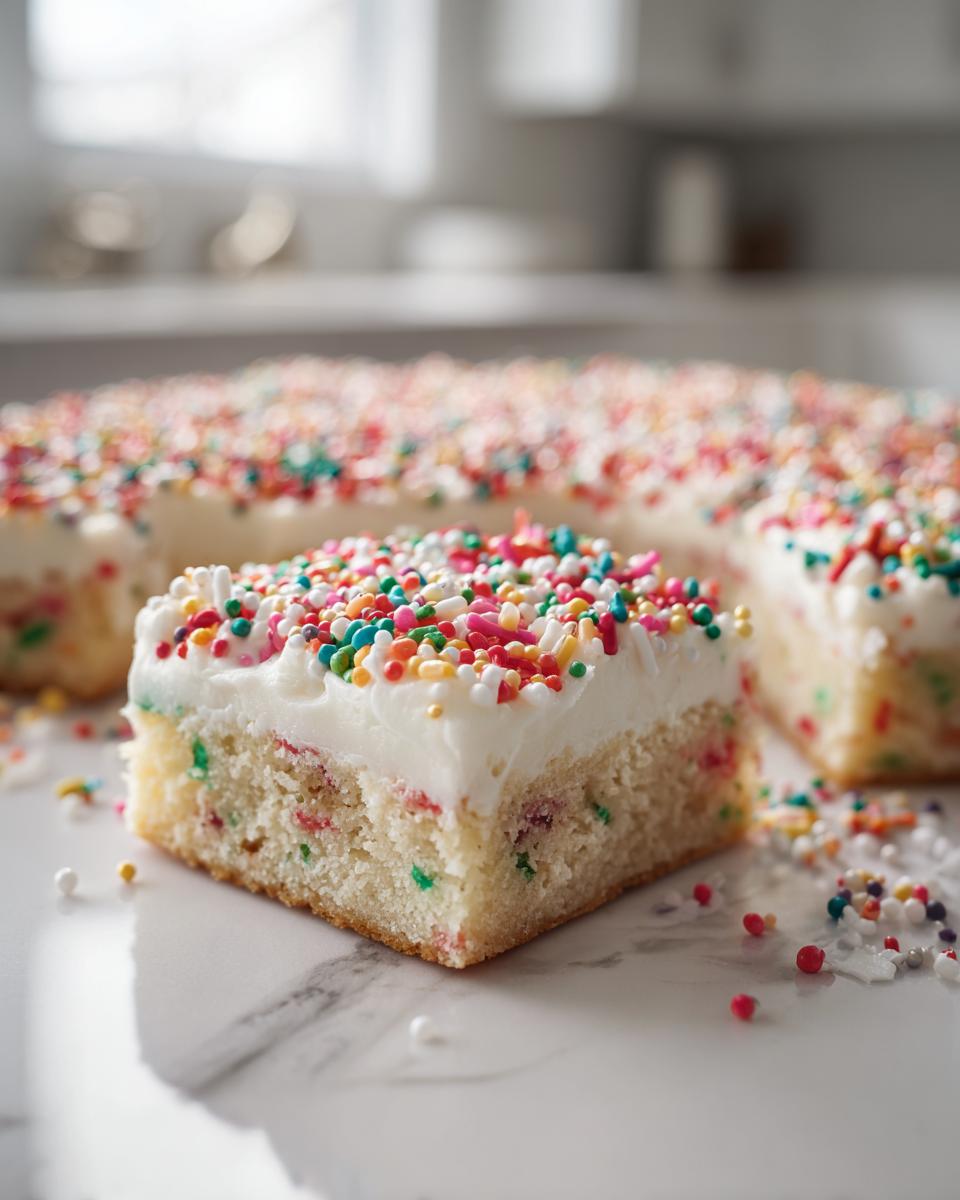
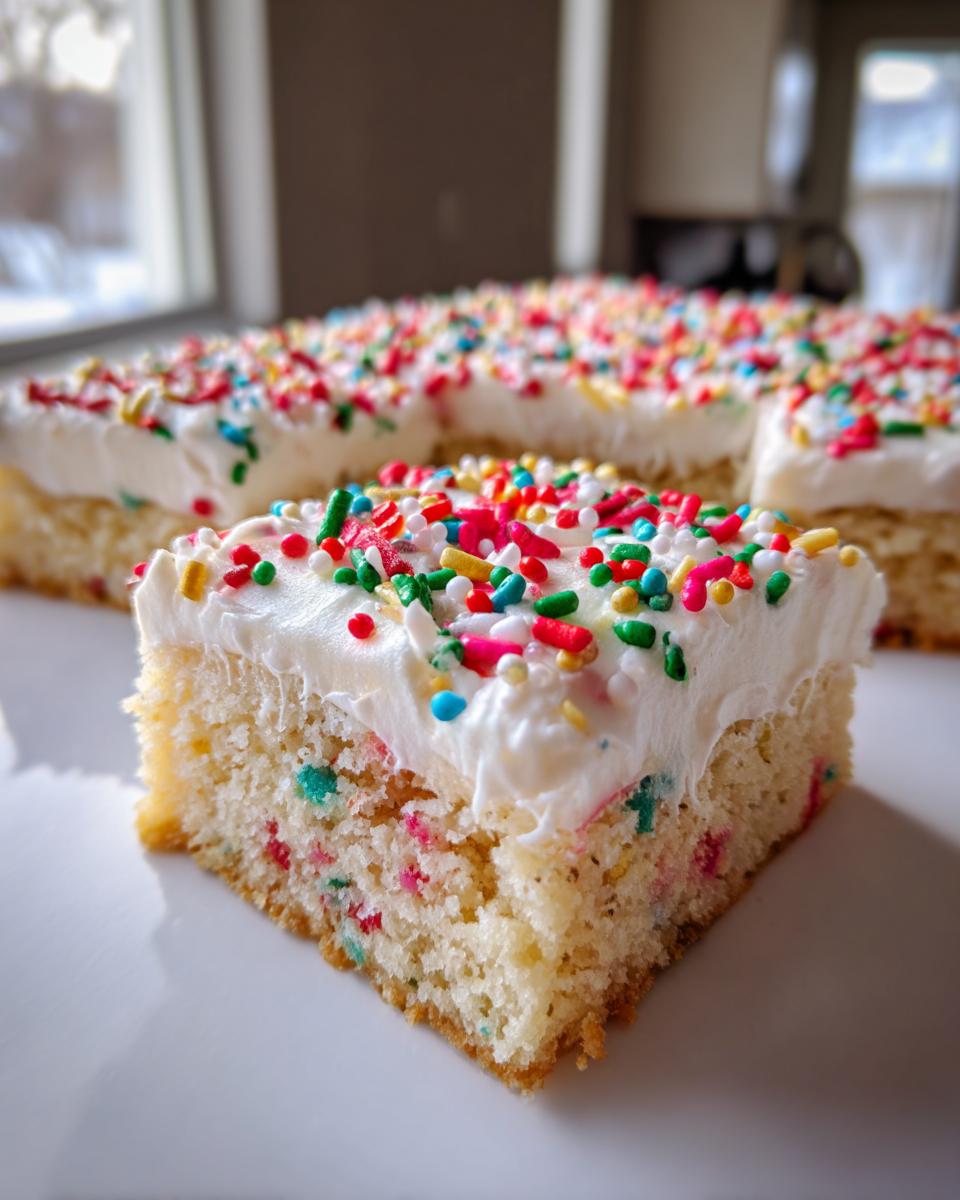
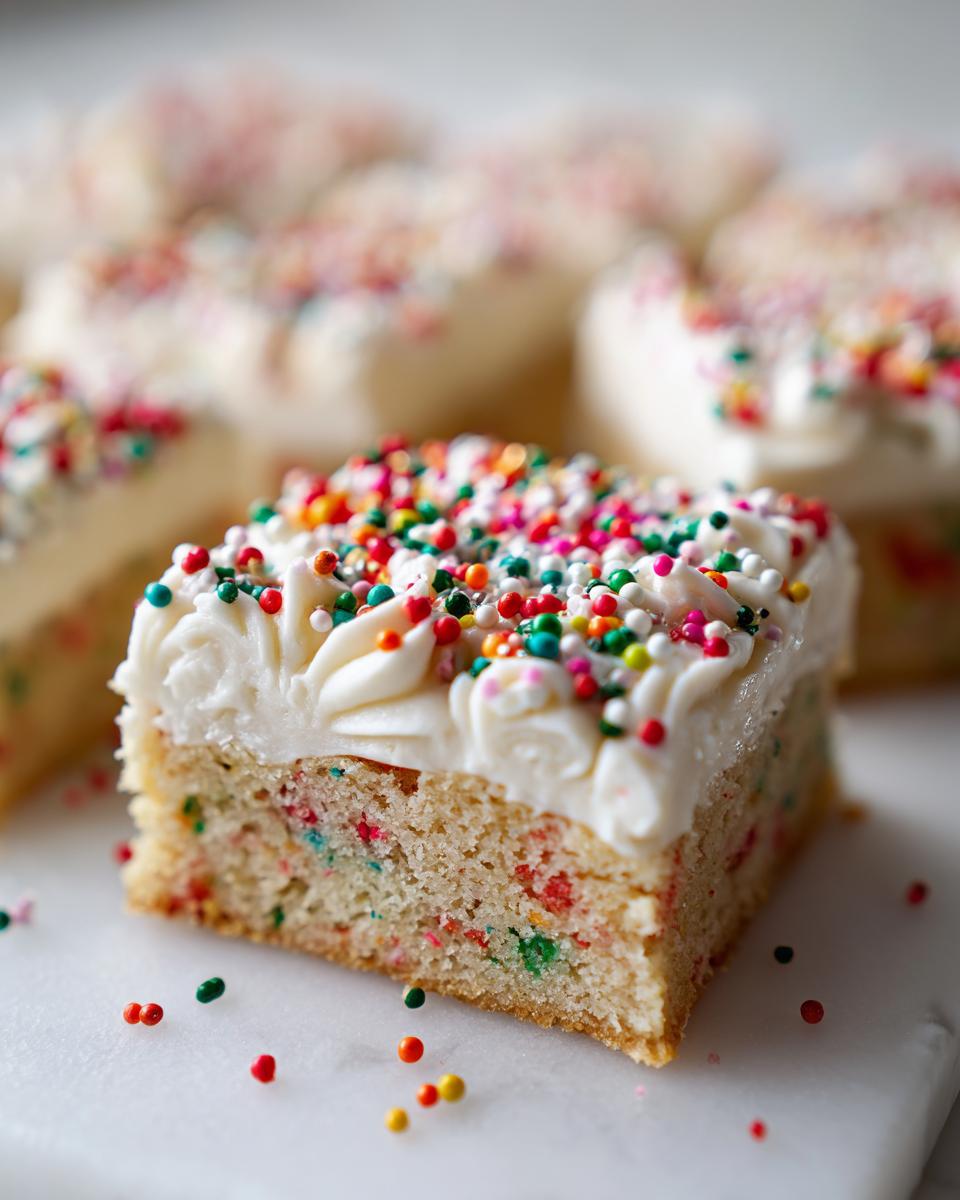
Once you stop mixing the flour, gently fold in your 1/2 cup of colorful festive sprinkles. Now, press that dough evenly into your prepared pan. You want a nice, flat surface. Pop this into the preheated oven and bake for 20 to 25 minutes. Pay attention to the edges; they should look just barely golden. If your toothpick comes out with moist crumbs attached, it’s done! It should still look a little pale in the middle—that’s how we guarantee softness. After you pull it out, you have to let it cool completely on a wire rack. Seriously, if you frost this warm, you’ll have soup.
Making and Applying the Vanilla Buttercream Frosting
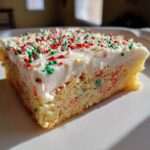
Once it’s fully cool, let’s whip up that topping. Beat that second cup of softened butter until it looks smooth. Slowly add the sifted powdered sugar. Once that’s incorporated, add the vanilla and 2 tablespoons of milk or cream. I usually start slow because you can always add more liquid, but you can’t take it away! Keep beating until it’s light and fluffy, adding a teaspoon of extra milk only if it seems too stiff to spread. When it’s perfect, spread it right over the cooled bars. Don’t wait—immediately cover the top with your extra festive sprinkles before the vanilla buttercream frosting sets up. Then, use those parchment handles to lift the whole block and cut into squares. Easy!
Tips for Success with Your Festive Sweets
When you’re managing a big batch of Holiday Treat Ideas, efficiency means nailing the small details the first time. My key project management strategy here is minimizing variables, especially concerning texture. We don’t want anyone thinking these are dry; they need to be soft and buttery like the best cookies.
My number one tip for preventing dryness is simple: underbake by about two minutes. Seriously. Those bars look slightly doughy when you pull them out at the 20-minute mark, but they finish setting up beautifully as they cool on the counter. If you wait until they look perfectly done in the oven, they’ll be tight once cooled.
For cutting, wait until they are fully cooled—I mean totally room temperature—before you even think about touching the knife. If you need clean cuts for a platter or your next cookie exchange favorite, run your knife under hot water, wipe it dry, and cut one or two squares at a time. Wipe the knife clean between each cut. It works like a charm for getting sharp edges without smearing that gorgeous frosting.
Storage & Reheating Instructions for christmas sugar cookie bars
These bars are designed to hang out on your counter during the holidays, so thankfully, they are super low-maintenance. Since we went to the effort of creating that incredibly soft, buttery cookie recipe, we need to protect that texture!
The critical thing here is moisture control. Once they are completely cooled and frosted—and I mean rock solid cool before that buttercream goes on—you need an airtight container. If you don’t have a huge one, that’s fine; just layer them carefully between sheets of wax paper or parchment paper. We don’t want them sticking together, and we certainly don’t want them drying out.

For the best results, store these at room temperature for up to three days. Putting them in the fridge is usually my enemy when I’m dealing with a buttery base like this, because the cold tends to firm up the butter in both the cookie and the frosting, making them taste denser and less “melt-in-your-mouth.” Stick to room temp for peak flavor!
Need to make them ahead? You can bake the bars (unfrosted!) for up to two days and keep them tightly wrapped in plastic wrap at room temperature. Frost them just the day before your party when you’re ready to decorate. This is a fantastic tactic for managing your Simple Christmas Baking timeline!
Ingredient Notes and Substitutions
One of the core principles of my approach to Simple Christmas Baking is using what you have, as long as the core structure remains sound. I know sometimes you’re missing that one specialty item, or you just prefer a different presentation. That’s fine! These christmas sugar cookie bars are forgiving, but let’s talk about the ingredients that make the biggest difference.
First up: the extracts. I highly recommend using both vanilla and that tiny bit of almond extract. If you absolutely cannot find almond extract, you can substitute it with an extra 1/4 teaspoon of vanilla. However, the almond extract is what gives commercial or bakery-style sugar cookies that specific nostalgic snap. If you skip it, the flavor is still great—just slightly mellower.
Now, let’s talk about the topping swap. That fluffy Vanilla Buttercream Frosting is divine, but if you’re running short on time or just prefer something lighter, you can easily pivot to a sweet glaze. You don’t need a whole new recipe for this; it’s just a quick mix. You’ll want to combine about 2 cups of powdered sugar with 3 to 4 tablespoons of milk and 1/2 teaspoon of vanilla. Whisk it until it’s smooth enough to drizzle, but thick enough that it doesn’t immediately run off the sides. If you go this route, make sure your bars are totally cool, and then drizzle away!
For the base, stick to real butter. That’s the one ingredient I insist on keeping for that signature rich taste. If you are interested in seeing another simple, versatile dough technique, I detailed one for homemade naan that prioritizes speed without sacrificing texture, which is the same philosophy we applied here!
Frequently Asked Questions About christmas sugar cookie bars
When you’re busy tackling all your Holiday Baking Recipes, you definitely want to eliminate any guesswork. Here are a few things I always get asked about making sure these bars turn out perfectly year after year for your Cookie Exchange Favorites!
Can I make these christmas sugar cookie bars ahead of time?
This is my favorite part of the bar format—yes, absolutely! For maximum efficiency, I bake the bars (unfrosted, of course) up to three days ahead of time. Store them tightly wrapped in plastic wrap at room temperature. When you are ready to serve, then you make the Vanilla Buttercream Frosting fresh and spread it on. Frosting them too early risks the sprinkles bleeding color onto the white topping, which isn’t the look we’re going for!
What is the best way to cut the bars neatly?
This is a classic baking question, and the answer always depends on temperature control. Rule number one: the bars must be 100% completely cool before you even touch them with a knife. If they are even slightly warm, the frosting shifts and everything gets messy. Once cool, grab a large, sharp knife and dip it into a tall glass of very hot water. Wipe the blade totally dry, and then make your cut. Dip, wipe, cut. Repeat that process for every cut. It keeps the blade clean and gives you those sharp, beautiful squares.
Can I use different colors or shapes of sprinkles for these Festive Sweets?
Go for it! These Festive Sweets are meant to be customized for your holiday theme. I used classic red and green jimmies in the dough because they look great when baked in, but you can use nonpareils, sanding sugar, or even mix in some silver or gold sprinkles. The key is just to make sure you are decorating right after you spread the frosting so they stick nicely. They look fantastic year after year!
If you’ve tried this streamlined method, please let me know how it worked for your schedule. You can find more of my tested and proven recipes, like these easy blueberry oatmeal muffins, right here on the site!
Estimated Nutritional Data for This Holiday Treat Idea
I always include the numbers because, when you’re planning out a whole holiday menu, knowing the approximations helps keep things balanced. Now, keep in mind, since we are using butter, sugar, and frosting, these festive treats are understandably on the richer side. These figures are estimates based on using the standard ingredients listed, assuming you cut the 9×13 pan into 36 servings.
As a project manager, I see this as input data—it lets you plan accordingly! You can see that the majority of the calories come from the fat and sugar, which is exactly what you expect from a decadent, buttery cookie recipe like this one.
- Serving Size: 1 bar
- Calories: 250
- Sugar: 28g
- Fat: 13g (with about 8g of that being saturated fat)
- Carbohydrates: 33g
- Protein: 3g
- Sodium: 110mg
Since this is homemade, your final numbers might shift slightly based on the brand of butter or how heavily you frost them! But this gives you a perfect baseline for your Winter Dessert Recipes planning. It’s good, solid data so you can serve confidently.
Share Your Baking Results
Alright, the hard part is over. You’ve successfully managed your holiday workload, avoided the stress of individual cookie cutting, and now you have a pan full of the best christmas sugar cookie bars ever made. I absolutely need to know how this highly optimized process worked out for you!
This is the final step in the project: feedback and tracking results. Did this save you precious time? Did the texture come out exactly as soft and buttery as you hoped? Please don’t leave me hanging!
Head down to the comments section right now and give this recipe a star rating. More importantly, leave a note explaining your experience. Telling me what worked for your timeline tells me that this efficient method is solid for other busy bakers out there.
And if you got fancy with the sprinkles or decided to experiment with the frosting—snap a photo! I love seeing these treats out in the wild. Tag us on social media so I can see your final product. You can always reach out directly via the contact page if you have specific questions or just want to brag a little (you deserve to!). Happy Holiday baking!
PrintThe Ultimate Easy Christmas Sugar Cookie Bars with Vanilla Buttercream Frosting
Make soft, buttery Christmas sugar cookie bars that taste like classic cut-out cookies but require less time. This one-pan recipe is a simple, festive treat perfect for holiday gatherings and cookie exchanges.
- Prep Time: 20 min
- Cook Time: 25 min
- Total Time: 45 min
- Yield: 36 servings 1x
- Category: Dessert
- Method: Baking
- Cuisine: American
- Diet: Vegetarian
Ingredients
- 1 cup unsalted butter, softened
- 1 cup granulated sugar
- 2 large eggs
- 1 teaspoon vanilla extract
- 3 cups all-purpose flour
- 1 teaspoon baking powder
- 1/2 teaspoon salt
- 1/4 teaspoon almond extract (optional, for classic flavor)
- 1/2 cup festive sprinkles (for dough)
- 1 cup unsalted butter, softened (for frosting)
- 3 cups powdered sugar, sifted
- 1 teaspoon vanilla extract (for frosting)
- 2–4 tablespoons milk or heavy cream
- Extra festive sprinkles (for topping)
Instructions
- Preheat your oven to 350°F (175°C). Line a 9×13 inch baking pan with parchment paper, leaving an overhang on the sides for easy removal. Lightly grease the paper.
- In a large bowl, cream together the 1 cup of softened butter and 1 cup of granulated sugar until light and fluffy. This step builds the texture.
- Beat in the eggs one at a time, mixing well after each addition. Stir in the vanilla extract and almond extract, if using.
- In a separate bowl, whisk together the flour, baking powder, and salt. Gradually add the dry ingredients to the wet ingredients, mixing on low speed until just combined. Do not overmix.
- Fold in the 1/2 cup of festive sprinkles into the dough.
- Press the dough evenly into the prepared 9×13 inch pan.
- Bake for 20 to 25 minutes, or until the edges are lightly golden and a toothpick inserted near the center comes out with moist crumbs attached. The bars should still look slightly pale in the center for a soft texture.
- Let the cookie bars cool completely in the pan on a wire rack. This cooling time is crucial before frosting.
- Prepare the frosting: In a medium bowl, beat the 1 cup of softened butter until smooth. Gradually add the sifted powdered sugar, mixing until combined.
- Add the 1 teaspoon of vanilla extract and 2 tablespoons of milk or cream. Beat on medium speed until light and fluffy. Add more milk, one teaspoon at a time, until you reach a smooth, spreadable consistency.
- Once the bars are completely cool, spread the vanilla buttercream frosting evenly over the top.
- Immediately decorate with extra festive sprinkles before the frosting sets.
- Once frosted, use the parchment paper overhang to lift the entire block of bars from the pan. Cut into squares for serving.
Notes
- For the softest texture, avoid overbaking. The bars should be slightly underdone when you remove them, as they continue to set while cooling.
- If you want a glaze instead of buttercream, mix 2 cups powdered sugar with 3-4 tablespoons of milk and 1/2 teaspoon vanilla until smooth, then drizzle over cooled bars.
- To achieve a true cut-out cookie flavor, the small amount of almond extract is recommended.
Nutrition
- Serving Size: 1 bar
- Calories: 250
- Sugar: 28g
- Sodium: 110mg
- Fat: 13g
- Saturated Fat: 8g
- Unsaturated Fat: 5g
- Trans Fat: 0.3g
- Carbohydrates: 33g
- Fiber: 0.5g
- Protein: 3g
- Cholesterol: 45mg