
That vibrant, short window when asparagus is perfect—tender snaps, bright green stalks—is honestly my favorite part of spring. But what do you do when you’ve got more spears than you can eat in a week? You preserve them, obviously! I’m Leo Grant, and when I streamlined my kitchen projects, I realized that old-school canning felt like too much overhead for a simple snack. That’s why I engineered this method for incredibly crunchy, perfectly tangy pickled asparagus. We are skipping the complicated water baths here; this is refrigerator pickling at its best. Trust me, once you taste these spears, you’ll want to make them every single year to extend that fresh spring flavor well into summer. You can find more appetizers and easy snack ideas here.
- Why You Need This Simple Pickled Asparagus Recipe
- Essential Ingredients for Flavorful Pickled Asparagus
- Equipment Needed for Perfect Pickled Asparagus
- Step-by-Step Instructions for Making Pickled Asparagus
- Tips for Success with Refrigerator Pickled Asparagus
- Serving Suggestions for Your Tangy Garnish
- Storage and Shelf Life of Pickled Vegetables
- Frequently Asked Questions About Pickled Asparagus
- Understanding the Nutritional Profile of Pickled Asparagus
Why You Need This Simple Pickled Asparagus Recipe
When optimizing a recipe, I focus on results where the effort-to-reward ratio is at its peak. This recipe for pickled asparagus delivers massive flavor and texture with minimal fuss. It’s the perfect efficient way to preserve that beautiful spring green. Here’s why this method is the only one you should bother with.
Perfect Crunch and Tang
We skip the long, hot canning cycles here because texture is everything! This refrigerator method locks in an incredible crunch that lasts. They become the perfect, crisp, tangy garnish for Bloody Marys or just snacking straight from the jar.
Easy Refrigerator Pickling for Pickled Asparagus
As you know from the Dishicious philosophy, complicated steps get cut. This isn’t a water-bath canning project; it’s super simple refrigerator pickling. You make the brine, pour it over, and chill. That’s it. No need to stress about seals or processing times.
Great for Healthy Snacks
They are fantastic straight out of the jar! Because we’re only using simple vinegar, water, and a touch of sugar for balance, these are genuinely light—only about 15 calories per serving, making them ideal for those looking for satisfying, healthy snacks.
Essential Ingredients for Flavorful Pickled Asparagus
When I break down any recipe, I look at the core ingredients that provide the maximum impact. For our pickled asparagus, everything works hard. We’re not using dozens of spices; we’re relying on quality inputs and balancing them perfectly. You need firmness in your spears and a bright, clean brine to make these truly sing. Let’s look at what you need to pull together the best jar!
Asparagus Preparation Notes
The asparagus has to be right, period. You want spears that are firm and bendy, not rubbery or woody. Forget the pencil-thin ones; aim for medium thickness, as they hold up best against the brine. The one crucial step here is making sure you aggressively snap off those tough, pale ends. Those fibrous bits will ruin the texture for everyone!
The Pickling Brine Components
The brine is non-negotiable for flavor and preservation structure. You need equal parts white vinegar and water—one cup of each usually does the trick for two pints. For the salt, please use kosher salt; table salt muddies up the brine sometimes. We balance that necessary saltiness with just a tablespoon of granulated sugar for complexity.
Aromatics for Tangy Garnish Flavor
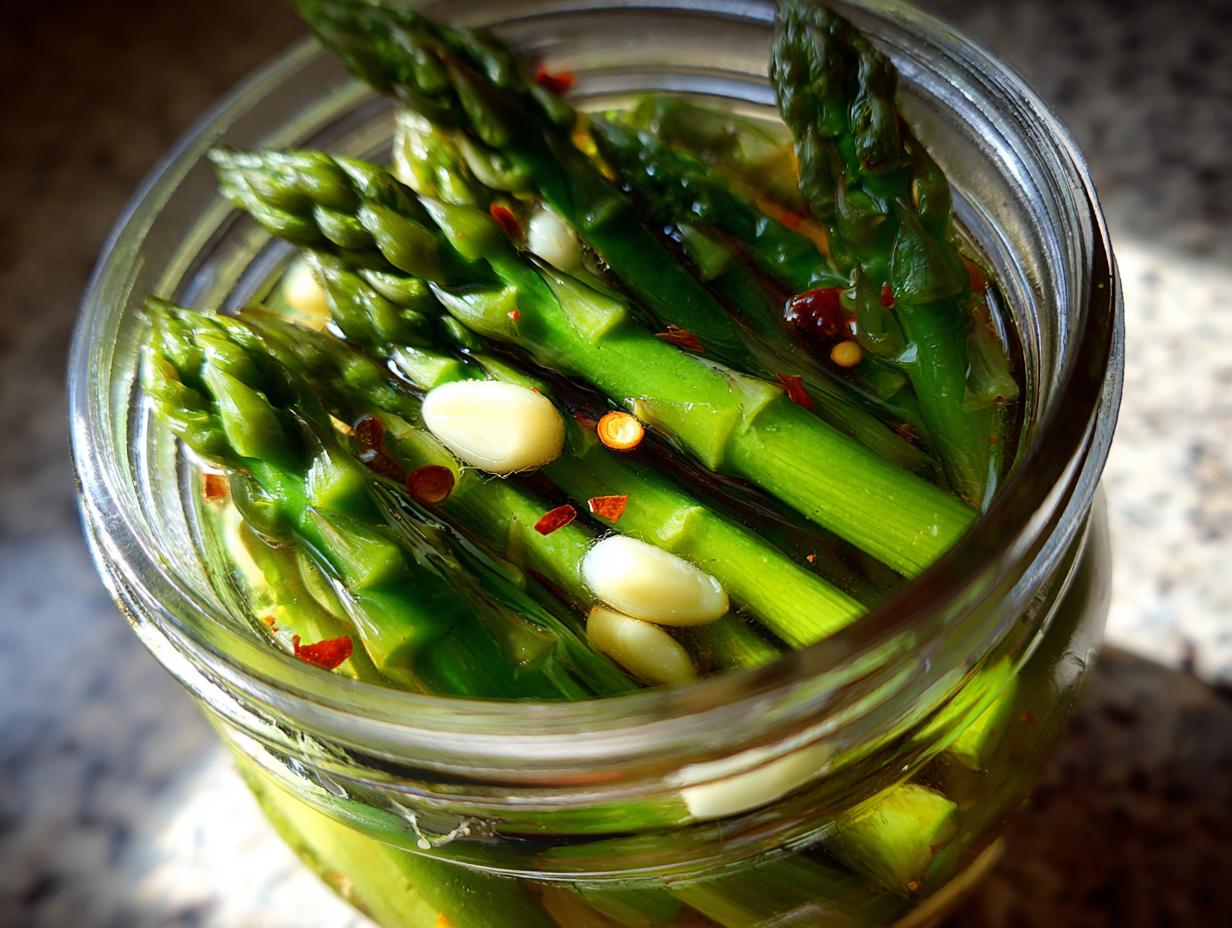
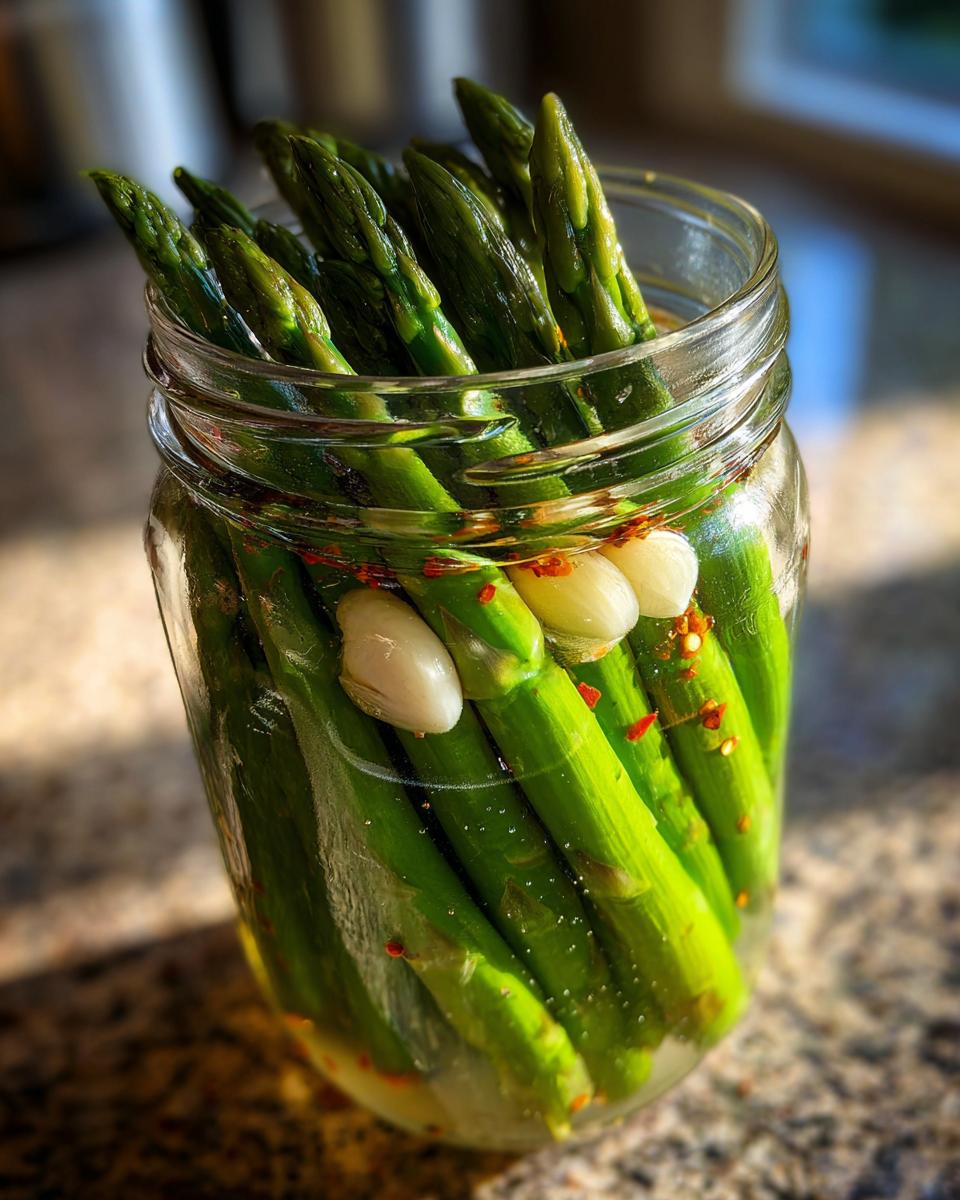
This is where the little bursts of flavor come from! You need a couple of smashed garlic cloves per jar—no need to chop them finely, smashed is better. Then we add the punch: whole black peppercorns and a good half teaspoon of red pepper flakes. That little kick of heat is essential for that sharp, tangy garnish quality.
Equipment Needed for Perfect Pickled Asparagus
See, this is where the project managing comes in handy! We want to minimize variables and ensure everything is ready before we start heating up anything. For this refrigerator pickling project, we aren’t doing serious processing, but there are a few simple tools you absolutely need on your counter.
First things first: you need your storage vessels. You’ll want at least two pint-sized canning jars. Make sure they are clean and ready to go. Do not worry about sterilizing them completely like you would for shelf-stable canning; hot soapy water is great for refrigerator pickles. Just make sure the lids and bands are clean too.
- One small, non-reactive saucepan. Stainless steel is perfect for dissolving your salt and sugar without worrying about reaction.
- A solid wooden spoon or heat-safe spatula for stirring that brine. Trying to stir salt into hot liquid with a plastic spoon is just asking for trouble!
- A measuring cup set, especially for getting that exact 1 cup water to 1 cup vinegar ratio down perfectly. Precision matters here.
- Tongs or a fork to gently pack those asparagus spears upright into the jars. We want them snug!
Have these set up, and the actual cooking time—which is only about five minutes—will flow perfectly. It’s all about having your stations set up beforehand!
Step-by-Step Instructions for Making Pickled Asparagus
Okay, let’s get this assembly line running! Since we’re focused on quick refrigerator methods, the process is faster than any traditional water bath canning. My goal here is to get you from fresh asparagus to finished jars of pickled asparagus in under 25 minutes total time in the kitchen. Stick to these steps, and you won’t have any issues. If you’re interested in exploring other fast preservation techniques, check out my guide to canning recipes for ideas.
Preparing Jars and Creating the Brine
First, handle the glass. Wash your jars really well with hot, soapy water—just make sure they are clean. Next, run the brine. Get your saucepan hot over medium-high heat. Dump in the vinegar, water, kosher salt, and sugar. You have to stir constantly until you see that salt and sugar disappear completely, turning the liquid perfectly clear. Once it boils and dissolves, kill the heat immediately. That hot brine is what starts the magic!
Packing and Filling Your Pickled Asparagus Jars
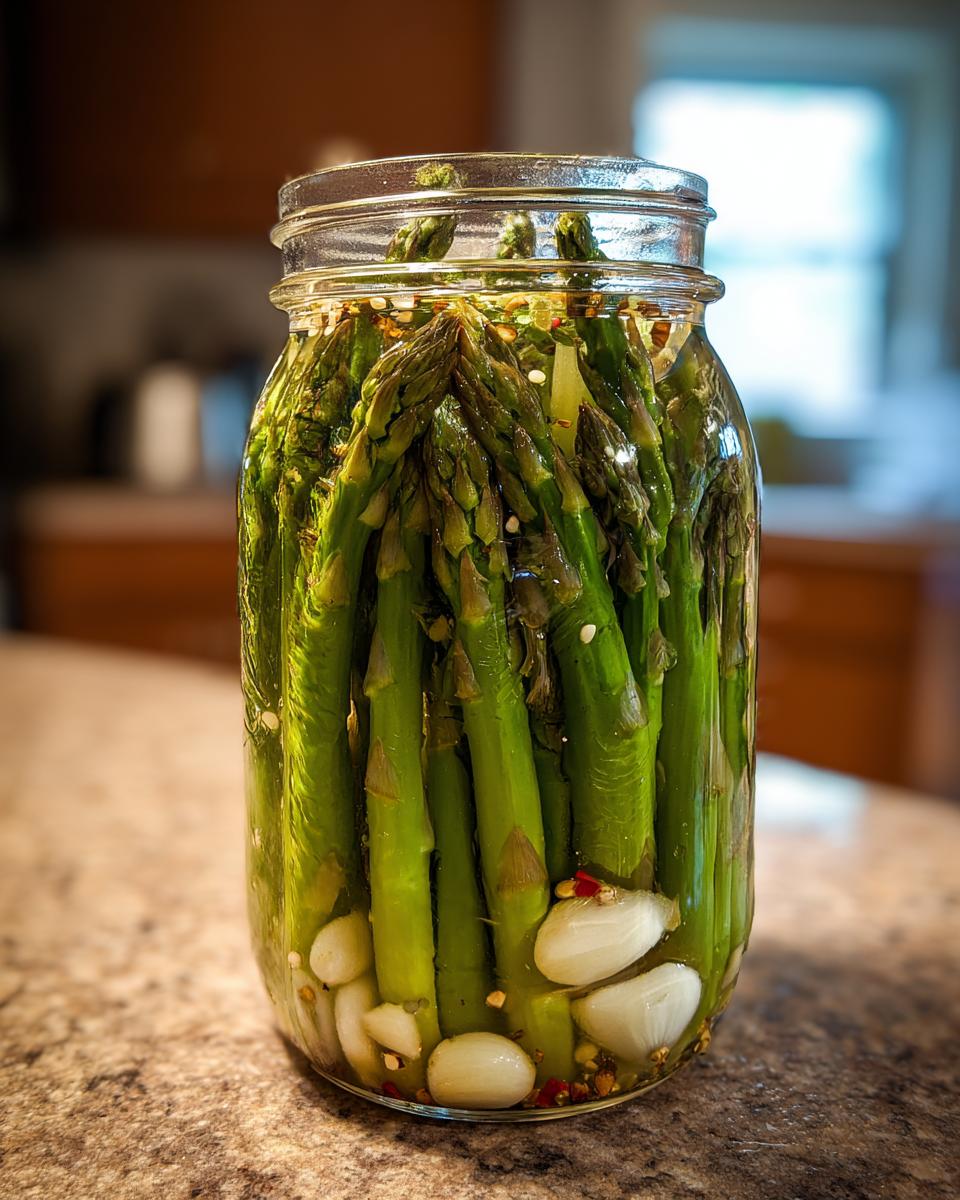
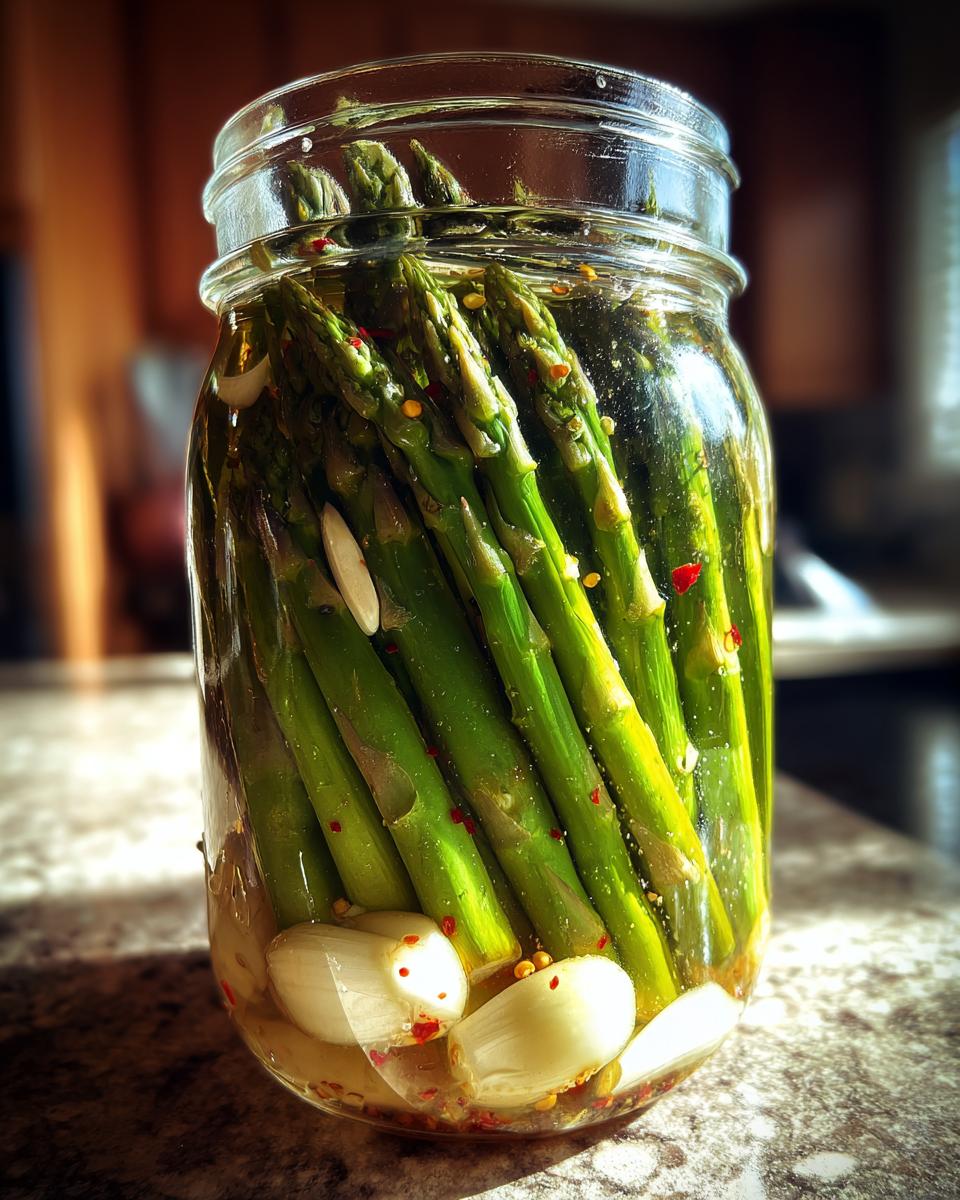
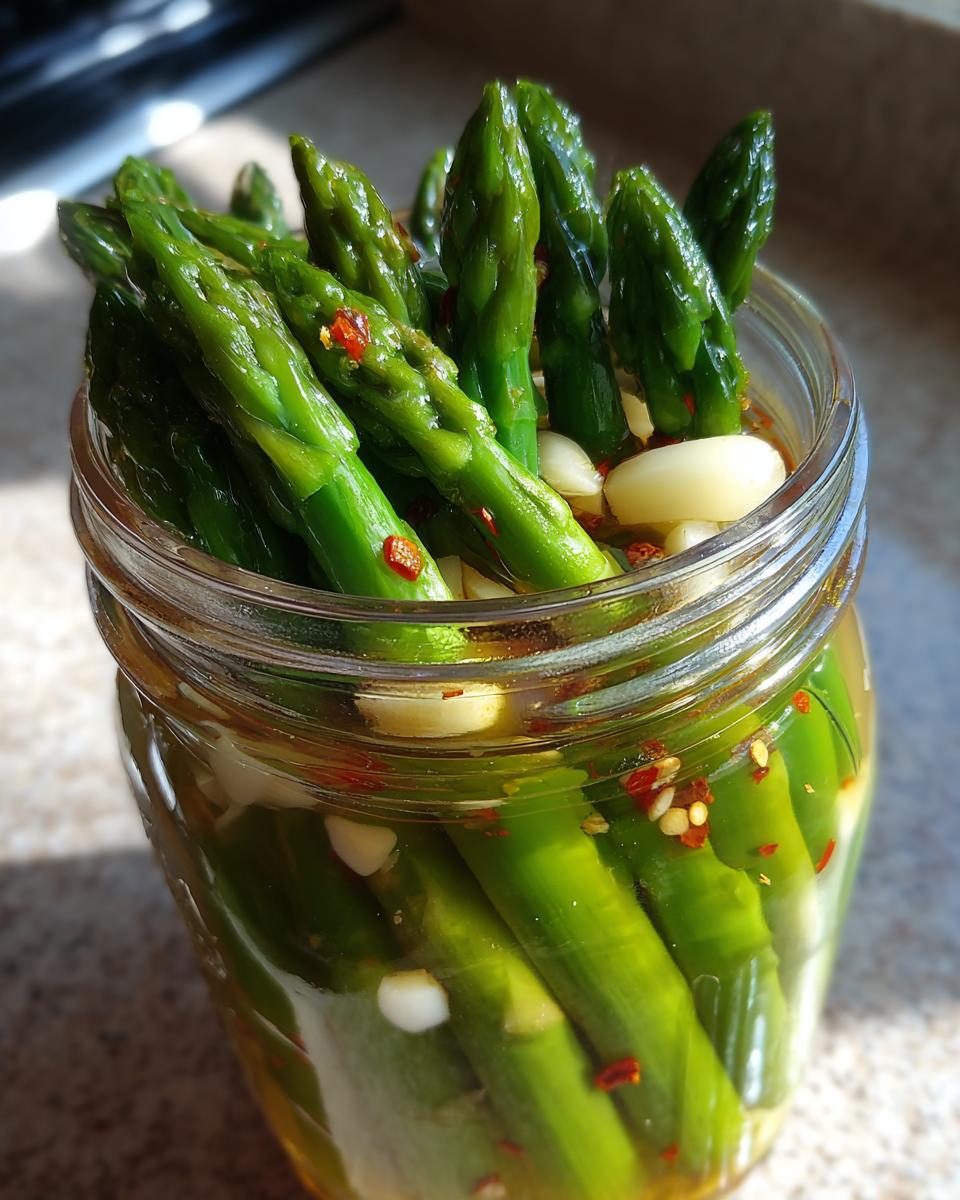
Now, pack those spears in tight! Try to get them standing straight up in your jars. It just looks better and packs them more efficiently. Once they are nestled in, drop in the smashed garlic cloves, peppercorns, and red pepper flakes—divide them evenly between the jars. Then, very carefully, pour that hot brine right over the top of the asparagus. Be sure you stop pouring when you have about half an inch of space left at the top rim. That’s called headspace, and you need it!
Sealing and Storing Your Pickled Vegetables
The last step is sealing things up. Take a clean paper towel and wipe those jar rims completely clean; any stray liquid will stop them from sealing right. Pop the lids on and tighten the bands until they are ‘fingertip tight.’ Set the jars on the counter to cool down completely. You’ll hear that satisfying little ‘pop’ as they seal. Resist the urge to taste them right away! They need at least 24 hours in the fridge for that brine to really penetrate the spears, but trust me, the wait is worth it.
Tips for Success with Refrigerator Pickled Asparagus
Even though this is a super straightforward recipe, a few small tweaks can take your pickled asparagus from good to absolutely incredible. Because we’re using the refrigerator method, our focus is entirely on texture and layering that initial burst of flavor. If you follow the instructions to the letter, you’ll nail it, but here are my project manager secrets for guaranteed results.
Maximizing the Asparagus Crunch
I cannot stress this enough: use the freshest, firmest asparagus you can find. If you accidentally bought spears that feel just a little bit limp—maybe they sat out too long at the store—don’t panic! You can do a quick rescue mission. Immediately snap off those woody ends, and then plunge the spears into a bowl of ice water for about 15 minutes before jarring them. That shock of cold water helps tighten up the fibers right before the hot brine hits them. It’s a little extra step, but it guarantees that satisfying snap when you bite in.
Adjusting Spice Levels in Your Pickled Asparagus
The recipe calls for half a teaspoon of red pepper flakes, which gives you that wonderful, background heat that really complements the brine’s tanginess. But I know not everyone wants that spice! If you’re serving these to kids or just prefer a very mild flavor profile where the vinegar shines through most, cut the flakes down to just a pinch or leave them out entirely. Conversely, if you love heat, feel free to bump that up to a full teaspoon. Because these are pickled vegetables stored in the fridge, you can test a spear sooner and adjust your next batch easily if you want more fire!
Serving Suggestions for Your Tangy Garnish
So, you’ve got these beautifully crisp jars of brine-soaked goodness chilling in the fridge. What now? The beauty of this recipe is that it excels in two very distinct categories: making a simple drink fancy, and elevating a grazing board. These spears are designed to be a punchy, tangy garnish that cuts through richness and adds texture wherever they land.
Forget the sad celery stalk! If you are making Bloody Marys on a Sunday morning—which you absolutely should be—these spears are mandatory. They stand right up in the glass and offer so much more flavor than a standard pickle slice. They are sturdy enough to be your stir stick!
For something a little more sophisticated, break out the cheese board. These are amazing alongside sharp cheddars, creamy Brie, or salty prosciutto. They offer that essential acidic counterpoint needed on any good charcuterie spread. I’ve even started chopping them up really finely and tossing them into tuna salad to inject some life into it! If you’re looking for other ways to mix up your drinks game, check out my simple cider mule recipe to see how simple flavor layering can be.
Storage and Shelf Life of Pickled Vegetables
Because we chose the quick refrigerator pickling method, we skipped the intense heat processing that makes food shelf-stable for years. That’s the trade-off we make for that superior crunch! This means you absolutely have to keep these jars chilling in the fridge once they’ve cooled down on the counter post-assembly. It’s a simple rule for keeping your harvest preserved safely.
Once they are in the cold, these pickled vegetables keep really well, lasting for several weeks. Honestly, they taste best in that 1 to 4-week window. After about a month, you might notice they start to soften just a bit—that’s normal when they aren’t commercially canned. The flavor, though, usually deepens nicely over the first week!
Make sure you always use a clean utensil when pulling spears out of the jar. Bringing warm knives or fingers into the brine can introduce bacteria that will shorten their lifespan unnecessarily. Think of it as good hygiene for your stored goodies. Keep them submerged in the brine, lid tight, and enjoy them all season long!
Frequently Asked Questions About Pickled Asparagus
When I streamline a recipe, I usually find people have similar questions about adapting it or making sure it works for their schedule. That’s fair—we want reliable results, right? Here are the quick answers to the most common things people ask about this method for making crunchy pickled asparagus.
How long does it take for pickled asparagus to taste good?
You technically can eat one after about three hours, but no! Don’t bother. For the brine to really penetrate and for these truly to shine as a great snack, you need to wait a full 24 hours in the fridge. That’s the minimum benchmark for flavor development!
Can I use different spices in my pickled vegetables?
Absolutely! This recipe is a fantastic base for experimentation with your canning recipes. If pepper flakes aren’t your thing, try skipping them and adding a teaspoon of whole coriander seeds or even a few sprigs of fresh dill. That will give you a totally different flavor profile for your pickled vegetables.
Can I water bath can this pickled asparagus recipe?
I strongly advise against it for this specific batch. This recipe is engineered for refrigerator pickling. If you try to process them in a boiling water bath, you’ll steam the spears and lose that amazing, crisp texture we worked so hard to keep. These are meant to be stored cold!
Understanding the Nutritional Profile of Pickled Asparagus
As passionate cooks, we need to know what we are putting into our bodies, even when we are enjoying a delicious snack straight from the jar. Since we optimized this recipe for flavor and crunch using very simple components—vinegar, salt, sugar, and vegetables—the nutritional profile holds up really well. It’s one of the great benefits of keeping your preservation methods straightforward!
Here is a projection of what you are looking at per serving size (which we defined as about 4 spears). Remember, this is based on the exact ingredient ratios we used, so slight variations in salt or sugar usage might change the numbers a tiny bit:
- Serving Size: 4 spears
- Calories: 15 (That’s incredibly low for a satisfying snack!)
- Fat: 0 g
- Cholesterol: 0 mg
- Carbohydrates: 3 g
- Sugar: 2 g
- Protein: 1 g
- Sodium: 290 mg (This is the necessary trade-off when preserving the harvest with brine, so keep that in mind!)
When you look at those numbers, it’s clear why I call these such great healthy snacks. You get great flavor and crispness without loading up on fat or excessive calories. Just be mindful of your overall sodium intake if you plan on eating half the jar in one sitting—which, let’s be honest, I totally have done!
PrintSimple Pickled Asparagus Spears
Make crunchy, tangy pickled asparagus spears perfect for snacking or garnishing. This recipe preserves your spring harvest easily.
- Prep Time: 15 min
- Cook Time: 5 min
- Total Time: 20 min
- Yield: 2 pints 1x
- Category: Appetizer
- Method: Refrigerator Pickling
- Cuisine: American
- Diet: Vegetarian
Ingredients
- 1 pound fresh asparagus, tough ends snapped off
- 1 cup white vinegar
- 1 cup water
- 2 tablespoons kosher salt
- 1 tablespoon granulated sugar
- 2 cloves garlic, smashed
- 1 teaspoon black peppercorns
- 1/2 teaspoon red pepper flakes
Instructions
- Prepare your canning jars by washing them thoroughly.
- In a small saucepan, combine the vinegar, water, salt, and sugar. Bring the mixture to a boil over medium-high heat, stirring until the salt and sugar dissolve completely. Remove from heat.
- Pack the raw asparagus spears tightly into the prepared jars, standing them upright if possible.
- Divide the smashed garlic, peppercorns, and red pepper flakes evenly between the jars.
- Carefully pour the hot brine over the asparagus in each jar, ensuring the spears are fully submerged. Leave about 1/2 inch of headspace at the top.
- Wipe the rims clean, seal the jars with lids and bands. Let the jars cool on the counter until sealed.
- Once cool, store the jars in the refrigerator. These pickled vegetables are ready to eat after 24 hours and keep for several weeks.
Notes
- For best crunch, use fresh, firm asparagus spears.
- If you prefer a milder flavor, reduce the red pepper flakes.
- These make a great addition to a charcuterie board or as a Bloody Mary garnish.
Nutrition
- Serving Size: 4 spears
- Calories: 15
- Sugar: 2
- Sodium: 290
- Fat: 0
- Saturated Fat: 0
- Unsaturated Fat: 0
- Trans Fat: 0
- Carbohydrates: 3
- Fiber: 1
- Protein: 1
- Cholesterol: 0