
Remember tearing open those bright red, slightly chewy fruit snacks as a kid? They were pure magic, right? Well, I’m here to tell you we can get that exact nostalgic hit, but better. Forget the questionable ingredients of the store-bought version; we are engineering a better experience with this viral homemade strawberry fruit roll up. As someone who approaches the kitchen like a project manager, I stripped this recipe down to its core—maximum flavor output with minimum time input. This isn’t complicated; this is just smarter, simpler snack creation that you can actually trust. I promise, these strawberry snacks are perfect for quickly sealing up for your next park day. Looking for great lunch companions? Check out my ideas for healthy lunch ideas!
- Why This Homemade Strawberry Fruit Roll Up Recipe Works (Viral Food Hack)
- Ingredients for Your Simple Strawberry Fruit Roll Up
- Step-by-Step Instructions for Making Strawberry Fruit Roll Ups
- Tips for Success When Creating Homemade Fruit Snacks
- Storing Your Fresh Strawberry Fruit Roll Ups
- Variations on Classic Fruit Roll Ups
- Serving Suggestions for These Healthy Rollups
- Frequently Asked Questions About Homemade Fruit Snacks
- Next Steps in Smarter Snacking
Why This Homemade Strawberry Fruit Roll Up Recipe Works (Viral Food Hack)
When I design a recipe, I focus on reliability, which is why this strawberry fruit roll up process is so foolproof. We aren’t relying on stabilizers or weird gums. We are just using quality strawberries, sugar, and a very specific baking temperature. This method takes the guesswork out of dehydration. If you need amazing appetizers and snacks for your next get-together, this is the one.
- Simplicity is Key: Only three main ingredients are needed. No sourcing specialty items; just pure fruit flavor.
- Low-Temp Baking: Using the oven at 200°F acts as your gentle dehydrator, ensuring the sugars caramelize perfectly instead of burning.
- Controlled Structure: We cook the fruit down sufficiently before baking, guaranteeing that chewy, rollable result every time.
Achieving the Perfect Texture for Your Strawberry Fruit Roll Up
Texture is everything when it comes to these fruit roll ups. You MUST spread the puree incredibly thin—think under an eighth of an inch. If it’s too thick, the middle stays gummy no matter how long you bake it. We blast it with low heat for hours to wick away the moisture slowly. If you want maximum structure, go ahead and add that tiny bit of pectin I listed. It really helps guarantee that satisfyingly chewy snap when you roll up your strawberry fruit roll up.
Ingredients for Your Simple Strawberry Fruit Roll Up
When I map out my projects, the ingredient list has to be clear and non-negotiable. This is the foundational list for making awesome strawberry snacks that taste like summer. Precision here means success later. Trust me, keeping this tight ingredient list means less cleanup and a faster path to your finished fruit roll ups.
- 2 cups fresh strawberries, hulled
- 1/4 cup granulated sugar
- 1 tablespoon lemon juice
- 1 teaspoon pectin (optional, for setting)
Ingredient Notes and Substitutions
The sugar isn’t just for taste; it plays a role in preservation, keeping that vibrant color locked in. Pectin is my project manager’s touch—it reinforces the structure. If you don’t want to mess with pectin, no sweat. Just budget an extra 30 minutes or so for drying time; the low and slow bake will still get you there.
Step-by-Step Instructions for Making Strawberry Fruit Roll Ups
Now we get into the execution phase of this plan! Making these strawberry fruit roll ups is less about frantic stirring and more about managed waiting time. The initial cooking phase is quick, but the drying stage requires patience—don’t try to rush it, or you’ll end up with a sticky mess. Remember, efficiency in the kitchen means respecting the process. If you’re planning these for a meal prep schedule, check out my guide to quick, easy dinners for inspiration on streamlining your week!
Pureeing and Spreading the Strawberry Fruit Roll Up Base
Your goal here is perfect uniformity. Once the strawberries cook down, you need to blend that mixture until it’s smooth as silk. Zero lumps allowed! Pour that bright red puree onto your prepared sheet. Now, grab an offset spatula—this is where you apply that project manager precision. Spread the mixture thinly, aiming for exactly 1/8 of an inch across the entire surface. Thinness equals chewiness in these fruit roll ups.
The Drying Process: Baking Your Fruit Leather
This is the longest part of the process, so set a timer and walk away! Preheat your oven to a gentle 200°F. We bake this delicate strawberry fruit roll up mixture for 2 to 3 hours total. Here’s the critical check: look at it every 30 minutes. If you see dark edges, pull it out sooner! You want it dry to the touch, not sticky. Once it passes the test, you absolutely must let it cool completely before you even think about peeling it off the parchment.
Tips for Success When Creating Homemade Fruit Snacks
I’ve definitely made this recipe enough times in my Chicago apartment to learn where things can go sideways. My testing proved that a few small steps make all the difference between a good snack and a perfect, packable treat. You want these homemade fruit snacks to unroll cleanly without tearing, right? That’s where experience comes in handy.
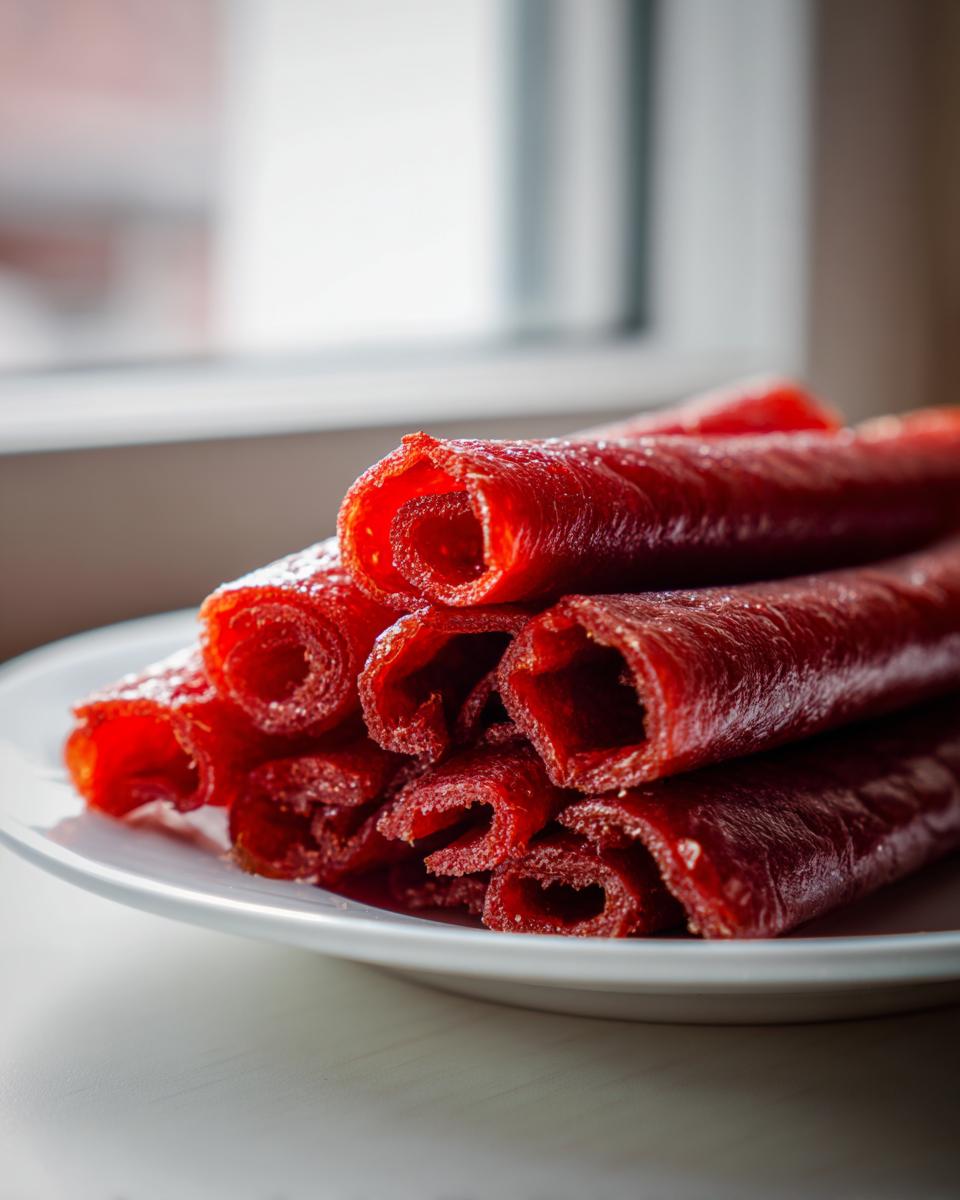
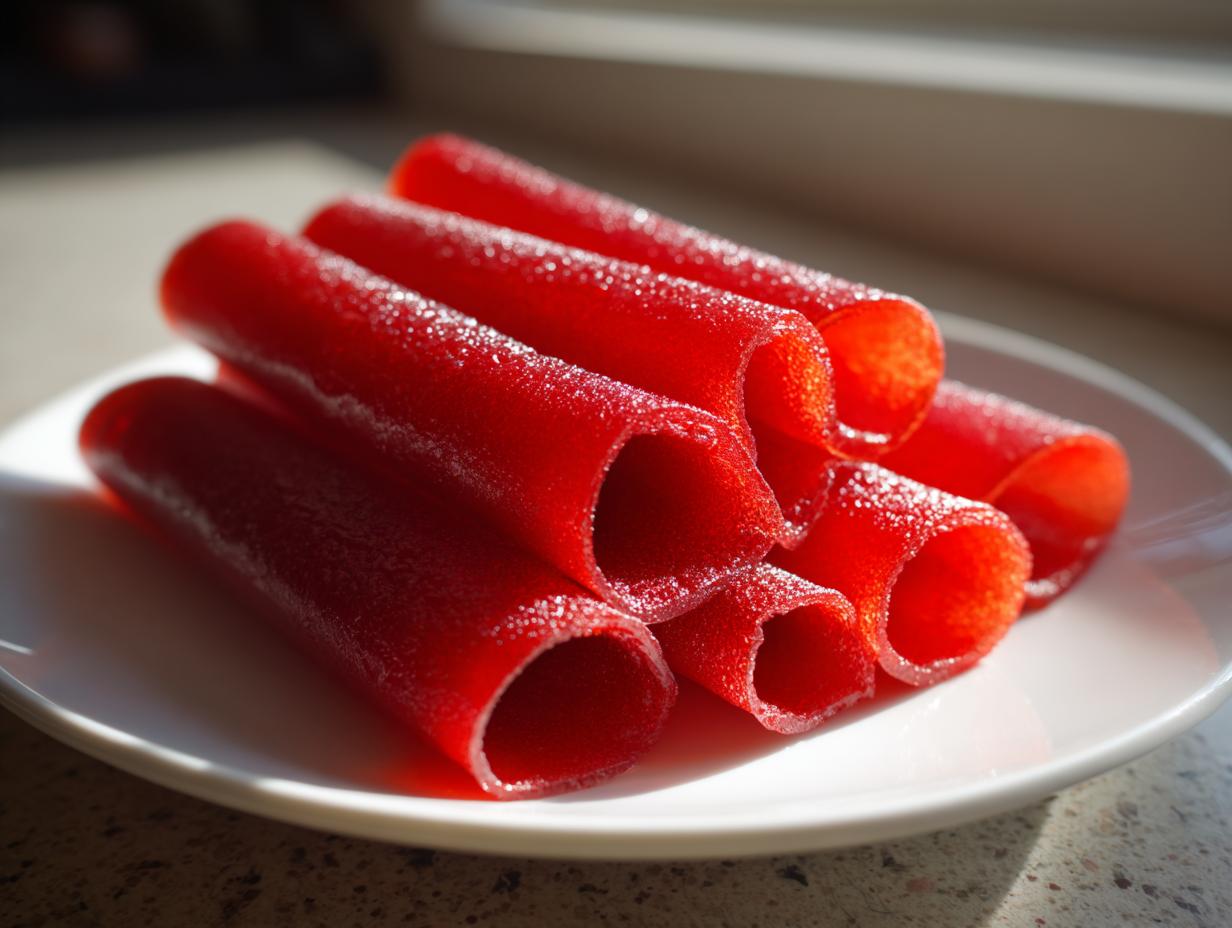
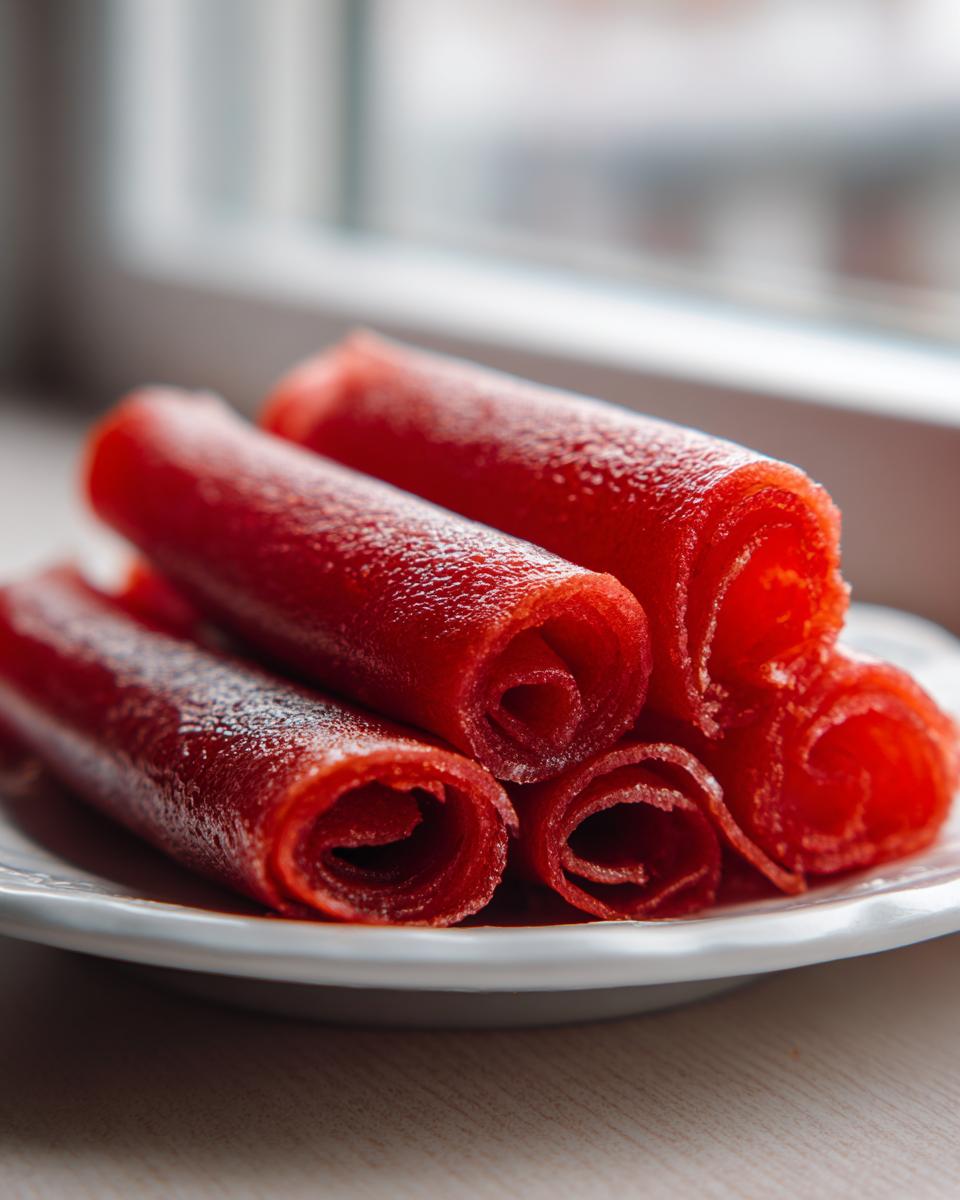
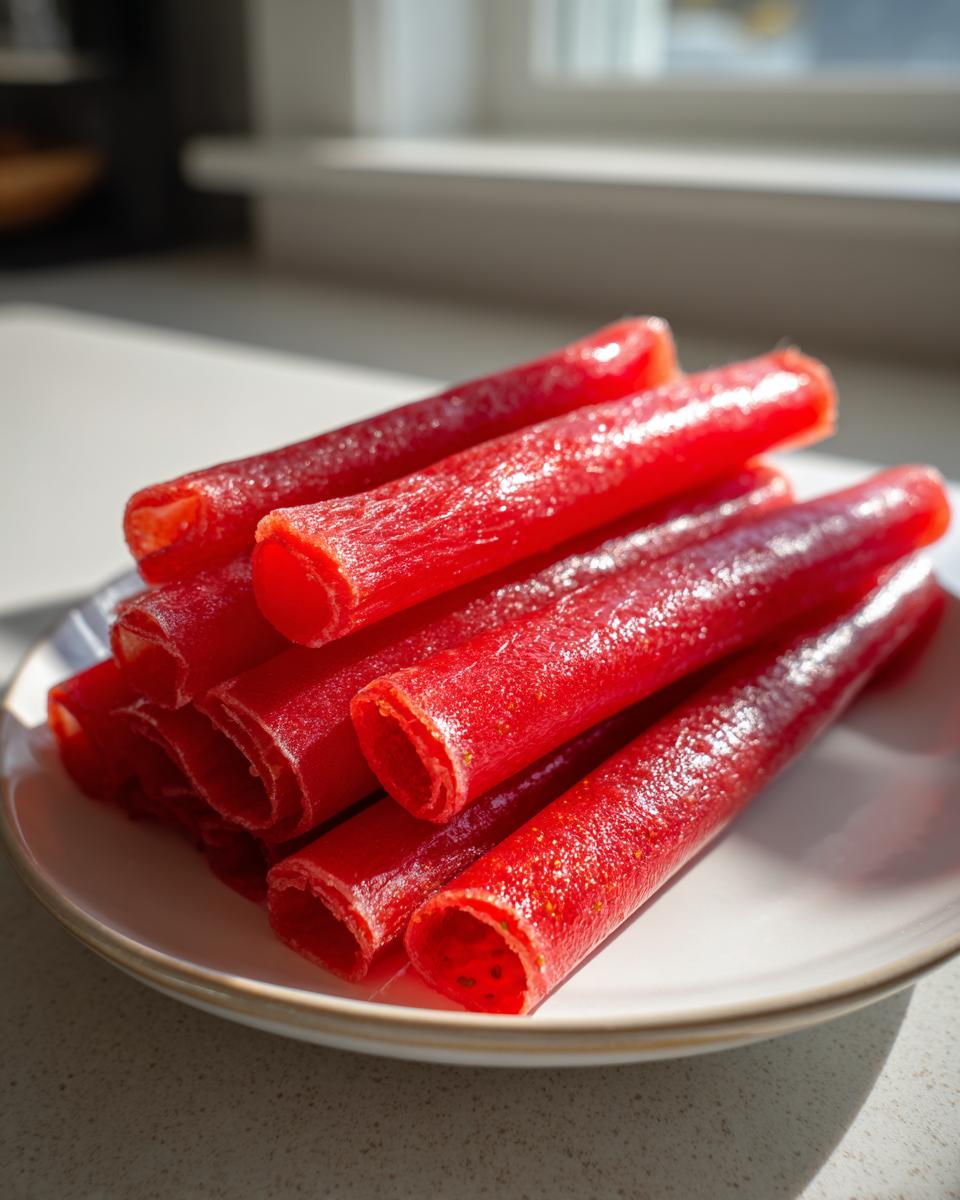
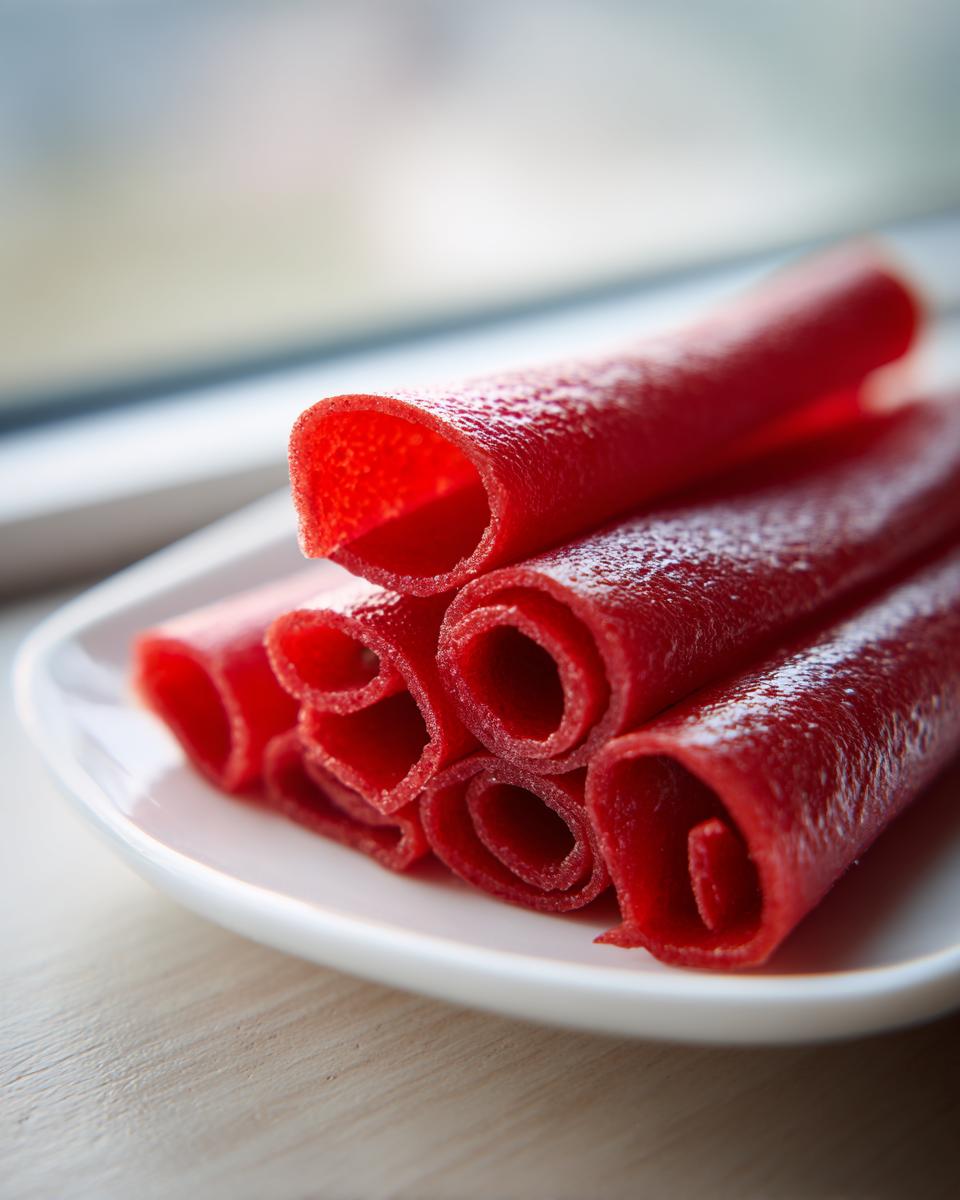
Here’s the pro-tip I learned the hard way: don’t try to slice the dried leather directly off the parchment paper. It sticks! Instead, once it’s completely cool, gently peel the fruit mat onto a large sheet of plastic wrap or wax paper. Then, use a pizza cutter—it glides so much better than a knife—to slice your 1-inch strips for your strawberry snacks. This little trick prevents cracking and makes rolling them into perfect little tubes incredibly easy. If you need more simple wins in the kitchen, you should check out my favorite dessert recipes.
Storing Your Fresh Strawberry Fruit Roll Ups
So you finally have your perfect strawberry fruit roll ups! Don’t let all that effort go to waste by storing them incorrectly. Honestly, I hate when fruits snacks get gummy. The key here is dryness and sealing. Once rolled, keep these beauties in a truly airtight container. If you’re packing these for a picnic, wrap individual fruit roll ups in a small piece of plastic wrap first—this guarantees they won’t fuse together into one giant sticky blob by lunchtime. They should hold up great for a week this way.
Variations on Classic Fruit Roll Ups
I love sticking to the core recipe for these fruit roll ups, but once you’ve mastered the process, it’s fun to experiment a little. You don’t need to overcomplicate things to get a new flavor profile. Since we’re dealing with a simple strawberry base, you can easily double the batch and mix in a half-cup of mashed raspberries during the cooking phase. Wow, that really amps up the tartness!
Another simple tweak is swapping that tablespoon of lemon juice for lime juice. It gives the strawberry snacks a brighter, almost candy-like zing. If you’re looking for inspiration on other sweet treats, I’ve got a great recipe for strawberry cake mix cookies that uses a similar flavor profile but is way faster!
Serving Suggestions for These Healthy Rollups
This is where the engineering pays off! These healthy rollups are designed to be shelf-stable and packable, making them heroes for summer. Forget fuss; these are go-to strawberry snacks for the park, the beach, or any adventure where you need a quick energy boost. They are fantastic straight out of the container, or paired alongside a simple cheese stick or some nuts for a balanced lunchbox moment. For more ideas on packing smarter lunches, you need to see my list of healthy lunch ideas!
Frequently Asked Questions About Homemade Fruit Snacks
I know some of these steps, especially that long, slow bake, might make you pause. That’s where I step in to troubleshoot! We covered the main process for getting perfect fruit roll ups, but let’s knock out a few lingering questions about timing and logistics for these strawberry snacks. My goal is to make sure your workflow is totally optimized.
Can I make strawberry snacks without an oven?
Technically, yes, if you have a food dehydrator, you can use that! Just use the lowest setting, usually around 135°F, and it might take 8 to 10 hours instead of 3. But honestly, for reliability and ease, the 200°F oven method is surprisingly consistent. It doesn’t require specialized equipment for this strawberry recipe.
How long do these homemade fruit snacks last?
If you follow my storage advice about that airtight container, these homemade fruit snacks will stay perfectly pliable and delicious for about two weeks at room temperature. That’s why they are such great grab-and-go options—no refrigeration needed!
Another thing that comes up is color. If your strawberry fruit roll up looks a little dull after a few days, don’t worry! That just means the natural sugars are setting. The flavor is still fantastic.
Next Steps in Smarter Snacking
Alright, team, that’s the full blueprint for mastering the viral homemade strawberry fruit roll up. We’ve engineered efficiency into every step, giving you a nostalgic, delicious, and healthy snack that’s ready for any adventure. Now that you’ve proven you can execute this project flawlessly, I need your feedback!
Head back up and give this recipe a rating based on how easy it was to streamline. And seriously, if you make these amazing fruit roll ups, tag me on social media! I want to see your perfectly rolled creations. Sharing successful projects is the best part. If you want more streamlined recipes that fit seamlessly into a busy life, make sure you bookmark the main Dishicious homepage—that’s where all the smart cooking begins!
PrintViral Homemade Strawberry Fruit Roll Ups

Make simple, nostalgic fruit snacks using fresh strawberries. This recipe delivers a fun, packable treat perfect for picnics.
- Prep Time: 10 min
- Cook Time: 3 hr
- Total Time: 3 hr 10 min
- Yield: About 12 roll ups 1x
- Category: Snack
- Method: Baking
- Cuisine: American
- Diet: Vegetarian
Ingredients
- 2 cups fresh strawberries, hulled
- 1/4 cup granulated sugar
- 1 tablespoon lemon juice
- 1 teaspoon pectin (optional, for setting)
Instructions
- Prepare your baking sheet by lining it with parchment paper or a silicone mat. Lightly grease the liner.
- Combine the strawberries, sugar, and lemon juice in a small saucepan.
- Heat the mixture over medium heat, stirring occasionally until the strawberries break down and the mixture simmers, about 10 minutes.
- If using pectin, stir it in now and continue to simmer for 1 minute, stirring constantly.
- Carefully transfer the strawberry mixture to a blender or use an immersion blender to puree until completely smooth.
- Pour the puree onto the prepared baking sheet, spreading it into a thin, even layer, about 1/8 inch thick.
- Bake in an oven preheated to 200 degrees Fahrenheit (95 degrees Celsius) for 2 to 3 hours, or until the fruit mixture is dry to the touch and no longer sticky. Check every 30 minutes to prevent burning.
- Remove from the oven and let it cool completely on the sheet.
- Once cool, carefully peel the fruit leather off the parchment paper.
- Using a sharp knife or pizza cutter, slice the leather into strips about 1 inch wide.
- Roll each strip tightly to create your homemade fruit snacks. Store in an airtight container.
Notes
- For easier rolling, place the dried fruit leather on a sheet of plastic wrap before slicing.
- If you want a more intense strawberry flavor, reduce the sugar slightly.
- This recipe makes excellent healthy rollups for lunchboxes.
Nutrition
- Serving Size: 1 roll up
- Calories: 55
- Sugar: 12
- Sodium: 1
- Fat: 0
- Saturated Fat: 0
- Unsaturated Fat: 0
- Trans Fat: 0
- Carbohydrates: 14
- Fiber: 1
- Protein: 0
- Cholesterol: 0