
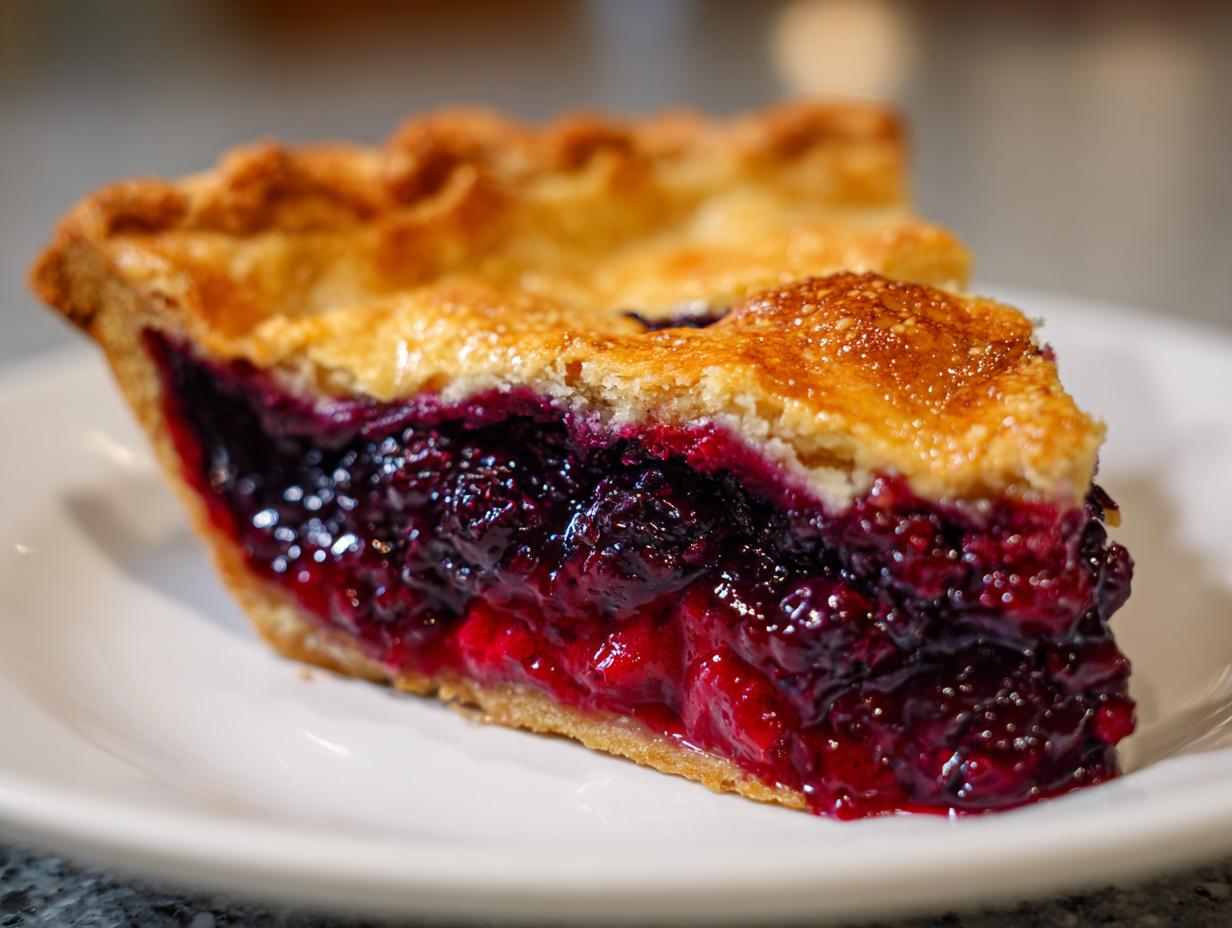
There’s something about cutting into a perfect fruit pie that just screams summertime, holidays, and pure comfort. But let’s be honest: most homemade berry pies are a project in disappointment. You spend all that time engineering a beautiful lattice top, only for the filling to run out onto the plate like a burst juice box. No, thank you. I’m Leo, and I hate wasted effort. That’s why I optimized this triple berry pie recipe. We’re solving the two main chaos points—soggy pastry and soupy filling—by applying a project management approach. Trust me, this is the ultimate, foolproof recipe for a shatteringly flaky crust and a perfectly sliceable fruit filling.
- Why This Triple Berry Pie Recipe Works Every Time (The Dishicious Method)
- Ingredients for the Best Triple Berry Pie
- How to Prepare Your Triple Berry Pie: Step-by-Step Instructions
- Tips for the Ultimate Homemade Berry Pie Success
- Triple Berry Pie Variations: Crumb Topping Pie and More
- Serving Suggestions for Your Classic American Pie
- Storage and Reheating Instructions for Triple Berry Pie
- Frequently Asked Questions About Making Triple Berry Pie
- Rate This Homemade Berry Pie Recipe
Why This Triple Berry Pie Recipe Works Every Time (The Dishicious Method)
My methodology in the kitchen is all about efficiency and reliability. When you bake this triple berry pie, you aren’t just following steps; you’re executing a system built to eliminate failure points. We tackle the crust and the filling separately to ensure peak performance in both components. I’ve tested this against lighter fillings like lemon, and the core principles hold true.
The most important component for getting that perfect, clean slice—the thing everyone hunts for in a best berry pie—is proper mitigation against excess juice. That’s where our thickener comes in. I rely on a specific amount of cornstarch because it provides a clear, glossy set without making the filling gummy. If you’re interested in other reliable setting agents, you can read about some of my process on flawless custard pie secrets, which uses similar structural logic.
Guaranteed Flaky Pie Crust Tutorial
The foundation of any great pie, including this triple berry pie, is the pastry. My rule for a buttery pie dough is simple: cold ingredients matter more than anything. You must keep your butter ice-cold and handle the dough as little as possible. We’re trying to create tiny layers of butter that steam in the oven, separating the flour layers to give you that shatteringly flaky texture. Warm butter just melts into the flour, resulting in a tough, dense mess. Don’t even think about using warm butter here!
Achieving a Sliceable Fruit Pie Filling
If you want a sliceable fruit pie that holds its shape when you cut it, you need two things: the right thickener and immense patience. We use cornstarch because it activates beautifully with the sugar and acid in the berries. But here’s the real trick for that no runny pie filling result: cooling time. You absolutely cannot rush the cooling process. If you slice into this pie when it’s warm, even if the cornstarch is activated, the structure hasn’t stabilized. You must allow it to set completely, which means a solid four hours on the counter.
Ingredients for the Best Triple Berry Pie
Okay, now that we know the strategy, let’s look at the parts list. Remember, for this Blueberry Raspberry Blackberry Pie to work right, precision on these measurements is key, especially with the butter. Don’t substitute; we are aiming for reliable flavor here. If you want to read up on how precise measurements matter in other areas, check out my thoughts on homemade mayonnaise. It’s all about controlled inputs!
For the Buttery Pie Dough
- 2 1/2 cups all-purpose flour
- 1 teaspoon salt
- 1 tablespoon granulated sugar
- 1 cup (2 sticks) unsalted butter, very cold and cubed
- 1/2 cup ice water (plus more if needed)
For the Sweet and Tart Berry Filling
- 6 cups mixed berries (blueberries, raspberries, blackberries—fresh or frozen!)
- 1 1/2 cups granulated sugar (adjust this if your berries are already super sweet)
- 1/4 cup cornstarch (this is your security blanket against a no runny pie filling!)
- 1 tablespoon lemon juice
- 1/2 teaspoon ground cinnamon
- 1 large egg, beaten with 1 teaspoon water (for that beautiful finish)
How to Prepare Your Triple Berry Pie: Step-by-Step Instructions
Alright, let’s get this project moving. Pie assembly happens in three clean phases: dough prep, filling assembly, and finally, the bake/set phase. If you want a great crust, you need to focus only on the crust during Phase One. Don’t worry about the filling yet! Speaking of efficient baking, I use a similar multi-batch approach for things like my sourdough starter—you tackle one element completely before moving to the next to reduce chaos.
Mixing the Flaky Pie Crust Tutorial
First, whisk your dry ingredients in a big bowl. Then, toss in that cubed, very cold butter. You need to work it in fast—I use a pastry blender for speed, smashing the butter into the flour until the pieces are about the size of peas. This creates those layers we want! Now, drizzle in your ice water, just a tablespoon at a time. Stop adding water the second the dough looks shaggy but starts holding together when you squeeze a handful. Divide it into two disks, wrap them tight, and get them into the fridge for at least an hour. Seriously, no shortcuts here; that chill time solidifies the fats.
Assembling the Blueberry Raspberry Blackberry Pie
Once chilled, it’s time to construct this beauty. Flour your counter lightly and roll out one disk until it’s roughly 12 inches across. Ease that crust into your pie plate carefully! Trim the overhang to about an inch. Now, gently pour in all those glorious mixed berries. Remember, the cornstarch is already mixed in, which is great for efficiency!
Roll out the second disk. This is where you decide: go traditional with a traditional lattice pie top—just weaving strips together—or if you’re short on time, just lay the top crust on whole and cut three or four vents in the top so the steam can escape. Crimp those edges firmly to seal the deal and brush the top with your egg wash. That little bit of egg makes it golden gorgeous!
Baking and Cooling for a Sliceable Fruit Pie
We bake this pie in two stages. Start high! Preheat your oven and bake at 400°F (200°C) for just 20 minutes. This initial blast sets the crust structure quickly. Then, drop that heat down to 375°F (190°C) and keep baking for another 35 to 45 minutes. Watch for thick bubbling juice—that means the cornstarch is working! I usually toss some foil over the edges halfway through so they don’t burn.
Here is the essential step for your sliceable fruit pie: DO NOT TOUCH IT. You must let this triple berry pie cool on a wire rack for a minimum of four hours. I know, it’s torture waiting when it smells this good, but this cooling period is non-negotiable if you want that no runny pie filling result you’re looking for.
Tips for the Ultimate Homemade Berry Pie Success
We’ve got the blueprint, but even engineered recipes need a little common-sense maintenance to guarantee success. I find that avoiding small operational errors is what separates a good pie from truly the best berry pie you’ve ever made. Think of these as quality control checks for your baked good project.
Handling Fresh or Frozen Berries in Your Triple Berry Pie
This recipe is flexible, which is great for busy home cooks. If you’re using berries from the freezer—and you absolutely can for this triple berry pie—I have one non-negotiable rule: Do not thaw them first! Throw those frozen blueberries and raspberries straight from the freezer into the bowl with the cornstarch mixture. The initial blast of high heat in the oven will handle them fine, and crucially, thawing them releases gallons of water, which guarantees a soup disaster inside your crust.
Preventing a Soggy Bottom Crust
A beautiful, flaky top crust paired with a soggy bottom? That’s a flavor failure in my book. There are two ways I tackle this to ensure a dry, crisp base that complements that buttery pie dough. First, if you have one, place your pie plate onto a preheated baking sheet before it even goes into the oven. That direct contact heat helps cook the bottom quickly. Second, remember that egg wash we put on top? If you have extra, you can lightly brush the bottom crust *before* adding the berry filling. It acts as a minor moisture barrier. For more on building solid foundational layers in recipes, you might look at my guide on classic homemade stuffing; the principles of layering are similar!
Triple Berry Pie Variations: Crumb Topping Pie and More
While the lattice top is classic Americana, sometimes you need a little variation in your homemade dessert ideas. Who says you can’t mix two favorites? If you’re craving texture over intricate weaving, switching to a crumb topping is a super easy pivot. It gives you that crunchy, buttery contrast to the soft fruit inside without any fuss.
This base recipe is so solid that it handles slight modifications beautifully. Think of it as Version 1.0 ready for your custom updates. For those who enjoy adding unique elements to their seasonal fruit desserts, I’ve got one particular twist that really wakes up the palate.
Making a Razzleberry Pie Recipe Twist
If you call it a Razzleberry Pie, you probably want a little extra zip. That extra tartness comes from sneaking in some rhubarb. Take about one cup of the mixed berries out—say, some blueberries—and swap them for finely diced rhubarb stalks. Rhubarb really balances the sweetness of the raspberries and blackberries perfectly. It turns this into a really dynamic, complex flavor profile. And hey, if you like experimenting with flavor pairings, you should check out my optimized cranberry walnut bread recipe; it’s all about balancing sweet and tart notes!
If you ditch the top crust entirely for a streusel, layer it on thick! That combination of crumb topping and mixed berries is seriously addictive, turning your pie into something closer to a glorious fruit crisp.
Serving Suggestions for Your Classic American Pie
Now that you’ve executed the project perfectly and your triple berry pie has fully set—thank goodness for that four-hour cool down!—it’s time for the best part: presentation and serving. A great dessert deserves the right accompaniment. Since this pie is naturally both sweet and tart, we want to bring in complementary flavors, not competing ones.
For a summer day, especially if you’re serving this up after a backyard barbecue, you can’t beat simple cold cream. A scoop of good quality vanilla ice cream turns this tart pie into something truly decadent. But honestly, I find that the best pairing is often a homemade whipped cream. It’s so much lighter than icing, and you can whip it up while the pie cools!
If you want a richer topping, especially for a holiday gathering where you might want something more structured, I always default to a homemade vanilla stabilization. You can find my reliable recipe for fluffy and stable vanilla buttercream, which, used sparingly as a side dollop rather than spread across the whole top, really elevates the dessert experience. It just adds that extra layer of creamy luxury that makes any classic American pie feel special.
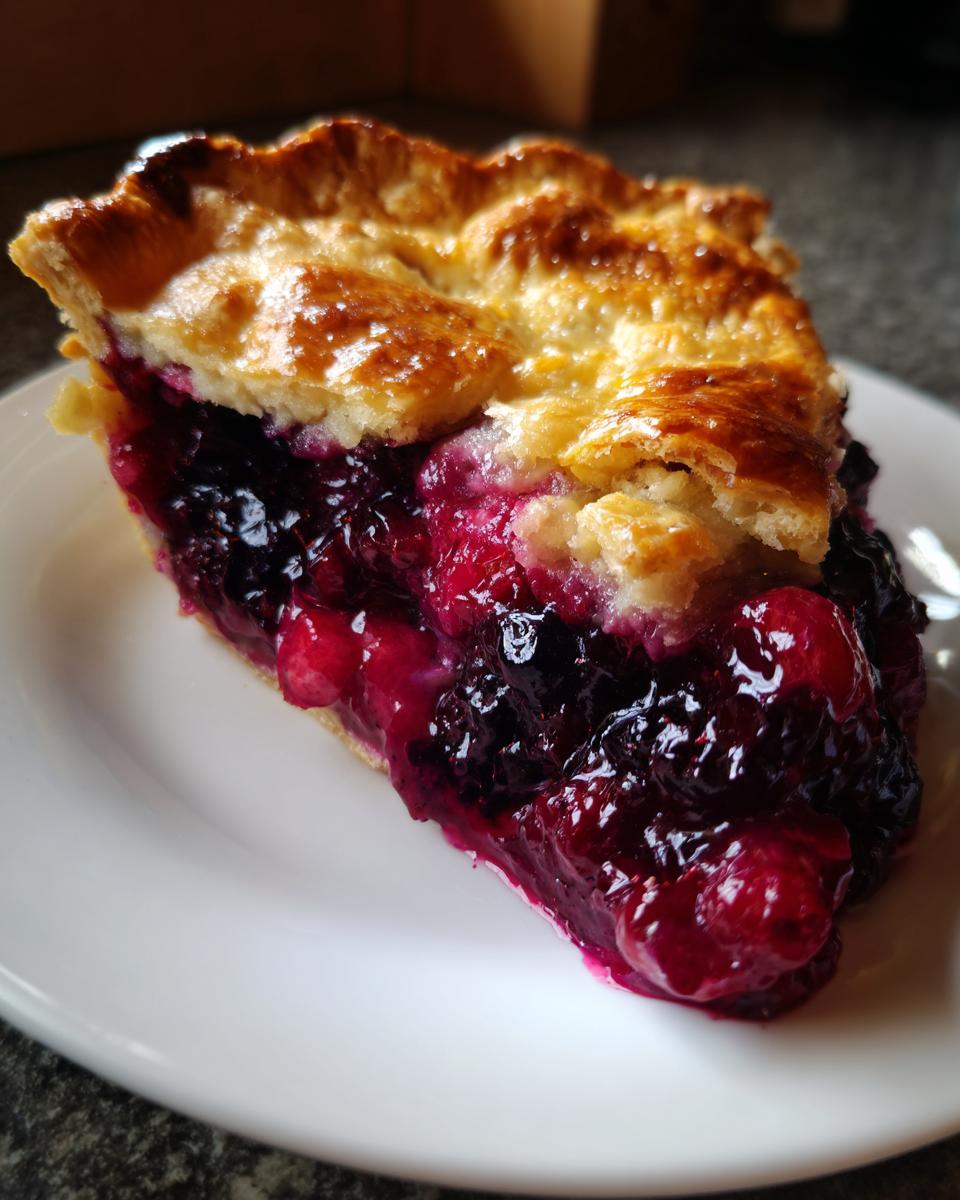
Remember, presentation-wise, if you went with a lattice top, let people see those jammy berries bubbling through! That visual is half the appeal of this gorgeous homemade berry pie.
Storage and Reheating Instructions for Triple Berry Pie
The beauty of this triple berry pie recipe is that it actually tastes better the next day once those flavors have settled in completely. But, you can’t just leave it sitting out indefinitely, especially if you used a crumb topping instead of a full top crust. We need to manage storage like any good project—preserve the outcome!
Since we engineered this filling to set perfectly using cornstarch, its stability is quite good. If you had a really hot day and you’re worried about the sugar content, the fridge is your best friend. Cover the cooled pie loosely with plastic wrap or foil—don’t seal it tightly right where the crust meets the filling, or you might trap moisture and steam the crust overnight.
At room temperature, this pie is generally fine for about 8 hours on the counter, provided your kitchen isn’t baking hot. If you need it to last longer, pop it into the refrigerator. It will last up to three days in the cold. Yes, the crust will soften a bit in the fridge, that’s the trade-off for longevity, but don’t worry, we have a simple reheat trick to fix that.
When reheating a single slice of your homemade berry pie, never use the microwave first. The microwave is too aggressive and turns that beautiful flaky pie crust tutorial work rubbery instantly. Instead, take the slice out and let it sit on the counter for about 30 minutes to come closer to room temperature. Then, pop that slice onto a baking sheet and heat it in a toaster oven or a conventional oven set to a low 300°F (150°C) for maybe 8 to 10 minutes. That gentle heat warms the filling through and re-crisps the crust edges perfectly. It basically resets the bake cycle for that slice, minimizing any moisture migration. This way, you still enjoy that perfect blend of sweet and tart berry filling!

Frequently Asked Questions About Making Triple Berry Pie
When you’re baking something this amazing, sometimes you run into little spots where you need clarification. That’s totally normal! My goal with Dishicious is to remove surprises, so let’s optimize these final sticking points. Think of these FAQs as fine-tuning the control panel on your baking project!
Can I use strawberries in this triple berry pie?
Absolutely! If you want to pivot this into a slightly sweeter treat, strawberries are perfect. The classic trifecta is usually blueberry, raspberry, and blackberry, but strawberries blend in beautifully, especially when you’re making summer berry desserts. Just be mindful that strawberries release a bit more liquid than blackberries, so if you use a lot of them, maybe add just a touch more cornstarch—say, another teaspoon—just to be safe. It’s all about managing that moisture yield!
How long must the triple berry pie cool to prevent running?
This question tells me you really want that perfect presentation, and I respect that! Remember, this step is the final quality check for that no runny pie filling promise. You need a minimum of four hours, no exceptions, for this specific cornstarch-thickened **triple berry pie** recipe. I know it feels like forever when that sweet and tart aroma is filling your kitchen, but until the pie is mostly cool, the filling hasn’t fully stabilized its structure. Patience earns you that clean slice!
What is the best way to achieve a ‘buttery pie dough’?
It all comes down to temperature and minimal contact. To get that superior buttery pie dough, you MUST use butter that is straight from the fridge—nearly frozen—and cut it into small, uniform cubes. Work quickly with your fingers or a pastry blender to incorporate it, leaving visible pea-sized chunks. When those chunks melt in the oven, they create steam pockets, which is what separates the dough layers into flakes. Overworking the dough warms the butter, creating a tough, cracker-like crust instead of a flaky one. If you’re interested in more simple baking processes that require high precision, check out my guide to easy sugar cookie bars for another dependable result!
This approach is why this easy fruit pie consistently performs better than recipes that call for just mixing everything together. Get those temperatures right, and the structure builds itself!
Rate This Homemade Berry Pie Recipe
So, there you have it—the optimized system for the absolute best triple berry pie you’ll ever make. We’ve handled the flaky crust, we’ve guaranteed a non-runny filling, and we’ve delivered that sweet-tart burst of flavor perfect for any summer event or holiday table.
Now it’s your turn to execute the project! I need real-world data to confirm my engineering works for everyone. I genuinely want to know how your crust turned out. Did you get those beautiful, crisp layers, or did you run into any snags with your homemade berry pie assembly? Drop a star rating below based on your experience, and please, tell me in the comments if you mastered that crucial cooling step required for a truly sliceable fruit pie.
Every time someone rates this recipe, it helps me refine the process for the next person battling that common kitchen chaos. Share your successes—especially those perfectly crimped edges or that clean slice shot! And if you’re looking for more dinner-to-dessert solutions, you can check out my full collection of simple dessert recipes here. Happy baking!
PrintThe Best Triple Berry Pie with Flaky Crust and Guaranteed Set Filling

Make this classic American pie featuring a sweet-tart filling of blueberries, raspberries, and blackberries encased in a shatteringly flaky, all-butter crust. This recipe guarantees a sliceable, non-runny fruit pie, perfect for summer gatherings or holidays.
- Prep Time: 45 min
- Cook Time: 65 min
- Total Time: 2 hours 55 min
- Yield: 8 servings 1x
- Category: Dessert
- Method: Baking
- Cuisine: American
- Diet: Vegetarian
Ingredients
- 2 1/2 cups all-purpose flour
- 1 teaspoon salt
- 1 tablespoon granulated sugar
- 1 cup (2 sticks) unsalted butter, very cold and cubed
- 1/2 cup ice water (plus more if needed)
- 6 cups mixed berries (blueberries, raspberries, blackberries, fresh or frozen)
- 1 1/2 cups granulated sugar (adjust based on berry sweetness)
- 1/4 cup cornstarch (for a non-runny pie filling)
- 1 tablespoon lemon juice
- 1/2 teaspoon ground cinnamon
- 1 large egg, beaten with 1 teaspoon water (for egg wash)
Instructions
- Prepare the Flaky Pie Crust: In a large bowl, whisk together the flour, salt, and 1 tablespoon sugar. Cut in the cold butter using a pastry blender or your fingers until the mixture resembles coarse crumbs with some pea-sized pieces of butter remaining.
- Gradually add the ice water, 1 tablespoon at a time, mixing until the dough just comes together. Do not overmix. Divide the dough in half, flatten each half into a disk, wrap in plastic, and chill for at least 1 hour.
- Prepare the Berry Filling: In a separate large bowl, gently combine the mixed berries, 1 1/2 cups sugar, cornstarch, lemon juice, and cinnamon. Toss lightly until the berries are evenly coated. The cornstarch is the secret to a sliceable fruit pie.
- Assemble the Pie: Preheat your oven to 400°F (200°C). On a lightly floured surface, roll out one dough disk into a 12-inch circle. Carefully transfer it to a 9-inch pie plate. Trim the edges, leaving a 1-inch overhang.
- Pour the berry filling into the bottom crust.
- Roll out the second dough disk. Create a traditional lattice pie top or a solid top crust. If using a solid top, cut several vents for steam release. Crimp the edges to seal the top and bottom crusts together.
- Brush the top crust lightly with the egg wash and sprinkle with a little extra sugar for color and crunch.
- Bake the Pie: Place the pie on a baking sheet to catch any drips. Bake at 400°F (200°C) for 20 minutes.
- Reduce the oven temperature to 375°F (190°C) and continue baking for another 35 to 45 minutes, or until the crust is golden brown and the filling is bubbling thickly. If the edges brown too quickly, cover them loosely with foil.
- Cool Completely: This step is critical for a non-runny pie filling. Let the triple berry pie cool on a wire rack for at least 4 hours before slicing. This allows the cornstarch to fully set the juices.
Notes
- For the flakiest pie dough, keep all ingredients, especially the butter, as cold as possible.
- If using frozen berries, do not thaw them first; use them directly from the freezer to prevent the filling from becoming too watery.
- For a Razzleberry Pie variation, substitute 1 cup of the mixed berries with diced rhubarb for added tartness.
- If you prefer a crumb topping over a lattice, omit the top crust and sprinkle the berry mixture generously with your favorite streusel topping before baking.
Nutrition
- Serving Size: 1 slice
- Calories: 410
- Sugar: 35g
- Sodium: 250mg
- Fat: 22g
- Saturated Fat: 14g
- Unsaturated Fat: 8g
- Trans Fat: 0g
- Carbohydrates: 52g
- Fiber: 3g
- Protein: 4g
- Cholesterol: 55mg