
Remember those Sunday dinners where the best part wasn’t the roast beef, but that perfect, wobbly slice of pie waiting on the counter? That’s the feeling I chased when I engineered this Old Fashioned Custard Pie recipe. As a home cook who lives by efficiency, I guarantee this is the foolproof method for achieving that signature silky, creamy filling without *ever* getting those annoying cracks. Forget wrestling with complicated techniques; my project management approach to baking boils this down to the essentials. You get pure, nostalgic comfort food that tastes like Grandma made it, but with a structure that never lets you down. This custard pie is seriously simple, and trust me, it’s what you need for your next cozy evening. If you love this level of reliable dessert magic, you’ll definitely want to check out my thoughts on the best classic lemon meringue pie recipe.
- Why This Old Fashioned Custard Pie Works Every Time
- Ingredients for Your Creamy Baked Custard Tart
- How to Prepare This Easy Homemade Custard Pie
- Variations: Cinnamon Vanilla Custard Pie and More
- Tips for a Grandma Approved Custard Recipe
- Storage and Reheating Instructions for Your Custard Pie
- Serving Suggestions for Traditional American Pies
- Frequently Asked Questions About Making Custard Pie
- Baking Confidently with Dishicious
Why This Old Fashioned Custard Pie Works Every Time
Look, I’m not a pastry chef, I’m a guy who needs results when the clock is ticking. That’s why this recipe is streamlined for success. We eliminate the variables that cause trouble, like curdling or splitting, resulting in that perfectly smooth, comforting texture everyone wants from a traditional dessert. It’s all about respecting the eggs and the heat!
- The reliance on simple, quality pantry staples means you don’t need obscure items to succeed.
- Gentle mixing results in a filling that sets beautifully, not unevenly.
For more reliable results in baking, make sure you check out my foolproof guide to the best apple crisp—same concept, reliable outcome!
The Secret to Silky Vanilla Pie Filling
This isn’t just about throwing ingredients in a bowl. To get that truly Silky Vanilla Pie Filling texture, you need to treat the eggs right. That means whisking the sugar and eggs first so the sugar dissolves instead of leaving a grainy feel later. Crucially, we avoid over-whisking the milk in, which whips in too much air. Remember, big air bubbles mean big cracks when the pie cools in the oven. It’s a gentle process from start to finish.
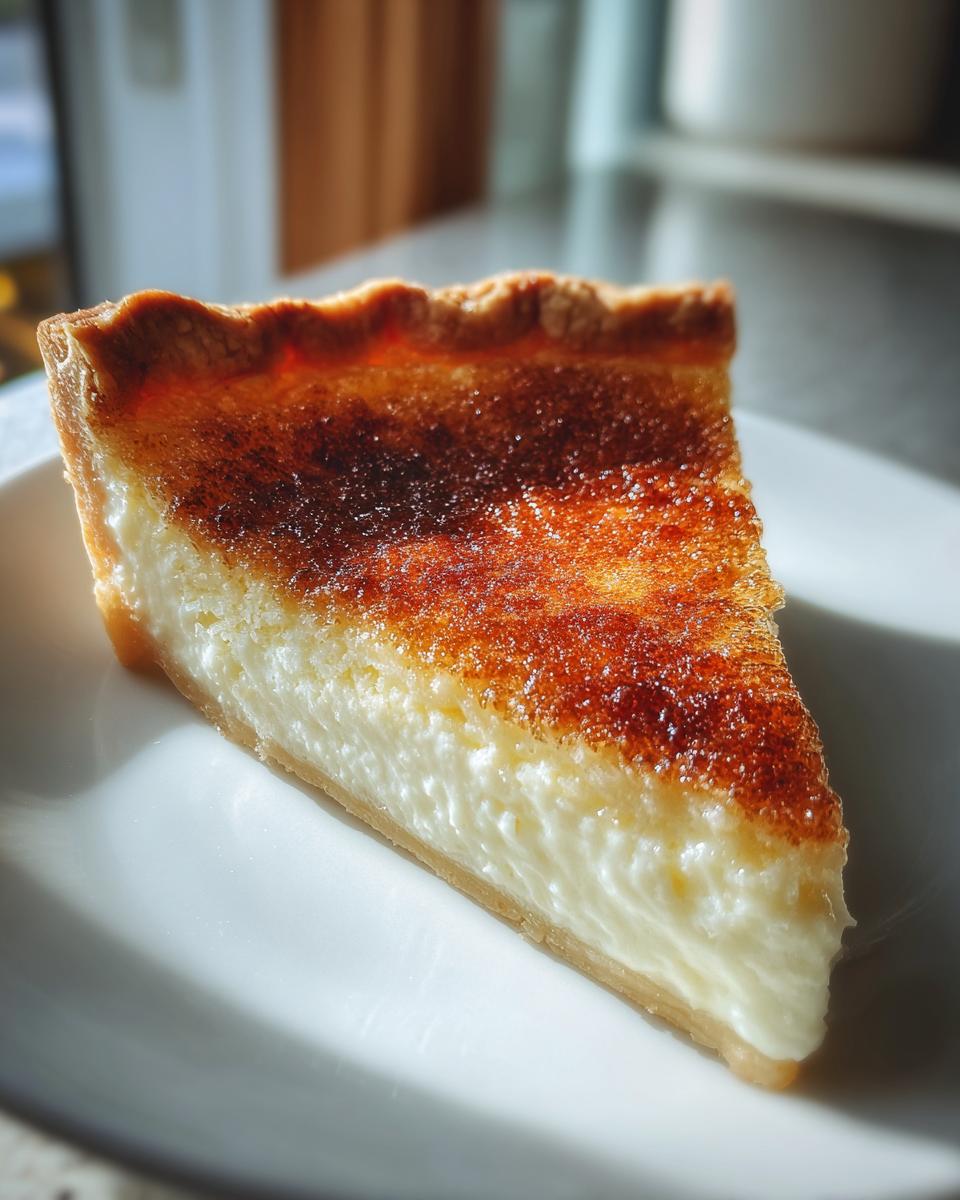
Foolproof Custard Pie Baking: Avoiding Cracks
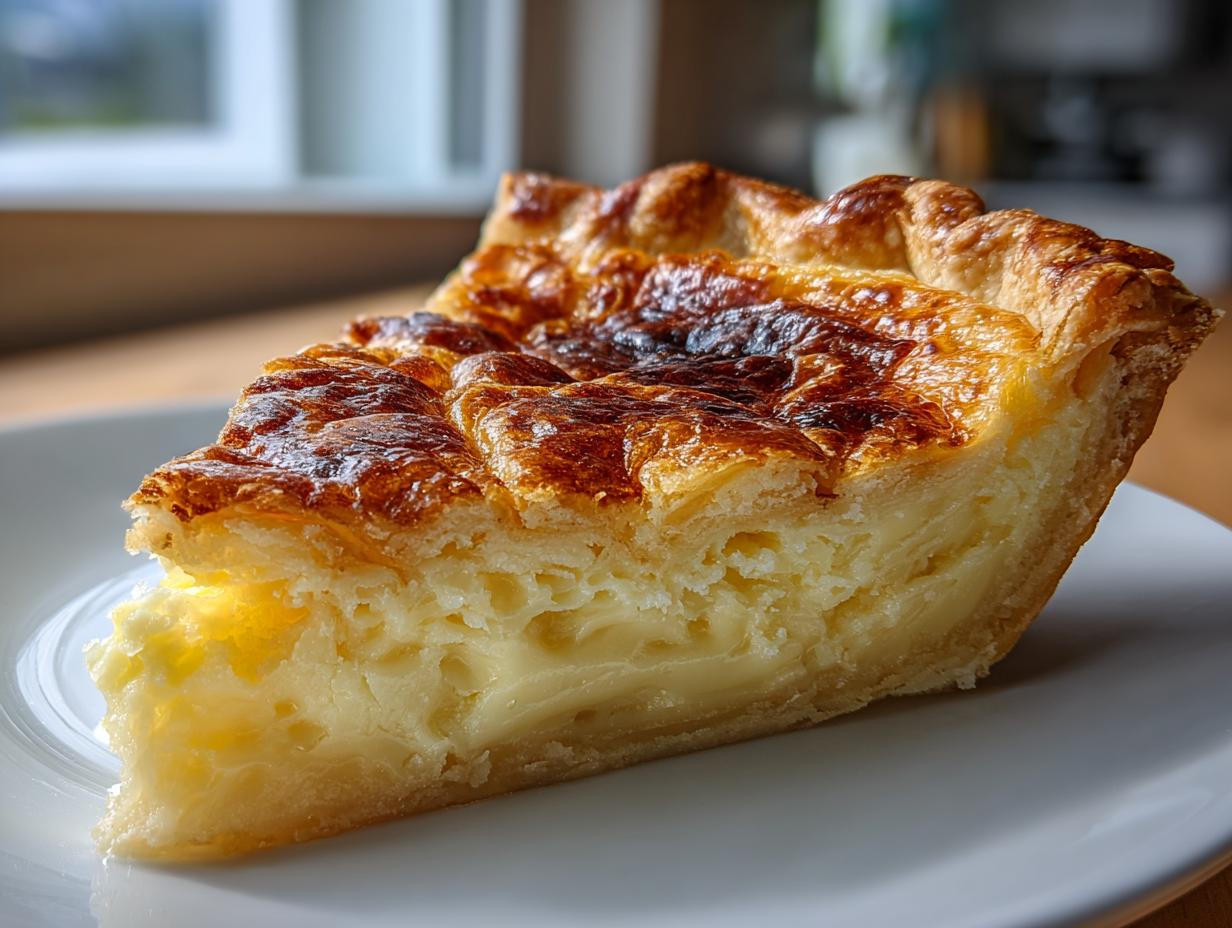
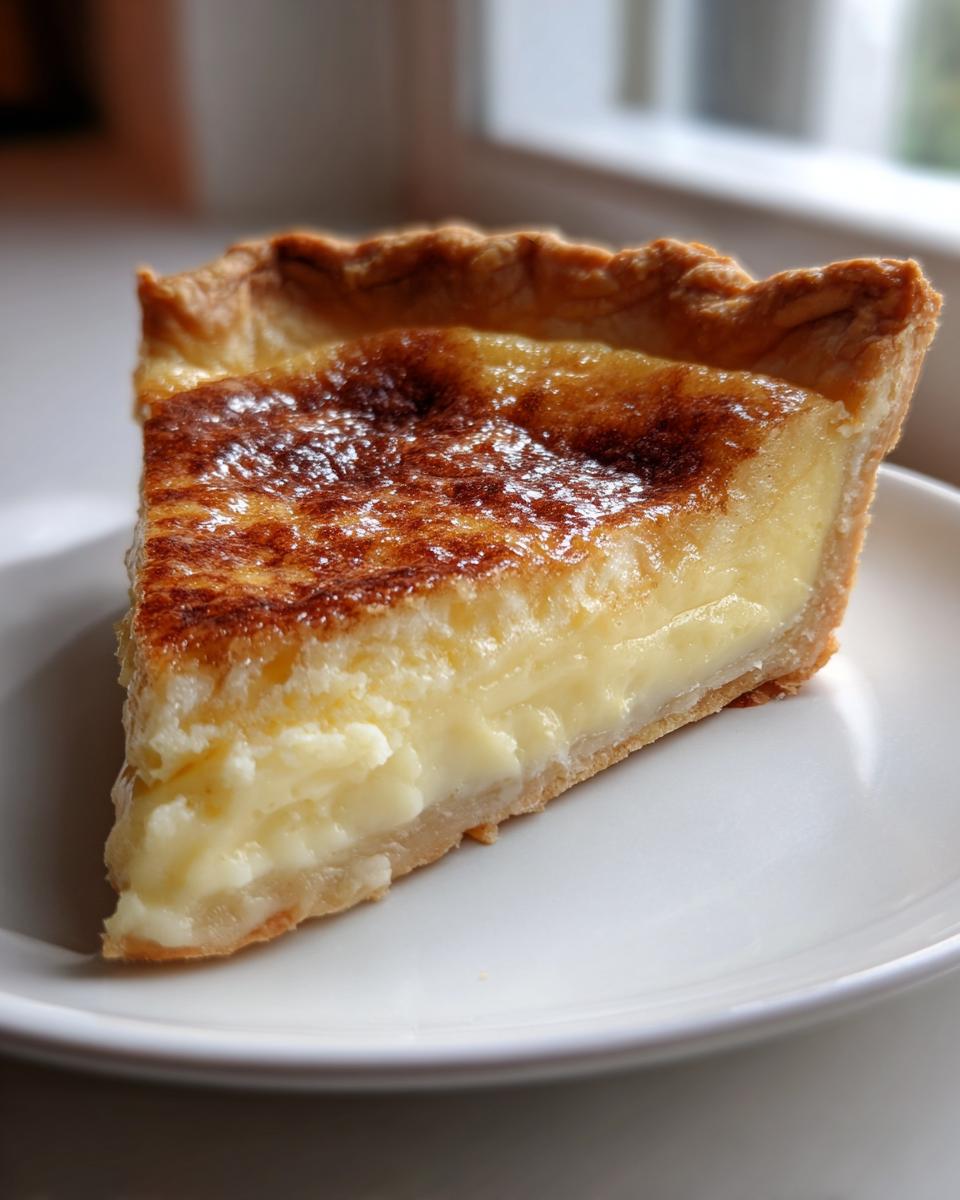
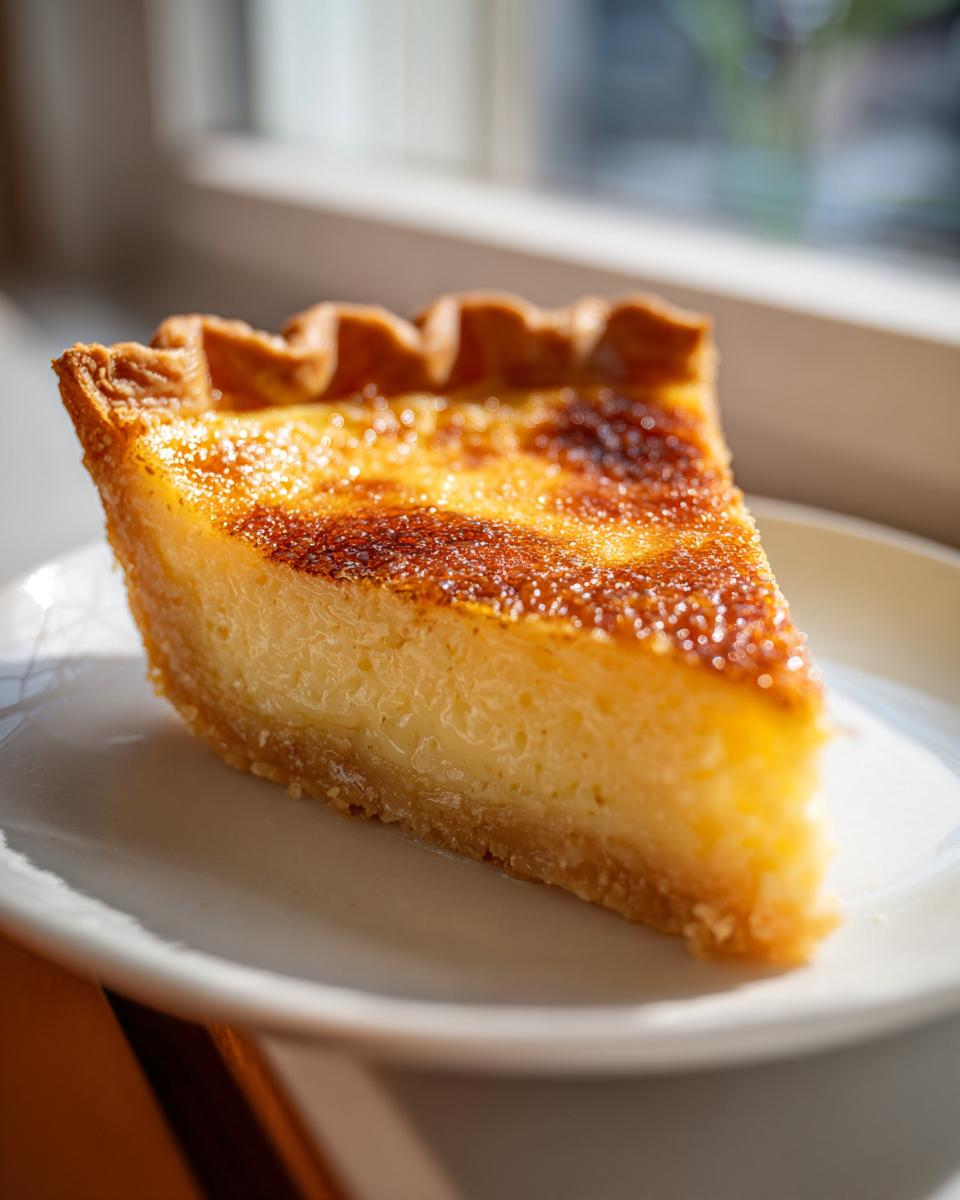
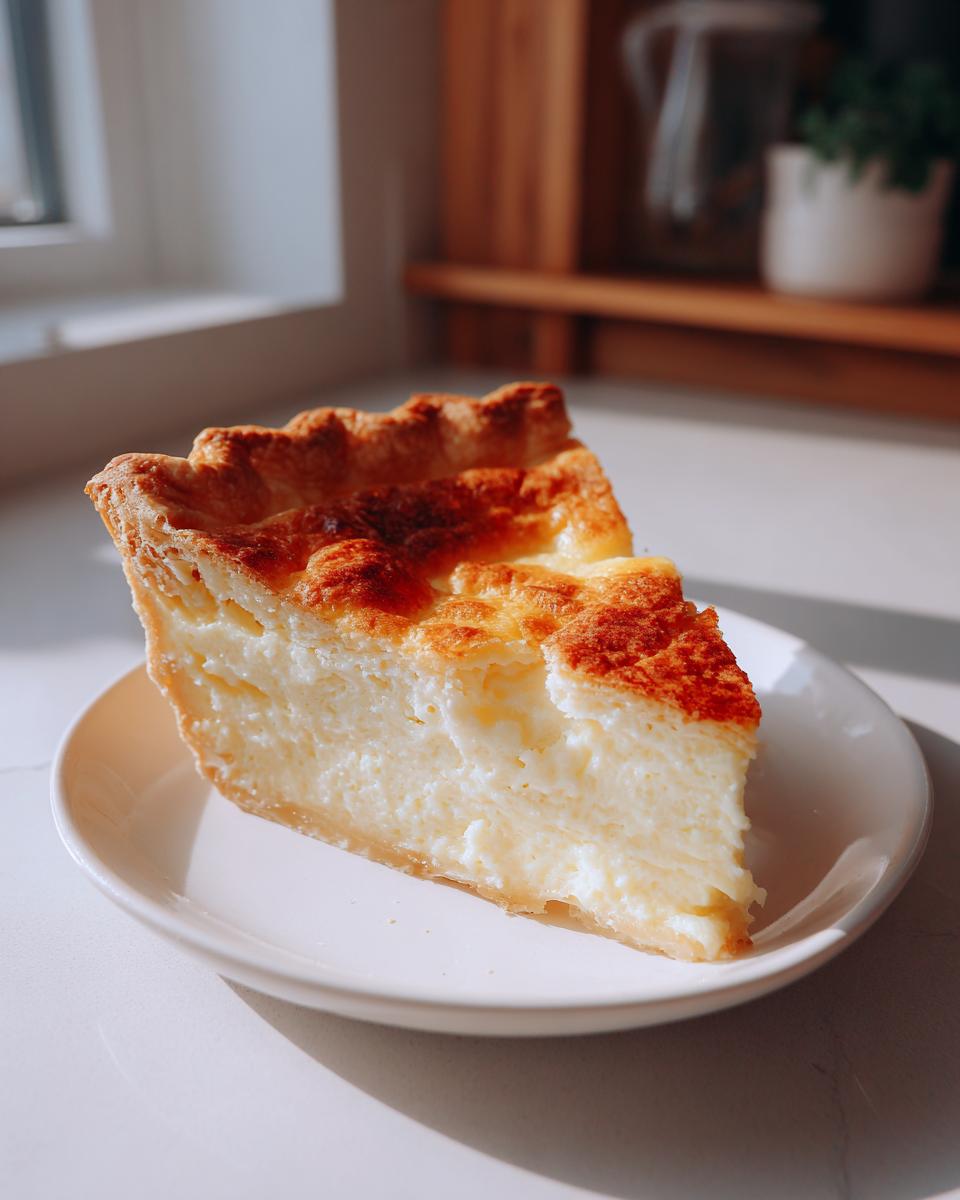
The biggest disaster for any baker is that cracked top, right? That’s why the Foolproof Custard Pie Baking technique centers on patience during the final minutes. We bake at a moderate 350°F, and the key is pulling it out when the edges are firm but the center still wobbles just a bit—like Jell-O. If you wait until it’s fully firm in the oven, it will be over-baked and cracked when it cools down. Trust the jiggle; the residual heat does the rest of the work!
Ingredients for Your Creamy Baked Custard Tart
When you’re aiming for that perfect, melt-in-your-mouth texture in a Creamy Baked Custard Tart, you can’t cut corners on the basics. Thankfully, this recipe is ridiculously simple, relying on standard pantry powerhouses. I always make sure my milk is at least room temperature—it mixes in much smoother that way. And always, *always* use pure vanilla extract; you absolutely taste the difference in a custard where vanilla is the star flavor. The quality matters when there are so few moving parts here!
For this recipe, here’s what you need on your staging area:
- 1 unbaked 9-inch pie crust (we keep it simple!)
- 1 1/2 cups whole milk
- 3 large eggs, lightly beaten
- 3/4 cup granulated sugar
- 1 teaspoon vanilla extract
- 1/4 teaspoon ground nutmeg
Buttery Pie Crust Tutorial Notes
Since we are skipping the pre-bake step—which is key for a non-soggy bottom—the integrity of your crust is vital! Whether you use a chilled store-bought crust or your favorite homemade version, make sure it’s very cold when you pour in the liquid filling. A cold crust helps insulate the bottom while the top bakes, preventing that dreadful soggy bottom often associated with these pies. If you need a refresher on creating that perfect base, my guide to a Buttery Pie Crust Tutorial covers all the tips for flakiness, though for this pie, keeping it chilled is step number one.
How to Prepare This Easy Homemade Custard Pie
Okay, let’s get this project started! Since we aren’t pre-baking anything, the oven needs to come up to temperature first: 350 degrees F (175 degrees C). Get your unbaked pie crust settled nicely into your pie plate. We are layering flavor precisely here, so stick to the order I laid out. First, combine the dry elements—the sugar and nutmeg—in a bowl. Why mix them dry first? Because this ensures the spice is perfectly distributed before it hits the wet stuff, preventing little clumps of spice later on. Then, lightly beat your eggs on their own before *slowly* introducing that sugar mix. It’s all about structured assembly for a great result!
Mixing the Custard Base: A Simple 4 Ingredient Pie Approach
We’re keeping this ultra-simple, leveraging the core flavors of this Easy Homemade Custard Pie. After the sugar and eggs are acquainted, it’s time to transition to liquid. Whisk in the cold milk and the vanilla extract slowly. Now, listen to me carefully: Do not over-whisk! The recipe notes warned me about this, and they were right. You want it uniform, but you absolutely must avoid whipping air into it. Too much air equals a porous filling, and we are aiming for that rich, heavy, Simple 4 Ingredient Pie indulgence, just silkier.
Baking and Setting the Perfect Custard Pie
Pour that gorgeous, slightly fragile mixture straight into the unbaked shell and slide it into the preheated oven. For the bake time, aim for 40 to 50 minutes. Don’t walk away! You’re looking for that specific visual cue: the edges should look done, but if you gently nudge the pan, the very center of the custard pie should still have a tiny wobble. That jiggle is your signal! After pulling it out, the cooling process is non-negotiable. It needs two hours on the counter before you even *think* about moving it to the fridge for four hours minimum. Chilling is what locks in that perfect texture for slicing later. If you want to see a great technique for getting smooth baked goods even when you use an oven, check out my tips on making easy homemade naan bread—it’s all about temperature control!
Variations: Cinnamon Vanilla Custard Pie and More
The beauty of this Old Fashioned Custard Pie is how it acts as a perfect canvas for slight tweaks. If you’re looking for something that screams holiday comfort while staying easy, you have to try the Cinnamon Vanilla Custard Pie variation. It’s incredibly simple: just swap out the 1/4 teaspoon of nutmeg for the exact same measurement of ground cinnamon. That warm spice profile complements the vanilla beautifully when serving it warm on Christmas Eve!
But why stop there? If you want a little brightness to cut through the richness, try adding the zest of one small lemon right into the milk mixture. It gives the silky vanilla pie filling a wonderful lift without changing the baking process at all. These small adjustments let you customize this classic custard pie for any occasion without adding extra minutes to the prep time. It’s efficient flavor layering—my favorite kind of cooking!
Tips for a Grandma Approved Custard Recipe
When you’re moving past the basic steps, this is where you elevate your baking to that Grandma Approved Custard Recipe level. I remember my first few attempts at this pie; the filling looked fine coming out of the oven, but the next day, it was slightly grainy. My grandmother would have sent me back to the stove! The absolute game-changer for me, something she always did but never wrote down, was straining the mixture right before pouring it in. Even if you don’t over-whisk, there might be a random bit of unincorporated egg white or undissolved sugar.
So here’s the advanced move: take your finished custard mixture and pour it through a fine-mesh sieve directly into the pie crust. It takes thirty extra seconds, but it guarantees that smooth consistency we’re obsessed with. This step, combined with pulling the pie when the center still has that tiny tremble, is the key to flawless results on Christmas Eve or any night of the week.
If you love the warmth of spices in your treats, you should definitely see how I incorporate extra flavor into my cinnamon rolls with heavy cream—it’s all about maximizing simple flavor additions!
Storage and Reheating Instructions for Your Custard Pie
Once you’ve achieved that perfect, creamy texture, the last thing we want to do is ruin it by storing it wrong. This custard pie must live in the refrigerator once it’s fully cooled—we are talking a bare minimum of four hours chilling, but honestly, overnight is even better. Cover the pie loosely with plastic wrap; make sure the wrap isn’t touching the filling, or the condensation will make it stick. Because this is an egg-based dessert, reheating usually does more harm than good; the custard can separate or get rubbery. Trust me, this pie is designed to be served chilled straight from the fridge!
Serving Suggestions for Traditional American Pies
So, you’ve pulled off a flawless custard pie—congratulations! Now for the presentation. Even though this is a simple, Old Fashioned Dessert Pie, it deserves to be treated like the centerpiece it is. Because the texture is so purely creamy and vanilla-forward, you want toppings that offer a little contrast. I always keep it minimal; a sharp, tart element really makes the custard sing.
Think about topping individual slices with a small scatter of fresh, mixed berries, like raspberries or sliced strawberries. Alternatively, a simple, unsweetened dollop of freshly whipped cream offers richness without overwhelming that perfect vanilla flavor. This honors the spirit of a classic, comforting treat while giving your guests something visually appealing. If you love simple, satisfying desserts made with high-quality ingredients, you should check out my recipe for an ultra-moist olive oil cake next!
Frequently Asked Questions About Making Custard Pie
I know diving into baking can bring up a ton of questions, especially when you are trying to nail a classic like this. Don’t worry; we’ve got you covered right here so your next attempt at a custard pie is a total success. These answers should help you move past those sticking points!
Can I use a pre-baked crust for this custard pie?
That’s a common question, especially if you’re trying to speed things up! For this specific Egg Custard Pie with Flaky Crust recipe, the answer is firmly no. Since the custard filling relies on a long, slow bake time to set up properly, a pre-baked crust almost always ends up soggy on the bottom. We need that cold, unbaked shell to essentially insulate against that liquid filling while it bakes through. Keep it cold going into the oven!
What is the best way to achieve a ‘Creamy Baked Custard Tart’ texture?
If you are chasing that smooth, luxurious feel of a perfect Creamy Baked Custard Tart, the key is twofold: gentle mixing (no air!) and gentle heat. You must use low and slow baking—350°F is the sweet spot—and here’s the big trick: do not disturb the pie while it’s baking or cooling initially. Let it settle naturally in the oven and on the counter. If you peek or bump the oven door too much, you introduce fluctuations that can ruin that beautiful, even set.
For more great tips on making consistently wonderful sweets, you might enjoy my guide to blueberry oatmeal muffins.
How do I ensure I don’t get a cracked top like on this Pioneer Woman example?
We talked about this in the main steps, but it’s worth repeating because this is the number one fear! Cracking happens when the outside of the custard sets firmly while the center is still liquid, and then that center keeps expanding until the surface breaks. Pull the pie out when the center still has that distinct, gentle jiggle—it should look wobbly but not soupy. The residual heat will finish setting it perfectly on the cooling rack, giving you a flawless surface.
Baking Confidently with Dishicious
There you have it: the streamlined, stress-free way to make a flawless, creamy custard pie. Seriously, bake this recipe once, and I bet it becomes your go-to. When you nail that perfect wobble, jump over to my Contact Page and let me know how it turned out. I always love hearing when one of these simple, reliable recipes works perfectly for someone!
PrintFlawless Old Fashioned Custard Pie: Simple, Creamy Recipe

Make a truly classic, old-fashioned custard pie with a velvety smooth vanilla filling and a buttery crust. This simple recipe guarantees a creamy dessert pie every time and avoids cracked tops.
- Prep Time: 15 min
- Cook Time: 50 min
- Total Time: 6 hours 5 min
- Yield: 8 servings 1x
- Category: Dessert
- Method: Baking
- Cuisine: American
- Diet: Vegetarian
Ingredients
- 1 unbaked 9-inch pie crust (store-bought or homemade)
- 1 1/2 cups whole milk
- 3 large eggs
- 3/4 cup granulated sugar
- 1 teaspoon vanilla extract
- 1/4 teaspoon ground nutmeg
Instructions
- Preheat your oven to 350 degrees F (175 degrees C). Place your unbaked pie crust into a 9-inch pie plate. Do not pre-bake the crust.
- In a medium bowl, whisk together the sugar and nutmeg.
- In a separate bowl, lightly beat the eggs. Gradually whisk the sugar mixture into the eggs until combined.
- Slowly whisk in the milk and vanilla extract until the mixture is uniform. Do not over-whisk; excessive air causes cracks.
- Pour the custard mixture carefully into the unbaked pie shell.
- Bake for 40 to 50 minutes. The pie is done when the edges are set but the center still has a slight jiggle when gently shaken.
- Remove the pie from the oven. Let it cool completely on a wire rack at room temperature for at least 2 hours before chilling.
- Chill the pie in the refrigerator for at least 4 hours, or until fully set, before slicing and serving.
Notes
- To prevent a cracked top, avoid over-baking. Remove the pie when the center is still slightly soft.
- For an extra smooth texture, strain the finished custard mixture through a fine-mesh sieve before pouring it into the crust.
- If you want a cinnamon-vanilla flavor, substitute 1/4 teaspoon of nutmeg with 1/4 teaspoon of ground cinnamon.
Nutrition
- Serving Size: 1 slice
- Calories: 280
- Sugar: 25
- Sodium: 150
- Fat: 14
- Saturated Fat: 7
- Unsaturated Fat: 7
- Trans Fat: 0
- Carbohydrates: 30
- Fiber: 1
- Protein: 8
- Cholesterol: 110