
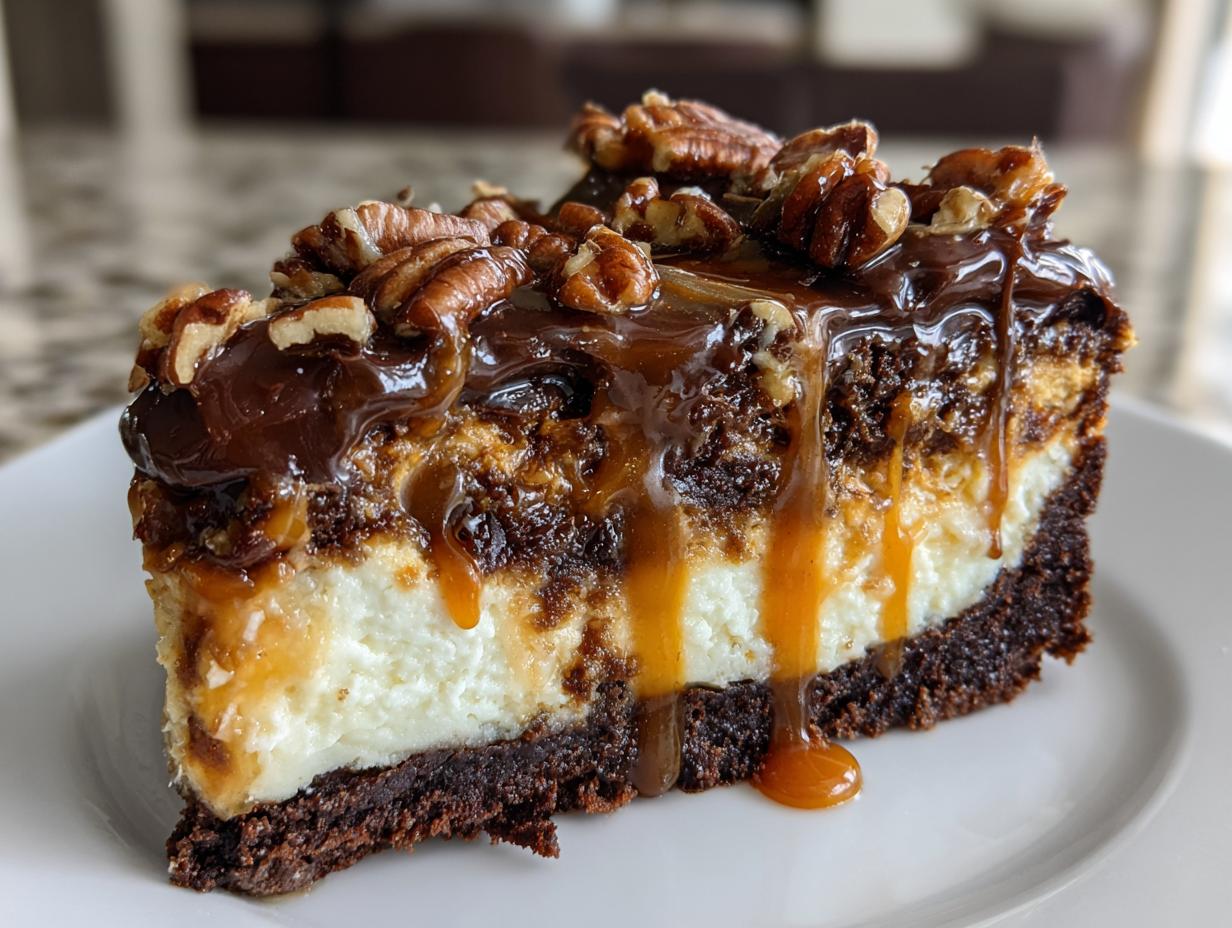
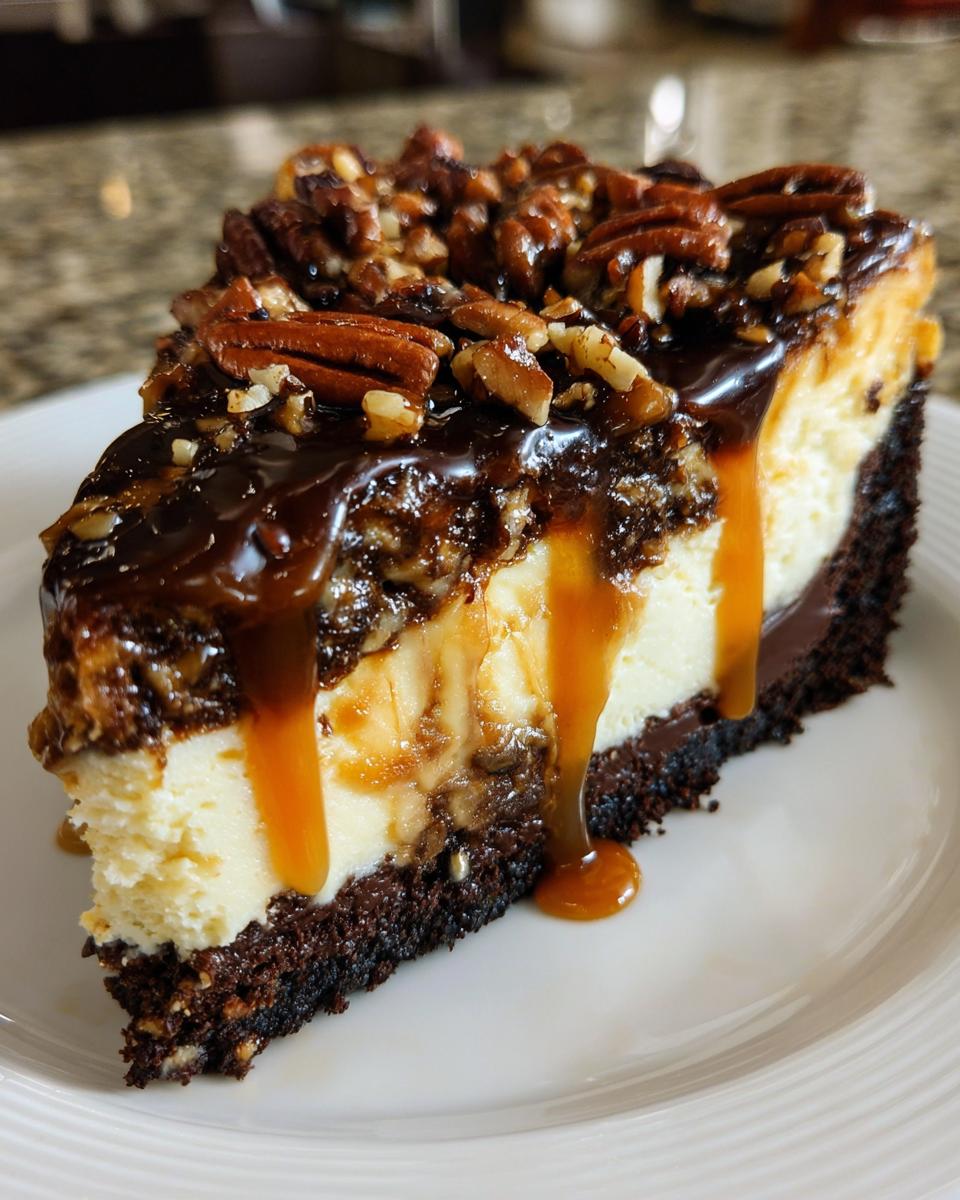
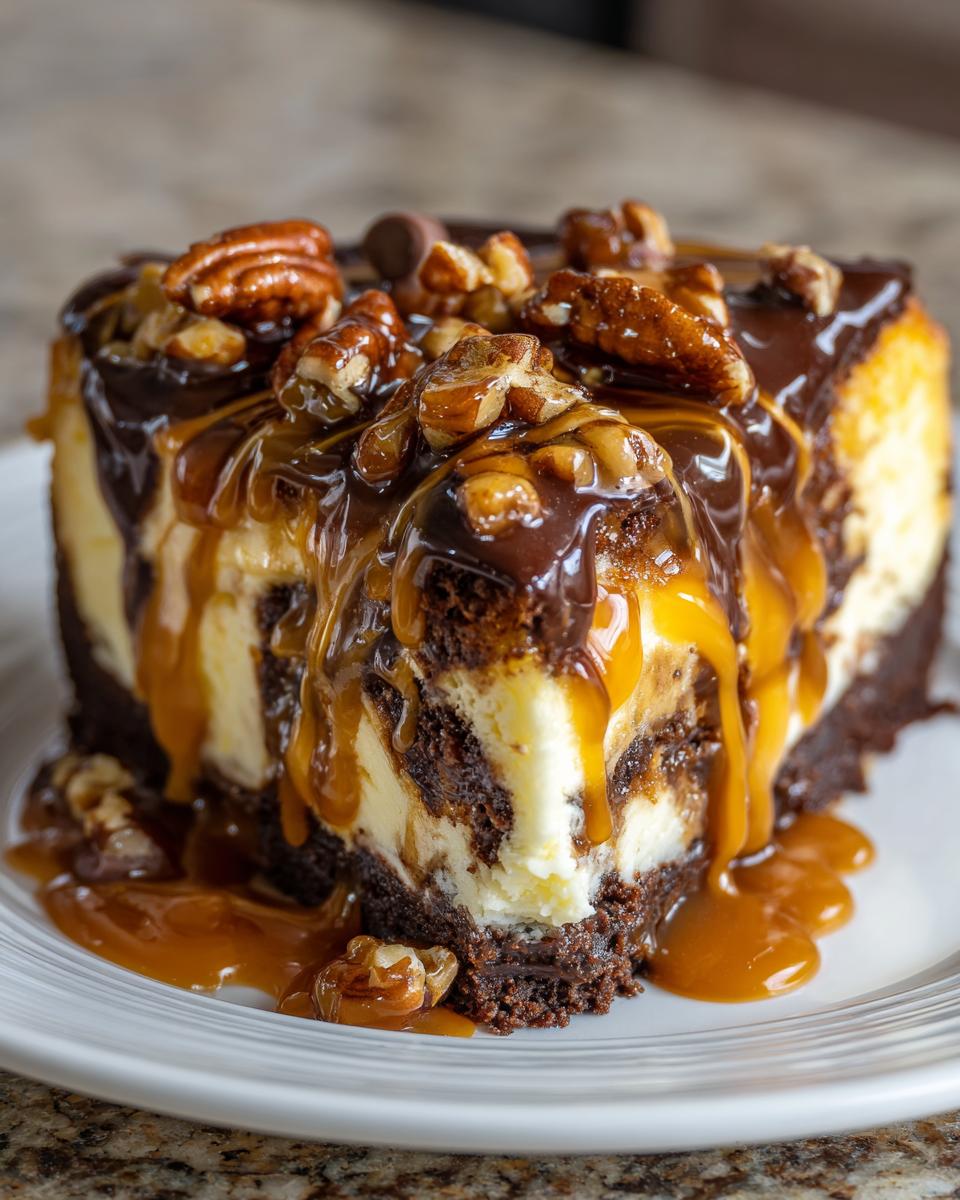
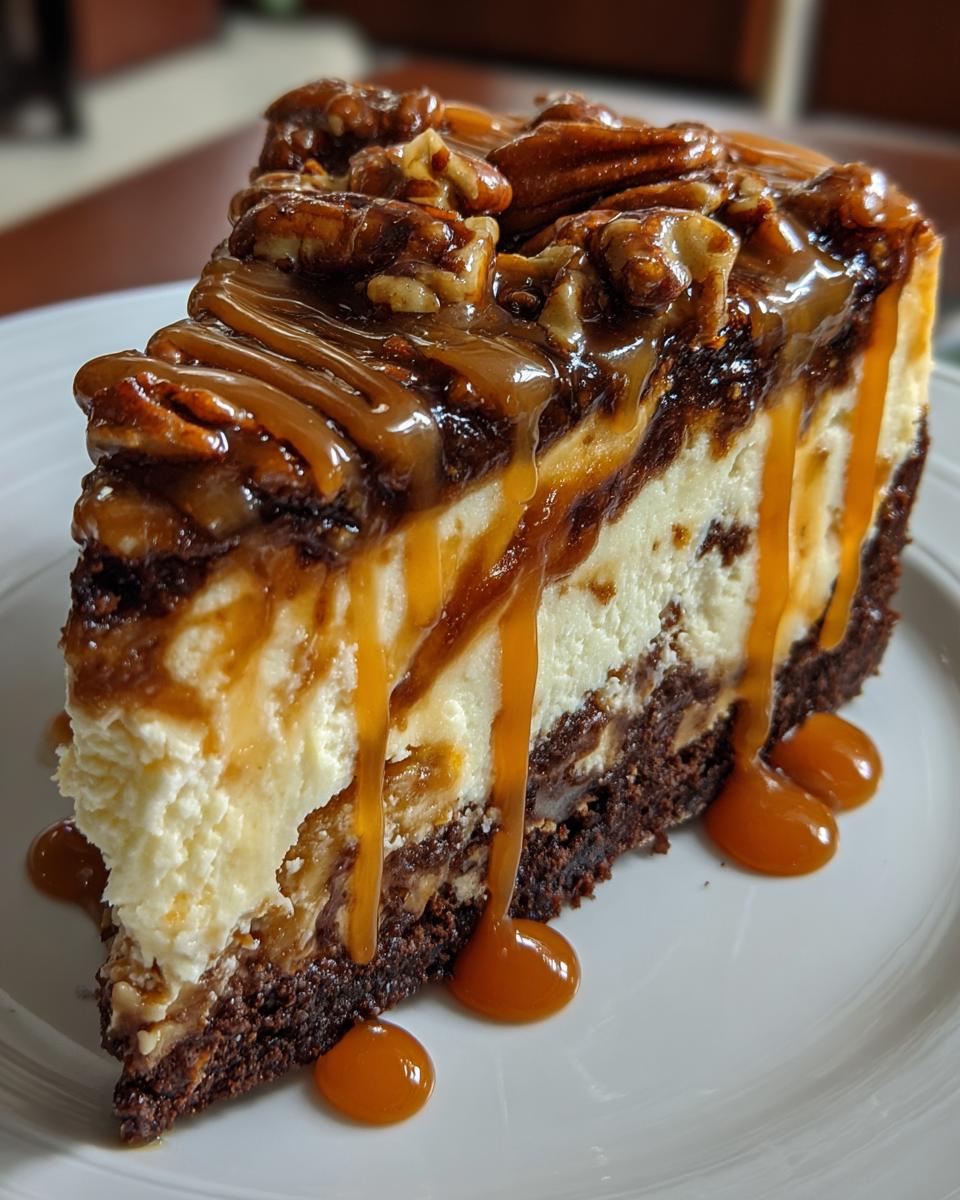
When you need a dessert that truly screams ‘special occasion,’ nothing cuts through the noise like something utterly decadent. We’re talking about layering rich chocolate, gooey caramel, and crunchy pecans into one unforgettable experience. That’s exactly what the turtle cheesecake delivers—it’s the ultimate showstopper. Now, you might look at a dessert like this and think it requires advanced culinary training, but I look at it through my project manager lens. My goal is to streamline complexity, stripping away anything non-essential so you get massive flavor payoff without spending all night babysitting the oven. Trust me, this Ultimate Easy Baked recipe is foolproof and designed to look like it came straight from a high-end bakery.
- Why This Ultimate Easy Baked turtle cheesecake Works Every Time
- Gathering Your Ingredients for turtle cheesecake
- Step-by-Step Instructions for the Best Homemade turtle cheesecake
- Tips for a Showstopper Holiday turtle cheesecake
- Variations: Baked vs. No Bake turtle cheesecake
- Serving Suggestions for this Caramel Chocolate Pecan Dessert
- Storage and Make Ahead Desserts for your turtle cheesecake
- Frequently Asked Questions About turtle cheesecake
- Sharing Your Decadent Cheesecake Recipes Experience
Why This Ultimate Easy Baked turtle cheesecake Works Every Time
I treat my recipes like a project plan: every step has a purpose, and we eliminate waste, whether that’s time or ingredients. This method ensures that even though the turtle cheesecake looks incredibly gourmet, the process itself is streamlined and reliable. You get that bakery-style texture without the drama.
- It delivers a dense, creamy filling instead of a grainy texture—that’s efficiency!
- The layering technique is simple but guarantees every slice gets that perfect chocolate, caramel, and pecan combination.
- It’s designed for maximum impact with minimum fuss, making it a reliable showstopper for any dinner or party.
If you are looking for other tried-and-true creamy desserts, check out my approach to easy creamy cheesecake recipes.
Foolproof Water Bath Technique for a Creamy Filling
Here’s where we apply the management expertise: the water bath. It sounds fussy, I know, but it’s the ultimate insurance policy against disaster. By baking the turtle cheesecake surrounded by moist heat, you minimize drastic temperature swings inside the oven. This gentle cooking environment is absolutely crucial for preventing those dreaded cracks on the surface and ensuring the filling sets into that impossibly smooth, rich texture we’re aiming for. Skip this step, and you’re rolling the dice. We don’t roll the dice here.
Gathering Your Ingredients for turtle cheesecake
When I plan any recipe, ingredient clarity is step one. For this turtle cheesecake, we need three distinct component groups to ensure everything comes together perfectly during assembly. Paying attention to the preparation notes here is key—things like making sure the cream cheese is actually soft or keeping your caramel sauce separate for layering makes a huge difference in the final outcome.
Here is what you need for this project:
- For the Crust:
- 1 1/2 cups graham cracker crumbs
- 1/4 cup granulated sugar
- 6 tablespoons unsalted butter, melted
- 1 cup semi-sweet chocolate chips
- For the Creamy Filling:
- 3 (8 ounce) packages cream cheese, softened (this is critical!)
- 1 1/2 cups granulated sugar
- 1 teaspoon vanilla extract
- 1/4 cup sour cream
- 3 large eggs
- For the Turtle Topping and Swirls:
- 1 cup caramel sauce, divided into two halves
- 1/2 cup chopped pecans, toasted
- 1/2 cup chocolate chips (for the very top layer)
If you want to see how I handle other nutty holiday treats, check out my recipe for pecan pie bark. It uses similar components but takes much less time!
Ingredient Notes and Substitutions
Don’t skip the prep work on these specific components; they elevate this simple recipe into something truly special. For instance, take those pecans—you absolutely need to toast them first. Just spread them on a dry skillet over medium heat for about five to seven minutes, stirring constantly until you can really smell that warm, nutty aroma.
Also, remember that note about the caramel? You must divide it! Half goes *into* the batter for that gooey interior swirl, and the other half is saved for drizzling on top after it chills. If you just dump it all in, your bottom layer won’t have enough structure.
And if you decide you want a richer, fudgier base instead of graham crackers? You can easily swap that crust out. Just use 1 1/2 cups of crushed chocolate wafer cookies mixed with 1/4 cup melted butter and 1/4 cup packed brown sugar. It instantly upgrades this to a brownie bottom cheesecake!
Step-by-Step Instructions for the Best Homemade turtle cheesecake
Okay, now we get down to the execution phase of this project. Remember what I always say: preparation is 90% of success. For this turtle cheesecake, that means getting your oven ready and tackling the base first. We need precision with temperature and timing to ensure we don’t run into any issues later on.
If you need to check out my guide on achieving perfect swirls in a caramel base, take a look at my salted caramel cheesecake recipe; the swirling technique translates perfectly here.
Building the Chocolate Crust Base
First up, preheat that oven to 325 degrees F. You need reliable heat. While it warms, get serious about wrapping your 9-inch springform pan. Use heavy-duty aluminum foil and wrap it tightly—we’re protecting it from the water bath later, so no shortcuts here! In a bowl, mix your graham cracker crumbs, the crust sugar, the melted butter, and those chocolate chips until everything is evenly coated. Now, press that mixture down firmly into the bottom of the pan. I mean *firmly*. Use the bottom of a dry measuring cup to pack it in tight. Pop it into the oven for just 10 minutes, then pull it out to cool while you focus on the main event—the filling.
Mixing the Rich Cheesecake Filling Tutorial
This is where texture is made or broken. Get your stand mixer out, or use a hand mixer, but grab that softened cream cheese and the main portion of sugar. Beat them together until you have something smooth, like silk. Add the vanilla and sour cream and mix until just combined. Here is the absolute most important rule for a creamy filling: add the eggs one at a time. Don’t dump them all in! Mix just after each egg to incorporate it, but stop mixing the *second* it disappears into the batter. Overmixing at this stage whips in too much air, and that air expands and contracts, causing cracks later. Seriously, don’t overdo it.
The Water Bath and Baking the turtle cheesecake
Time for layering! Pour half your gorgeous batter over the cooled crust. Now, drizzle half of that caramel sauce—just spoon it randomly across the top—and sprinkle half your toasted pecans over that caramel. Then, pour the rest of the batter on top. Now, for the swirls, dollop the remaining caramel randomly across the top layer. Take a knife or a skewer and gently run it through the top layer a few times to create those beautiful, messy patterns. Place the foil-wrapped pan inside a roasting pan and carefully pour hot water into the roasting pan until it’s about halfway up the sides of your springform pan. Bake this setup for 60 to 75 minutes. You know it’s ready when the edges look set, but the very center still has a slight jiggle when you nudge the pan. That jiggle is success!
Cooling and Chilling for Perfect Texture
This part requires patience, which is the hardest ingredient for me to measure, but it’s non-negotiable for a perfect slice of turtle cheesecake. Immediately turn the oven off, but *do not* take the cheesecake out. Just prop the oven door open slightly (a wooden spoon works well) and let it cool down slowly in that humid environment for a full hour. This gradual temperature drop prevents thermal shock. Once the hour is up, take it out of the water bath, let it fully cool on a rack, cover it, and stick it in the fridge. We need at least six hours, but preferably overnight. That time is essential for the texture to firm up correctly so you get beautiful, clean slices.
Tips for a Showstopper Holiday turtle cheesecake
You’ve nailed the baking, but presentation is where we really sign off on that ‘showstopper’ status, especially when this rich turtle cheesecake is headed to a holiday table. Think of the garnishing stage as the final quality control check on your project. It needs to look as good as it tastes.
First, let’s talk about that final topping. When you’re ready to serve, warm up your reserved caramel sauce *just* slightly. You don’t want it hot, just warm enough so it flows beautifully when you drizzle it over the top. If it’s too cold, it will just sit there in thick clumps, and we want that luxurious, melting look, right?
For the cleanest cut, you need a hot knife. Fill a tall glass with very hot water and keep a clean kitchen towel handy. Dip your long, sharp knife into the hot water, wipe it completely dry, and then make your first slice. Repeat that process—dip, wipe, slice—for every single cut. This keeps the fudgy topping and the creamy filling from dragging. It’s a simple trick that immediately elevates your slicing game.
And finally, don’t forget the crunch factor. If you reserved any extra toasted pecans, sprinkle them around the outer edge right before serving. This provides a nice visual border and a fantastic textural contrast against the smooth caramel swirls. When you’re ready for more innovative, impressive sweets, you might want to look into my chocolate meringue pie recipe for another flavor profile that still delivers on that gourmet feel.
Variations: Baked vs. No Bake turtle cheesecake
I absolutely love providing options because I know everyone’s schedule isn’t the same. While this guide walks you through what I consider the ultimate version—the baked turtle cheesecake—I totally get it if one afternoon you just don’t have 75 minutes to dedicate to the oven. That’s where the no bake turtle desserts come in handy.
The main difference, texturally, is the structure. Baking the cream cheese, eggs, and sugar with that water bath sets the proteins just right. It yields that signature dense, almost velvety mouthfeel that screams ‘classic cheesecake.’ If you’re looking for that rich, sturdy slice that holds up perfectly, the baked route is your best bet.
A no-bake version, though? It’s much faster, obviously, typically relying on gelatin or stabilized whipped heavy cream mixed with the softened cream cheese and powdered sugar. The resulting texture is lighter, fluffier, and definitely more mousse-like. It’s fantastic for summer when you aren’t turning on the oven, but it won’t have the same ‘cheesecake-y’ heft as the version we just made.
If you’re going no-bake, I usually swap the graham cracker crust for a cookie crust—think crushed Oreos or chocolate wafers mixed with butter—because it sets up faster in the fridge without that initial bake. You skip the water bath entirely, layer everything up, and let the refrigeration do all the heavy lifting. Both are delicious, but for that showstopper, gourmet look, the baked method wins every time. If you liked the ease of planning this recipe, you might also enjoy my approach to easy sopapilla cheesecake bars when you’re looking for something quick!
Serving Suggestions for this Caramel Chocolate Pecan Dessert
When you’ve gone all out creating something this magnificent—a true Caramel Chocolate Pecan Dessert—you want the plating to match the effort. This turtle cheesecake is incredibly rich, so honestly, sometimes the best accompaniment is just a simple cup of coffee. The bitterness of a strong, dark roast cuts through that sweetness perfectly and cleanses your palate between rich bites.
If you are serving this for a big holiday meal or a party, presentation is everything. Don’t worry about piling plates high. Since this cheesecake is so indulgent, a small, perfect slice makes a much bigger impression than a massive wedge.
For the adults looking for a pairing, think about a nice contrasting drink. A slightly chilled Tawny Port works wonders because its nutty, oxidized notes complement the pecans beautifully. Alternatively, a high-quality espresso tastes almost like a built-in accompaniment.
If you absolutely must add something else to the plate visually, keep it light and zesty to balance the deep, heavy flavors of chocolate and caramel. A few fresh raspberries or a light dusting of cocoa powder on the serving plate goes a long way. Speaking of chocolate combinations, if you ever want to explore how fruit pairs with deep chocolate flavors, my recipe for chocolate raspberry cake offers a brighter counterpoint to this decadent cheesecake.
Storage and Make Ahead Desserts for your turtle cheesecake
Planning ahead is the secret weapon of any organized cook, and this turtle cheesecake is tailor-made for making in advance. Since it requires that crucial overnight chill anyway, you might as well get the messy parts done early! This keeps you focused on the main meal when hosting, turning this into a true make ahead dessert success. You never want to rush the chilling process; it’s just as important as the baking itself.
For storage, leftovers are honestly almost better the next day once those caramel and chocolate swirls have fully settled into the filling. Once completely chilled, you need to protect that beautiful topping. Cover the springform pan (or transfer the slice to an airtight container) and keep it refrigerated. It stays fantastically fresh for about four to five days. I never advise freezing cheesecake, especially one loaded with extra toppings like ours. When you try to reheat it, the texture just falls apart. We want creamy perfection, not mush, so stick to refrigeration.

If you’re tackling this as a showstopper holiday dessert, I recommend finishing the entire cheesecake—crust, filling, baking, and chilling—at least 24 hours before you plan to serve it. Then, the morning of your party, you only have one task left: adding the final drizzle of warm caramel and the last sprinkle of pecans right before slicing. This ensures your toppings are fresh and look fantastic, not soggy from resting in the fridge for two days.
If you are looking for more high-impact desserts where you can skip the stress on the day of the event, you absolutely have to check out my list of make ahead desserts. Planning these things out makes hosting so much less stressful!
Frequently Asked Questions About turtle cheesecake
How do I prevent my turtle cheesecake from cracking?
That is the question everyone asks about baked cheesecake! The reason this recipe works so well is because we address cracking systematically. The two most important steps in making this a truly decadent cheesecake recipe are using the water bath for gentle baking and then letting it cool down super slowly *inside* the turned-off oven for an hour. A crack usually happens because of a sudden temperature change. Slow cooling is your best defense against that ugly surface flaw.
Can I use store-bought caramel sauce?
Absolutely! I built this whole system around efficiency, remember? You don’t need to make your own sauces when you’re aiming for a reliable weeknight dessert. If you buy a high-quality sauce, it works perfectly well. Just make sure it’s thick enough to hold its swirl when you put it into the batter. If your store-bought sauce seems too thin, just microwave about half a cup gently for 30 seconds until it thickens up a bit, then proceed with dividing it as instructed for the swirl and the topping.
What is the best way to cut a clean slice of turtle cheesecake?
This is where that little bit of effort transforms your slice from ‘homemade’ to ‘bakery style cheesecake at home.’ You need heat! Fill a tall, skinny glass with very hot water. Dip your sharp knife into that water for a few seconds—just long enough to heat the blade—then wipe it completely dry with a clean towel. Slice the cheesecake, then repeat the dip-and-wipe process before making the next cut. It melts ever so slightly through the hard chocolate topping and the dense filling, giving you the cleanest edge possible.
Can I make this recipe a bite-sized treat instead?
Yes, you totally can turn this into bite sized cheesecake treats! Instead of a 9-inch pan, line a standard muffin tin with liners. You’ll still need to do the crust bake for 10 minutes. For the filling layer, you might need to reduce the overall bake time slightly, so start checking them around 25 minutes. This is a fantastic solution if you are making an assortment of indulgent dessert recipes for parties and don’t want everyone tackling a massive slice!
If you want more tips on achieving guaranteed creamy results every time you bake, check out my guide on easy creamy cheesecake techniques!
Sharing Your Decadent Cheesecake Recipes Experience
So, there you have it—the ultimate project plan for making an absolutely show-stopping, turtle cheesecake without losing your mind in the process. Now, I’ve given you the blueprint, the best materials, and the most efficient steps. The final quality control check is up to you!
When you take that first delicious, creamy, chocolate-caramel-pecan loaded bite, I genuinely want to know what you think. Did the water bath work its magic? Did the slow cool-down result in that signature perfect, crack-free surface? These details make or break a recipe, and your feedback is crucial for me to keep refining these methods for everyone.
Drop a rating below! Let me know how many stars this recipe gets in your personal playbook for gourmet cheesecake ideas. If you had any hiccups or, better yet, any brilliant tweaks you came up with—please share them in the comments. I love seeing how everyone adapts these strategies in their own kitchens. If you have questions about scaling or substitutions for your next batch, don’t hesitate to reach out. We handle all our recipe inquiries through our contact page here: Contact Dishicious. Happy baking, and I can’t wait to hear about your decadent experience!
PrintThe Ultimate Easy Baked Turtle Cheesecake
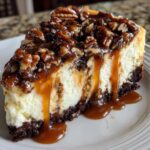
Make this show-stopping, decadent turtle cheesecake at home. This recipe features a simple crust, a creamy filling, and is topped with chocolate, caramel sauce, and toasted pecans for a rich dessert.
- Prep Time: 25 min
- Cook Time: 75 min
- Total Time: 140 min
- Yield: 12 servings 1x
- Category: Dessert
- Method: Baking
- Cuisine: American
- Diet: Vegetarian
Ingredients
- 1 1/2 cups graham cracker crumbs
- 1/4 cup granulated sugar (for crust)
- 6 tablespoons unsalted butter, melted
- 1 cup semi-sweet chocolate chips (for crust)
- 3 (8 ounce) packages cream cheese, softened
- 1 1/2 cups granulated sugar (for filling)
- 1 teaspoon vanilla extract
- 1/4 cup sour cream
- 3 large eggs
- 1 cup caramel sauce, divided
- 1/2 cup chopped pecans, toasted
- 1/2 cup chocolate chips (for topping)
Instructions
- Preheat your oven to 325 degrees F. Wrap the outside of a 9-inch springform pan tightly with heavy-duty aluminum foil.
- Prepare the crust: Mix graham cracker crumbs, 1/4 cup sugar, melted butter, and 1 cup chocolate chips in a bowl until combined. Press the mixture firmly into the bottom of the prepared springform pan. Bake for 10 minutes. Let cool slightly.
- Prepare the filling: In a large bowl, beat the softened cream cheese and 1 1/2 cups sugar with an electric mixer until smooth. Beat in the vanilla extract and sour cream. Add the eggs one at a time, mixing just until combined after each addition. Do not overmix.
- Pour half of the cheesecake batter over the cooled crust. Drizzle half of the caramel sauce (1/2 cup) over the batter. Sprinkle half of the toasted pecans over the caramel. Pour the remaining batter over the top.
- Create swirls: Dollop the remaining 1/2 cup of caramel sauce randomly over the top of the batter. Use a knife or skewer to gently swirl the caramel into the batter.
- Bake the cheesecake in a water bath: Place the foil-wrapped springform pan into a larger roasting pan. Carefully pour hot water into the roasting pan until it reaches halfway up the sides of the springform pan.
- Bake for 60 to 75 minutes, or until the edges are set but the center still jiggles slightly.
- Turn off the oven, crack the door open slightly, and let the cheesecake cool in the oven for 1 hour. This prevents cracking.
- Remove the cheesecake from the water bath and let it cool completely on a wire rack. Once cool, cover and refrigerate for at least 6 hours, or preferably overnight.
- Before serving, top the chilled cheesecake with the remaining toasted pecans, the remaining 1/2 cup of chocolate chips, and an extra drizzle of warm caramel sauce if desired. Release the springform sides carefully.
Notes
- To toast pecans, spread them on a dry skillet over medium heat for 5 to 7 minutes, stirring often until fragrant.
- If you want a brownie bottom cheesecake, substitute the graham cracker crust ingredients with 1 1/2 cups of crushed chocolate wafer cookies mixed with 1/4 cup melted butter and 1/4 cup packed brown sugar.
- For a smoother caramel swirl, warm the caramel sauce slightly before drizzling it over the batter.
Nutrition
- Serving Size: 1 slice
- Calories: 550
- Sugar: 45g
- Sodium: 350mg
- Fat: 35g
- Saturated Fat: 20g
- Unsaturated Fat: 15g
- Trans Fat: 0.5g
- Carbohydrates: 55g
- Fiber: 2g
- Protein: 9g
- Cholesterol: 110mg