
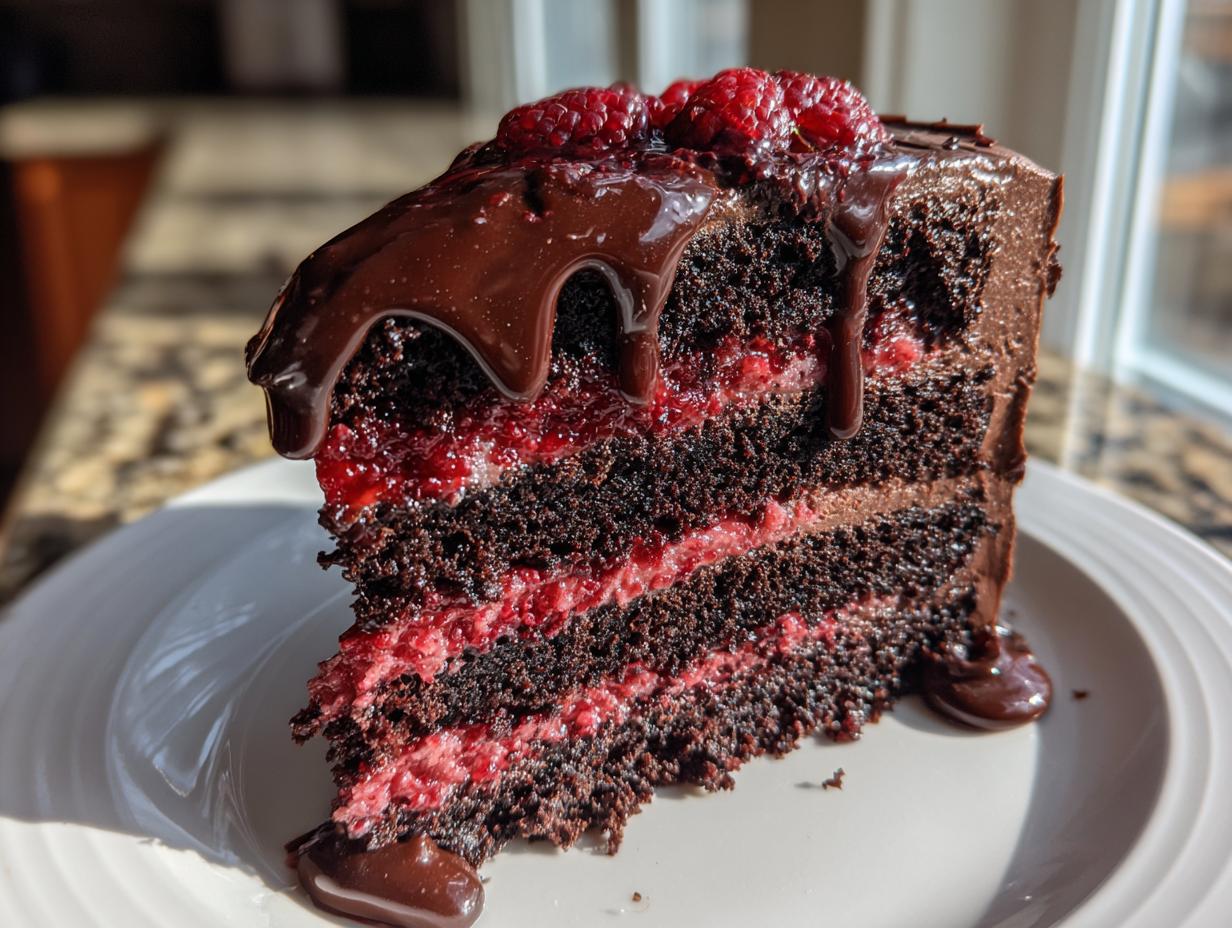
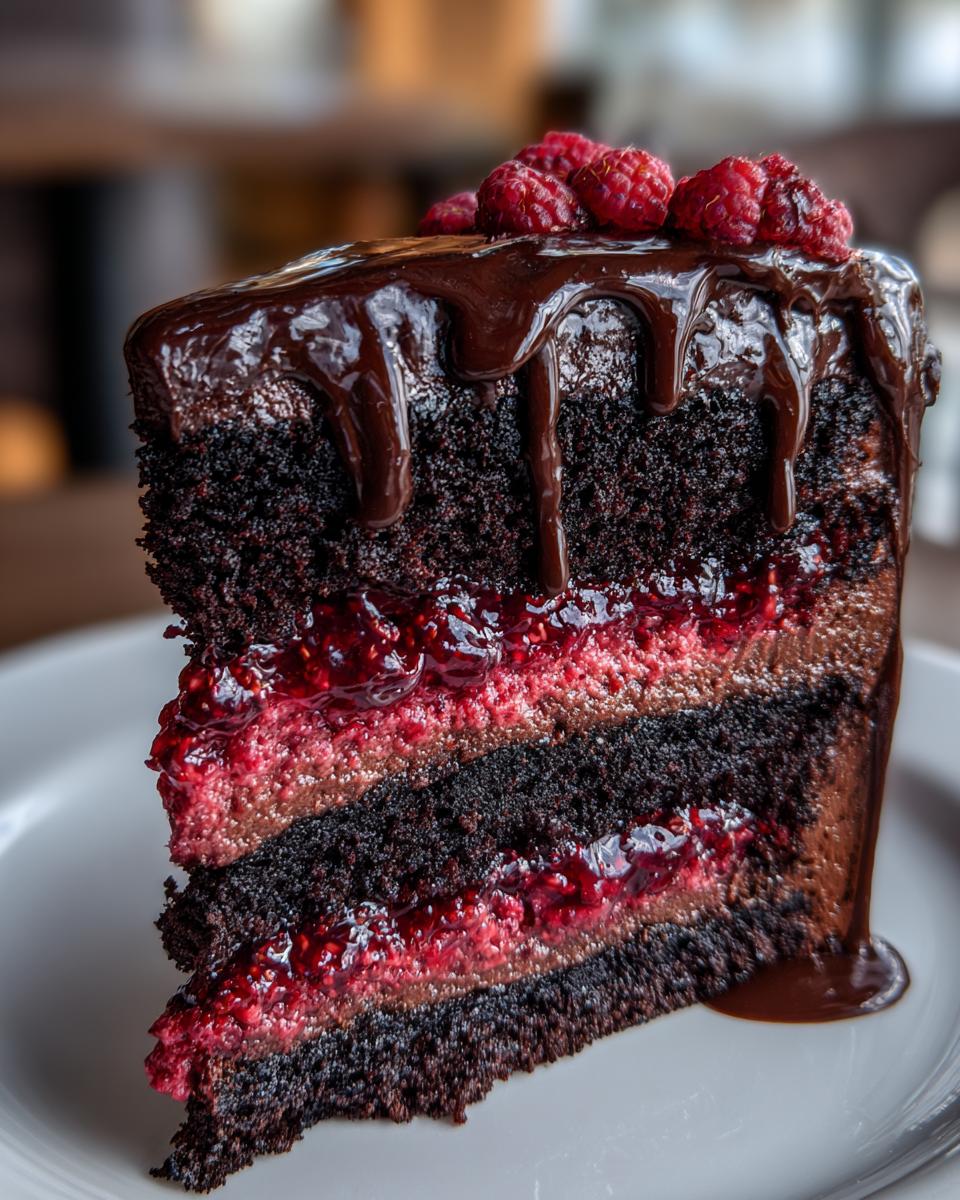
When you need a dessert that stops people in their tracks—I’m talking about that rich, layered centerpiece everyone photographs before they eat—it usually means hours of complicated work, right? Wrong! That’s what I used to think until I brought my project management brain into the kitchen. When I first started Dishicious, I wanted spectacular results without spending my whole Saturday baking. This Decadent Chocolate Raspberry Layer Cake is the perfect example. It looks like it came straight from a high-end bakery, but I promise you, my goal was efficiency. We streamline the process so you get that showstopper **chocolate raspberry cake** with moist layers, bright fruit, and that amazing ganache drip, all without the headache. If you loved the idea of a centerpiece like that Red Velvet Cheesecake recipe, you’ll nail this chocolate version. Trust me, the method works.
- Why This Chocolate Raspberry Cake is Your New Showstopper Celebration Cake
- Gathering Ingredients for Your Ultimate Chocolate Raspberry Cake Recipe
- Step-by-Step Instructions for the Chocolate Raspberry Cake
- Expert Tips for the Best Chocolate Raspberry Cake
- Ingredient Notes and Substitutions for Your Chocolate Raspberry Cake
- Serving Suggestions for This Chocolate Layer Cake Special Occasion
- Storage and Reheating Instructions for Leftover Chocolate Raspberry Cake
- Frequently Asked Questions About Making a Chocolate Raspberry Cake
- Share Your Showstopper Chocolate Raspberry Cake Experience
Why This Chocolate Raspberry Cake is Your New Showstopper Celebration Cake
When you’re aiming for a dessert that feels incredibly special, this cake delivers without forcing you into an all-day baking marathon. It hits all the right notes, proving that easy doesn’t mean boring.
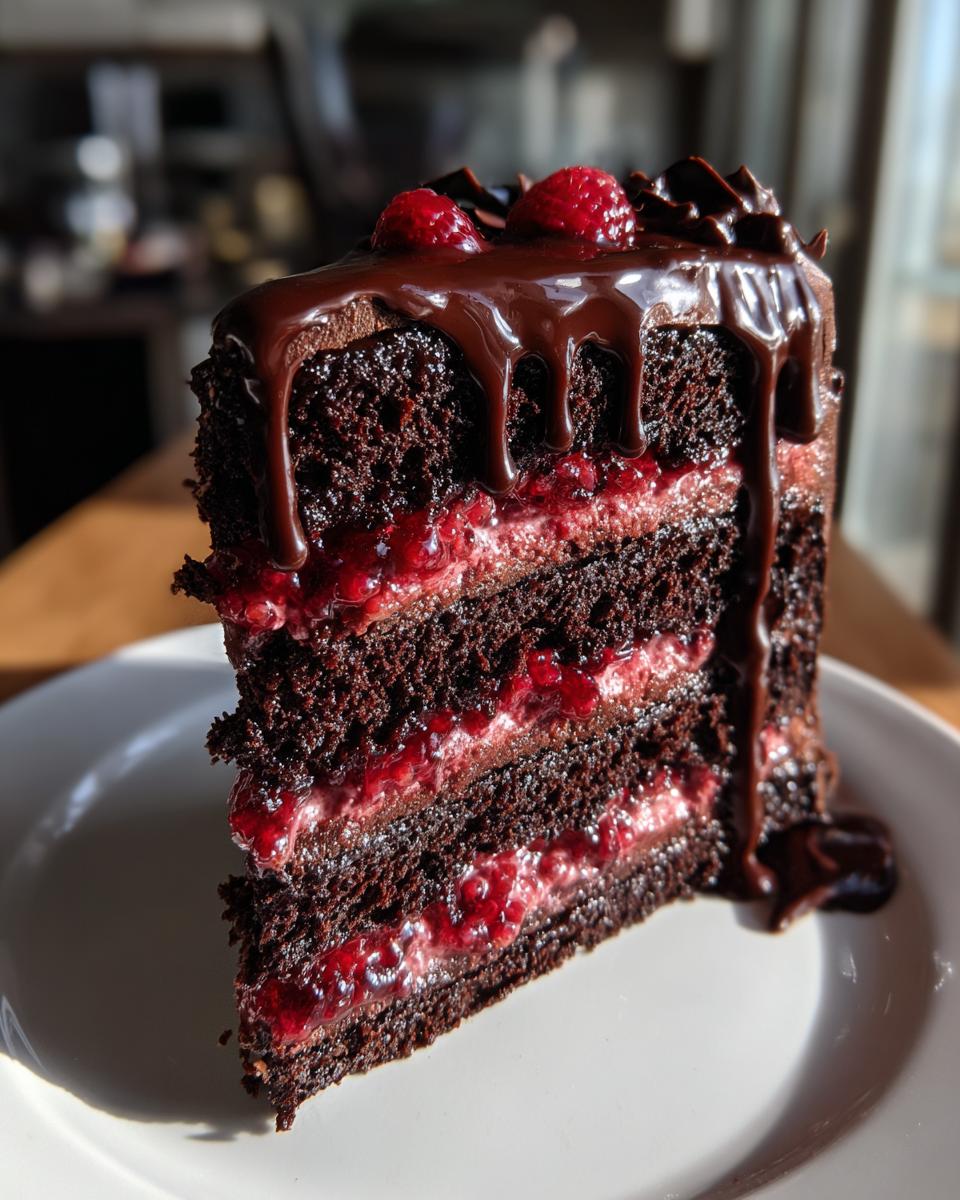
- It’s a true Showstopper Celebration Cake—the layers and drip look incredible for any big moment.
- You get that perfect balance: the deep, rich flavor of a Decadent Chocolate Cake paired with the zing of tart raspberry.
- The moisture holds up beautifully, meaning you get perfect slices every time, which is essential for a party dessert.
If you love the layered approach but want something different than my usual fudgy fare, like the German Chocolate Pie, this is your moment. It’s elegance made manageable, just like my ultimate moist chocolate fudge cake.
Gathering Ingredients for Your Ultimate Chocolate Raspberry Cake Recipe
Okay, so organization is where my project manager side really shines! For this **chocolate raspberry cake**, laying everything out upfront prevents chaos when it’s time to mix. We need precision because we are aiming for that perfect bakery style flavor. I’ve broken down the shopping list into four main components: the cake base, the luxurious ganache drip, the chocolate buttercream, and the required filling. Don’t skip the quality cocoa here—it makes a huge difference in the final depth of flavor. If you’re making your jam from scratch, check out my easy raspberry jam recipe!
For the Moist Chocolate Cake Layers
- 1 3/4 cups all-purpose flour
- 1 3/4 cups granulated sugar
- 3/4 cup unsweetened cocoa powder
- 1 1/2 teaspoons baking powder
- 1 1/2 teaspoons baking soda
- 1 teaspoon salt
- 2 large eggs
- 1 cup whole milk
- 1/2 cup vegetable oil
- 2 teaspoons vanilla extract
- 1 cup boiling water
For the Rich Chocolate Ganache Drip
- 8 ounces semi-sweet chocolate, chopped
- 1 cup heavy cream
For the Simple Chocolate Buttercream Frosting
- 1 cup unsalted butter, softened
- 3 cups powdered sugar
- 1/2 cup cocoa powder
- 1/4 cup milk
- 1 teaspoon vanilla extract
And don’t forget the essential filling components:
- 1 cup raspberry preserves (for filling)
- 1 cup fresh raspberries (for garnish)
Step-by-Step Instructions for the Chocolate Raspberry Cake
When you approach this like a project, timing everything perfectly makes the difference between a good cake and an amazing **chocolate raspberry cake**. This recipe uses a high-liquid method which makes the batter super thin, but don’t panic—that’s exactly how we get that unbelievably moist crumb. Keep an eye on your oven time, and remember, cooling completely is non-negotiable before we start stacking!
Preparing and Baking the Chocolate Cake Layers
First things first, get that oven preheated to 350°F (175°C). Prep two 8-inch round pans by greasing and flouring them well. In your large bowl, whisk together everything dry: flour, sugar, cocoa powder, baking powder, baking soda, and salt. Next, add the eggs, milk, oil, and vanilla. Mix this on medium speed for a solid two minutes until it’s just combined—we aren’t overmixing yet! Now for the crucial part that makes this batter look wild: slowly stir in that full cup of boiling water until the batter is smooth. Yes, it’s going to look thin, almost like soup; that’s right! Pour it evenly into your pans and bake for 30 to 35 minutes. Test it with a pick; if it comes out clean, pull those layers out and let them cool in the pans for about 10 minutes before inverting them onto a cooling rack.
Creating the Rich Chocolate Ganache Cake Drip
While the cakes are cooling off, we tackle the chocolate! Put all your chopped chocolate into a heatproof bowl. Heat your heavy cream on the stove until it’s just starting to simmer around the edges—don’t let it boil over! Pour that hot cream directly over the chocolate waiting in the bowl. Step away for five minutes; this resting time lets the heat melt everything perfectly. After the rest, whisk it gently until you have a smooth, glossy ganache. This needs time to cool down before we use it. If it’s too hot, it will just slide right off the cake! You’re aiming for a thick, pourable consistency, almost like honey that’s slightly cold.
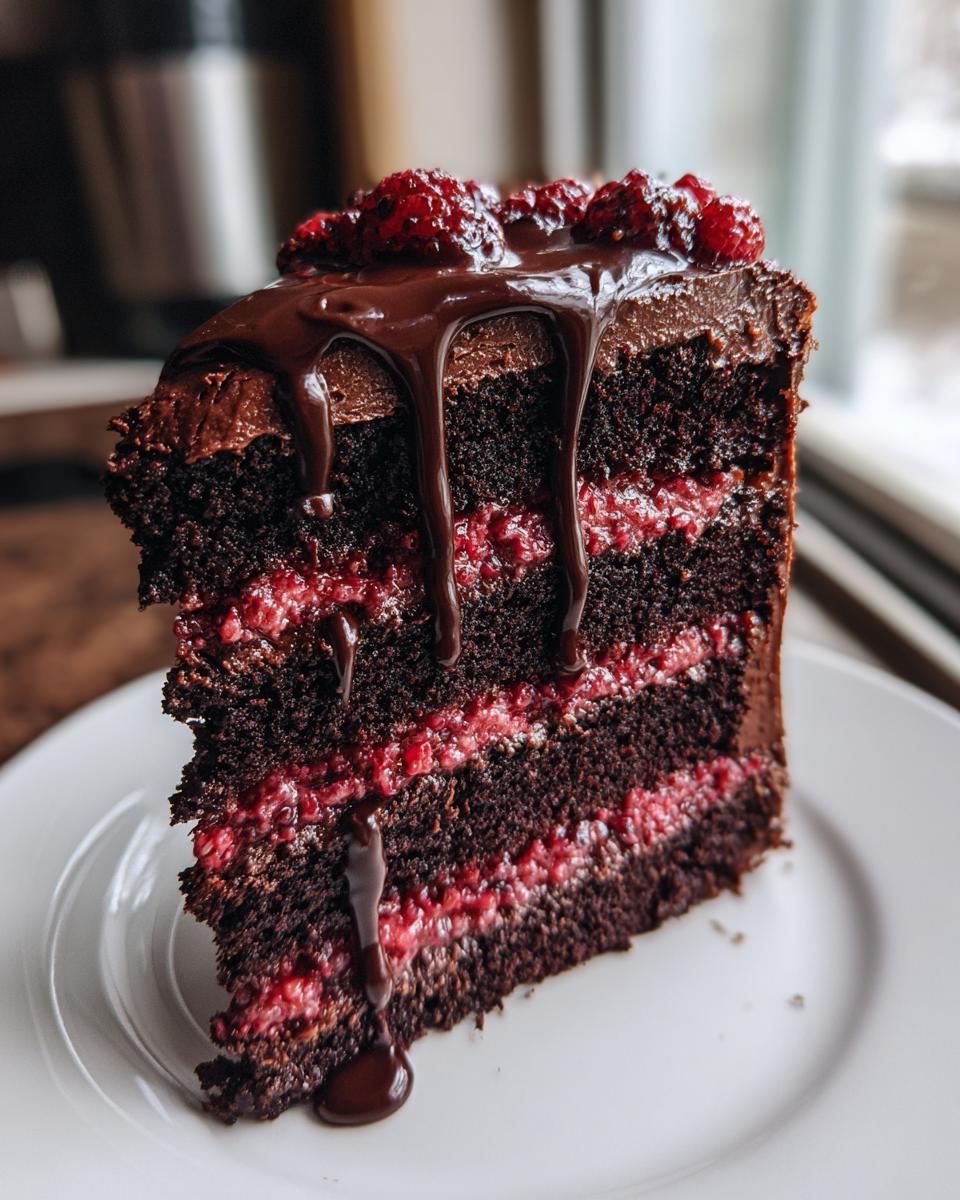
Assembling Your Moist Raspberry Filling Cake
Once those cake layers are completely cool—and I mean totally cool, or the frosting melts—it’s time to build. Take one layer, put it on your stand, and spread that vibrant raspberry preserves evenly across the top. Place the second layer gently on top. Now, you can move onto the chocolate buttercream, which you can find instructions for making on my quick and easy chocolate frosting recipe here. Frost the entire top and sides smoothly. Here is the professionalism tip: before you apply the drip, stick the whole frosted cake into the fridge for about 30 minutes. This chills the buttercream just enough so the ganache holds its shape when you pour it. Then, pour that slightly cooled ganache over the top edge, guiding it around so it drips cleanly down the sides. Finish with a scattering of those gorgeous fresh raspberries right in the center top. Let the ganache set slightly, and you’re picture-perfect!
Expert Tips for the Best Chocolate Raspberry Cake
Look, anyone can follow instructions, but making this **chocolate raspberry cake** truly great means knowing a few insider tricks. That’s how we elevate a simple **Chocolate Layer Cake Special Occasion** into something memorable. Since I treat recipes like projects that need stress-testing, I’ve learned exactly where things can go wrong and how to stop them before they happen.
Achieving the Perfect Moist Raspberry Filling Cake Texture
The absolute number one rule here, which I carry over to my ultimate moist chocolate cake, is temperature. Use room temperature milk and eggs! Cold ingredients don’t emulsify well with the creamed fats, leading to a slightly curdled, less smooth batter. Also, pay attention to that boiling water step. When you pour it into the cocoa mixture, you aren’t just thinning the batter; you are “blooming” the cocoa. This process releases intense chocolate flavor that you absolutely can’t get if you use room-temperature water. It makes the cake taste richer and keeps that dark color vibrant.
Now, about the filling protecting the cake layers: If you’re worried about the raspberry preserves soaking into the bottom layer and making it soggy, try a quick preliminary barrier. Before spreading the preserves, pipe a thin border of your chocolate buttercream around the edge of the first layer, creating a little dam. Then, fill the center with your preserves. That fat barrier keeps the moisture locked in place, preserving the texture of your moist raspberry filling cake beautifully.
Troubleshooting the Ganache Drip on Your Chocolate Raspberry Cake
The ganache drip is purely visual, but getting the consistency wrong is the biggest frustration when aiming for that **Bakery Style Chocolate Cake** look!
- If the Drip is Too Thin (Slipping Right Off): This usually means you poured it on when the cream was too hot or you didn’t use enough chocolate relative to the cream. No worries. Let the bowl of leftover ganache sit on the counter for another 20 minutes, stirring occasionally. It will thicken up significantly as it cools. You want it thick enough that when you lift the whisk, it falls off in a slow, heavy ribbon.
- If the Drip is Too Thick (Clumpy or Won’t Flow): If you let it cool down too much (it’s setting up like fudge), you need to warm it up slightly. Put the bowl over a pan of simmering water—a double boiler setup—for just 30 seconds, stirring constantly until it loosens back up to that honey-like pourable state.
Remember that key tip: chilling the cake before you apply the ganache drip is your insurance policy. A cold, firm frosting layer helps the drip set much faster and prevents those sloppy, running edges. It’s a project management move designed for a flawless finish!
Ingredient Notes and Substitutions for Your Chocolate Raspberry Cake
When we’re building a **chocolate raspberry cake** this decadent, the quality of the components really matters, even if the method is simple. Just like in managing a project timeline, if the inputs are weak, the final delivery suffers. Because this recipe relies heavily on the depth of the chocolate flavor, I want to talk specifically about cocoa powder, and then, of course, the fun substitutions you can make for the frosting if you’re feeling adventurous!
For the deepest, richest flavor in your cake layers and the Rich Chocolate Ganache Cake components, use high-quality Dutch-processed cocoa powder if you can find it. Standard unsweetened cocoa works fine, but Dutch-processing gives you a smoother, darker chocolate taste that feels instantly more luxurious. You want that intense flavor to cut through the sweetness of the preserves.
The biggest note from my original recipe sheet concerned the frosting. While I adore the silky chocolate buttercream we outlined, sometimes you want that slight tang that only cream cheese provides. Don’t hesitate to swap!
- For Raspberry Cream Cheese Frosting: If you want to switch things up, you can easily modify the buttercream. Instead of using 1 cup of butter, use 8 ounces of softened cream cheese blended with 1/2 cup of the butter. You might need to add a little extra milk or powdered sugar to keep the consistency right, but the resulting flavor is fantastic with the fruit filling. You can find a great detailed guide over at my cream cheese frosting recipe guide if you decide to make that swap.
- Milk Alternatives: Since the cake itself uses whole milk, I highly recommend sticking to that here in the buttercream for stability. If you try substitutes like almond or oat milk in the frosting, you might have to add considerably more powdered sugar to stabilize it, which can sometimes make the frosting gritty instead of smooth. Stick to whole milk or heavy cream for best results when frosting a layer cake.
Remember, every ingredient choice is a small efficiency decision—choosing the right cocoa saves you from having to amp up the sugar later!
Serving Suggestions for This Chocolate Layer Cake Special Occasion
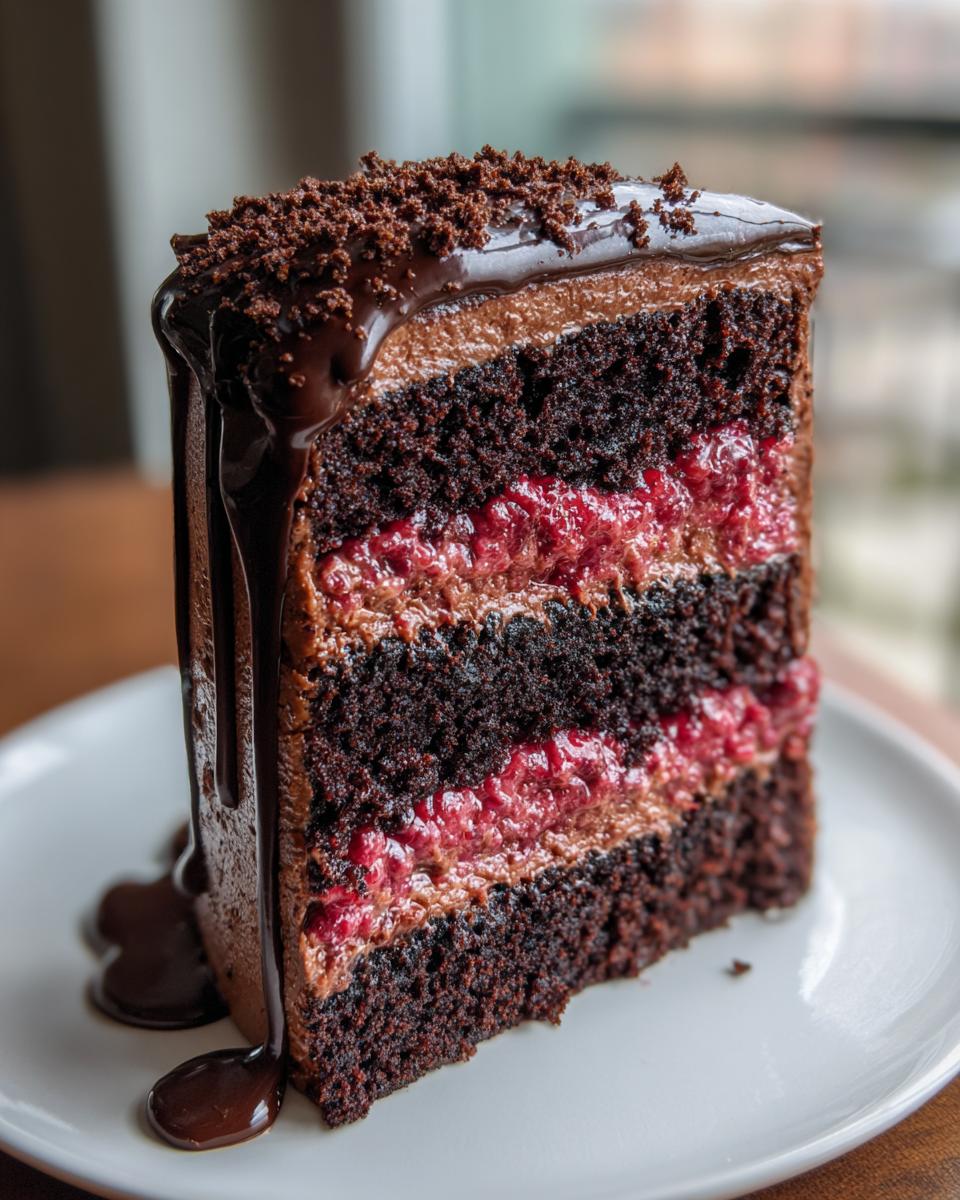
So, you’ve successfully baked this stunning **chocolate raspberry cake**—the layers are moist, the ganache is dripping perfectly, and it looks like a masterpiece destined for a magazine cover. Now, how do we serve it up to really make it feel like a professional **Bakery Style Chocolate Cake** moment? It’s all about pairing and presentation!
First, let’s talk about presentation. Since this cake is already so visually impressive with the deep chocolate, pops of red raspberry, and glossy drip, keep your serving plate clean. If you want extra flair, place the slice on a white plate and add just a tiny, artful swirl of leftover chocolate buttercream or a small, very deliberate smear of raspberry preserves on the side. Sometimes, less is more, letting that incredible height and those clean layers speak for themselves.
Perfect Drink Pairings
A dessert this rich needs something to balance the intensity. I always have a few go-to options ready for when I serve a showstopper like this:
- Coffee Culture: If you’re serving this after dinner, a strong, freshly brewed black coffee or a simple Americano is non-negotiable. The bitterness of the coffee cuts right through the decadence of the dark chocolate and resets your palate between bites. If you’re feeling fancy, a small espresso works wonders.
- Wine Choice: For celebrations or evenings when you want to linger, look for a wine that complements dessert without being too sweet itself. A good quality Ruby Port is my favorite pairing here. Its dark fruit notes echo the raspberry, and its warmth stands up beautifully against the richness of the chocolate. Avoid anything overly tannic; we want harmony, not a fight!
- Simple Milk Treat: Don’t dismiss the classics! A chilled glass of whole milk is surprisingly perfect, especially if younger guests are enjoying this **Chocolate Layer Cake Special Occasion**. It’s comforting and classic.
If you happen to have whipped up some extra shortbread or have some plain, crisp cookies around—maybe even some homemade chocolate chip cookies for later—they make a great crunchy textural side, but honestly, this cake eats perfectly all on its own. The goal is to let that chocolate and raspberry pairing shine.
Storage and Reheating Instructions for Leftover Chocolate Raspberry Cake
Alright, if you manage to have leftovers of this glorious **chocolate raspberry cake**—which, honestly, is a feat in itself—we need to handle storage correctly. Because we used actual fruit preserves for the filling and topped it with fresh components, this isn’t something you just leave on the counter like a plain pound cake. We need to treat this like the structured project it is: protect the different components!
The first decision is the garnish. If you haven’t put the fresh raspberries on yet, definitely tuck them away separately in a sealed container in the fridge. Once they go on, they start weeping juice and compromising that gorgeous, clean look of the ganache drip. If they are already on there, just know they might look a tiny bit sadder the next day, but they’ll still taste great!
For keeping the structure sound, refrigeration is absolutely required due to the filling and butter-based frosting. Cover the remaining cake loosely with plastic wrap or place it under a cake dome, but make sure the plastic isn’t touching the ganache swirl unless you’ve already eaten the top portion! Keep it in the fridge for up to four days. If you want to store individual slices, small airtight containers are perfect; you can even separate the slice from the fresh fruit garnish if you want the absolute best texture later on.
Reheating isn’t usually necessary for a cake this moist, but if the buttercream has gotten a little too firm sitting in the cold, just pull the slice out about 30 to 45 minutes before you plan to eat it. That bit of counter time allows the butter in the frosting and the cake crumbs to soften back to that perfect melt-in-your-mouth state. Serving it room temperature is always better than serving it straight from the chill, especially after you’ve made such an effort crafting this **Decadent Chocolate Cake**!
If you’re looking for other great storage methods for decadent treats, my notes on keeping fudgy date brownies fresh are surprisingly applicable here regarding airtight containers. Good luck keeping any of this around!
Frequently Asked Questions About Making a Chocolate Raspberry Cake
I always get questions when people tackle a more involved bake like this. That’s totally fine! Remember, treating this like a planned project means anticipating the sticking points. Here are a few things I hear most often when folks are building their **Chocolate Raspberry Cake Recipe** so you can avoid any hiccups along the way.
Can I make the layers for this chocolate raspberry cake ahead of time?
Absolutely! This is one of the best parts about planning a big dessert. Once your chocolate layers are completely cool, you need to wrap them tightly—I mean, really tightly—in plastic wrap. Make sure they are totally encased. You can definitely store them like this at room temperature for up to two days, but if you need more time, pop them in the freezer for up to a month. When you plan to assemble, just let them thaw for a few hours on the counter before unwrapping. This keeps the structure firm without drying out the cake crumbs, which is critical for achieving that moist raspberry filling cake feel.
What is the best way to get a clean slice of this rich chocolate ganache cake?
This is where that project management step we implemented really pays off! If you chilled the cake for 30 minutes before pouring on the ganache, your buttercream is firm, and the ganache will set up harder than if it’s warm. To get those beautiful, clean slices worthy of any **Elegant Birthday Cake Ideas** board, grab a large, sharp knife and dip it into a tall glass of very hot water. Let it sit for about 20 seconds to heat the blade up. Wipe the knife bone-dry with a paper towel, then make your cut. Wipe the knife clean and reheat it before every single cut. This melts the chocolate and buttercream just enough to pass through cleanly without dragging the layers or smearing the beautiful ganache drip. It’s a simple thermal trick that makes all the difference!
Also, if you decide to make a homemade berry infusion instead of using preserves, try my recipe for easy homemade strawberry milk—just swap the berries—and use that slightly thinner liquid instead of preserves in the center. Just remember to use the buttercream dam I mentioned earlier, or the liquid berry layer will seep into the cake!
Can I use fresh raspberries *instead* of preserves in the filling?
You sure can, but this changes the texture drastically, so you have to plan for it! If you just throw fresh raspberries between the layers, they release a lot of water, making the center very soupy quickly, which we definitely want to prevent on a **Showstopper Celebration Cake**. If you use fresh berries, gently toss them with one tablespoon of granulated sugar and one teaspoon of cornstarch. Let that sit for about 15 minutes. The cornstarch will absorb some of the initial release, allowing the berries to break down slightly and create a lovely, thick, fruity layer once they bake into the heat of the room-temperature cake layers. It’s a great way to get that bright, fresh flavor!
Share Your Showstopper Chocolate Raspberry Cake Experience
Alright, project complete! You’ve navigated the mixing, you’ve mastered the drip, and hopefully, you’ve managed to keep this magnificent **chocolate raspberry cake** intact long enough to cut a slice. Now comes the best part for me: hearing how the process went for you.
I’m Leo, and while I love optimizing the process, the payoff is seeing the results you get in your own kitchen. Did the ganache drip behave exactly as planned, or did you embrace a little artistic messiness? Did your family think this **Decadent Chocolate Cake** looked like it came from a professional bakery? Seriously, I want to know!
Please take a moment to leave a rating below—five stars if this simple, streamlined approach gave you the showstopper you were hoping for. More importantly, drop a comment detailing your triumphs or any little tweaks you made. Knowing what worked for you helps me refine my own methods, and it gives confidence to others who are looking at the recipe and thinking, “Can I really pull this off?”
If you want to check out what other home cooks are doing with their showstoppers, or if you want another great look at a brilliant finish, check out this great idea for a similar bake over at Taste by Kylie. Happy baking, and I truly look forward to seeing your gorgeous results!
If you’re already thinking about what to bake next, maybe try something a little different next time, perhaps my fudgy gingerbread brownies for a totally different kind of decadent treat!
PrintDecadent Chocolate Raspberry Layer Cake with Ganache Drip
This recipe delivers a showstopper Chocolate Raspberry Cake, featuring moist chocolate layers, a vibrant raspberry filling, and a rich chocolate ganache drip. It is perfect for special occasions and celebrations.
- Prep Time: 35 min
- Cook Time: 35 min
- Total Time: 1 hr 45 min
- Yield: 10 servings 1x
- Category: Dessert
- Method: Baking
- Cuisine: American
- Diet: Vegetarian
Ingredients
- 1 3/4 cups all-purpose flour
- 1 3/4 cups granulated sugar
- 3/4 cup unsweetened cocoa powder
- 1 1/2 teaspoons baking powder
- 1 1/2 teaspoons baking soda
- 1 teaspoon salt
- 2 large eggs
- 1 cup whole milk
- 1/2 cup vegetable oil
- 2 teaspoons vanilla extract
- 1 cup boiling water
- 1 cup raspberry preserves (for filling)
- 1 cup fresh raspberries (for garnish)
- For the Ganache: 8 ounces semi-sweet chocolate, chopped, 1 cup heavy cream
- For the Frosting: 1 cup unsalted butter, softened, 3 cups powdered sugar, 1/2 cup cocoa powder, 1/4 cup milk, 1 teaspoon vanilla extract
Instructions
- Prepare the cake layers: Preheat your oven to 350°F (175°C). Grease and flour two 8-inch round cake pans.
- In a large bowl, whisk together the flour, sugar, cocoa powder, baking powder, baking soda, and salt.
- Add the eggs, milk, oil, and vanilla extract to the dry ingredients. Beat with an electric mixer on medium speed for two minutes.
- Carefully stir in the boiling water until the batter is smooth. The batter will be thin.
- Divide the batter evenly between the prepared pans. Bake for 30 to 35 minutes, or until a wooden pick inserted into the center comes out clean. Let the cakes cool in the pans for 10 minutes before inverting them onto a wire rack to cool completely.
- Make the chocolate ganache: Place the chopped chocolate in a heatproof bowl. Heat the heavy cream in a small saucepan until it just begins to simmer. Pour the hot cream over the chocolate. Let it sit for 5 minutes, then whisk until smooth. Set aside to cool until it reaches a thick, pourable consistency for the drip.
- Make the chocolate buttercream frosting: Beat the softened butter until creamy. Gradually add the powdered sugar and cocoa powder, alternating with the milk. Beat until light and fluffy, adding vanilla extract.
- Assemble the cake: Place one cooled cake layer on a serving plate. Spread the raspberry preserves evenly over the top.
- Top with the second cake layer. Frost the top and sides of the entire cake with the chocolate buttercream.
- Create the ganache drip: Pour the slightly cooled ganache over the top edge of the cake, allowing it to drip down the sides.
- Garnish the top center of the cake with fresh raspberries. Allow the ganache to set before slicing.
Notes
- For an ultra-moist cake, use room temperature milk and eggs when mixing the batter.
- If you prefer a raspberry cream cheese frosting instead of buttercream, substitute 8 ounces of softened cream cheese for half of the butter in the frosting recipe.
- Chill the cake for 30 minutes after applying the buttercream before adding the ganache drip for cleaner lines.
Nutrition
- Serving Size: 1 slice
- Calories: 480
- Sugar: 55g
- Sodium: 250mg
- Fat: 28g
- Saturated Fat: 15g
- Unsaturated Fat: 10g
- Trans Fat: 0.5g
- Carbohydrates: 58g
- Fiber: 3g
- Protein: 5g
- Cholesterol: 75mg