
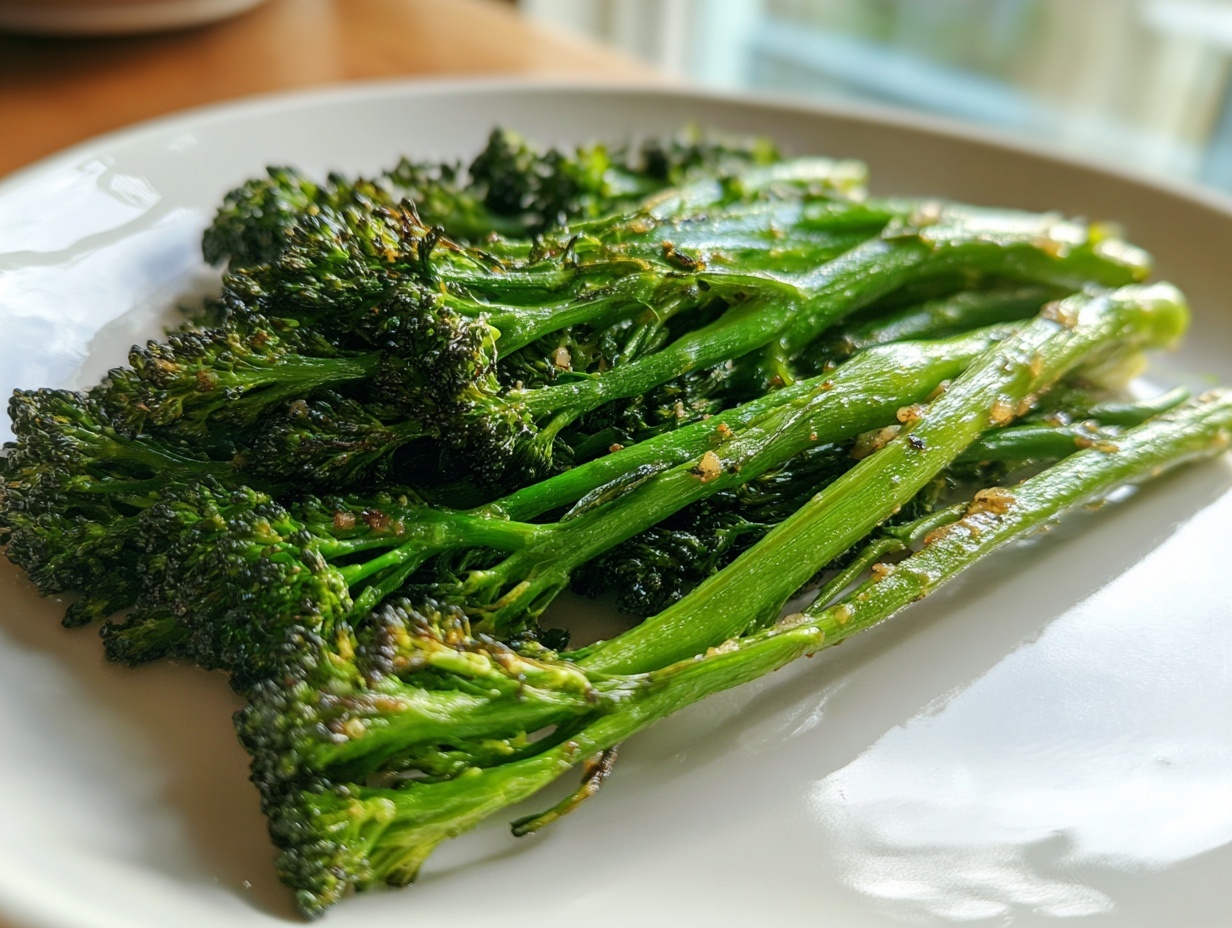
We’ve all been there, right? Staring down a pile of green vegetables, knowing we *should* eat them, but dreading another bland, steamed disaster. That’s exactly what stopped me when I was trying to manage projects all day and cook dinner by 7 PM. I needed efficiency, but I refused to compromise on flavor. So, I engineered a solution for the perfect, vibrant side dish: the Ultimate 15-Minute Garlic Lemon Roasted Broccolini. This isn’t just any recipe; it’s streamlined perfection. We treat this as a project: trim, toss, roast, done. This little spear of baby broccoli, or broccolini, transforms into something incredible with minimal effort. That’s the Dishicious approach: practical efficiency meets delicious results, every single time.
- Why This Roasted Broccolini Is Your New Favorite Quick Vegetable Side
- Ingredients for Ultimate Garlic Lemon Roasted Broccolini
- How to Prepare Perfect Tender Crisp Broccolini
- Expert Tips for Cooking Broccolini: Roasting, Sautéing, and Air Frying
- Serving Suggestions for Your Lemon Broccolini Side Dish Ideas
- Storage and Reheating Instructions for Leftover Broccolini
- Frequently Asked Questions About Cooking Broccolini
- Nutritional Estimates for This Simple Vegetable Recipe
- Share Your Experience Making This Broccolini Recipe
Why This Roasted Broccolini Is Your New Favorite Quick Vegetable Side
Look, the dinner dilemma is real. You need something fast, but you’re sick of just nuking green beans. This roasted broccolini is the answer because it solves the complexity problem entirely. Roasting is truly the best way to cook broccolini, giving you those crispy, charred florets without ever touching a steamer basket.
Here’s why this preparation makes the cut for our busy lives:
- It’s a fantastic keto side dishes option—simple fats and greens!
- It qualifies as a versatile healthy green vegetable that actually tastes exciting.
- Cleanup? It’s a piece of cake because we use a sheet pan.
Speed and Simplicity: The 15-Minute Side Dish Promise
When I say 15 minutes, I mean it. That’s the cook time. Think about it: that’s faster than waiting for a pot of water to boil for regular broccoli! Roasting requires almost zero active attention once it’s in the oven. You toss it, spread it out, and walk away for 12 minutes. It’s the ultimate quick vegetable side because it handles itself beautifully, giving you time to focus on the main event.
Ingredients for Ultimate Garlic Lemon Roasted Broccolini
When you’re aiming for efficiency, you need ingredients that do heavy lifting without cluttering the process. Good news: this recipe uses simple, accessible items. We want bright, clean flavor that lets the quality of the broccolini shine through. You’ll notice we aren’t using a ton of spices here because the roasting process concentrates the natural flavors beautifully. This recipe is calibrated to serve about four people, perfect for a family dinner or a couple of leftovers for lunch the next day.
Here is the reliable list of components you’ll need:
- 1 bunch broccolini (about 1 pound)
- 2 tablespoons olive oil
- 3 cloves garlic, minced
- 1/2 teaspoon kosher salt
- 1/4 teaspoon black pepper
- 1 tablespoon fresh lemon juice
How to Prepare Perfect Tender Crisp Broccolini
This is where the process management comes in. We can’t just throw everything on a pan and hope for the best; that leads to uneven cooking and soggy spots. For this recipe to deliver that ideal tender crisp texture, we need high, consistent heat and space. Make sure your oven is fully preheated to 425°F before you even start prepping the vegetable itself. I line my sheet pan with parchment—not because it’s required, but because cleaning up sticky roasted garlic bits takes time I’d rather spend eating!
Preparation and Seasoning for Flavorful Broccolini
First things first: wash your stalks. After they are rinsed, pat the broccolini until it’s as dry as you can get it. Excess water creates steam, and we are roasting, not steaming! Next, you need to trim them. Look at the very bottom of the stalks—if it looks dry, woody, or discolored, slice about half an inch off. This small step makes a huge difference in the final tenderness. Remember, we want tender stalks, not chewy ones.
Now for the flavor application. Put your trimmed spears in a bowl. Drizzle on the olive oil—just enough to coat, not drown them. Then, toss in your minced garlic, salt, and pepper. You need to be thorough here. Make sure every single spear gets some oil and seasoning clinging to it. If you skip this thorough coating, you end up with some bland spots next to your delicious garlic broccolini pieces.
Roasting the Broccolini for Tender Crisp Perfection
Once seasoned, spread them out on your prepared sheet pan. This is non-negotiable: spread them out in a single layer. If you overlap them, the bottom layer steams while the top layer burns. We want consistency! They should only be touching slightly, ideally with space between each spear.
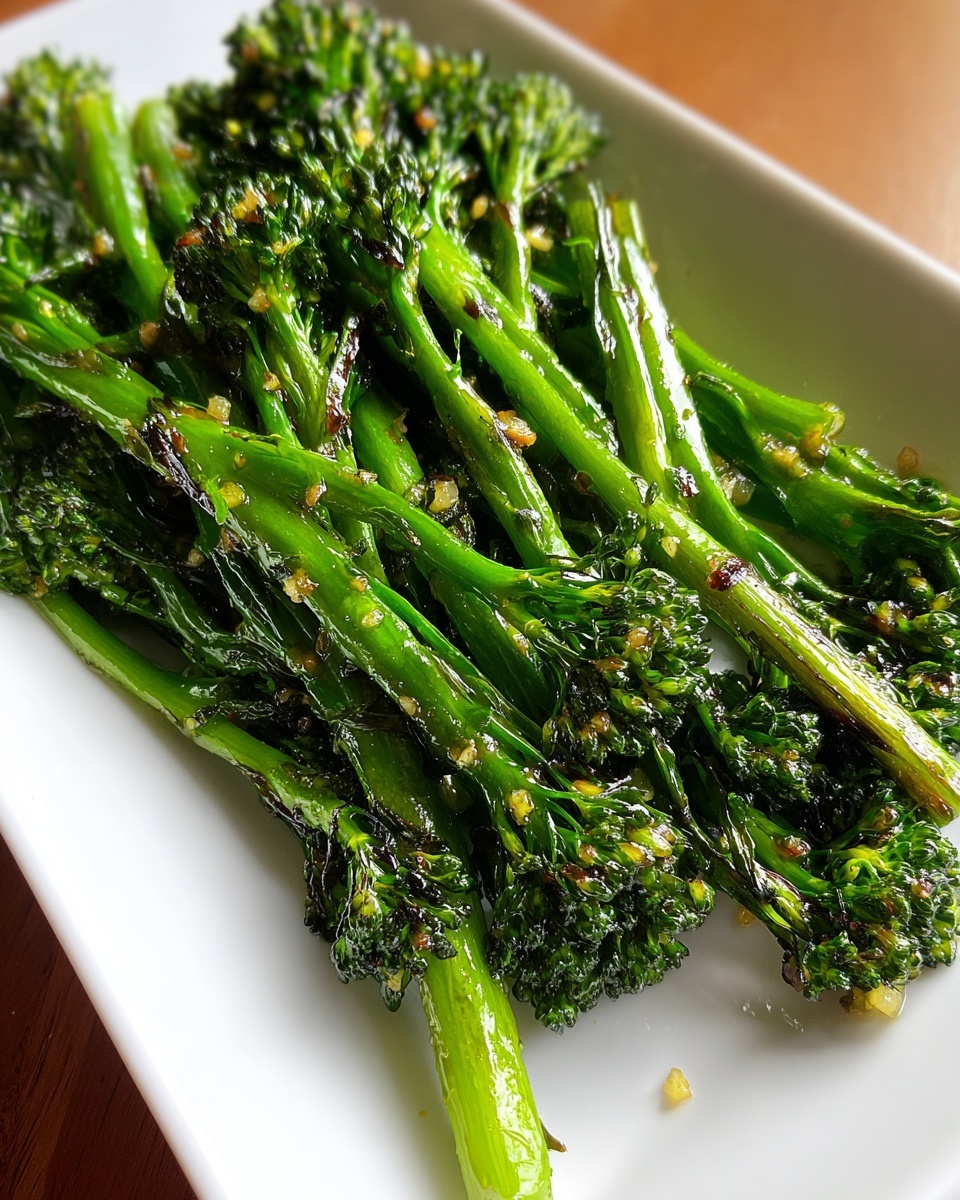
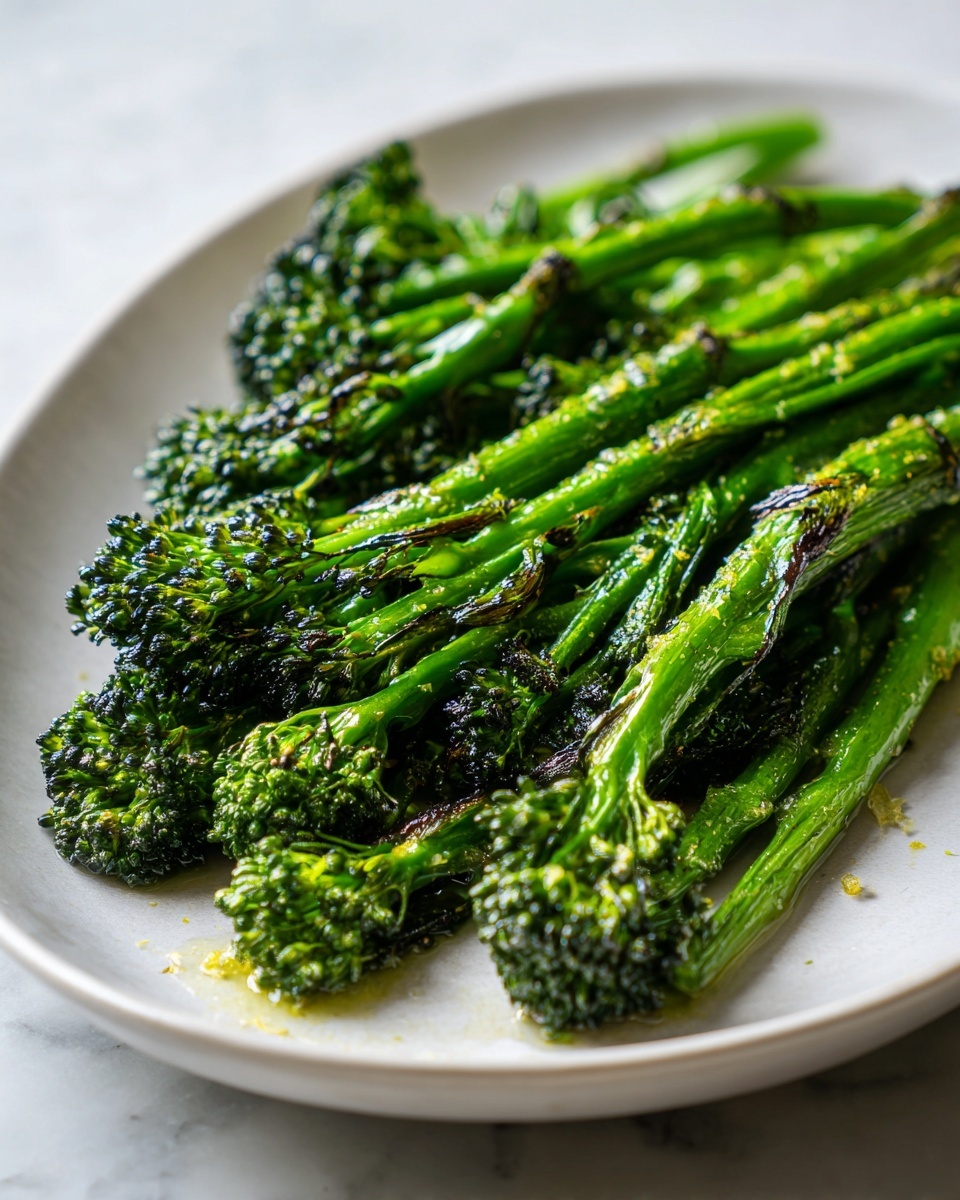
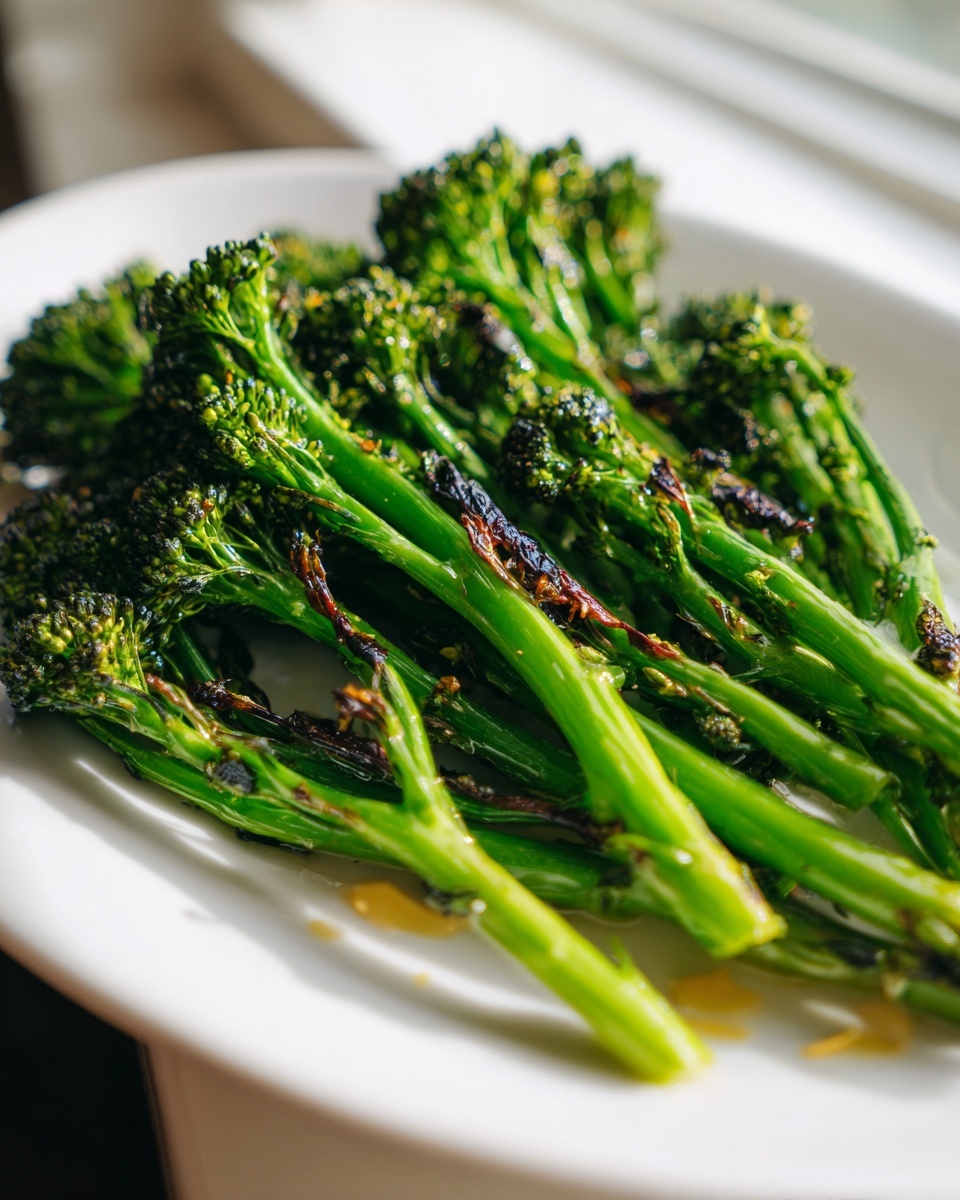
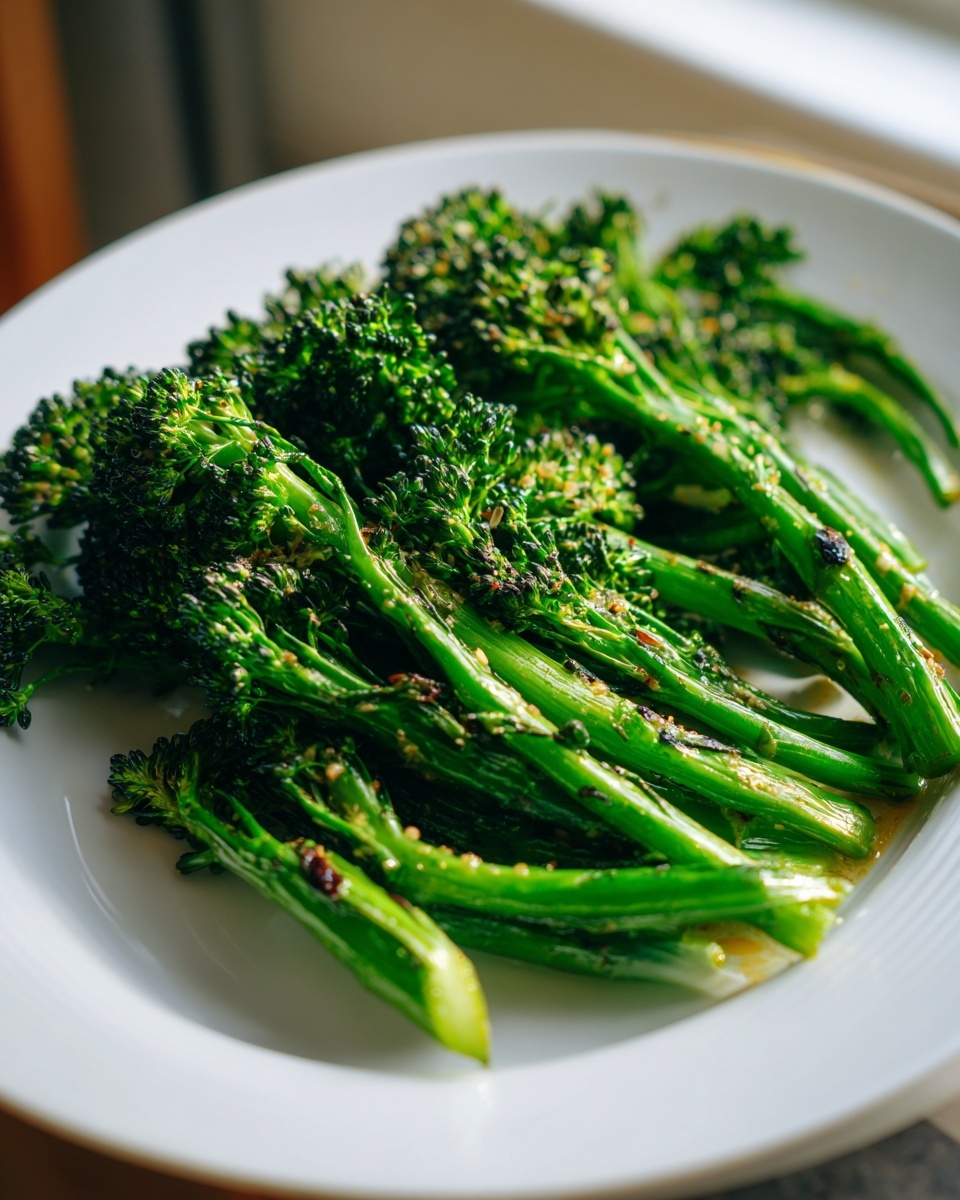
Slide that pan into the hot oven. Set a timer for 12 minutes. At the 12-minute mark, check them. You are looking for slight caramelization or browning on the florets—that’s where the deep flavor comes from. The stalks should yield easily when poked with a fork, but still offer a slight snap. If they aren’t there, keep roasting for up to 15 minutes total. Then, pull them out immediately and hit them with that splash of fresh lemon juice while they are piping hot. Toss quickly and move straight to the serving plate. This process ensures you get that perfect roasted broccolini every time.
Expert Tips for Cooking Broccolini: Roasting, Sautéing, and Air Frying
Okay, roasting is my go-to because it’s hands-off, but I know sometimes you need stovetop speed or maybe you’re obsessed with your air fryer—I get it! When you’re out of oven space, especially when making a big meal, you need alternatives. This recipe for broccolini is built to adapt without losing its essential flavor profile. I’ve tested these variations myself, treating them like mini-projects to ensure they still hit that tender-crisp target.
Before you even think about grabbing another pan, remember that the key to any good green vegetable is high heat for a short amount of time. We are aiming for vibrancy, not mush!
Mastering Sautéed Broccolini with Garlic Butter Vegetable Finish
If you’re short on time or just prefer stove action, we can quickly pivot to a lovely sauteed broccolini. Instead of setting up the oven, grab a large skillet—one that can handle a pound of florets without crowding them too much. Heat your olive oil and garlic (just like in the roasting prep) over medium heat until the garlic is fragrant, maybe 60 seconds. Don’t let it brown yet!
Toss in your seasoned spears. Here’s the trick for tenderness: add about two tablespoons of water or broth, then immediately cover the pan. Let that steam work its magic for 5 to 7 minutes. The condensation helps soften the stalks quickly. Once they are almost done, uncover the skillet. Let that excess liquid boil off, and cook for another 1 to 2 minutes until you get a little sizzle and char around the edges. You’ve just created a delicious garlic butter vegetable finish that’s fantastic!
For my air fryer fans—you’re in luck! It’s kind of like mini-roasting. Toss your seasoned broccolini really well, place it in the basket in a single layer (you might need to work in batches!), and cook at 380°F for about 8 to 10 minutes total. Just shake the basket halfway through so everything gets evenly exposed to that hot air. The results are incredible.
If you are looking for more brilliant one-pan meals, check out my tricks for sheet pan vegetables—it uses the same efficiency principles!
Serving Suggestions for Your Lemon Broccolini Side Dish Ideas
So, you’ve got this beautiful, bright, perfectly seasoned broccolini sitting on the counter, still warm from the oven. What’s next? As a kitchen strategist, I always plan my pairings around maximizing flavor contrast while minimizing secondary cooking time. This lemon broccolini is so versatile; it elevates anything from a simple weeknight meal to something you’d be proud to serve at a dinner party!
Since this preparation is bright and slightly acidic from the lemon, it cuts through rich flavors perfectly. Forget the boring sides you were forced to make before; this is a vibrant component!
Here are a few of my favorite dinner side ideas that pair flawlessly with this dish:
- Roasted Proteins: You cannot go wrong pairing this with a perfectly seared protein. It’s amazing next to a flaky baked salmon or a crisp-skinned chicken thigh. If you’re making my technique for pan-seared tuna steak, this broccolini is the ideal fresh counterpoint.
- Simple Steak Nights: If you’re grilling a flank steak or even just a quick piece of sirloin, the caramelized edges of the roasted spears hold up beautifully against the richness of the red meat.
- Pasta Nights: While this might seem like a heavy side for pasta, it’s perfect alongside a lighter butter or olive oil-based noodle dish. It adds necessary vegetable volume without weighing down the plate.
Honestly, the best pairing is whatever main dish you need to finish plating quickly. This is the definition of a reliable dinner side ideas solution that comes together in the final minutes of your project timeline!
Storage and Reheating Instructions for Leftover Broccolini
When I design an efficient recipe, I always build in a second-day plan. Leftover broccolini is great, but the texture is the tricky part. If you cook it perfectly—tender-crisp—you don’t want it turning limp and soggy in the fridge. If you find yourself with extra spears, don’t just toss them! Store them properly, and you’ve already managed part of tomorrow’s side dish project.
You can safely refrigerate this broccolini for about 3 to 4 days. The key is container choice. Don’t seal it airtight immediately. Let it cool down completely on the counter first. Then, transfer the roasted spears into a shallow, airtight container. Avoid squeezing them in; we want to minimize the crushing that leads to mush.
Reheating is simple, but we have to commit to bringing back that crisp edge we worked so hard to achieve. I strongly advise against the microwave if you can avoid it. Microwaving produces steam, and steam equals limp vegetables. Here are my two preferred methods for reviving your leftovers:
- The Quick Sauté (My Recommendation): This is super fast. Get a clean skillet ripping hot over medium-high heat. Add a tiny drizzle of fresh olive oil—maybe half a teaspoon. Toss the cold broccolini in for just 2 minutes, moving them constantly. You are aiming to drive off the residual moisture and bring back that light char.
- The Oven Re-Crisp: If you’re already heating up the oven for a main course, throw the leftovers on a small baking sheet. Roast at 400°F for just 5 minutes. This brings back that lovely oven-dried texture you get from the initial roast.
If you want to add a burst of flavor on reheating, toss the warm spears with a fresh squeeze of lemon right before serving. That little hit of acid wakes everything up again!
Frequently Asked Questions About Cooking Broccolini
When you’re optimizing a recipe, you sometimes run into questions about variations or technique specifics. I treat all these questions like mini-projects that need clear, efficient answers to give you confidence. Here are some common queries I get about achieving that perfect green side dish.
What is the best way to cook broccolini to keep it green?
The secret to keeping those spears super vibrant and green isn’t a special chemical; it’s high heat applied for a very short window. Whether you’re doing the roasting in this recipe or a quick sauté, you need immediate, intense heat. That’s what locks in the color and prevents the vegetable from breaking down into an olive shade. If you cook it low and slow, you lose the vibrancy. This 15-minute roasting method is designed specifically to maximize color while achieving that necessary tender-crisp texture.
Can I use broccoli instead of broccolini in this easy broccolini recipe?
Yes, you absolutely can swap in regular broccoli florets if you can’t find spears, or if you just prefer them! However, you have to adjust the project plan—meaning, you have to adjust the cook time. Broccoli heads are denser and thicker than delicate broccolini stalks. If you use the same timing in the oven, your broccoli will be raw. Since regular broccoli takes longer to soften, I would add about 5 to 7 extra minutes to the total roasting time. If you’re making easy chicken enchiladas and need a quick side, just remember to get that broccoli in the oven a few minutes before you put in any other thinner vegetables!
Why does my broccolini come out soggy instead of crisp?
Oh, the dreaded sogginess! This usually points to one of two common kitchen inefficiencies. First, if you skipped drying them after washing, extra water created steam, and steam equals mush. Second, if you crowded the sheet pan during roasting, the spears baked into each other instead of cooking directly on the hot metal. For a perfect broccolini side dish, ensure they have room to breathe in a single layer. If you’re sautéing, make sure you let the excess moisture boil off before removing the lid for that final crisping stage.
Is this recipe suitable for paleo broccolini preparation?
Great question for those sticking strictly to ingredients! This specific version is inherently very close to being perfect for paleo diets. We use olive oil, which is fine, and we have no dairy or grains, obviously. The only thing you’d want to confirm is that you are using sea salt rather than iodized table salt, though for most home cooks, this is a non-issue. It works wonderfully as a paleo broccolini base—just skip any optional Parmesan cheese you might be tempted to sprinkle on at the end!
Nutritional Estimates for This Simple Vegetable Recipe
As a project manager, I always value seeing the final metrics, even for something as simple as a side dish. While I focus on flavor and speed, I know many of you are tracking macros or keeping things clean for specific diets. These numbers are estimates based on the core ingredients listed above—the broccolini, oil, garlic, salt, pepper, and lemon juice. Remember, if you drizzle on extra olive oil or load it up with Parmesan later, those values will shift!
We’re looking at four servings here, and even with the healthy fats from the olive oil, this turns out incredibly clean. It’s great news for anyone managing their intake while still wanting something genuinely delicious on their plate.
Here is the estimated breakdown per serving:
- Serving Size: 1/4 of recipe
- Calories: 95
- Fat: 7g
- Carbohydrates: 7g
- Fiber: 3g
- Protein: 4g
- Sugar: 1g
- Sodium: 280mg
See? It’s high in fiber, low in sugar, and it’s naturally low-carb, making it perfect if you’re aiming for simple, clean fuel for the rest of your day!
Share Your Experience Making This Broccolini Recipe
If you’ve followed these steps, you should be looking at a pan of the most delicious, vibrant, and perfectly timed broccolini you’ve ever made. My entire philosophy here at Dishicious is about creating reliable results, and the best way for me to verify that I’ve done my job is to hear from you!
Don’t just cook it and forget it; please let me know how this recipe works in *your* kitchen project. Did you stick to the lemon flavor profile, or did you try sneaking in some other ingredients? I love seeing the variations people come up with!
Take a moment after you’ve served it up, maybe alongside that perfect piece of steak or fish, and tell us about it:
- Did this hit that 15-minute mark for you?
- Was the roasted texture exactly what you were hoping for?
- Did you add any cheese, like Parmesan, at the end? Let us know if it made a difference!
Rating the recipe (a trusty 5 stars means you nailed the efficiency!) and leaving a comment below helps other busy cooks trust the process. It shows that this simple, flavorful vegetable side—this fantastic broccolini recipe—solves the dinner dilemma, just like it does for me here in Chicago. If you liked this, you might also enjoy my equally efficient easy no-bake peanut butter bars for dessert!
PrintUltimate 15-Minute Garlic Lemon Roasted Broccolini

This recipe delivers perfectly tender-crisp broccolini with charred edges using simple roasting. It is a fast, flavorful, and healthy green vegetable side dish ready in 15 minutes.
- Prep Time: 5 min
- Cook Time: 15 min
- Total Time: 20 min
- Yield: 4 servings 1x
- Category: Side Dish
- Method: Roasting
- Cuisine: American
- Diet: Low Fat
Ingredients
- 1 bunch broccolini (about 1 pound)
- 2 tablespoons olive oil
- 3 cloves garlic, minced
- 1/2 teaspoon kosher salt
- 1/4 teaspoon black pepper
- 1 tablespoon fresh lemon juice
Instructions
- Preheat your oven to 425°F. Line a sheet pan with parchment paper for easy cleanup.
- Wash the broccolini and trim off any tough, dry ends from the bottom of the stalks. Pat the broccolini dry with paper towels.
- In a medium bowl, toss the broccolini with olive oil, minced garlic, salt, and pepper until everything is evenly coated.
- Spread the seasoned broccolini in a single layer on the prepared sheet pan. Do not overlap the stalks.
- Roast for 12 to 15 minutes, checking at 12 minutes. You want the florets slightly browned and the stalks tender-crisp.
- Remove the pan from the oven. Immediately drizzle with fresh lemon juice. Toss gently and serve this quick vegetable side immediately.
Notes
- For an air fryer broccolini variation, cook at 380°F for 8 to 10 minutes, shaking the basket halfway through.
- If you prefer a sautéed broccolini method, heat the oil and garlic in a skillet over medium heat for 1 minute, add the broccolini, cover, and cook for 5-7 minutes until tender-crisp. Remove lid and cook uncovered for 2 more minutes until lightly browned.
- This recipe is naturally keto side dishes compatible and paleo broccolini friendly.
Nutrition
- Serving Size: 1/4 of recipe
- Calories: 95
- Sugar: 1
- Sodium: 280
- Fat: 7
- Saturated Fat: 1
- Unsaturated Fat: 6
- Trans Fat: 0
- Carbohydrates: 7
- Fiber: 3
- Protein: 4
- Cholesterol: 0