
There is nothing quite like the nostalgia of walking into a classic bakery and seeing those iconic **black and white cookies** staring back at you. As someone who thrives on streamlining processes, I always felt like achieving that perfect New York City bakery texture at home was a complicated project. Forget that! I spent too much time studying overly fussy recipes that produced hard, crunchy things. That’s not what we want here.
My goal with this approach is simple: deliver that soft, moist, cake-like base everyone loves, topped with the distinct vanilla and chocolate glaze, without the fuss. Trust me, this is the **Best Black and White Cookie Recipe** you need for a simple, elegant, homemade treat that requires minimal guesswork. You’re going to love how easy this project turns out.

- Why This Black and White Cookie Recipe Delivers That NYC Bakery Texture
- Gathering Ingredients for Your Easy Black and White Cookies
- Step-by-Step Instructions for Perfect **Black and White Cookies**
- Tips for Mastering Your Homemade Black and White Treats
- Storage and Keeping Your **Black and White Cookies** Fresh
- Frequently Asked Questions About NYC Bakery Cookies
- Estimated Nutritional Breakdown for **Black and White Cookies**
- Share Your Black and White Cookie Recipe Success
Why This Black and White Cookie Recipe Delivers That NYC Bakery Texture
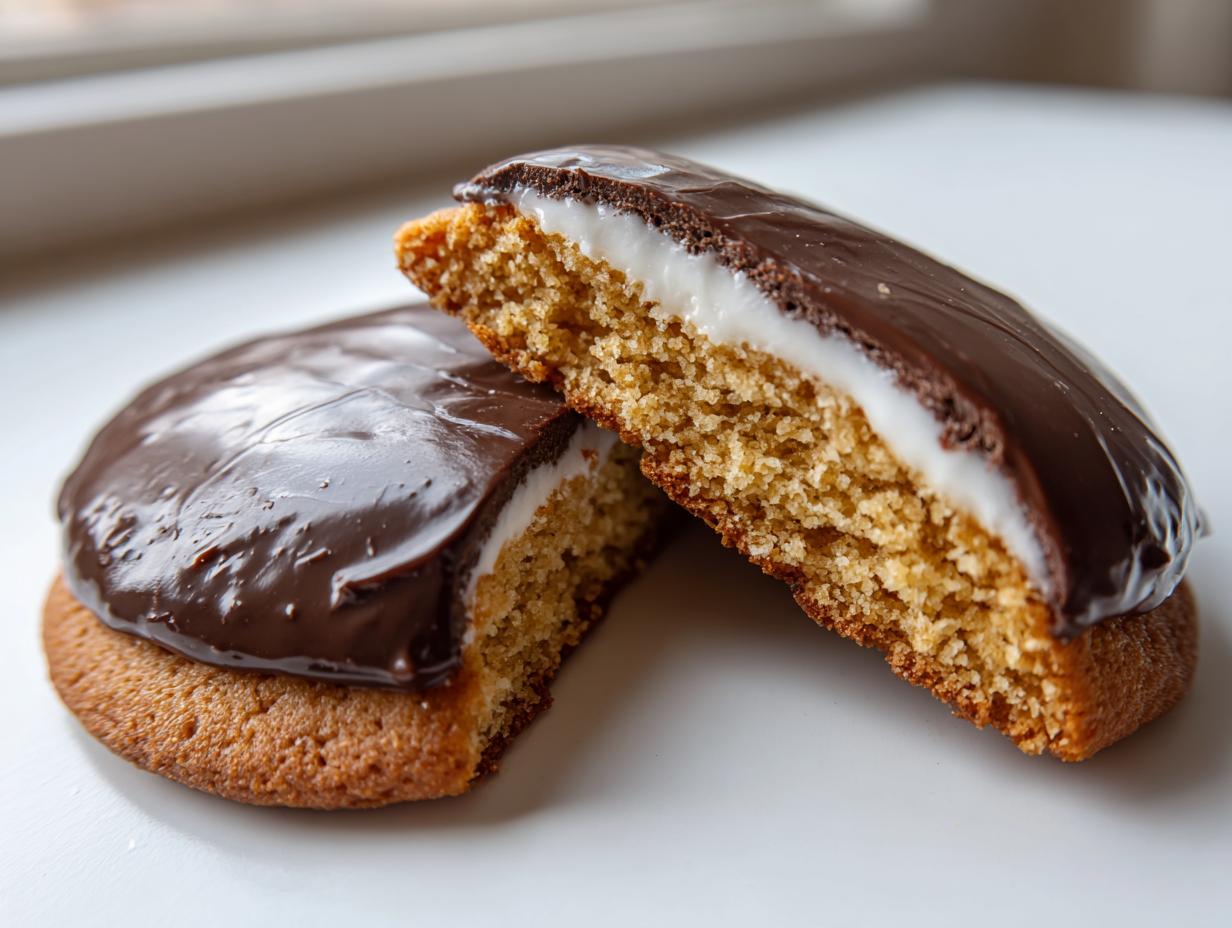
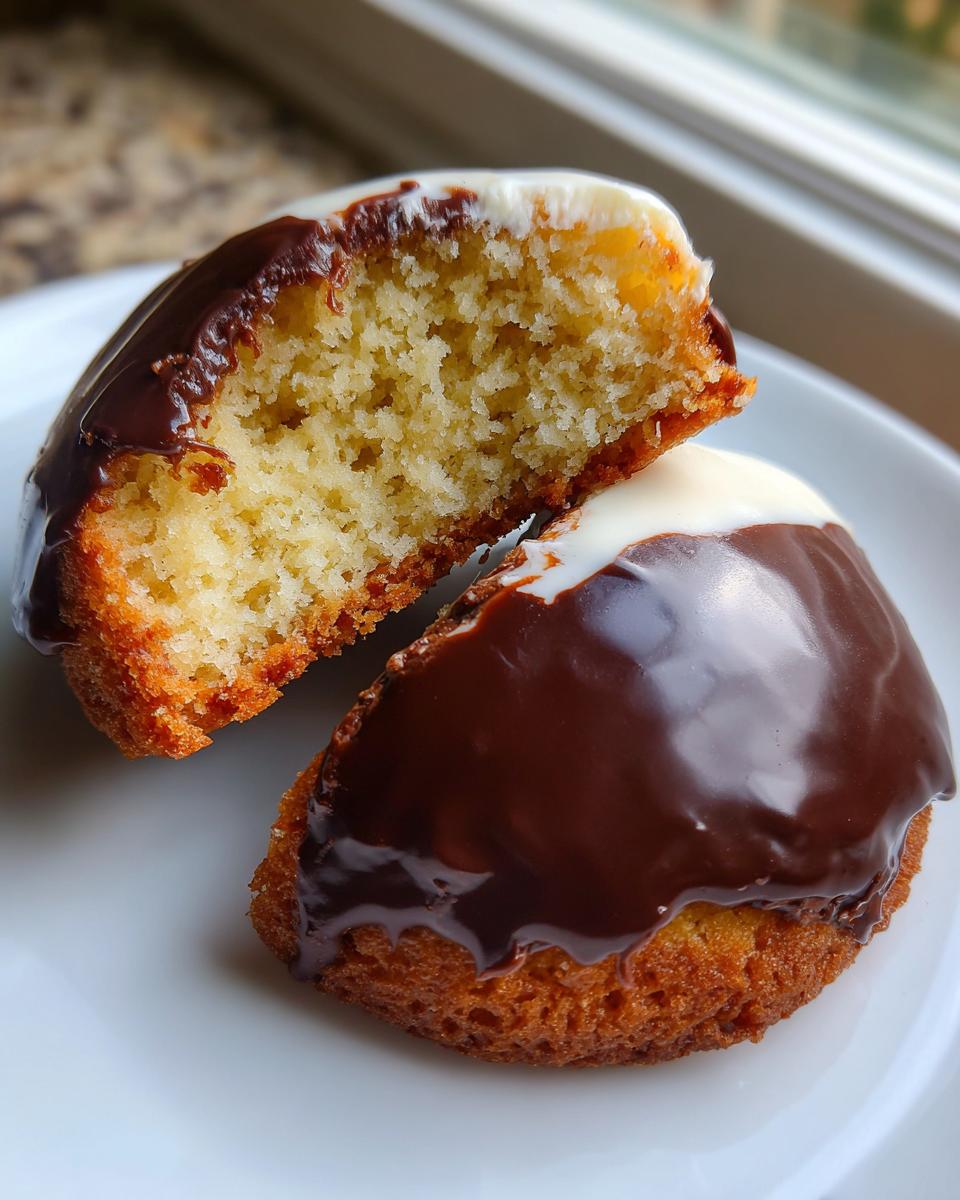
If you’ve ever been disappointed grabbing one of these from a place that clearly rushed the process, I get it. Most recipes aim for chewy; we are actively aiming for the opposite. These **black and white cookies** are meant to be soft, moist, and tender—basically, a drop cake disguised as a cookie. That unique mouthfeel is exactly what makes the iconic **NYC Bakery Cookies** style so famous.
My method focuses heavily on ingredient ratios and careful mixing to ensure we create that desirable crumb. We are deliberately dialing back on things that encourage spreading and crisp edges, which is why this recipe works so well for beginners looking for **Soft Cake Cookies**.
If you love learning how technique impacts texture, you might also enjoy my approach to getting perfect results with sugar cookie bars; it’s the same principle of structure control!
The Secret to **Thick Bakery Style Cookies**
The key here is the balance of liquid to flour. We use enough milk to hydrate the flour just enough so the result is soft, not chewy. Avoid overmixing the dough once the flour goes in! Seriously, stop mixing as soon as you see no dry streaks. Overworking develops gluten, and gluten gives you chew. We want tenderness, which means gentle incorporation is crucial for these thick, beautiful rounds.
Gathering Ingredients for Your Easy Black and White Cookies
When I approach any recipe, I look at the ingredient list like a project plan—every item has a specific job. Luckily, for these **Easy Black and White Cookies**, the list is straightforward and uses items you likely already have stocked up. This isn’t the time for complicated hunts; we need reliable components to guarantee that classic outcome.
We’ll break this down into two simple project phases: the cookie base itself, which creates that unique softness, and then the colorful icing that defines the cookie.
Cookie Base Ingredients
- 2 1/2 cups all-purpose flour
- 1 1/2 teaspoons baking powder
- 1/2 teaspoon salt
- 1 cup unsalted butter, softened (make sure it’s actually soft, not melty!)
- 1 cup granulated sugar
- 2 large eggs
- 1 teaspoon vanilla extract
- 1/2 cup milk
For the Chocolate Vanilla Contrast Dessert Icing
You’ll need two separate bowls for these icings, so grab two small mixing bowls right now.
For the White (Vanilla) Icing:
- 1 cup powdered sugar
- 1 tablespoon milk or water
- 1/4 teaspoon vanilla extract
For the Black (Chocolate) Icing:
- 1 cup powdered sugar
- 2 tablespoons unsweetened cocoa powder
- 2 tablespoons milk or water
Step-by-Step Instructions for Perfect **Black and White Cookies**
Okay, let’s move into the execution phase. Think of this like ticking off tasks on a checklist; we follow the necessary sequence for the best result. Since this is one of those wonderful **Cookie Recipes for Beginners**, the steps are very logical. First, get your workspace ready—oven preheated to 350°F (175°C), and sheets lined with parchment. You can’t frost until they are cool, so we build the base first.
Mixing the Cake-Like Cookie Dough
Start by combining your dry essentials (flour, baking powder, salt) in one bowl. In your main mixing bowl, execute the creaming step perfectly: butter and sugar until it’s genuinely light and fluffy—this builds air. Then, incorporate eggs individually. Once your wet and dry mixtures are ready, you need to alternate adding them, split up with the milk. This gradual introduction keeps the batter smooth and prevents that dense, heavy outcome we are trying to avoid. Remember my project rule: mix only until it just vanishes. No more!
Baking and Cooling **Black and White Cookie Recipe**
Portion out your dough using a rounded tablespoon onto the prepared sheets, giving them space because they will spread a bit into those classic thick rounds. They bake fast, usually 10 to 12 minutes. Here’s the crucial visual cue: you want the edges slightly set but the center should still look a little soft and pale. This guarantees the cake texture. Once they come out, do not rush the cooling process! They must be completely cool on a wire rack before the icing goes anywhere near them, or you’ll have a melted, messy disaster.
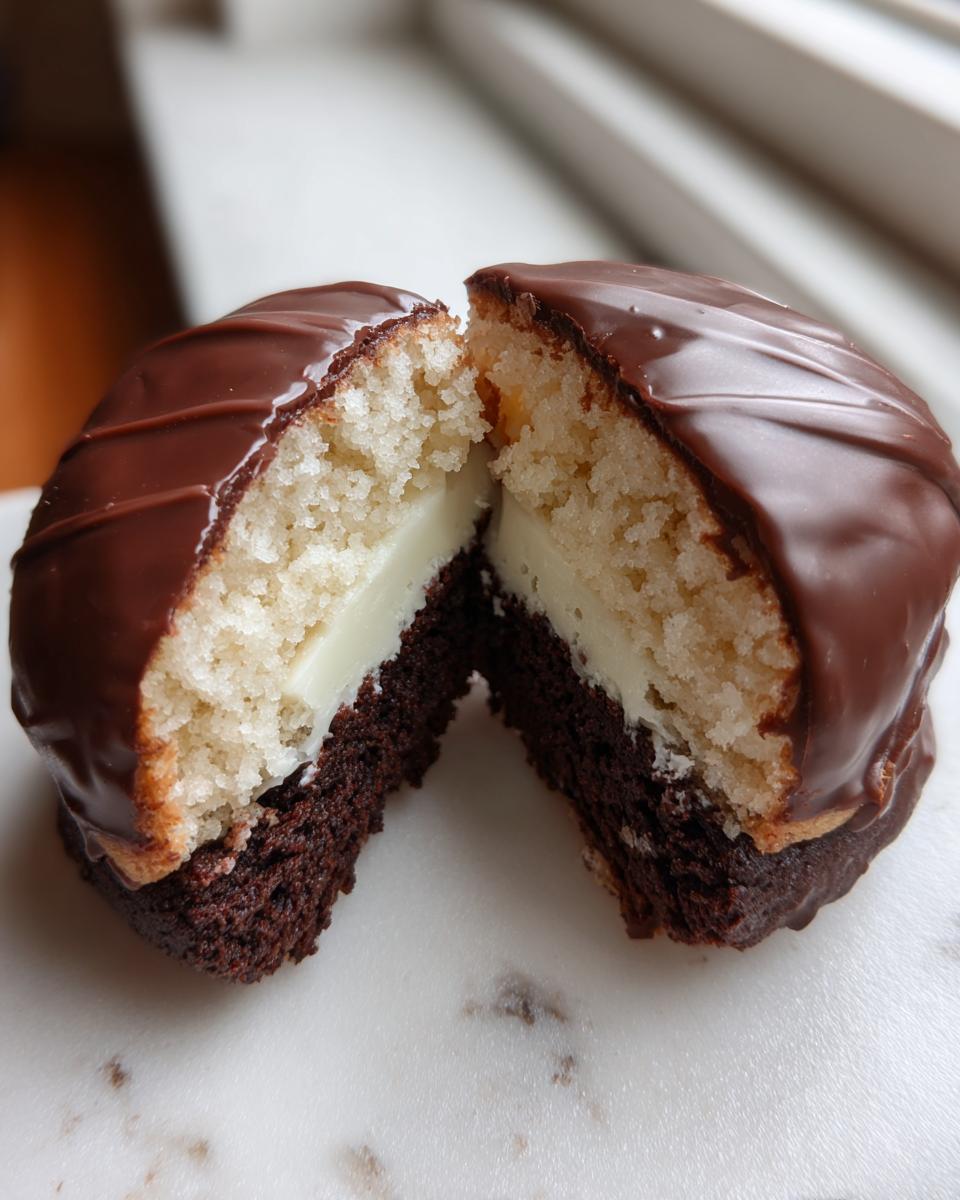
Applying the Iconic **Chocolate Vanilla Icing Cookies** Glaze
Once cool, time for the fun part! We need both glazes to be thick and spreadable—if they look too runny, add powdered sugar a tablespoon at a time until you feel that good resistance. Use an offset spatula to carefully glaze half the cookie in white, then immediately do the other half in dark chocolate. The trick to achieving that sharp, beautiful line down the middle is getting them to meet just slightly without blending. Once you’ve iced them all, let them sit untouched until that icing hardens up completely. This clean separation is what makes them so visually appealing!
If you’re looking for another super straightforward baking project once you master these, check out my recipe for no-bake peanut butter bars—effortless results guaranteed.
Tips for Mastering Your Homemade Black and White Treats
Now that you’ve mastered the bake time, let’s talk about perfecting the visual appeal and ensuring these **Nostalgic Cookies** turn out exactly like they jumped out of a New York City bakery case. Getting the icing consistency right is where most people get tripped up, but it’s totally fixable if you know what to watch for. This is where my efficiency-focused approach really pays off.
If your icing base seems too runny—maybe it looks runny when you test it on a cool cookie—don’t panic and don’t add more liquid! Just whisk in a little more powdered sugar, a teaspoon at a time, until you get that thick, slow-moving texture. The goal is for it to coat the back of a spoon without immediately dripping off.
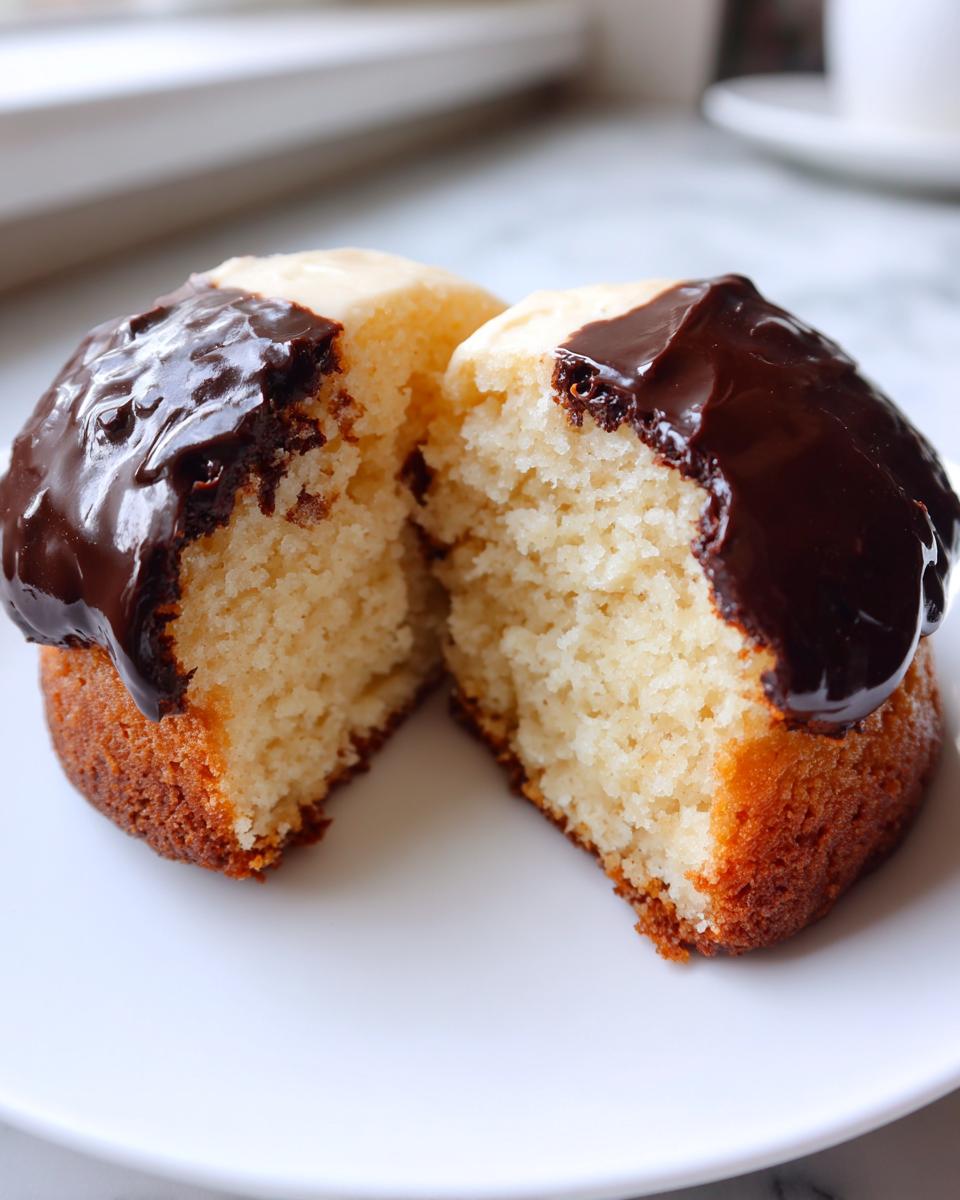
Achieving the Perfect Vanilla Chocolate Contrast
If you accidentally go too thick, it’s just as easy. Add liquid, maybe a half-teaspoon of milk or water, and mix it gently. You want the icing substantial enough that it holds its shape when you drag your spatula through it, but smooth enough that it settles nicely across the cookie surface. This control is essential for that sharp divide between the white and black halves.
Regional Names: **Half Moon Cookies** vs. **Half and Half Cookies**
You might hear people call these by fancier names depending on where you are, and I want you to know you’ve got the right flavor profile regardless. If someone calls them **Half Moon Cookies** or **Half and Half Cookies**, they are talking about the exact same delicious, dual-glazed creation. It’s just regional flavor! Don’t worry about renaming them; just enjoy the perfect sweet and rich combo.
For more baking tips focusing on structure and reliability, take a peek at how I handle brown butter sugar cookies—it’s all about temperature control!
Storage and Keeping Your **Black and White Cookies** Fresh
So, you’ve made the perfect batch of these beautiful **black and white cookies**. The challenge now is keeping that soft, cake-like quality right until you eat the last one, which might take a few days if you don’t hide them well! Since the cookie itself is more like cake, it can dry out faster than a chewy cookie.
Here’s my project manager tip for storage: Airtight containers are non-negotiable. Layer them gently separated by parchment paper—don’t stack them too high, or you risk smudging that beautiful icing work. Stored correctly, they stay wonderfully soft at room temperature for about three or four days. If you need them to last longer, you can freeze them unfrosted, but honestly, these never last that long in my house. Speaking of making things last, if you ever want to try preserving bread, I have a great bread bowl recipe that focuses on good airtight storage too.
Frequently Asked Questions About NYC Bakery Cookies
When you tackle a classic like this, questions are totally normal. Think of this FAQ section as checking off the final project milestones to make sure everything is rock solid before you distribute the final product. I’ve compiled the queries that always pop up when people try to recreate these perfect **NYC Bakery Cookies** at home.
Can I make **Black and White Cookies** ahead of time?
Yes, you absolutely can, and I often recommend it! The trick is patience: You must let the icing fully set up. If you try to stack or store them while the glaze is tacky, you’ll end up with smeared messes. Once the icing is set—which can take a few hours depending on humidity—store them in an airtight container at room temperature. They hold up really well, often tasting just as good the next day!
What makes these different from **Classic American Cookies**?
Great question that gets right to the heart of this recipe! Most standard **Classic American Cookies**, like chocolate chip or peanut butter drop cookies, aim for chewiness or crisp edges. These are fundamentally different. Our **Black and White Cookies** are built on a cake batter base; they are meant to spread slightly, bake pale, and have a soft, somewhat dense crumb instead of a chewy one. That softness is non-negotiable for an authentic experience.
How do I get the icing perfectly smooth on my **Black and White Cookies**?
The smoothness comes almost entirely from the tool you use and working quickly when the icing consistency is perfect. Don’t try to spread it thick with a butter knife! Use a small offset spatula if you have one—it lets you glide the icing easily without digging into the cookie. If you don’t have one, the back of a smooth teaspoon works fine. Just lay the icing down and gently smooth it out towards the center line.
If you’re looking for more streamlined baking projects that build confidence fast, be sure to check out my guide on cookie recipes for beginners for more foolproof options!
Estimated Nutritional Breakdown for **Black and White Cookies**
I always like to include a quick data snapshot, just to keep things transparent—like closing out the logistics part of the project plan. Since these **black and white cookies** are topped with a generous layer of sugary icing, they definitely fall into the “treat” category, not “everyday snack.”
Keep in mind these figures are estimates based on breaking the recipe yield (18 cookies) evenly. Your exact numbers might shift depending on how you measure your flour or the type of milk you opt for, but this gives you a fantastic ballpark idea.
- Serving Size: 1 cookie
- Calories: 250
- Fat: 11g
- Carbohydrates: 36g
- Sugar: 35g (Yes, that sugar is up there because of that glorious icing!)
- Protein: 3g
- Sodium: 120mg
This nutritional information is just a general guide, intended to help you fit these perfectly baked **Homemade Black and White Treats** into your overall week. Enjoy them responsibly!
Share Your Black and White Cookie Recipe Success
And just like that, project complete! You have successfully navigated the steps to produce gorgeous, soft, café-quality **black and white cookies** right in your own kitchen. I really hope this recipe has proven that even iconic, seemingly complicated desserts can be streamlined into a manageable, rewarding kitchen task.
Now that you’ve tasted the difference between a complicated recipe and an efficient, tested one, I’d love to hear your thoughts. If this recipe worked perfectly for you—and I’m banking on it—please take a quick moment to give it a five-star rating right under this section. It helps other home cooks trying to cut through the noise find the reliable recipes they need.
More importantly, I’m genuinely curious: What’s your favorite memory associated with these cookies? Did they remind you of your first trip to New York? Or maybe you have a fun family tradition involving these **Vanilla Chocolate Contrast Desserts**? Drop those stories and any quick feedback in the comments below. Connecting over shared food memories is what Dishicious is all about!
If you enjoyed tackling this classic dessert and want more reliable, simplified favorites—everything from weeknight dinners to other show-stopping sweets—make sure to check out my full collection of dessert recipes. Happy baking, everyone!
PrintClassic Soft, Cake-like New York Style Black and White Cookies with Perfect Vanilla and Chocolate Glaze

Follow this straightforward recipe to make soft, cake-like Black and White Cookies, the iconic New York bakery favorite. You get the perfect contrast of vanilla and chocolate icing in every bite.
- Prep Time: 20 min
- Cook Time: 12 min
- Total Time: 32 min
- Yield: 18 cookies 1x
- Category: Dessert
- Method: Baking
- Cuisine: American
- Diet: Vegetarian
Ingredients
- 2 1/2 cups all-purpose flour
- 1 1/2 teaspoons baking powder
- 1/2 teaspoon salt
- 1 cup unsalted butter, softened
- 1 cup granulated sugar
- 2 large eggs
- 1 teaspoon vanilla extract
- 1/2 cup milk
- 1 cup powdered sugar (for white icing)
- 1 tablespoon milk or water (for white icing)
- 1/4 teaspoon vanilla extract (for white icing)
- 1 cup powdered sugar (for black icing)
- 2 tablespoons unsweetened cocoa powder
- 2 tablespoons milk or water (for black icing)
Instructions
- Preheat your oven to 350°F (175°C). Line baking sheets with parchment paper.
- In a medium bowl, whisk together the flour, baking powder, and salt. Set this aside.
- In a large bowl, cream together the softened butter and granulated sugar until light and fluffy. This takes about 3 minutes.
- Beat in the eggs one at a time, mixing well after each addition. Stir in the vanilla extract.
- Gradually add the dry ingredients to the wet ingredients, alternating with the milk. Mix until just combined; do not overmix. The dough will be thick and soft.
- Drop rounded tablespoons of dough onto the prepared baking sheets, spacing them about 2 inches apart. These cookies spread into thick rounds.
- Bake for 10 to 12 minutes, or until the edges are just set and the centers look slightly soft. They should remain pale.
- Cool the cookies completely on a wire rack before icing.
- Prepare the white icing: Whisk together 1 cup powdered sugar, 1 tablespoon milk/water, and 1/4 teaspoon vanilla until smooth. Adjust liquid for a thick, spreadable consistency.
- Prepare the black icing: Whisk together 1 cup powdered sugar, cocoa powder, and 2 tablespoons milk/water until smooth. Adjust liquid for a thick, spreadable consistency similar to the white icing.
- Once cookies are cool, use an offset spatula to spread half of the cookie surface with the white icing. Immediately spread the other half with the black icing, meeting the line in the middle.
- Let the icing set completely before serving or storing your **Black and White Cookie Recipe** treats.
Notes
- For the best **NYC Bakery Cookies** texture, avoid overbaking; the centers should remain soft and cake-like.
- If you want a thinner glaze, add liquid to the icing mixture one teaspoon at a time.
- These are also known as **Half Moon Cookies** or **Half and Half Cookies** in some regions.
Nutrition
- Serving Size: 1 cookie
- Calories: 250
- Sugar: 35g
- Sodium: 120mg
- Fat: 11g
- Saturated Fat: 7g
- Unsaturated Fat: 4g
- Trans Fat: 0g
- Carbohydrates: 36g
- Fiber: 1g
- Protein: 3g
- Cholesterol: 45mg