
Sometimes you just crave a dessert so ridiculously decadent it feels like it should come with a tuxedo recommendation. If you’re looking for that showstopper—a cake that screams ‘special occasion’ but doesn’t demand you spend three days covered in flour—then I have found your project. Forget those overly complicated recipes you see gathering digital dust; this is the ultimate homemade caramel crunch cake.
When our founder Leo started optimizing recipes, this was one of the goals: complex flavor, simple execution. That’s exactly what we achieved here. We’ve engineered this recipe to give you deep, buttery caramel and a satisfyingly crisp texture right next to a perfectly moist vanilla layer. If you loved tinkering with sweets like our chocolate peanut butter cake recipe, you’ll appreciate the methodical approach we took to simplifying this bake for the everyday cook.
It’s rich, it’s sweet, and it delivers that addictive crunch every single time. You absolutely have to try this version.
- Why This Homemade Caramel Crunch Cake is Your New Favorite Showstopper
- Essential Ingredients for the Ultimate Caramel Crunch Cake
- Step-by-Step Instructions for Your Caramel Crunch Cake
- Tips for Success When Making a Caramel Crunch Cake
- Ingredient Notes and Substitutions for Your Caramel Crunch Cake
- Serving Suggestions for Your Special Occasion Cake
- Storage & Reheating Instructions for Leftover Caramel Crunch Cake
- Frequently Asked Questions About Making a Caramel Crunch Cake
- Estimated Nutritional Data for This Caramel Crunch Cake
Why This Homemade Caramel Crunch Cake is Your New Favorite Showstopper
I get it—a layered cake looks intimidating! But trust me, this layer cake recipe is designed to be reliable. It’s what I pull out when I need a guaranteed win. It proves you can have a grand, showstopper dessert without the panic, which is exactly why Leo built this site!
Texture Perfection: Moist Cake Meets Toffee Crunch
The best part? That contrast! You get this incredibly easy-to-make, moist vanilla cake with caramel soaking into the layers, and then BAM! You hit those surprising pockets of crispy toffee. It’s that textural combination that makes people go back for a second slice.
Achieving Rich, Buttery Caramel Dessert Flavor
We make our caramel sauce from scratch here, and that step is non-negotiable for flavor. Buying it in a jar just doesn’t cut it for this cake. This homemade version creates a truly buttery caramel dessert flavor that is deep, complex, and just the right amount of sweet.
Essential Ingredients for the Ultimate Caramel Crunch Cake
Okay, gather everything before you start mixing, because when that caramel gets going, you need to move fast! Think of this like a project checklist; having all your components ready makes all the difference between a smooth time and a frantic scramble. We’re going to break this down into three manageable parts so nothing gets overwhelming—that’s Leo’s influence shining through!
For the Moist Vanilla Cake Layers
These are the cozy foundation that soaks up all that amazing sauce. Make sure your butter and eggs are actually at room temperature; it really affects how light the batter gets.
- 1 1/2 cups unsalted butter, softened
- 3 cups granulated sugar
- 4 large eggs
- 1 tablespoon vanilla extract
- 3 cups all-purpose flour
- 1 tablespoon baking powder
- 1/2 teaspoon salt
- 1 cup whole milk
For the Rich Homemade Caramel Sauce
This is where we hit that deep, rich flavor profile. Don’t try to rush the cooking process here—let it genuinely get amber! This sauce is what makes it a proper homemade caramel dessert.
- 1/2 cup heavy cream
- 1 cup packed light brown sugar
- 1/2 cup granulated sugar
- 1/2 cup unsalted butter
- 1/4 cup water
- 1 teaspoon vanilla extract
- 1/2 teaspoon salt
For the Toffee Crunch Element
This ingredient is crucial for the “Crunch” part of the name! You need that textural contrast to keep every bite interesting. If you’re looking for shortcuts, it’s fine to grab pre-made toffee bits at the store; just check the substitution section later if you want to make your own crunch!
- 1 cup toffee bits
Step-by-Step Instructions for Your Caramel Crunch Cake
Alright, this is where we put all the prep work together and build our magnificent creation. Don’t rush the caramel part—that’s the secret sauce, literally! When I use this recipe, I always pretend I’m designing a blueprint, just like Leo taught me; every step has a reason, making this layer cake recipe super straightforward, even if it looks fancy.
Preparing and Baking the Cake Layers
First, get that oven humming at 350°F (175°C) and make sure those baking pans are well greased and floured. We want easy release! Take your softened butter and the granulated sugar and cream them until they look pale and fluffy—this step traps the air we need for a tender crumb. Then, knock in the eggs one by one, making sure each one is incorporated before adding the next, followed by the vanilla.
Now, the alternating: mix your dry ingredients (flour, baking powder, salt) in one bowl and add them to the wet mix, swapping back and forth with the milk. Sound familiar? It keeps the batter smooth! Only mix until you see no more flour streaks. Bake these beauties for about 28 to 32 minutes. When a toothpick comes out clean, take them out, let them sit for 10 minutes in the pan, and then flip them onto a rack to cool completely. Seriously, cool them all the way!
Mastering the Homemade Caramel Sauce
This is the most crucial part of baking with caramel. Grab a medium saucepan and combine your cream, brown sugar, granulated sugar, butter, and water. Stir that mix constantly until the sugar is dissolved, then—and this is vital—STOP stirring once it starts boiling! You need to watch it like a hawk now. Let it boil until it hits a deep, gorgeous amber color. If you stir, you risk sugar crystals forming, which ruins the smooth texture.
Once it’s that rich color, pull it straight off the heat and whisk in the vanilla and salt. It will bubble up, so be careful! Let this cool a bit; it thickens up nicely as it rests. If you’re using the sauce right away, a quick trip to the fridge will speed that up.
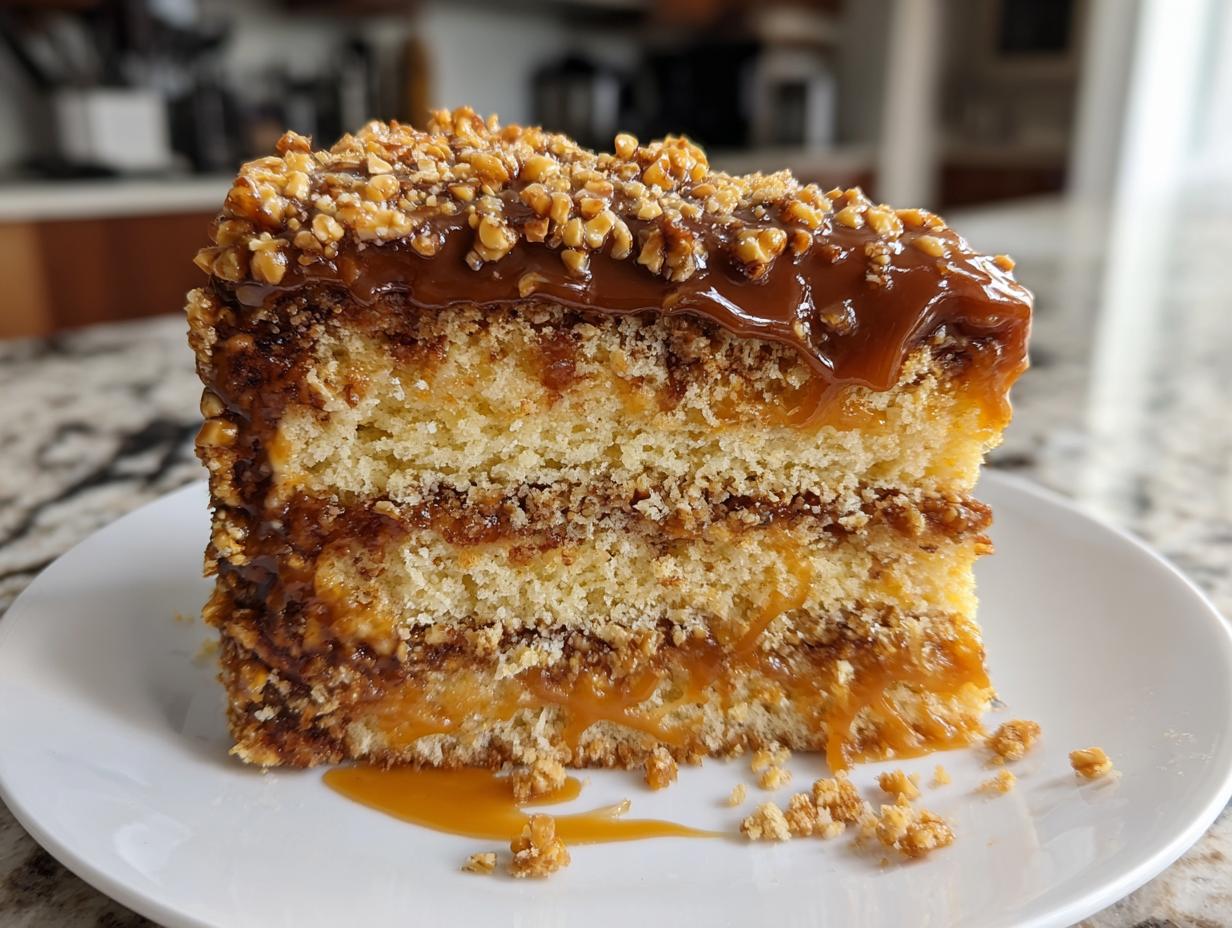
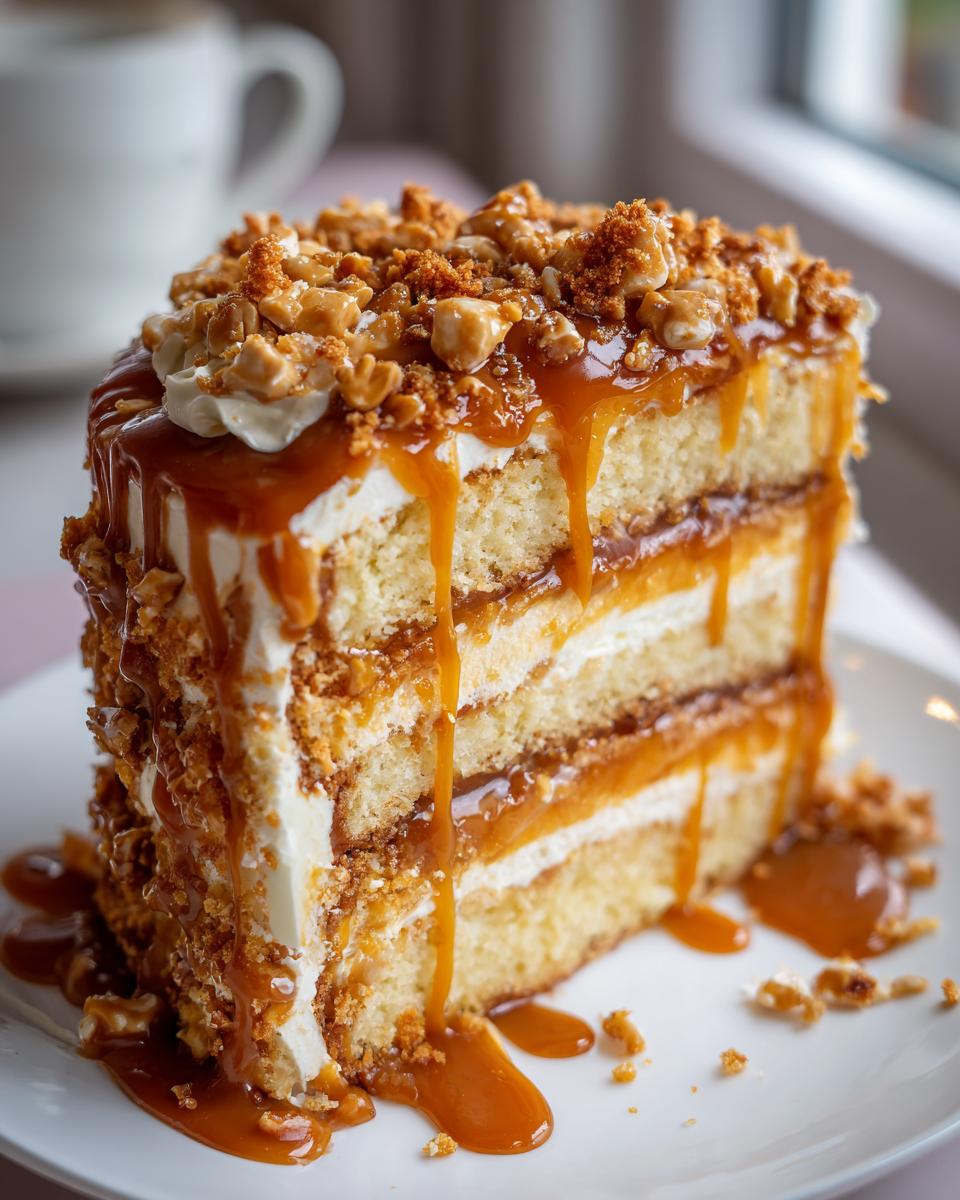
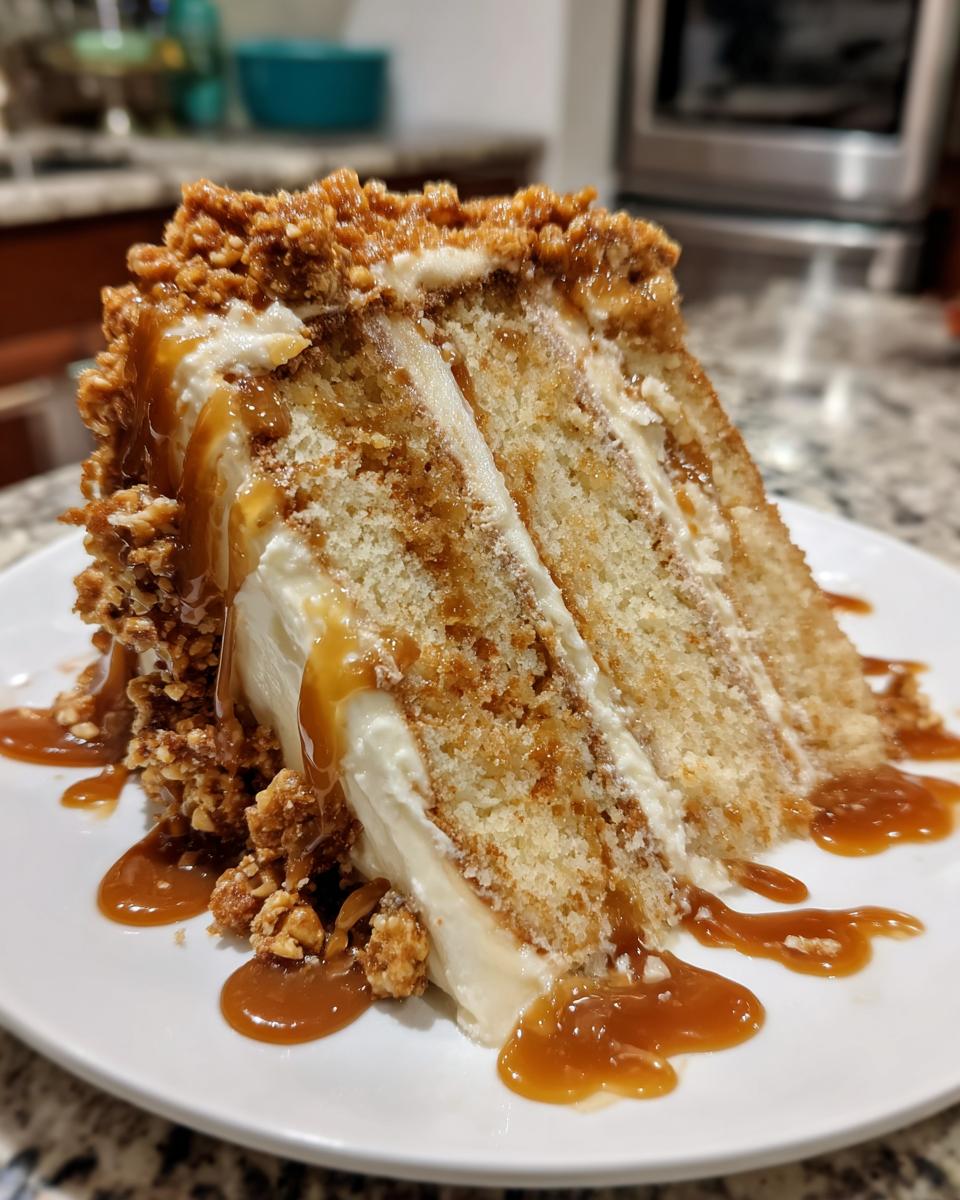
Assembling the Decadent Caramel Crunch Cake
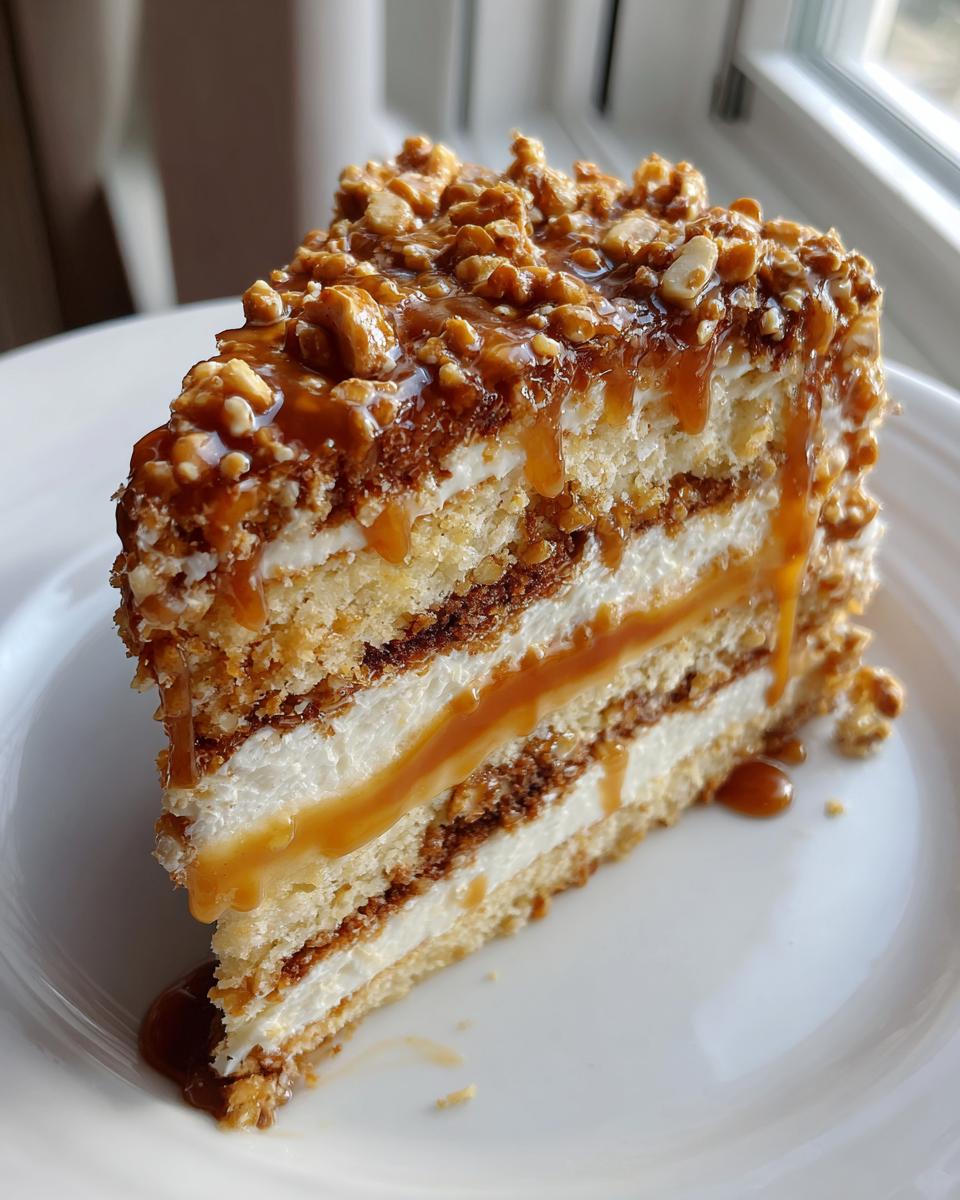
Time for the fun part! Put your first cooled layer down. Spoon on a generous layer of that luscious caramel sauce, and then sprinkle evenly with one-third of your toffee bits. Top it with the next layer and repeat: caramel, crunch, cake, caramel, crunch!
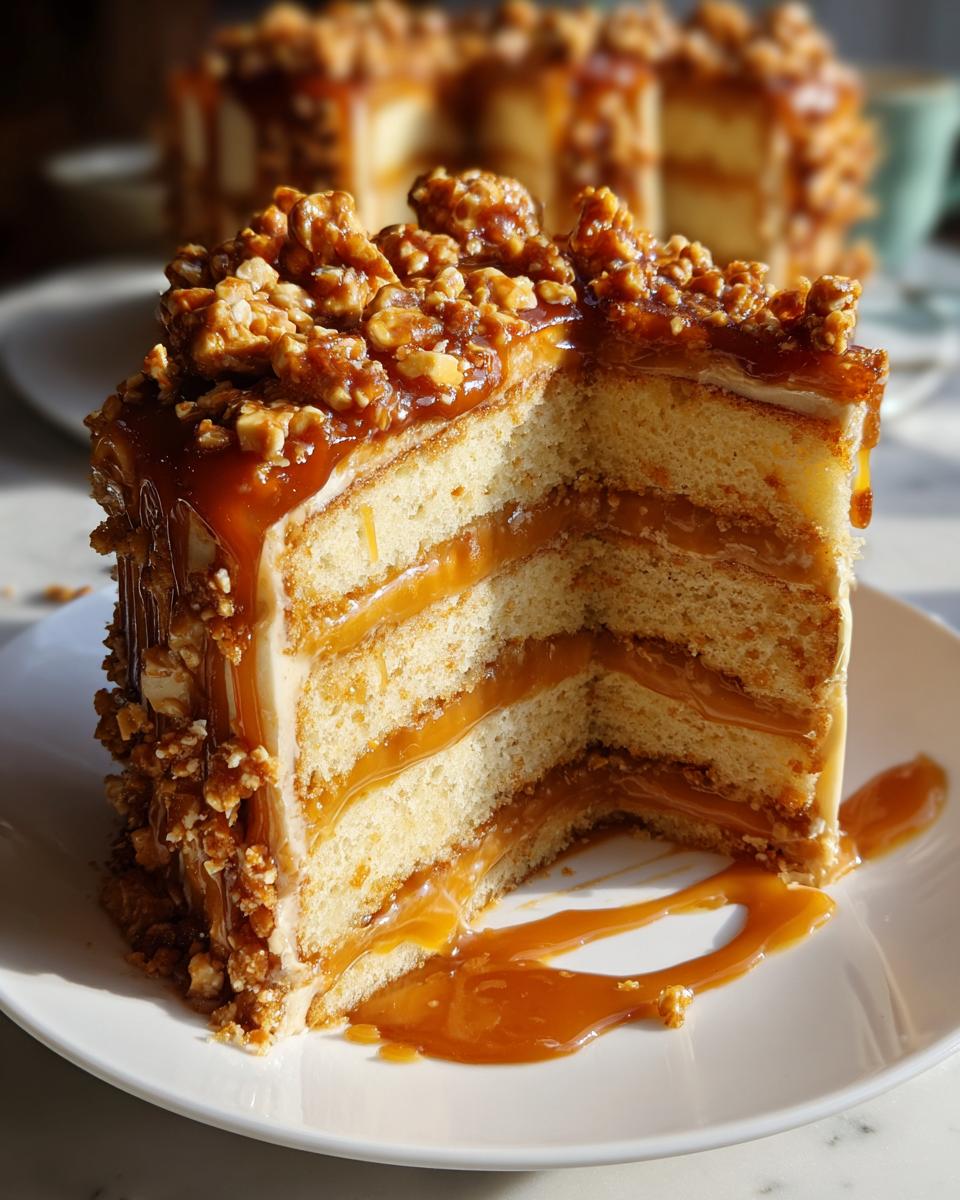
Place your final cake layer on top. Now, do a glorious pour with the rest of that sauce, letting it drip dramatically down the sides—that’s how you get that impressive look. Finish the whole thing by tossing the last of the toffee bits over the top so they stick to the wet caramel. This is what seals the deal!
If you need a good reference for slow baking if your cakes take longer, check out my thoughts on slow cooker pot roast; sometimes, low and slow is the way to go, but for this cake, quick and hot works best!
Tips for Success When Making a Caramel Crunch Cake
Even with a solid **caramel crunch cake** recipe, little things can throw you off! Baking is chemistry, sure, but it’s also about knowing the little secrets that keep things lovely. I’ve learned the hard way that temperature and timing are everything, especially when you are dealing with both hot sugar syrup and delicate cake layers.
Troubleshooting Common Caramel Crunch Cake Issues
If your caramel sauce gets a little stubborn, don’t panic and don’t throw it out! Remember that one of the recipe notes mentioned that if the caramel sauce becomes too thick to drizzle easily, you can gently reheat it on low heat for a few minutes. This usually happens if you let it cool too long while assembling the cake layers.
Now, what about that marvelous toffee crunch dessert element? The biggest risk is that the wet caramel sauce will make your toffee bits go soft too quickly. To combat this—and this is key for keeping that satisfying snap—make sure your cake layers are completely cooled down before you apply the sauce. A warm layer acts like a warming plate, accelerating any sogginess.
If you feel like your batter split (curdled) when you added the eggs, it’s usually because the eggs were too cold compared to the creamed butter mixture. Next time, remember to pull those out! If the cake sticks to the pan, even after greasing, it often means the oven spring was too aggressive for the pan coating. Next time, try making a batch of cake goop like I use for my fudgy crinkle cookies to ensure perfect sides.
Overall, this cake is super forgiving—just remember that patience during the caramel cooling stage saves you hours of frustration later!
Ingredient Notes and Substitutions for Your Caramel Crunch Cake
I realize that sometimes you just don’t have what the recipe calls for, or maybe you want to veganize or adjust things. That’s totally fine! The beauty of this **caramel crunch cake** is that the core structure holds up well, but let’s talk about the key ingredients that truly make or break it. If you’re aiming for that stellar **toffee crunch dessert** experience, you need to respect a few of these components.
For instance, the butter in the caramel needs to be real butter. Margarine just doesn’t brown the same way and you won’t get that deep, cooked butter complexity we’re aiming for. Stick to the full-fat dairy when you can; in baking, fat equals flavor!
Milk Choices for the Cake Batter
I used whole milk in the main recipe because it offers a great balance of fat and liquid, keeping the crumb tender but sturdy enough for layering. If all you have is 2% or skim milk, the cake will still bake fine, but it might not be *quite* as rich—you might notice it crumbling just a little more easily.
I’ve experimented with buttermilk in place of regular milk, too! Buttermilk makes for a slightly tangier and incredibly tender cake crumb. If you go that way, you might want to slightly reduce the baking powder, just by half a teaspoon, since the acid in the buttermilk reacts with it.
Toffee Bit Brands and Making Your Own Crunch
You asked about brands for the toffee bits, and honestly, you can use whatever you find! Skor bits or Heath bits work perfectly, as they are pre-made and ready to go, which keeps your assembly time down. Just make sure they are the smaller pieces, not the full bar.
Now, if you want to get really fancy, you can skip the store-bought bits and make your own simple brittle crunch. It involves heating sugar with a little corn syrup and butter until it’s hard crack, then smashing it up. It takes about 15 minutes more, but the flavor infusion from scratch is amazing if you have the time!
Why the Sugar Ratio Matters in the Caramel
Notice how the caramel uses *both* brown sugar and white sugar? Please don’t try to use all white, even though it burns faster. The brown sugar brings that deep, molasses-y note that pairs so perfectly with the vanilla cake. Without the brown sugar, you just end up with a very sweet syrup, not a true, rich caramelized flavor you need for this decadent dessert.
When you are cooking the sugar for the caramel, remember: consistency is everything. Dry, room-temperature ingredients for the cake, but liquid, controlled heat for this sauce!
Serving Suggestions for Your Special Occasion Cake
Now that you’ve created this incredible Caramel Crunch Cake, the big question is, what do you serve alongside it? This cake is already a powerhouse—it’s rich, sweet, and has that amazing textural pop, so you don’t need a ton of fuss on the side. But when you’re making something this spectacular for a birthday or a holiday, a little something extra can elevate the whole dessert experience!
Since the caramel is so buttery and deep, I always look for flavors that cut through that richness just a tiny bit. Think bright, slightly acidic, or something cool and creamy. This way, every bite of cake feels refreshing, not overwhelming, even though it’s totally decadent!
Pairing with Beverages
When it comes to drinks, you need something that can stand up to that heavy caramel. Forget weak coffee; you need something bold!
- A seriously strong black coffee or an Americano works wonders.
- A rich, dark roast tea, like an English Breakfast, is fantastic.
- If you are feeling festive, a small glass of dark rum or a bourbon on the rocks pairs unbelievably well with the cooked sugar notes in the caramel.
Simple Dessert Companions
Sometimes, you just need a counterpoint to the heavy cake. Because this is such an impressive **special occasion cake**, keep the sides super simple. We’re aiming for contrast, not competition!
- A very light, tart whipped cream: Beat heavy cream with just a touch of powdered sugar and maybe half a teaspoon of fresh lemon juice. The slight tartness is an absolute game-changer against the sweet caramel.
- Vanilla Bean Ice Cream (the good kind!): Serve a small scoop right on the side. As it melts, it creates its own light sauce that balances the darker caramel perfectly.
- Fruit is rare for me with dark cakes, but if you want a small bite of freshness, try a side of tart berries—raspberries or blackberries—no sugar needed, just the natural tang!
If you ever need a refreshing, non-alcoholic option to balance out your meal beforehand, I have a great recipe for homemade lemonade that uses a basic simple syrup approach. But honestly, after a slice of this cake, usually all you need is the cake itself!
Storage & Reheating Instructions for Leftover Caramel Crunch Cake
You know how it is—you make something this good, and sometimes you have a slice or two left over. We need to make sure those leftovers are just as amazing the next day, right? Because of that gorgeous, gooey caramel sauce we poured all over this thing, proper storage is key.
The biggest enemy here is humidity, which sucks the life right out of that wonderful crunch element. Also, too much air exposure will dry out those lovely cake layers we worked so hard on. So, how do we keep it perfect until tomorrow?
Storing the Layer Cake Correctly
If I’m serving the cake immediately over a couple of days, I just cover the whole thing loosely with a cake dome or even just tent it loosely with plastic wrap. I’ll leave it right on the counter at room temperature. Since it’s refrigerated storage that tends to dry out cake faster, I only put it away if I need to keep it for more than three days.
If it has to go into the fridge (say, for up to five days), you must cover it TIGHTLY with plastic wrap first. Then, put that wrapped cake into an airtight container. When you bring it back out, let it sit on the counter for at least an hour before slicing. Chilling tends to make everything, including the caramel, much too firm.
Keeping the Crunch Crisp
This is the professional secret for cakes with loose toppings: don’t store the topping with the cake! If you can possibly manage it, store any leftover toffee bits in a tiny, separate container with a good seal.
Right before you are ready to slice the remaining portion, gently sprinkle the fresh toffee bits over the caramel exposed on the top slice or individual slices. Storing them separately means the moisture trapped in the cake and sauce won’t touch the brittle candy, keeping that texture contrast exactly where we want it!
Reheating Slices for Maximum Gooeyness
If your cake has been in the fridge and the caramel has set up like concrete, you might want to gently warm your slice. I don’t recommend microwaving the whole slice, as it often turns the cake rubbery.
Instead, try this: place a single slice on a microwave-safe plate and zap it for about 10 to 15 seconds on medium power. This warms the caramel up just enough so it flows again without turning the cake heavy. It brings that ‘freshly assembled’ feeling right back!
For any whole leftover cake that’s been refrigerated, let it come back to room temperature completely first before attempting any reheating or slicing. It just slices cleaner that way—no ripped layers!
Frequently Asked Questions About Making a Caramel Crunch Cake
I know sometimes when you look at a showstopper like this, you have a few nagging questions before you even start mixing. Is it hard? Can I cheat? Can I make it the day before Thanksgiving? Absolutely! We designed this dessert knowing that most of us are juggling a million things. These answers cover the main concerns I hear all the time about making this truly decadent cake.
Can I make this caramel crunch cake ahead of time?
This is the million-dollar question for any layer cake recipe, right? Yes, you can break it down, but I strongly advise against full assembly more than 12 hours before serving. Here’s how I manage it:
- Bake Layers: You can bake the cake layers up to two days ahead! Let them cool completely, wrap each layer tightly in plastic wrap, and keep them at room temperature or in the fridge.
- Caramel Sauce: The easy caramel sauce keeps beautifully! Make it up to a week ahead and store it in an airtight jar in the fridge. Remember, you’ll need to gently reheat it on the stove until it’s pourable again before assembly.
- The Crunch: Keep those toffee bits away from the moisture until the very last minute, as I mentioned before.
The assembly—layering the cake, saucing, and crunching—should happen ideally the morning you plan to serve it, or at least the afternoon before. Storing it assembled overnight means the toffee definitely starts to soften, and while it’s still tasty, it won’t have that powerful snap we love in an easy caramel crunch cake.
What is the secret to the best caramel cake recipe?
If I had to boil down the entire process to the single most important thing for the best caramel cake, it would be temperature control during that caramel making phase. Seriously, don’t look away when that sugar starts boiling!
The secret boils down to reaching that perfect, deep amber color without tipping over into burnt sugar territory. If you stop too soon, the caramel will be too sweet and thin—it won’t have that complex, slightly smoky profile that makes it delicious. If you cook it too long, you get bitter disaster! You need to watch for that beautiful, medium-to-dark amber glow right as it pulls off the heat. That color is what dictates the depth of flavor in your entire buttery caramel dessert.
Also, make sure your heavy cream is warm-ish when you add it, even though the recipe just says to whisk it in after taking it off the heat. Adding cold cream to super hot sugar can sometimes cause the caramel to seize up or crystallize into a sticky mess. Tiny details like that make a huge difference! Like ensuring your icing sets up right; if you ever need tips on that, check out my guide on easy cookie icing recipe—it’s all about quick, clean setting!
Can I use a different flavor of crunch than toffee?
While toffee is classic for a reason, I love creative twists! If you don’t love toffee, you can swap it out for another crunchy element that complements caramel. Just make sure the item you pick can handle sitting next to a gooey sauce for a few hours without completely dissolving. Good alternatives for a fun crunch cake idea include:
- Chopped, toasted pecans or walnuts, maybe even tossed briefly in a little butter and sugar first.
- Small, plain crispy rice cereal mixed with a drizzle of melted chocolate just to help it hold its shape.
- Crushed gingersnap cookies—the spice is surprisingly good with the deep caramel flavor!
Whatever you pick, store it dry until the final assembly step, and you’ll have an amazing result!
Estimated Nutritional Data for This Caramel Crunch Cake
Okay, let’s talk numbers. Because this is such a rich and decadent cake, you know those slices pack a punch! Here is the estimated nutritional breakdown per serving based on the recipe ingredients provided. Remember, this is just an estimate, and if you use fancier butter or different toffee bits, the totals will shift around a little bit, so just use this as a general guide!
- Serving Size: 1 slice
- Calories: 550
- Sugar: 65g
- Protein: 5g
- Fat: 32g
- Saturated Fat: 19g
- Carbohydrates: 68g
It’s definitely a treat meant to be enjoyed! It’s not an every-day bake, but it’s certainly worth it when you need a centerpiece for a gathering.
PrintDecadent Homemade Caramel Crunch Cake with Toffee Bits
Make this impressive Caramel Crunch Cake featuring moist vanilla layers, rich homemade caramel sauce, and a satisfying toffee crunch topping. This recipe delivers a showstopper dessert that is manageable for the home baker.
- Prep Time: 40 min
- Cook Time: 35 min
- Total Time: 1 hour 35 min
- Yield: 10 servings 1x
- Category: Dessert
- Method: Baking
- Cuisine: American
- Diet: Vegetarian
Ingredients
- 1 1/2 cups unsalted butter, softened
- 3 cups granulated sugar
- 4 large eggs
- 1 tablespoon vanilla extract
- 3 cups all-purpose flour
- 1 tablespoon baking powder
- 1/2 teaspoon salt
- 1 cup whole milk
- 1/2 cup heavy cream (for caramel)
- 1 cup packed light brown sugar (for caramel)
- 1/2 cup granulated sugar (for caramel)
- 1/2 cup unsalted butter (for caramel)
- 1/4 cup water (for caramel)
- 1 teaspoon vanilla extract (for caramel)
- 1/2 teaspoon salt (for caramel)
- 1 cup toffee bits (for crunch)
Instructions
- Prepare the Cake Layers: Preheat your oven to 350°F (175°C). Grease and flour three 8-inch round cake pans.
- In a large bowl, cream together the 1 1/2 cups of softened butter and 3 cups of granulated sugar until light and fluffy.
- Beat in the eggs one at a time, mixing well after each addition. Stir in the vanilla extract.
- In a separate bowl, whisk together the flour, baking powder, and salt.
- Gradually add the dry ingredients to the wet ingredients, alternating with the milk, beginning and ending with the flour mixture. Mix until just combined. Do not overmix.
- Divide the batter evenly among the three prepared pans. Bake for 28 to 32 minutes, or until a toothpick inserted into the center comes out clean.
- Let the cakes cool in the pans for 10 minutes before inverting them onto a wire rack to cool completely.
- Make the Caramel Sauce: Combine the 1/2 cup heavy cream, brown sugar, 1/2 cup granulated sugar, 1/2 cup butter, and water in a medium saucepan.
- Cook over medium heat, stirring constantly until the sugar dissolves. Stop stirring once it boils.
- Continue to cook without stirring until the mixture reaches a deep amber color, about 8 to 12 minutes. Watch carefully to prevent burning.
- Remove from heat and carefully whisk in the vanilla extract and salt. Let the caramel cool slightly; it will thicken as it cools.
- Assemble the Cake: Place one cooled cake layer on a serving plate. Spread a layer of caramel sauce over the top. Sprinkle with one-third of the toffee bits.
- Top with the second cake layer, repeat with caramel sauce and toffee bits. Place the final cake layer on top.
- Pour the remaining caramel sauce over the top layer, allowing it to drizzle down the sides. Sprinkle the remaining toffee bits over the top for the final crunch.
Notes
- For a cleaner assembly, allow the cake layers to cool completely before frosting or saucing.
- If the caramel sauce becomes too thick to drizzle, gently reheat it on low heat for a few minutes.
- You can substitute store-bought toffee bits if you prefer not to make them from scratch.
Nutrition
- Serving Size: 1 slice
- Calories: 550
- Sugar: 65g
- Sodium: 280mg
- Fat: 32g
- Saturated Fat: 19g
- Unsaturated Fat: 13g
- Trans Fat: 0.5g
- Carbohydrates: 68g
- Fiber: 1g
- Protein: 5g
- Cholesterol: 120mg