
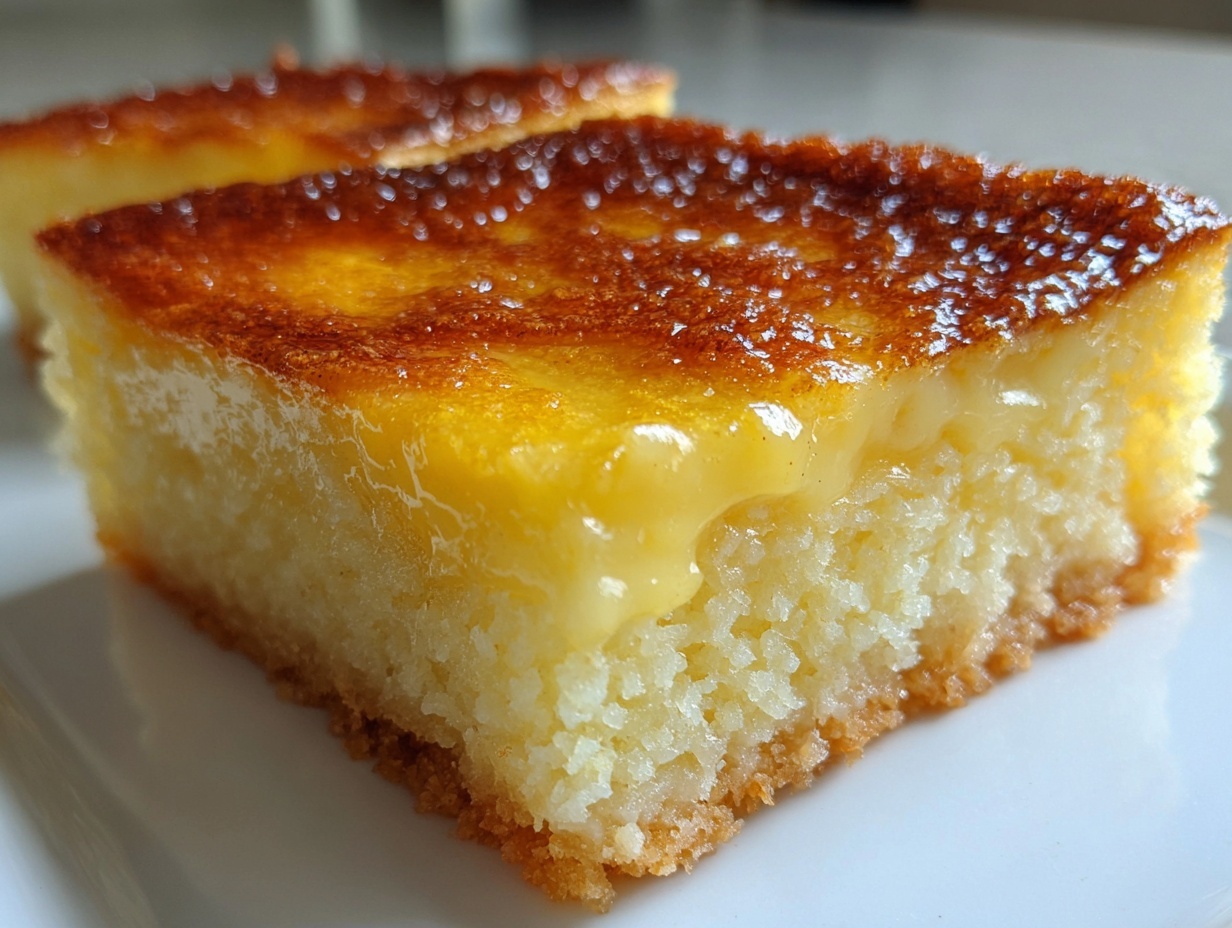
If you’re scrolling late at night, suddenly desperate for that unmistakable taste of a **Filipino Dessert Recipe**, I get it. You want authentic Bibingka flavor—that rich, dense, wonderfully chewy coconut profile—but the idea of a complicated, hours-long bake just stops you cold. Well, stop searching! What I’ve engineered here is truly the **best cassava cake** you’ll ever make, and I mean that, because I applied my project manager mindset to strip away all the fuss. This version delivers that signature creamy cassava dessert texture you crave, but it’s simple enough for a weeknight fix. Trust me, this smart approach makes homemade tropical dessert baking surprisingly easy.
I’m Leo Grant, and I built Dishicious because I needed efficiency in my kitchen. Traditional recipes often have unnecessary steps that slow us down. This approach cuts right to what matters: maximizing the flavor of the cassava, coconut milk, and sugar to create a stunningly chewy coconut cake that sets perfectly every single time. We’re getting that incredible depth without the headache.
It’s a winner because we skip the complexity but keep all the deliciousness. You might think that achieving that perfect base sometimes requires advanced techniques, but that’s not true. We rely on solid ingredient ratios and the right baking method. Plus, if you need something fast, this recipe is fantastic. We’re talking about getting this rich, moist cassava creation out of the oven and ready to cool down in less than an hour and a half total!
If you’re looking for other recipes that balance speed and quality, check out my process for the Italian Love Cake. It uses the same philosophy: simple steps for maximum payoff.
- Why This Easy Cassava Cake Recipe Works
- Gathering Ingredients for Authentic Cassava Cake
- How To Make Cassava Cake Step-by-Step
- Tips for the Best Cassava Cake
- Variations: Cassava Cake with Macapuno and Cheesy Cassava Cake
- Serving Suggestions for Your Filipino Dessert Recipe
- Storage and Reheating Instructions for Creamy Cassava Dessert
- Frequently Asked Questions About Cassava Cake
- Estimated Nutritional Values for Cassava Cake
- Share Your Homemade Cassava Cake Experience
Why This Easy Cassava Cake Recipe Works
When I approach a classic Filipino Dessert Recipe like this, my goal is not to reinvent it, but to streamline the chaotic parts. I want you to get that amazing, melt-in-your-mouth quality without feeling like you need to be a professional baker. This recipe succeeds because it focuses only on the variables that actually move the needle on flavor and texture.
- We use simple pantry staples mixed in a straightforward order. No weird soaking schedules or tempering confusion here!
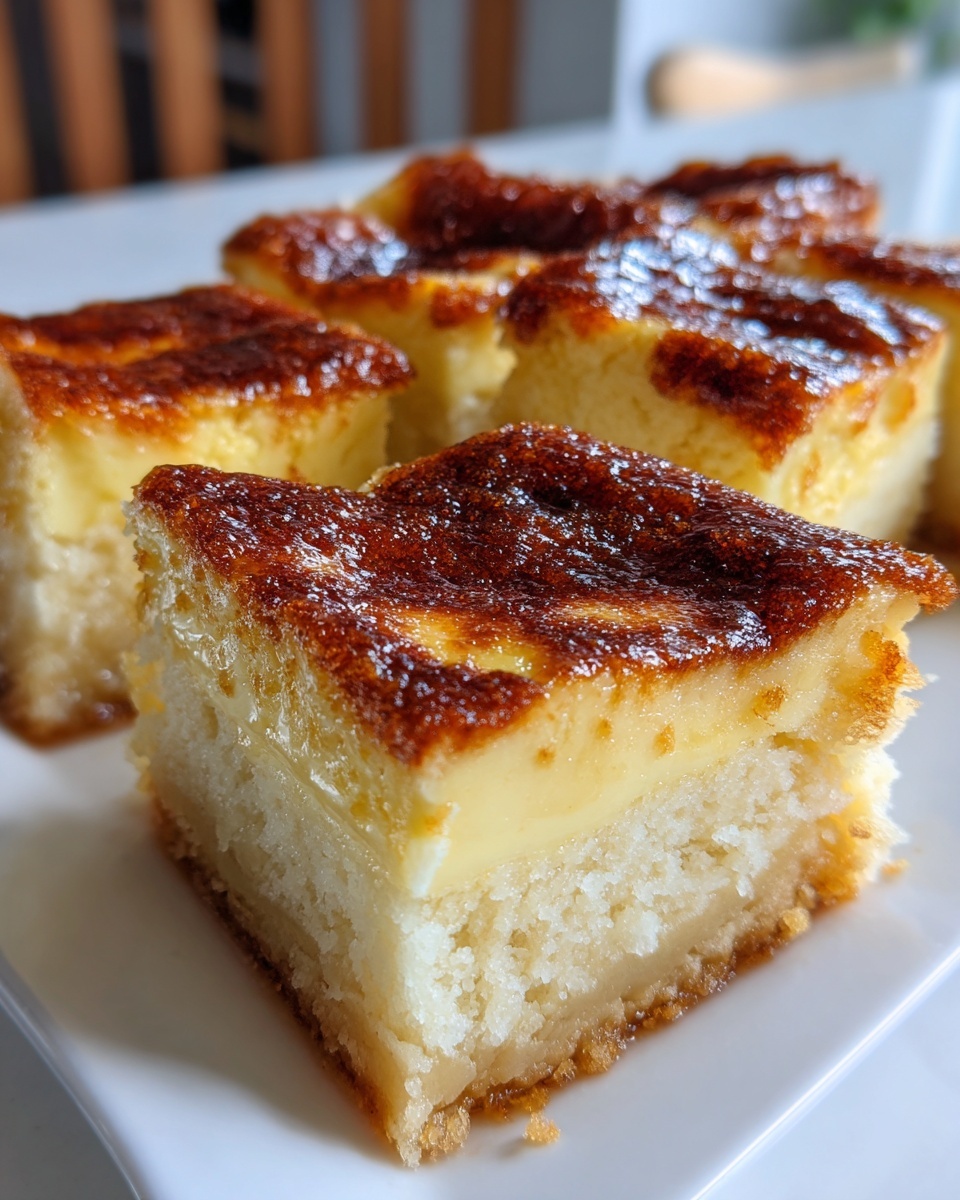
- The two-step baking process guarantees that signature creamy cassava dessert top layer without compromising the base.
- It’s designed for speed, making it a genuinely great option when you need a last-minute potluck dessert.
If you love smart shortcuts that don’t sacrifice quality, you might also want to check out my approach over on my Easy No-Bake Peanut Butter Bars or these Easy Sugar Cookie Bars.
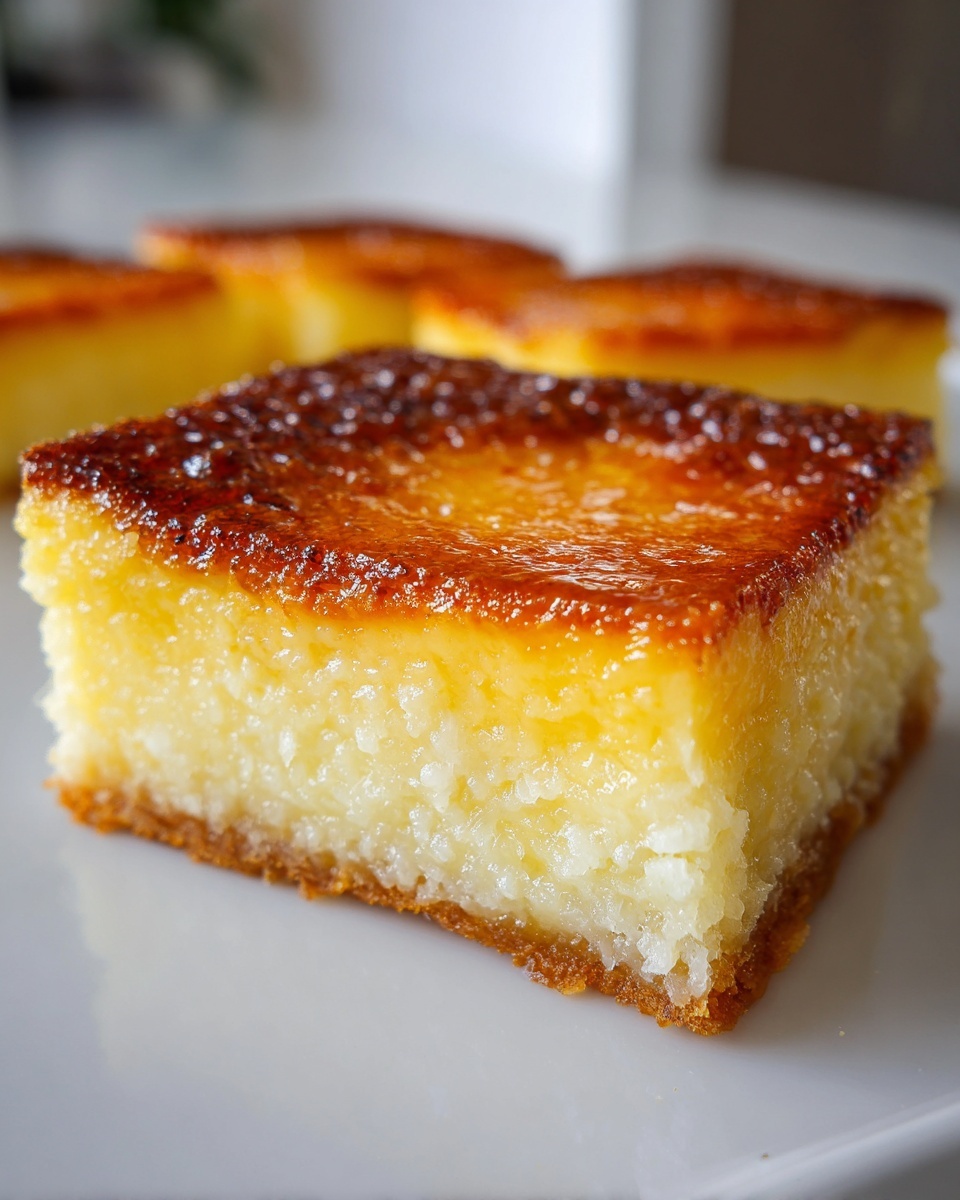
Achieving the Perfect Chewy Coconut Cake Texture
The chewiness in this cassava cake comes entirely from the grated cassava itself and how we treat it. We mix just enough to combine—I’m talking minimal stirring! Overmixing develops gluten in the starches, which results in a tough cake. By keeping the mixing gentle and relying on the natural starches, we lock in that delightful, slightly resilient, satisfyingly chewy attribute this Filipino favorite is famous for.
Under 90 Minute Dessert Timeline
This is what sold me when I first tested this build. The prep time is a snappy 15 minutes. You mix everything, pour it, and stick it in the oven. With about 70 minutes of total cook time (45 base + 15 custard + 10 cheese/setting), we are coming in right under that 90-minute goal! It makes this a truly practical Under 90 Minute Dessert solution for satisfying that tropical dessert craving immediately.
Gathering Ingredients for Authentic Cassava Cake
Look, when we’re optimizing a recipe, we skip the confusion. You don’t need a specialty market run for this! Every component here is chosen specifically to maximize flavor and texture—that rich, moist cassava feel—while keeping the shopping list short. Sticking to the right measurements here is what ensures you don’t end up with a runny center when you pull this out of the oven.
Having everything ready to go—that’s what I call efficient project management. If you love utilizing coconut cream in baking, you should also check out my tips for making the Best Coconut Cake; the principles of richness are similar.
Cassava Cake Base Ingredients
These ingredients build the beautiful foundation of your cake. Make sure you’re using full-fat coconut milk; using light just won’t give you the richness we are aiming for in this Chewy Coconut Cake.
- Grated cassava (about 4 cups total—fresh or thawed frozen works). Remember, we want it grated, not mashed!
- One 13.5 oz can of full-fat coconut milk.
- One 14 oz can of sweetened condensed milk.
- About 1/2 cup of granulated sugar for the base mix.
- 1/4 cup of unsalted butter, melted down and ready to go.
- 2 large eggs, which need to be lightly beaten before they join the party.
- A quick splash of vanilla extract for depth.
- And if you’re feeling a little extra, toss in 1/2 cup of Macapuno strings here!
Creamy Cassava Dessert Topping Components
This combination creates the wonderful, slightly tangy layer that sets up beautifully over the base. It cooks right on top, creating that essential creamy texture.
- Coconut cream will be our binder here (about 1/2 cup).
- Just 2 tablespoons of granulated sugar, mixed carefully with the cream.
- Don’t forget the optional but highly recommended grated cheddar cheese (1 cup) if you want that salty-sweet contrast!
How To Make Cassava Cake Step-by-Step
Alright, let’s get this project moving. As a process-oriented cook, I break this down into clearly defined phases. If you stick to these four tactical stages—Prep, Mix, Bake/Layer, Finish—you’ll nail this every time. My goal here is zero guesswork and maximum delicious, chewy results. Remember, we are aiming for that perfect flawless custard in the topping!
Preparing the Pan and Oven for Cassava Cake
First thing: get organized. You need your oven set to 350°F (175°C) right now so it’s ready to rock when the batter is mixed. For the pan, we are using a standard 9×13 inch baking dish. Grease it well, and then use parchment paper to line the bottom. This step is non-negotiable for a clean release later, especially with a sticky bake like this.
Mixing the Rich and Moist Cassava Batter
Grab your largest bowl; we want efficiency here. Dump in the grated cassava, coconut milk, condensed milk, the base sugar, the melted butter, the lightly beaten eggs, and the vanilla. Mix everything until it’s just combined. Seriously, stop once you no longer see streaks of white milk or pools of egg. If you overwork this, you lose the signature chewy texture. If you’re adding Macapuno, gently fold those strings in right at the end.
Baking the Base and Applying the Custard Topping
Pour that glorious mixture into your prepared pan and spread it level. Pop it into the 350°F oven for 45 to 55 minutes. This is Stage One. While that’s happening, grab your topping ingredients and whisk the coconut cream and topping sugar together. Once the base looks set and slightly golden at the edges, pull it out—carefully!—and pour that cream mixture evenly over the top. Return it to the oven for another 10 to 15 minutes until that custard layer is fully set.

Finishing Touches for a Golden Brown Cassava Bake
If you ordered cheese (and you should!), sprinkle that 1 cup of grated cheddar right over the custard layer now. Stick it back in for just 5 minutes to melt and get happy. Once it’s out, this is the hardest part: you must let the **cassava cake** cool completely in the pan. If you slice it hot, it falls apart. Chilling makes it firm up into that perfectly dense, chewy slice we worked so hard for.
Tips for the Best Cassava Cake
We’ve got the process down, but sometimes the difference between good and unforgettable comes down to small details regarding ingredients and timing. Since I treat every recipe like a project that needs rigorous quality control, I want to pass on the observations that guarantee success with this wonderful Filipino Dessert Recipe.
If you want to see how I applied similar high standards to different baking projects, take a look at my method for the Ultra-Moist Lemon Olive Oil Cake. It’s all about optimizing the key components!
Ingredient Deep Dive: Fresh vs. Frozen Cassava
If you’re using fresh cassava, which I totally encourage for the best flavor, there’s one step you absolutely cannot skip—and it’s crucial for that final, perfect texture. Freshly grated cassava holds a ton of water. You need to squeeze out the excess liquid vigorously before you mix it with the milks and eggs. If you don’t squeeze, your base will be too watery, and it’ll take ages to set, potentially ruining the chewiness. Frozen is easier, but always ensure it’s completely thawed and drained well before use.
How to Guarantee a Golden Brown Cassava Bake
We want that incredible golden color, right? If you decide to skip the cheese topping—and hey, sometimes you just want that pure, creamy coconut finish—you have to adjust the heat. To get that shiny, slightly burnished look, bump the oven temperature up to 375°F (190°C) for the final 10 minutes of baking time. This quick blast of higher heat sets the surface beautifully. I actually learned a few things about achieving that perfect baked finish when I was gathering info for a piece over on Nora’s site, and it applies here too!
Variations: Cassava Cake with Macapuno and Cheesy Cassava Cake
So, you’ve mastered the base recipe, but now you want to customize it? That’s the beauty of sticking to a simple framework, like the one I laid out for this Easy Cassava Cake. We can easily upgrade this treat based on what you love most, whether it’s texture or that great sweet-and-salty combo. If you enjoy adding unique textures to your bakes, you might also want to try my tips in the Cranberry Orange Cake—it’s about layering flavor!
Incorporating Cassava Cake with Macapuno
If you want that truly authentic tropical dessert flavor, adding Macapuno strings is the way to go. I included this step earlier, but here’s the key: fold them in right at the very end of the base batter mixing. You’re not stirring vigorously; you’re gently incorporating them so they distribute evenly throughout the cake. This gives you delicious pockets of sweet coconut strings in every bite of your Chewy Coconut Cake. You can find great tips on how to use this ingredient beautifully over at Dishes Tasty.
Making a Cheesy Cassava Cake
My favorite deviation has to be the cheesy version. It sounds wild if you haven’t tried Filipino desserts before, but trust me, the salty cheddar cutting through the sweetness of the coconut milk base is addictive. Remember during the last stage, before the cake cools, sprinkle 1 cup of grated cheddar right over the hot custard topping. It melts beautifully and gives you that signature golden finish we talked about. It turns this standard dessert into a genuine party favorite!
Serving Suggestions for Your Filipino Dessert Recipe
This cassava cake is incredibly versatile since it’s rich but not overly sweet. Traditionally, we enjoy this warm, chewy coconut cake as merienda—that perfect mid-afternoon snack. It stands up perfectly on its own, especially when it’s fully cooled and sliced cleanly. But if you want to elevate it for a weekend crowd, a simple cup of strong, hot coffee is the perfect partner. The slight bitterness cuts through the richness of the coconut milk wonderfully. For an even more layered experience, try pairing a slice with a crisp, tart fruit to balance the sweetness, maybe even a simple refreshing cider drink on the side!
Storage and Reheating Instructions for Creamy Cassava Dessert
Because this **cassava cake** relies on those starches to give it that fantastic chew, I always recommend letting it cool completely before thinking about storage. If you try to wrap it warm, you get steam, and we don’t want soggy coconut cake!
Once fully cooled, cover your 9×13 pan tightly with plastic wrap or transfer slices into an airtight container. Here’s the secret: this Creamy Cassava Dessert actually gets better overnight in the fridge. The texture firms up perfectly, making those chewy slices even easier to manage. It’ll keep well for about four days chilled. If you want to refresh a slice, just let it sit on the counter for about 20 minutes before serving. No need to reheat it in the oven unless you really want the cheese topping soft again; room temperature is usually perfect for enjoying this delicious treat! If you’re storing other baked goods, make sure you check out my tips for easy homemade bread bowls to see how I keep things fresh.
Frequently Asked Questions About Cassava Cake
As a project manager, I know that having clean data—or in this case, clean answers—is vital before starting any big task, like baking a whole **cassava cake**! Here are the quick answers to the most common snags I hear about making this wonderful Filipino favorite. If you have other questions after testing this recipe out, please leave a comment below. You can also find my general advice on keeping things fresh in my Easy Chicken Enchiladas guide, which sometimes applies to storage tips here too!
Can I use pre-grated cassava instead of fresh for this Cassava Cake?
Yes, you absolutely can! This is an easy swap when you need an **Under 90 Minute Dessert**. The only major consideration is moisture. Pre-grated cassava sometimes holds less water than fresh, but sometimes it holds a bit more—it really varies by brand. If you use pre-grated, make sure you still drain it well. The result will still be a fantastic slice of **Rich and Moist Cassava**, but the texture might lean slightly softer than when using fresh, squeezed root.
What is the best way to serve this Chewy Coconut Cake?
This is where chilling pays off! For the absolute best, clean-slicing, satisfyingly chewy texture, you must let the cake cool completely to room temperature, or even better, chill it for a few hours. Serving it slightly chilled maximizes that dense, springy chew. If you’re in a rush and need it sooner, room temperature is totally fine, and you can still enjoy the creamy elements. For more super easy dessert finds like this, check out the tips provided by InspireSpire.
Can this be made ahead of time?
Definitely, and I highly encourage it! As I mentioned in the storage section, this **Chewy Coconut Cake** actually improves overnight. The flavors meld, and the starches set up perfectly, creating those neat slices we aim for. Prepare it completely, let it cool, cover it tightly, and store it in the refrigerator. It’s one of the best **Potluck Dessert Ideas Filipino** home cooks rely on because it tastes better the next day!
Estimated Nutritional Values for Cassava Cake
I always suggest taking nutritional estimates with a grain of salt—they are literally calculated based on standard product databases, not the specific brands I used in my kitchen. Think of this as a nice guideline for your Simple Ingredients Dessert, not a mandate! For this recipe, based on the richness of the coconut milk and condensed milk, here’s what you can generally expect per slice.
- Serving Size: 1 slice
- Calories: About 320
- Fat: 16g (Be careful, a lot of this is rich saturated fat from the coconut!)
- Carbohydrates: 42g
- Sugar: 35g (It’s a dessert, after all!)
- Protein: 4g
If you’re focused on dialing in macros, you might want to check out my framework for much lower-carb options, like my Keto Chicken Parmesan. But for a traditional, rich Filipino treat, this is the data profile. Enjoy responsibly!
Share Your Homemade Cassava Cake Experience
Okay, you’ve seen my streamlined process for making this incredible Filipino Dessert Recipe. I’ve done my part by optimizing the steps to get you that perfect, chewy, creamy result without wasting your entire afternoon. Now it’s your turn to put it into action!
I genuinely want to know how yours turned out. Did you go for the creamy, pure coconut top, or did you indulge in the full Cheesy Cassava Cake experience? Did those Macapuno strings add the texture boost you were hoping for? Don’t be shy!
The best way you can support this simple cooking philosophy is by leaving a rating right below the recipe card. A five-star rating tells me that this efficiency works for you, too! If you snapped a photo of your beautifully Golden Brown Cassava Bake, please tag me on social media. I love seeing your beautiful kitchen projects come to life. If you tried something slightly different, drop that feedback in the comments so we can refine the process for the next reader. If you have any final questions, you can always reach out via my contact page!
Print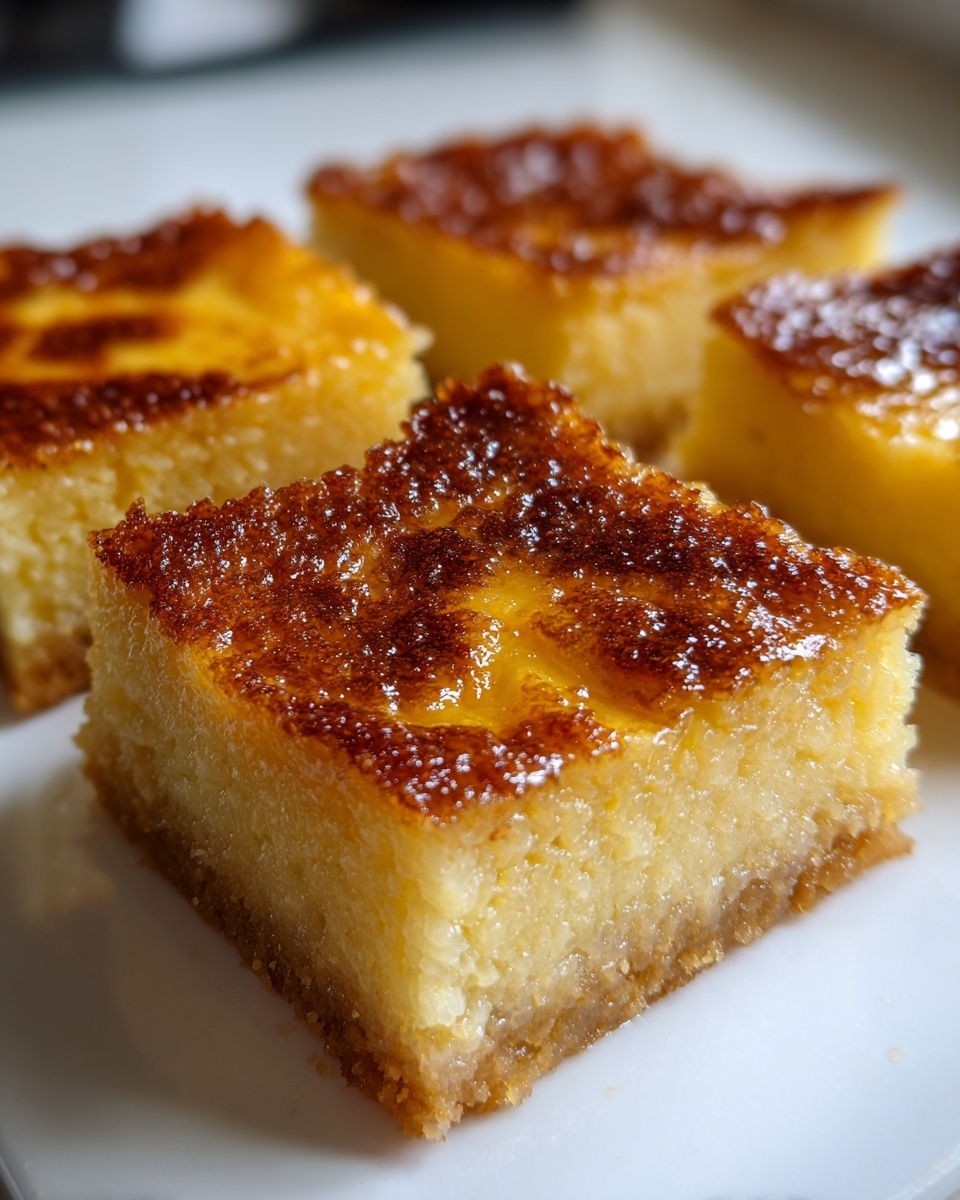
Easy Filipino Cassava Cake with Creamy Custard Topping

Make this authentic Filipino Cassava Cake, also known as Bibingka, using simple ingredients for a chewy, rich, and creamy dessert. This straightforward recipe is perfect for beginners and delivers a golden-brown finish.
- Prep Time: 15 min
- Cook Time: 70 min
- Total Time: 85 min
- Yield: 12 servings 1x
- Category: Dessert
- Method: Baking
- Cuisine: Filipino
- Diet: Vegetarian
Ingredients
- 4 cups grated cassava (fresh or frozen, thawed)
- 1 (13.5 oz) can full-fat coconut milk
- 1 (14 oz) can sweetened condensed milk
- 1/2 cup granulated sugar
- 1/4 cup melted unsalted butter
- 2 large eggs, lightly beaten
- 1 teaspoon vanilla extract
- 1/2 cup Macapuno strings (optional)
- 1 cup grated cheddar cheese (for topping, optional)
- 1/2 cup coconut cream (for topping)
- 2 tablespoons granulated sugar (for topping)
Instructions
- Preheat your oven to 350°F (175°C). Grease and line a 9×13 inch baking pan with parchment paper.
- In a large bowl, combine the grated cassava, coconut milk, condensed milk, 1/2 cup sugar, melted butter, eggs, and vanilla extract. Mix until just combined. If using, fold in the Macapuno strings.
- Pour the cassava mixture into the prepared baking pan, spreading it evenly.
- Bake the base layer for 45 to 55 minutes, or until the edges are set and lightly golden.
- While the base bakes, prepare the custard topping. In a small bowl, whisk together the coconut cream and 2 tablespoons of sugar.
- After the base has baked, carefully pour the coconut cream mixture over the top of the partially baked cake.
- Return the cake to the oven and bake for another 10 to 15 minutes, until the custard is set.
- If using cheese, sprinkle the grated cheddar evenly over the top. Return to the oven for 5 minutes, or until the cheese is melted and lightly browned.
- Remove the cassava cake from the oven. Let it cool completely in the pan before slicing for the best chewy texture.
Notes
- For a richer flavor, use freshly grated cassava if available. Squeeze out excess liquid before mixing.
- To achieve a golden brown top without cheese, increase the oven temperature to 375°F (190°C) for the final 10 minutes of baking.
- This dessert is best served at room temperature or slightly chilled.
Nutrition
- Serving Size: 1 slice
- Calories: 320
- Sugar: 35g
- Sodium: 150mg
- Fat: 16g
- Saturated Fat: 14g
- Unsaturated Fat: 2g
- Trans Fat: 0g
- Carbohydrates: 42g
- Fiber: 2g
- Protein: 4g
- Cholesterol: 35mg