
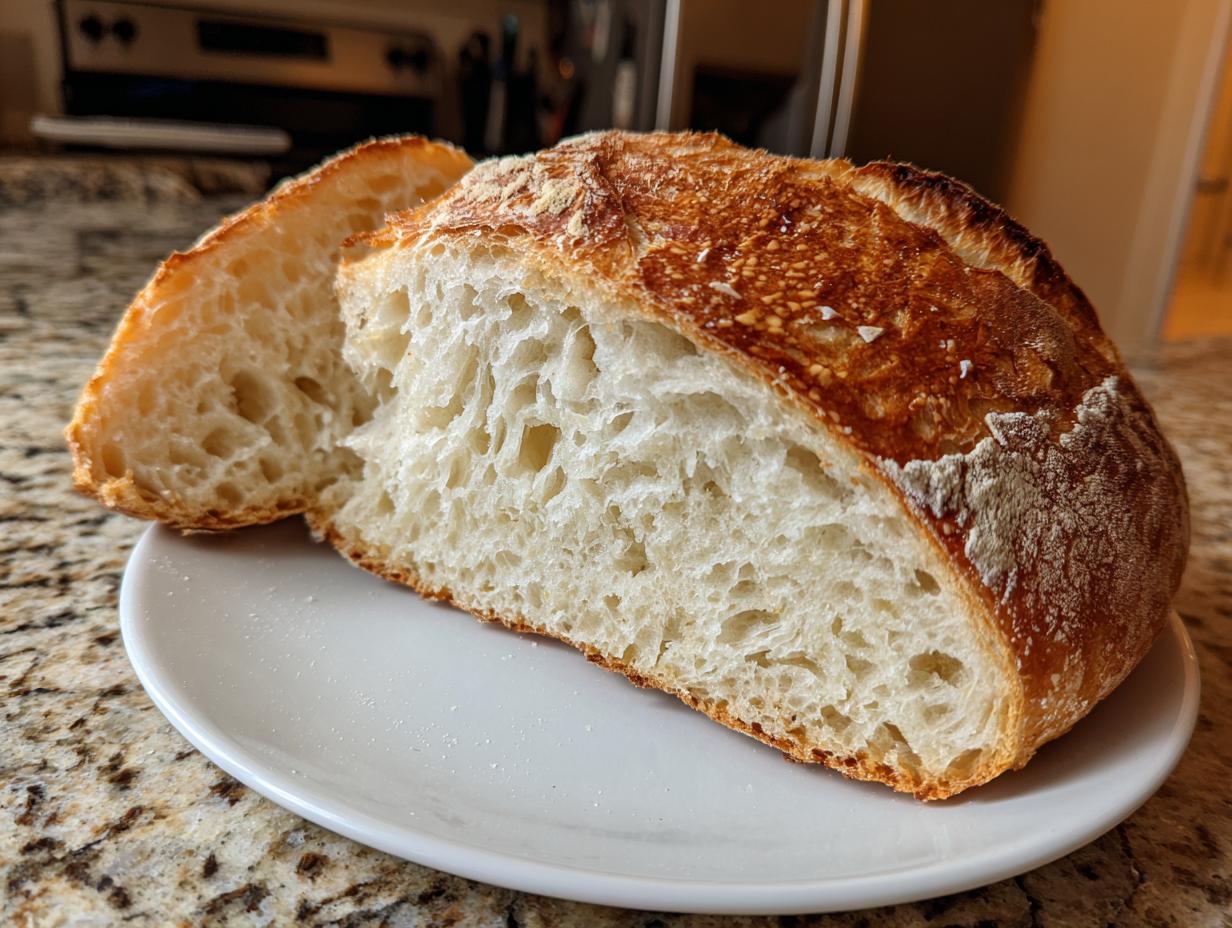
Listen, I’m all about efficiency in the kitchen. Every project manager knows that waste is just inefficiency waiting to happen, and throwing out perfectly good sourdough discard? That’s a culinary crime we absolutely need to solve. That’s why I engineered this specific Country Loaf with Sourdough Discard. It’s my favorite kind of optimization: turning inevitable leftovers into a show-stopping rustic bread using sourdough discard. Forget complicated feeding schedules; this is a straightforward, no-waste sourdough bread recipe that delivers that deep, artisan crumb you’re looking for. Trust me, you won’t believe how much flavor is hiding in that extra starter!
- Why This Sourdough Discard Country Loaf Recipe Works (EEAT Focus)
- Ingredients for Your Rustic Country Loaf with Sourdough Discard
- Step-by-Step Instructions: How to Make Country Loaf with Sourdough Discard
- Tips for Success When Baking Rustic Bread Using Sourdough Discard
- Ingredient Notes and Substitutions for Your Country Loaf with Sourdough Discard
- Storage and Reheating for Your Homemade Artisan Bread Discard Loaf
- Frequently Asked Questions About This Sourdough Discard Country Loaf Recipe
- Estimated Nutritional Data for One Slice of Country Loaf with Sourdough Discard
- Share Your Homemade Artisan Bread Discard Baking Success
Why This Sourdough Discard Country Loaf Recipe Works (EEAT Focus)
When you’re looking for the best sourdough discard bread, you need a plan that leans into the flavor complexity that discard offers, rather than fighting its lack of raw lift. This method is exceptionally reliable because we build structure differently. It’s designed to use that excess starter effectively while still producing beautiful oven spring.
- It truly eliminates waste—we’re turning what typically gets dumped into a fantastic loaf.
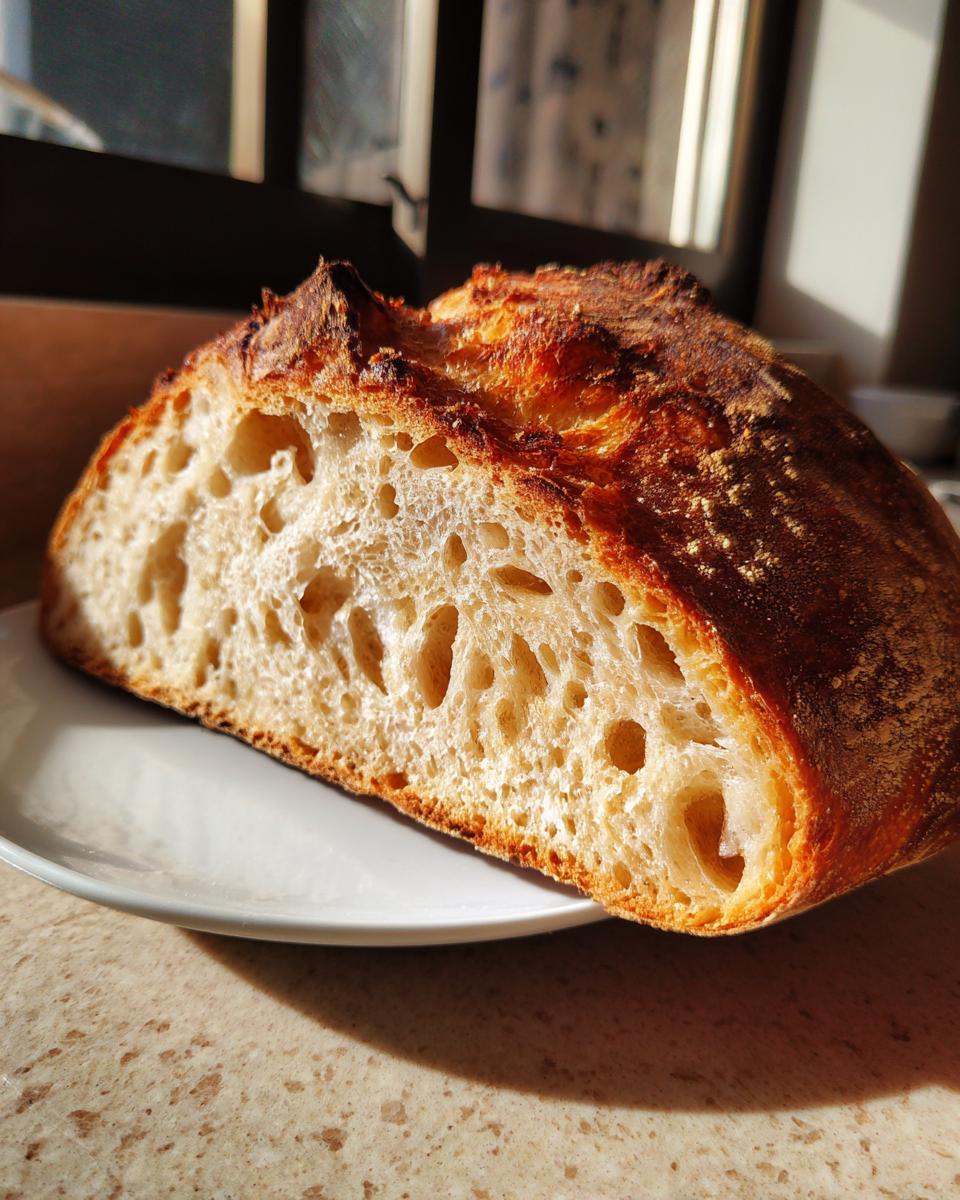
- It produces that signature rustic texture we all love in an artisan bake.
- The long, slow cold proof ensures we capture the maximum, satisfying tang.
The Advantage of Using Sourdough Discard in a Country Loaf
Discard might not give you the immediate power of a freshly peaked starter, but it carries huge flavor potential. Think less aggressive sourness and more complex, nutty notes. Because we aren’t relying only on the discard for rise, we can manage a slightly higher hydration, making this a great recipe for tackling a high hydration discard bread without making your mixing process overly difficult. It’s all about smart allocation of power in the dough!
Ingredients for Your Rustic Country Loaf with Sourdough Discard
When sourcing ingredients for any project, quality matters, right? For this country loaf with sourdough discard, we are keeping the ingredient list tight, which lets that whole wheat component really shine through. Don’t overthink this part; the magic happens later during the fermentation process. We’ll list everything you need right here for clarity.
Flours and Starter Components for Country Loaf with Sourdough Discard
You absolutely need that good bread flour—it’s the backbone, the structure we rely on since we aren’t using actively bubbling starter. Make sure your 100g of sourdough discard is just that: discard. It should be cold or straight from the counter, unfed, not a peak-performance levain. Now, for the insurance policy:
- 350g bread flour
- 150g whole wheat flour
- 350g water (room temperature—no need for fancy filters here)
- 100g active sourdough discard (unfed starter)
- 10g fine sea salt
- 3g instant dry yeast (I call this my ‘structure insurance.’ If your discard is sluggish, this guarantees you get that spring!)
Step-by-Step Instructions: How to Make Country Loaf with Sourdough Discard
Okay, this is where we put the plan into action. We’re moving past the theory and digging into the actual process of turning those great ingredients into a spectacular crusty loaf. Since we are managing the complexity of how to make country loaf with discard, timing is everything, but don’t panic. It’s just scheduling, which is what I do best!
Mixing and Building Structure in Your Sourdough Discard Country Loaf
First step: the autolyse. In a large bowl, just combine your flours, water, and that 100g of discard. You aren’t kneading here; you’re just mixing until no dry bits remain. Cover it up and let it rest for a solid 30 minutes. This hydration period is crucial before we introduce the salt. After that rest, sprinkle in your salt and the optional yeast. Mix thoroughly by hand until the salt dissolves and the dough starts grabbing onto itself. Next, we build strength: perform four even sets of stretch and folds, leaving 30 minutes between each set over the next two hours. These steps are doing the heavy lifting that a super-active starter usually handles, so be deliberate!
Shaping Artisan Bread Discard and Cold Proofing
Bulk fermentation is next, which can take anywhere from three to five hours depending on your ambient temperature—watch the dough, not the clock! You’re looking for about a 30–50% volume increase. Once it’s ready, gently invert the dough onto a lightly floured surface. Do a quick pre-shape into a round, let it relax for 20 minutes (that’s the bench rest), and then move to the final shaping. I like a tight round for a classic profile, but an oval works too. Pop that tightly shaped loaf, seam-side up, into a well-floured banneton. Now, for the flavor secret: slide it straight into the fridge for 12 to 18 hours. This long, cold fermentation is what develops that signature, complex, tangy sourdough bread recipe profile.
Baking the Country Loaf with Sourdough Discard in a Dutch Oven
Get your oven screaming hot before you do anything else—500°F (260°C) with your Dutch oven inside for a full 45 minutes. Mass needs heat! When it’s time to load, carefully take the loaf from the fridge, turn it out onto parchment paper, and score it decisively with a very sharp blade—this controls where the steam vents. Gently lower the loaf, paper and all, into that screaming hot Dutch oven. Cover it, drop the heat to 450°F (230°C), and bake for 20 minutes. This steam trapped by the lid gives you that incredible oven spring. After 20 minutes, remove the lid and drop the temp again to 450°F for another 20–25 minutes until you have that deep, burnished crust. If you struggled with bread before, check out my tips on shaping artisan bread for cleaner results!
Tips for Success When Baking Rustic Bread Using Sourdough Discard
Look, baking with discard requires a slightly different monitoring strategy than using a freshly fed starter. You only need the dough to increase by about 30% to 50% during bulk fermentation. Don’t wait for that huge, angry dome you get with active levain—if you wait that long, you’ll end up with pancake bread! I learned this the hard way on a very chilly morning here in Chicago. I thought the dough needed extra time to ‘wake up’ because the kitchen was cold, and I ended up completely over-proofing it during the bench rest. Total disaster, zero structure.
Lesson learned: temperature is your primary variable. If your kitchen is cold, don’t just let the bulk fermentation run forever; give that bowl a little warmth. Maybe sit it near the pilot light on the oven or even in a barely warm, turned-off oven. Also, when you do your stretch and folds, you’ll notice the dough feels less airy than normal, but it should become smooth and cohesive quickly. By the time your cold proof is done, you should see a little tension under the surface. That tension is what saves the homemade artisan bread discard loaf from falling flat when it hits the heat. For some fun shaping ideas, check out my notes on making bread bowls—the shaping concepts are similar!
Ingredient Notes and Substitutions for Your Country Loaf with Sourdough Discard
When we’re looking to streamline production, knowing where we can swap things out is key. For this recipe, the 350g of bread flour is technically the non-negotiable element because it gives us the necessary gluten strength for that classic country loaf structure, even without a super-active starter. If you don’t have whole wheat, you can swap the 150g entirely for more bread flour, but you’ll lose some of that earthy goodness and the crust might be slightly less rustic.
If you’re out of instant yeast, you can use active dry yeast, but you need to proof it first in a little warm water (maybe 10g of the recipe water) for about five minutes. I rarely substitute salt—it’s vital for fermentation control—but if you absolutely must, use regular table salt, just measure slightly less since it’s finer.
Storage and Reheating for Your Homemade Artisan Bread Discard Loaf
Handling what’s leftover is just as important as the bake itself! For this crusty loaf, just leave it on the counter wrapped in a clean kitchen towel or paper bag at room temperature for a couple of days. Don’t freeze it unless you plan to slice it first. If your loaf is a day old and feeling a little sad and stiff, revive it! Just give the crust a light spritz with water and pop it back into a 350°F oven for about seven minutes. It comes right back to life!
If you’ve been checking out my other recipes, like this whole wheat bread, you know I stress cooling completely before slicing. That rule holds true here too. Don’t ruin that perfect crumb you worked so hard for by cutting into a warm loaf!
Frequently Asked Questions About This Sourdough Discard Country Loaf Recipe
I know when you look at a new bread formula, especially one involving discard, your brain starts firing off questions. That’s good! It means you’re thinking strategically about the process. I’ve collected the ones I get asked most often about this specific sourdough discard country loaf recipe so we can get you baking with confidence immediately.
Can I use active starter instead of discard in this country loaf recipe?
You totally can, but be aware that you are changing the dynamics of the recipe. If you use a freshly fed, active starter—say, 100g of it—instead of the unfed discard, your bulk fermentation time is going to shrink drastically. The discard contributes complexity but less raw lift. If you switch to active starter, you should plan on cutting your bulk fermentation time by about half. Keep a close eye on that dough volume; you don’t want it to collapse!
What is the ideal temperature for bulk fermenting this high hydration discard bread?
For this kind of dough—which relies heavily on the slow action of what’s in the discard—consistency in temperature is your friend. I aim for the sweet spot right around 72 to 75°F (that’s 22 to 24°C). If your environment is cooler than that, things slow down a lot, meaning your bulk fermentation could stretch out past five or six hours. Conversely, if it’s too warm, that discard mixture can over-proof surprisingly fast, and nobody wants to deal with a floppy mess after all that hard work!
How tangy will this bread be compared to a standard sourdough?
That’s a great question for anyone hunting for a tangy sourdough bread recipe! Because we are using unfed discard that hasn’t had a chance to generate a huge amount of acetic acid, this loaf tends to have a fantastic, sophisticated tang rather than a sharp, overpowering sour punch. The long 12-to-18-hour cold proof is where we coax out most of that delicious flavor complexity. It’s tangy, but balanced—perfect for a hearty country loaf!
Do I really need the optional yeast for this beginner country loaf discard baking?
I listed the yeast as optional because I trust the structure we build with our stretch and folds, but honestly? I almost always include it. Think of it as an insurance policy, which I mentioned before. Especially when you are just learning how your kitchen temperature affects the bulk fermentation, that tiny bit of commercial yeast guarantees you get sufficient lift and structure for a decent bake. It rarely affects the final flavor negatively when used in this small amount!
Estimated Nutritional Data for One Slice of Country Loaf with Sourdough Discard
When we wrap up a project, we need the final specs, right? Transparency is key here at Dishicious. While baking sourdough is an organic process and variables like hydration and proofing time can shift things slightly, these numbers give you a solid baseline for one reasonable slice of this homemade artisan bread discard loaf.
Please remember that I calculated these based on the exact inputs in the recipe above, assuming a standard 14-slice yield. Any deviation in ingredients—like adding honey or oil—will naturally change these figures. But for this clean, rustic bake, here are the estimates:
- Serving Size: 1 slice
- Calories: 250
- Fat: 1g
- Saturated Fat: 0g
- Unsaturated Fat: 1g
- Trans Fat: 0g
- Cholesterol: 0mg
- Sodium: 350mg
- Carbohydrates: 55g
- Fiber: 3g
- Sugar: 1g
- Protein: 9g
Share Your Homemade Artisan Bread Discard Baking Success
Alright, team, the project is complete! You’ve wrestled a beautiful homemade artisan bread discard loaf into submission, and now it’s cooling on the rack. That’s a success in my book, achieving artisan results with an optimized use of ingredients. I sincerely hope this recipe solved your discard dilemma while delivering that perfect, slightly tangy country loaf flavor we were aiming for.
Don’t keep these baking wins to yourself! I want to see what you created. Did you nail the scoring? Did the cold proof give you that amazing open crumb? Drop a comment below and rate the recipe—your feedback helps me continually refine these processes for the next home cook looking for smarter solutions. If you’re curious about the Dishicious philosophy and how these efficient methods were developed, you can always read more About Us here.
Go ahead, slice into it (after it’s fully cooled, seriously!), enjoy that rustic crust, and know you just took a perfect step toward smarter, more delicious cooking. Happy baking!
PrintCountry Loaf with Sourdough Discard
A reliable recipe for a rustic country loaf that effectively uses your excess sourdough discard, resulting in a flavorful bread with good oven spring.
- Prep Time: 20 min
- Cook Time: 45 min
- Total Time: 13 hours 5 minutes
- Yield: 1 loaf 1x
- Category: Baking
- Method: Baking
- Cuisine: American
- Diet: Vegetarian
Ingredients
- 350g bread flour
- 150g whole wheat flour
- 350g water (room temperature)
- 100g active sourdough discard (unfed starter)
- 10g fine sea salt
- 3g instant dry yeast (optional, for insurance)
Instructions
- Mix the flours, water, and sourdough discard in a large bowl until just combined. Cover and let it rest for 30 minutes (autolyse).
- Add the salt and optional yeast to the dough. Mix thoroughly by hand until the salt is incorporated and the dough starts to feel slightly stronger.
- Perform four sets of stretch and folds, spaced 30 minutes apart, over the next two hours. This builds structure.
- Let the dough bulk ferment at room temperature (around 72°F) until it has increased in volume by about 30-50%. This may take 3 to 5 hours, depending on your kitchen temperature.
- Gently turn the dough out onto a lightly floured surface. Pre-shape it into a loose round. Let it rest, covered, for 20 minutes (bench rest).
- Shape the dough tightly into your desired final shape (round or oval). Place it seam-side up in a well-floured banneton basket.
- Cold proof the dough in the refrigerator for 12 to 18 hours. This develops the tangy flavor.
- Preheat your oven to 500°F (260°C) with a Dutch oven inside for at least 45 minutes.
- Carefully remove the hot Dutch oven. Gently turn the cold dough out onto parchment paper. Score the top surface of the loaf with a sharp blade.
- Carefully lower the dough (using the parchment paper) into the hot Dutch oven. Cover and bake for 20 minutes.
- Reduce the oven temperature to 450°F (230°C). Remove the lid and continue baking for another 20 to 25 minutes until the crust is deep brown.
- Transfer the loaf to a wire rack to cool completely before slicing.
Notes
- Using 100% discard instead of active starter contributes to a milder tang but requires careful monitoring during bulk fermentation.
- For a higher hydration discard bread, increase the water slightly, but be prepared for stickier dough management.
- If your kitchen is cold, place the dough in a slightly warmer spot during bulk fermentation to speed up the process.
- A good crust comes from high initial heat and steam provided by the Dutch oven.
Nutrition
- Serving Size: 1 slice
- Calories: 250
- Sugar: 1
- Sodium: 350
- Fat: 1
- Saturated Fat: 0
- Unsaturated Fat: 1
- Trans Fat: 0
- Carbohydrates: 55
- Fiber: 3
- Protein: 9
- Cholesterol: 0