
If you think making an impressive, gourmet-level dessert means spending hours wrestling with fussy water baths and trying to press a perfect graham cracker crust, I have excellent news for you. That’s what I thought until I started optimizing my baking projects. We’re diving into the magic of the Basque cheesecake today, and let me tell you, this is it. This is The Best Easy, Creamy, No-Crust Burnt Basque Cheesecake Recipe you’ll ever see. I’ve stripped away every unnecessary step—no tricky crust, no fragile water bath—to deliver an unbelievably rich, custardy interior topped with that signature deeply caramelized dessert shell. It’s my most streamlined, foolproof process for maximum flavor payoff.
- Why This is Your Best Basque Cheesecake Recipe Method
- Ingredients for the Perfect Creamy Cheesecake Dessert
- How to Make Basque Cheesecake: The No Fuss Baking Recipe
- Baking and Cooling: Secrets to the Best Basque Cheesecake Method
- Variations: Try a Loaf Pan Basque Cheesecake
- Serving Suggestions for Your Impressive Homemade Cake
- Storage and Reheating Instructions for Basque Cheesecake
- Frequently Asked Questions About Making Basque Cheesecake
- Share Your Experience with This Spanish Dessert Recipe
Why This is Your Best Basque Cheesecake Recipe Method
When I first encountered the traditional San Sebastian Cheesecake, I loved the rustic look, but I didn’t love the fuss. My approach, using project management principles, fixed that immediately. This method proves you can have an impressive homemade cake without the headache. It’s designed specifically for home cooks who want that ‘wow’ factor.
- Zero Crust Stress: Forget fussing with crumbs; we go completely crustless.
- No Water Bath Necessary: Seriously, toss that intimidating setup. High heat does the work for us.
- Maximum Creaminess: The specific ratio of cream cheese to heavy cream guarantees that rich, custardy filling.
- Minimal Ingredient List: We stick only to what’s necessary for an amazing creamy cheesecake dessert.
Achieving the Signature Caramelized Top Dessert
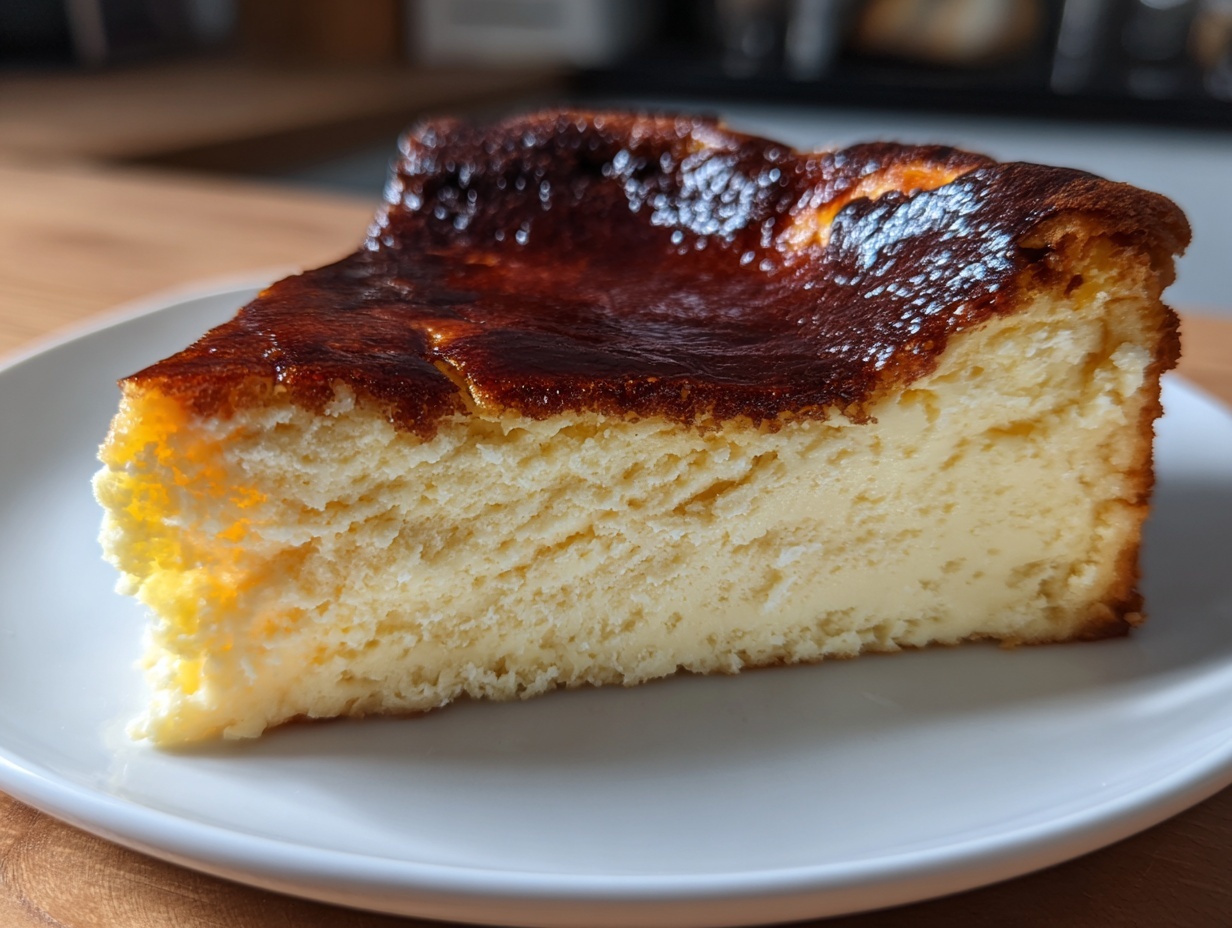
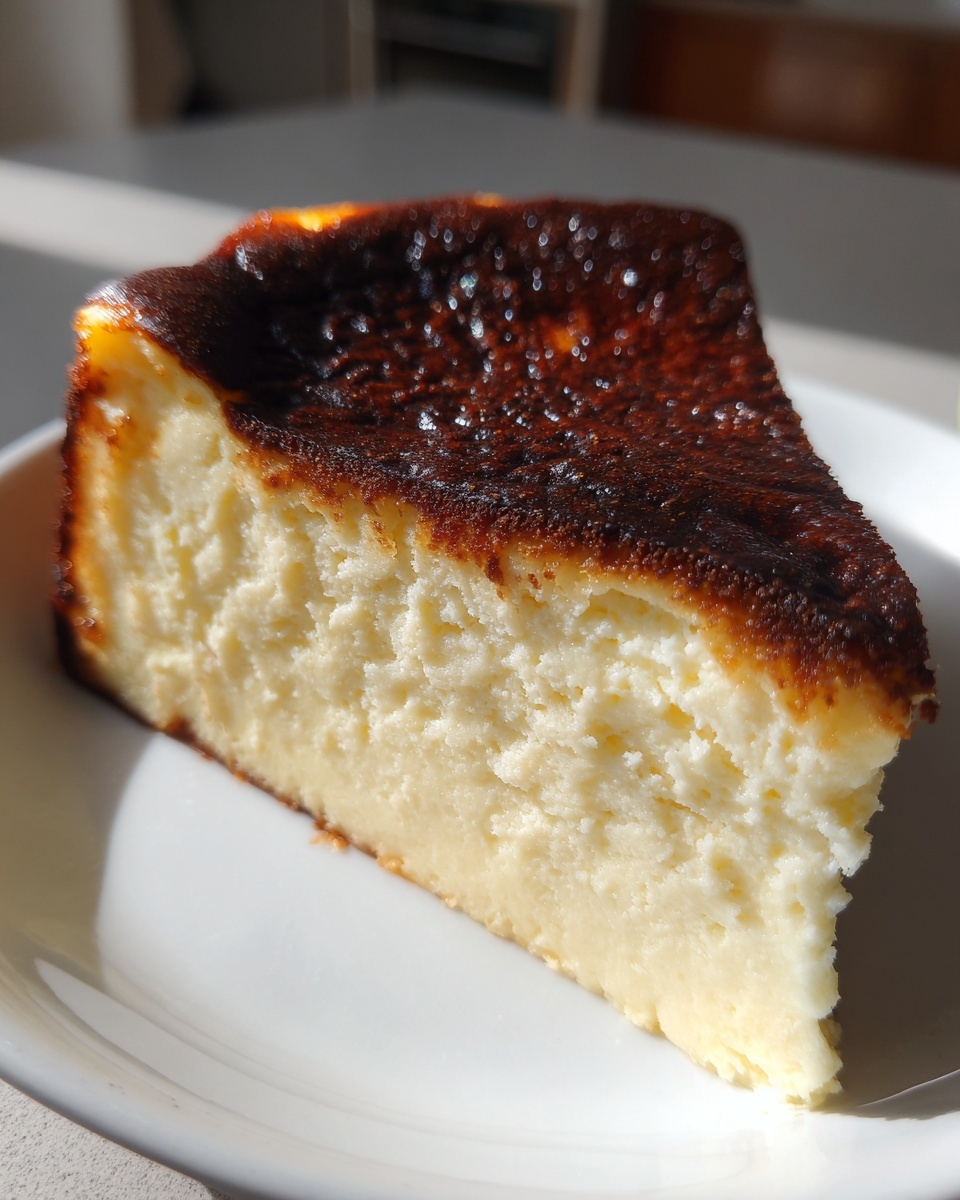
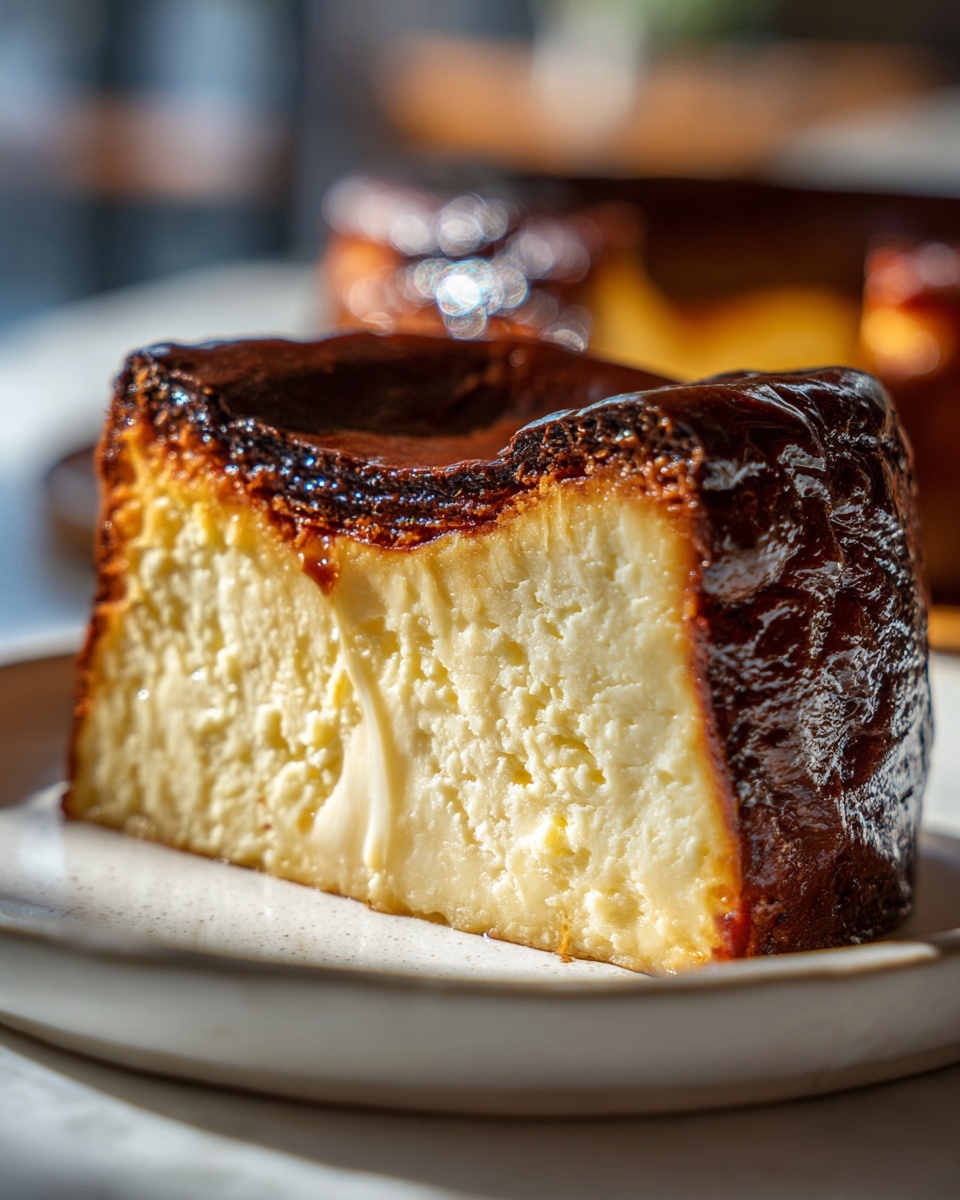
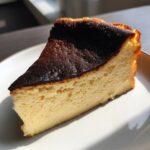
The key to that dark, dramatically beautiful top is extreme heat. We’re blasting this cheesecake at 400°F. This intense blast is crucial because it quickly caramelizes the sugars on the surface, giving you that signature bittersweet contrast. We want that deeply caramelized top dessert—almost black in spots—while keeping the interior barely set. Don’t panic midway through; achieving that perfect golden brown cheesecake top is all about trusting the high temperature!
Ingredients for the Perfect Creamy Cheesecake Dessert
When I streamline a recipe, it means the ingredients we use must perform double duty. For this truly creamy cheesecake dessert, we aren’t hiding anything behind crusts or complicated flavorings. We are relying on quality and quantity to deliver that incredible, almost savory-sweet custardy filling. This list is short, which is wonderful for minimizing trips to the grocery store, but every item matters immensely.
You’ll need:
- 900g full-fat cream cheese, softened
- 1 1/4 cups granulated sugar
- 6 large eggs
- 2 cups heavy cream
- 1 teaspoon vanilla extract
- 1/4 cup all-purpose flour
Notice that 900 grams of cream cheese—that’s a lot! That bulk is what gives this **Basque Cheesecake** its signature density while still being gloriously creamy inside. Don’t skimp on that full-fat requirement; it’s non-negotiable for the texture we’re aiming for. If you try to substitute a lighter version, you’ll end up with something closer to a mousse, and that’s just not the authentic experience we want here!
Ingredient Notes and Substitutions for your Basque Cheesecake
The success of this simple gourmet dessert hinges on preparation, even before you turn the mixer on. First, the cream cheese absolutely must be fully softened. I mean room temperature soft, where you could gently press a finger in and it leaves an indent. Cold cream cheese lumps up, and when that happens, no amount of mixing will save you from a patchy flawless custard pie texture.
As for size, this recipe is engineered for a standard 9-inch pan. If you decide to pivot based on what I mentioned about the Loaf pan Basque Cheesecake variation, you need to adjust. A loaf pan—say, an 8×4 inch—will only hold about a third of this batter volume. If you use a loaf pan, you’ll cut the recipe down by two-thirds. You’ll need fewer eggs, less cream, and you’ll need to keep a close eye on baking time since the depth is different but wider than a standard small pan. For the main recipe, stick to the 9-inch to hit that sweet spot for baking time!
How to Make Basque Cheesecake: The No Fuss Baking Recipe
Okay, here is where we put the “easy” into this otherwise stunning no fuss baking recipe. Since you’ve got your cream cheese perfectly softened, getting this batter ready takes about 15 minutes of active work—that’s it! We move fast, but we move deliberately, which is my whole approach to cooking. The goal is a smooth batter that bakes up beautifully without needing that stressful water bath that ruins everyone’s vibe.
Preparing the Pan for a Crustless Cheesecake
This step is your insurance policy. Grab a 9-inch springform pan. You need two large sheets of parchment paper, and I mean large. Overlap them in a cross pattern inside the pan. Don’t trim them! You want that paper sticking up maybe two or three inches over the top edge of the tin. This allows the Basque Cheesecake to rise high and look rustic when it balloons up. If you trim it short, you get overflow, and trust me, cleaning burnt cheesecake off your oven floor is not part of the plan.
Mixing the Custardy Cheesecake Filling
We tackle this in order. First, beat that softened cream cheese until it’s utterly velvety smooth. Then, mix in the sugar until it looks light and fluffy—we’re building air here. Now, here’s the discipline: add the eggs one by one, mixing just until you don’t see the yolk anymore. Once the heavy cream and vanilla go in, mix only on low speed. When you finally sift in that flour, mix just until *no white streaks remain*. Stop! Overmixing from this point on develops gluten and fights the beautiful, custardy cheesecake filling we are targeting. Pour that thin batter right into your prepared pan and get it into the hot oven.
Baking and Cooling: Secrets to the Best Basque Cheesecake Method
When that thin batter goes into the oven, you need to trust the process, even though the top will look totally wild. We’re baking this Basque Cheesecake at 400°F for about 50 to 60 minutes. Watch it closely. You want the edges to look set, but the center—the center should actually have a really pronounced wobble, almost like liquid Jell-O. That’s your cue that the interior will be perfectly creamy and decadent, not dry.
Here’s that little expert nudge for the best results: For the final 10 minutes, carefully move the pan up to the highest rack in your oven. This gives the top that deep, dramatic char we’re after, nailing that signature caramelized top dessert look without baking the inside too far. If you skip this, it might just look golden, and we want *burnt*!
The Critical Cooling Period for Your Rustic Cheesecake Recipe
Once it’s gloriously dark, pull it out, but don’t rush to the fridge! This is my second big optimization tip for achieving the best texture in this rustic cheesecake recipe. Let it cool completely on the counter for at least two hours. It will deflate dramatically in the middle during this time; don’t worry, that’s normal and correct for this style. After it’s totally cool to the touch, wrap it up and chill it for a minimum of six hours, but honestly, overnight is always better.
This long, cool set is what locks in that incredibly smooth texture. Oddly enough, though, for the best experience serving this impressive homemade cake, take it out about 30 minutes before slicing. Serving it slightly warmer than fridge-cold maximizes that soft, unbelievable melt in your mouth.

Variations: Try a Loaf Pan Basque Cheesecake
So, you love the recipe but you’re only baking for two, or maybe you just don’t have a 9-inch springform pan lying around? I get it. That’s why I’ve spent time testing the adaptation. This Basque cheesecake bakes up just as beautifully in a standard loaf pan, which makes it such an easy and elegant serving size for a small crowd or a quiet night in. It’s a wonderfully rustic presentation.
If you choose to make a Loaf pan Basque Cheesecake, remember that volume changes everything in baking. You can’t just pour the whole recipe in there! You need to scale the batter down significantly—I found reducing the whole recipe by two-thirds works perfectly for a standard 8.5×4.5 inch loaf pan. Because the loaf pan is deeper than it is wide, you definitely need to check the internal temperature sooner than you would the round cake. You’re looking for that same significant wobble in the middle, even though the bake time will shorten up considerably!
Serving Suggestions for Your Impressive Homemade Cake
This is the part where we move from project execution to presentation, and honestly, this Basque Cheesecake needs very little help to look stunning. Because it already has that dramatic, deeply caramelized top dessert, you don’t have to worry about frosting or complicated piping. It’s inherently rustic and gorgeous exactly as it is. It truly is the perfect, no-fuss centerpiece when you need an impressive homemade cake for a gathering.
When serving this as a cheesecake for dinner party, I usually take the parchment paper off completely right before serving. That naked, dark crust against a white platter just screams sophisticated simplicity.
If you feel like you need just a touch more color, keep it light. Don’t drown that incredible top! My favorite simple approach is to either:
- Dust it super lightly with powdered sugar right before you bring it out. It catches in the crevices of the burnt top beautifully.
- Serve thin slices alongside a small bowl of fresh mixed berries—raspberries and blueberries are perfect because their tartness cuts through the richness beautifully.
Remember what I always say: simplicity done right always wins. This simple gourmet dessert shines when you let its natural, deeply flavored texture speak for itself. You did the work optimizing the bake; now just enjoy the applause!
Storage and Reheating Instructions for Basque Cheesecake
Okay, you nailed the bake, you navigated the chilling, and now you have this glorious, decadent dessert. The question is, how do we keep that perfect texture intact? Since this is essentially a baked custard, longevity is entirely about moisture control. I’m Leo, and my rule for storing almost any custard-style creation is: cover it up and keep it cold, but only until serving time.
Once you’ve removed the springform ring and the parchment paper—which I recommend doing right before the final chill or just before serving—wrap the entire Basque Cheesecake loosely but completely in plastic wrap or place it in an airtight container. This stops it from absorbing any weird smells from the fridge and keeps that creamy center from drying out.
It keeps beautifully in the refrigerator for up to four or five days. It’s actually one of the best parts about this crustless cheesecake; it tastes just as good, if not better, on Day Three!
Now, let’s talk heat. You asked about reheating your Burnt Cheesecake, and my answer, based on decades of testing simple baking projects, is a firm no. Applying direct heat will likely break down the custardy texture we worked so hard to achieve during the cooling phase. It could cause it to weep or separate. Instead of reheating, focus on serving temperature. Remember that tip from earlier? The texture is best when it’s slightly warmer than straight out of the fridge.
So, the smart project manager move here is planning ahead! Take your stored Basque Cheesecake out onto the counter about 30 to 45 minutes before you plan to slice into it. That little bit of ambient warmth softens the texture just enough, making that filling sing with creaminess. No microwave required for this Spanish dessert recipe!
Frequently Asked Questions About Making Basque Cheesecake
I know baking can feel like an exact science, but sometimes you hit a snag, right? That’s fine! That’s why I spend so much time optimizing these projects—so you can troubleshoot quickly and get back to enjoying your dessert. When people try this Basque Cheesecake recipe, they usually have a few hang-ups about that signature look or texture. Here are the things I see most often, so you can bypass those issues immediately.
Why is my Basque Cheesecake not burnt enough?
If you’re expecting that dramatic, almost black, beautiful crust, and you’re only getting light gold, it almost always comes down to two things: temperature accuracy or rack position. First, check your oven temperature with an external thermometer; they lie, sometimes significantly! Second, and this is the big one for achieving that perfect caramelized top dessert look, you need the heat source close to the top.
Remember what I detailed in the baking section? You have to move the cheesecake to the highest rack in your oven for the last ten minutes. If you leave it on the middle rack, the top doesn’t get enough direct radiant heat to properly char. Crank that heat and raise that pan—that’s the secret ingredient for the look!
Can I use low-fat cream cheese in this easy crustless cheesecake recipe?
No. Seriously, please don’t try it. This is one area where Leo Grant absolutely insists on sticking to the plan for this easy crustless cheesecake. The high percentage of fat, especially in the full-fat cream cheese, is what keeps the internal structure from curdling or getting dense and dry when baked at high heat.
Fat equals moisture and richness here. If you swap to low-fat, you lose that essential richness, and the cheesecake will bake up rubbery and frankly, disappointing. We are aiming for decadent, not diet-friendly, with this specific Spanish dessert recipe. Stick to the full-fat bricks for that signature melt-in-your-mouth experience.
Do I really need a water bath for this baskque cheesecake recipe?
Absolutely not! That’s one of the best parts about the Basque Cheesecake method. Traditional New York-style cheesecakes rely on the gentle, humid heat of a water bath to bake slowly and prevent cracks. But we are totally skipping that drama here. We are deliberately going for high heat and a rustic, browned top.
This specific recipe is engineered from the ground up to be a no water bath cheesecake. The combination of high sugar, high fat, and high heat creates steam within the high-walled parchment paper setup, which acts as its own little gentle cooking environment inside the oven. Trust the process; the water bath is absolutely unnecessary and would only slow down the necessary caramelization on top!

Share Your Experience with This Spanish Dessert Recipe
Whew! We did it. You’ve successfully navigated the optimization process and made what I consider to be hands-down the best Basque Cheesecake out there. No fussy crusts, no nervous hovering over a water bath, just pure, creamy, charred perfection. That’s the Dishicious way; high reward with minimal hassle.
Now that you’ve mastered this incredibly rewarding Spanish dessert recipe, I genuinely want to hear about it! Did the top get perfectly burnt just like mine? Did the center wobble exactly as expected before it chilled down?
The kitchen is a community, and seeing your results helps me keep refining these projects to make sure they work for everyone. Please take a second right now:
- Rate this recipe using the stars below. This tells me how well the process worked for you immediately.
- Drop a comment detailing any small adjustments you made or how it was received at your latest dinner gathering.
- If you snapped a picture of that gorgeous, rustic cake, share it! You can tag me on social media—I love seeing the personalized touch everyone brings to these streamlined recipes.
This easy crustless cheesecake shouldn’t be a secret; it should be on every home cook’s rotation. Let’s spread the word that gourmet desserts can be simple!
PrintThe Best Easy, Creamy, No-Crust Burnt Basque Cheesecake Recipe
Make this impressive Burnt Basque Cheesecake with minimal ingredients. It features a signature caramelized top and a rich, custardy interior without needing a water bath or crust.
- Prep Time: 15 min
- Cook Time: 60 min
- Total Time: 7 hours 15 min
- Yield: 10 servings 1x
- Category: Dessert
- Method: Baking
- Cuisine: Spanish
- Diet: Vegetarian
Ingredients
- 900g full-fat cream cheese, softened
- 1 1/4 cups granulated sugar
- 6 large eggs
- 2 cups heavy cream
- 1 teaspoon vanilla extract
- 1/4 cup all-purpose flour
Instructions
- Preheat your oven to 400 degrees Fahrenheit (200 degrees Celsius). Line a 9-inch springform pan with two layers of parchment paper, allowing the paper to extend high above the sides of the pan. Do not trim the excess paper.
- In a large bowl, use an electric mixer to beat the softened cream cheese until it is completely smooth. Scrape down the sides of the bowl.
- Add the sugar to the cream cheese and beat until the mixture is light and fluffy, about 2 minutes.
- Add the eggs one at a time, beating well after each addition until just combined. Do not overmix.
- Pour in the heavy cream and vanilla extract. Mix on low speed until incorporated.
- Sift the flour over the batter and mix on low speed until no streaks of flour remain. The batter will be thin.
- Pour the batter into the prepared pan.
- Bake for 50 to 60 minutes. The top should be deeply caramelized, almost black in spots, and the edges should be set. The center should still have a significant wobble, indicating a custardy interior.
- Remove the cheesecake from the oven. Let it cool completely on a wire rack at room temperature for at least 2 hours. The center will deflate as it cools.
- Once cool, cover the pan loosely and chill in the refrigerator for a minimum of 6 hours, or preferably overnight, before serving.
- To serve, carefully remove the outer ring of the springform pan and peel away the parchment paper. Serve this decadent dessert at room temperature for the best texture.
Notes
- For the best caramelized top, place the cheesecake on the highest rack in the oven for the last 10 minutes of baking.
- If you want a smaller, more rustic version, you can use a loaf pan instead of a 9-inch springform pan. Adjust baking time slightly.
- This crustless cheesecake is best served slightly warmer than straight from the fridge to achieve the signature creamy texture.
Nutrition
- Serving Size: 1 slice
- Calories: 450
- Sugar: 35g
- Sodium: 250mg
- Fat: 32g
- Saturated Fat: 20g
- Unsaturated Fat: 12g
- Trans Fat: 0.5g
- Carbohydrates: 30g
- Fiber: 0g
- Protein: 8g
- Cholesterol: 180mg