
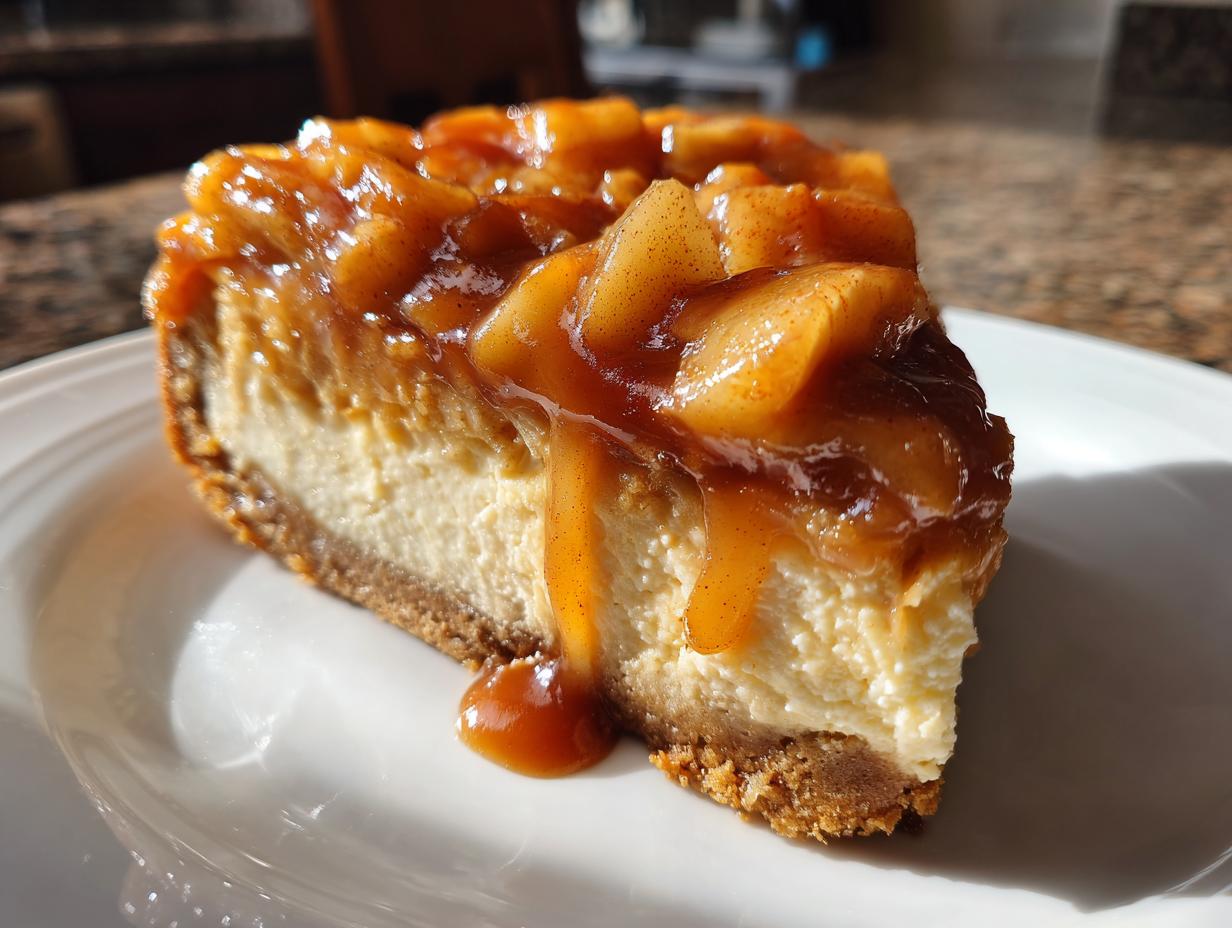
When that first crisp autumn breeze hits, you know what that means: it’s time for desserts that taste like nostalgia and cozy sweaters. For me, that means ditching complicated, fussy baking projects for things that just work. I’ve spent years taking those intimidating, multi-step recipes and streamlining them—because you should be enjoying the season, not stressing over batter consistency. This caramel apple cheesecake recipe? It’s the result of that optimization. It delivers that incredibly smooth, creamy texture and the perfect spiced apple lift every single time. Trust me, this reliable bake is what your fall table has been waiting for. You can see how other bakers are enjoying the process, too, which always tells me I’m on the right track here with a showstopper fall dessert.
- Why This Caramel Apple Cheesecake Recipe Works Every Time
- Gathering Ingredients for Your Caramel Apple Cheesecake
- Step-by-Step Instructions for the Ultimate Caramel Apple Cheesecake
- Tips for a Flawless Caramel Apple Cheesecake
- Serving and Storing Your Indulgent Fall Treats
- Variations on the Classic Caramel Apple Cheesecake Recipe
- Frequently Asked Questions About Caramel Apple Cheesecake
- Estimated Nutritional Data for This Dessert
- Share Your Dishicious Creations
Why This Caramel Apple Cheesecake Recipe Works Every Time
When I tackle a sophisticated bake like this, I approach it like any tough project: map out the failure points and eliminate them early. That’s the Dishicious method applied to dessert! This isn’t just guesswork; it’s engineering for flavor. We strip away the complexity to leave you with reliable results. You can even check out this other great resource for some excellent Thanksgiving ideas.
- It reliably produces the Best Fall Dessert year after year.
- The structured approach guarantees a genuinely Creamy Apple Cheesecake filling.
- The slow cooling method eliminates those frustrating cracks around the edges.
- The spiced apple layer integrates perfectly without sinking to the bottom.
It’s all about process control. We are moving toward an easy, foolproof cake here.
Achieving the Perfect Creamy Apple Cheesecake Texture
The number one source of cheesecake failure? Ingredients that aren’t ready! If your cream cheese is cold, you are guaranteed lumps, no matter how powerful your mixer is. Make sure that cream cheese is fully softened—leave it out for a couple of hours. Seriously, don’t rush it.
Next up is the water bath. Some people skip this part, but honestly, it’s my non-negotiable defense against a cracked top. Wrapping that springform pan tight and letting it float in warm water during its bake ensures gentle, even heat distribution. That’s how we lock in that silky, smooth texture that makes this creamy apple cheesecake so famous.
Gathering Ingredients for Your Caramel Apple Cheesecake
Alright, let’s get our supplies ready. Think of this as laying out the materials for a renovation project—organization is half the battle won! I’ve listed exactly what you need below. Notice how we have the crust components separate from the filling, and the apples are their own little team, ready to jazz things up.
Having everything measured out before you turn on the mixer stops you from suddenly realizing you’re out of salt mid-process. That’s just good project management, right? We are setting this caramel apple cheesecake up for success before it even hits the heat.
- For the Crust: 1 1/2 cups graham cracker crumbs, 1/4 cup sugar, and 6 tablespoons melted butter.
- For the Filling: Three 8-ounce packages of cream cheese (softened, please!), 1 1/2 cups sugar, vanilla, salt, and those crucial three large eggs.
- For the Apples: About four medium apples, diced small, plus brown sugar, cinnamon, and water to stew them down. And, of course, the star drizzle: 1 cup of your best caramel sauce.
Ingredient Notes and Substitutions for Caramel Apple Cheesecake
We need sturdy apples here. I usually mix Honeycrisp—they bake up sweet—with just a couple of tart Granny Smiths to keep things from getting too heavy. That little bit of acid brightens everything up. Also, about that caramel sauce? Don’t skimp. If you are short on time, buy a high-quality jar, but if you have an extra 15 minutes, making your own homemade sauce makes an incredible difference in the final flavor profile. This whole structure rests soundly on that buttery Graham Cracker Crust Dessert base, so make sure you pack it in tight!
Step-by-Step Instructions for the Ultimate Caramel Apple Cheesecake
Okay, time to put the plan into action! This is where the project management mindset really pays off. We need precision timing, especially around the bake and cooling phases, which prevents the dreaded sinking or cracking. I want you to follow these steps exactly, pay close attention to temperatures, and you will end up with that perfect, sliceable caramel apple cheesecake.
If you’re looking for other ways people are structuring their fall bakes, check out this interesting take on cheesecake bars. For the full cheesecake, we move sequentially.
Preparing the Graham Cracker Crust Dessert Base
First things first, get that oven up to 325 degrees Fahrenheit. Before anything else, you need to wrap that 9-inch springform pan in heavy-duty foil, wrapping the outside tightly all the way up. This keeps water from seeping in when we set up the water bath later. It’s a crucial seal!
Mixing the crust is simple: combine your crumbs, that small bit of sugar for the crust, and the melted butter. Feel free to use a food processor if you are short on time, but mixing by hand works fine too. Press that mixture down really firmly and evenly onto the bottom of the foil-wrapped pan. We want density! Pop that base into the oven for a quick ten minutes to set it up. Let it cool down a little bit once it comes out.
This initial bake is what solidifies our foundation, ensuring this Graham Cracker Crust Dessert stands up beautifully to the creamy center.
Mixing the Creamy Filling and Creating the Spiced Apple Topping
Now for the good stuff. You should have your cream cheese totally softened. Beat it with the main sugar, vanilla, and salt. Once it is perfectly smooth—seriously, check every corner of the bowl for lumps—add those three eggs. This is my biggest warning: mix them in one at a time, and stop mixing the second they disappear into the batter. Overmixing eggs introduces too much air, which expands in the oven and then contracts too fast when cooling, meaning cracks! We want a flat, gentle top on our caramel apple cheesecake filling.
While the batter is being mixed, you need to work on the apples. Grab a saucepan and combine your diced apples, brown sugar, cinnamon, and water. Cook that mixture over medium heat. You are aiming for the apples to become tender—soft enough to bite easily—but you want them to still hold their little diced shape. We don’t want applesauce! Stir them occasionally, and once they soften up (about 8 to 10 minutes), take them off the heat and let them chill slightly. These are your gorgeous Spiced Apple Topping pieces.
Gently pour your smooth cream cheese mixture right over that set crust. Then, lovingly spoon those slightly cooled apple pieces evenly over the top. No swirling needed here; we want distinct layers.
The Water Bath and Easy Cheesecake Baking Technique
This is the moment of truth for that smooth structure. Take your foil-wrapped springform pan and set it inside a larger roasting pan. Now, carefully pour hot water into the roasting pan until it comes about halfway up the sides of the cheesecake pan. This water bath buffers the heat, making the bake incredibly gentle.
Bake this setup at 325 degrees Fahrenheit for 60 to 75 minutes. You’ll know it’s done when the edges look firm, but the very center—maybe a two-inch circle—still has a little wiggle to it when you nudge the pan gently. It should not be liquid, just jiggly.
Here is the crucial final step I learned the hard way: Don’t shock the cake! When the time is up, turn the oven off completely. Prop the door open just a crack—just enough to let some air escape slowly—and leave the cheesecake inside the cooling oven for a full hour. After that hour, take it out of the water bath, remove the foil, and let it finish cooling on a rack before you even think about chilling it. It needs a minimum of six hours, but overnight is best, before you add that crowning glory of caramel.
Tips for a Flawless Caramel Apple Cheesecake
Even with the best plan, sometimes things go a little sideways in the kitchen, right? That’s why I always build contingency plans into my recipes. For this rich caramel apple cheesecake, we primarily fight two enemies: cracking and weeping. If you followed the instructions on the slow cooling, cracking should be minimal, but let’s talk about what to do if you see any issues.
If you notice separation or “weeping” (that watery layer that sometimes appears between the crust and the filling), it almost always means the cream cheese wasn’t truly room temperature, or you added the eggs too quickly. The eggs just scramble a bit if the base is too cold. If weepage happens, it’s usually fixed once chilled and covered tightly, but lesson learned for next time: patience is necessary for that creamy texture.
For minor surface cracks that somehow still appear despite the water bath, don’t panic! We are covering this entire landscape up with warm apples and thick caramel drizzle anyway. If the crack is fine, just cover it with a thin layer of my fluffy vanilla buttercream before adding the apples—or just ignore it and lean into the rustic charm. Nobody judges a homemade bake!
If you are looking for bar versions instead of the big cake, remember to check out these easy caramel apple cheesecake bars for a hand-held treat. For the full-sized beauty, the key takeaway is consistency in temperature and slow temperature changes.
Serving and Storing Your Indulgent Fall Treats
We are so close to tasting victory here! Once your caramel apple cheesecake is completely cooled on the rack, you absolutely cannot rush the chilling process. This dessert firms up and develops its true, creamy character in the cold. I insist you chill this for a minimum of six hours, but if you plan ahead—and that’s what I always recommend for baked goods—let it sit in the fridge overnight. It transforms!
The chilling time is also essential because it sets the cheese structure so tightly that when you finally unfasten that springform pan, the cake stands perfectly proud. Once you’ve removed the ring, that’s the moment to be generous! Drizzle that thick, glossy caramel sauce generously over the top and scatter any remaining spiced apples you might have saved.
This is definitely my favorite Thanksgiving Cheesecake Idea because it feels festive without requiring oven space on the big day. Since it stores so well, you can easily make it the day before your gathering.
For storage, this monster needs to stay cold. Keep any leftovers—if you’re lucky enough to have any!—covered tightly in the refrigerator. It stays fantastic for about five days wrapped up like that. Honestly, I rarely bother trying to reheat cheesecake; the texture is simply best when it’s perfectly chilled. However, if you happen to have a slice that’s gotten just a *little* too cold from the fridge, letting it sit on the counter for about 20 minutes really lets the flavors open up. Don’t try to microwave it unless you want soupy apples and melted cheese!
If you’re looking for ideas on what else to serve alongside giant slices of cheesecake, check out some of my favorite recipes for serving hearty holiday sides.
Variations on the Classic Caramel Apple Cheesecake Recipe
Look, I love standardization. It’s how we ensure reliability. But sometimes, you need to tweak the specs on the final build, right? This amazing caramel apple cheesecake is fantastic as built, but it’s simple enough that you have room to customize based on what you have or what mood you’re in. We’re always looking for efficiency here at Dishicious, and sometimes that means swapping out a crust or layering things differently.
For instance, if you find yourself running low or just feeling fancy, you absolutely can swap out the standard graham cracker base mentioned in the main instructions. A basic shortbread crust works great—just substitute the crumbs for finely processed shortbread cookies and use the same amount of melted butter to bind it. Press it, bake it for 10 minutes, and you’re set. It adds a richer, almost buttery cookie flavor underneath the spiced apples.
Another popular modification I see people trying is adding some crunch right on top of the spiced apples before the final caramel drizzle. This moves us into that delightful hybrid space sometimes called the Apple Pie Cheesecake Fusion. Before you bake, after you place the spiced apples on top of the batter, mix up a quick crumble using flour, a little brown sugar, some cold cubed butter, and a splash of cinnamon. Pinch it with your fingers until it looks like coarse sand, and sprinkle that evenly over the apples. It bakes up beautifully and adds a textural contrast that is just incredible.
If you want to see how others are adapting these concepts, check out how they layer things up in this apple pie cheesecake creation. It’s all about taking those classic fall flavors and making them work for your specific kitchen project.
If you’re feeling extra motivated and want another famous apple dessert, I’ve got my ultimate classic recipe for apple fritters, too, but for this cheesecake, simple swaps are usually all you need!
Frequently Asked Questions About Caramel Apple Cheesecake
Since I’m all about making sure your projects run smoothly from start to finish, I figured I’d head off a few common questions cooks have when they tackle a bake like this. When you optimize a recipe, you eliminate most issues, but knowing these answers preemptively builds confidence!
Can I skip the water bath for this Caramel Apple Cheesecake Recipe?
You absolutely *can* skip it, but I wouldn’t recommend it if you are aiming for that perfectly smooth, professional finish. The water bath is non-negotiable for me because it regulates the heat so precisely, making it the best way to ensure a creamy apple cheesecake that doesn’t crack. If you must skip it, make sure you follow my secondary tip: bake it at 325 degrees Fahrenheit and let it cool for a full hour in the turned-off oven with the door cracked. That slow decline in temperature is the next best thing for avoiding trouble.
What apples are considered the best for this Spiced Apple Topping?
I strongly suggest using a mix! If you only use something soft, like McIntosh, they will turn to complete mush when you cook them down for the topping. If you only use something super crisp that resists softening, your topping might feel crunchy even after cooking. I use a 50/50 split between a sweet, reliable baker like Honeycrisp and a tart workhorse like Granny Smith. This combination ensures that perfect balance of sweetness and acidity, preventing your spiced apple topping from being monotone. It’s all about hitting that flavor sweet spot.
How far ahead of time can I prepare this dessert?
This is a fantastic Thanksgiving Cheesecake Idea precisely because you can make it entirely ahead of time. The flavor actually deepens and improves after chilling! You can assemble and bake the cheesecake completely, cool it, and refrigerate it—un-topped—for up to two days. I strongly advise against pouring the caramel sauce until just before serving, though. The moisture in the caramel can sometimes soften the edges of the cheesecake if they sit too long. Chilling overnight is the sweet spot for the best texture.
Is this recipe easy to transform into Caramel Apple Cheesecake Bars?
It’s an easy modification, but you’ll need to adjust your baking pan and time significantly. To make bars, you would use a greased and parchment-lined 9×13 inch baking dish instead of the springform pan. Because the depth of the dessert is much thinner in a bar format, you’ll need to reduce that bake time down significantly—probably closer to 45 to 55 minutes total, checking for that slight jiggle early on. If you’re looking for written guidance on bars, you should definitely look up some of the dedicated bar recipes out there; they often have slightly different ingredient ratios to account for the crust-to-filling volume!
Estimated Nutritional Data for This Dessert
Alright, let’s look at the specs on this magnificent caramel apple cheesecake before we wrap up. Since we are dealing with cream cheese, sugar, and butter—this is truly an indulgent fall treat—it’s not exactly a light snack! I always calculate these figures as estimates because the exact size of your apples or the brand of your caramel can shift the total slightly.
This data reflects one single, gloriously sized slice, as calculated in the recipe details. Treat this as a guide for budgeting your indulgence, not a strict rulebook. After all, every slice is worth it in the fall!
- Serving Size: 1 slice
- Calories: 450
- Sugar: 38g
- Fat: 28g (This is where the richness comes from!)
- Carbohydrates: 45g
- Protein: 7g
- Cholesterol: 110mg
If you are using a store-bought salted caramel sauce, your sodium and sugar inputs might change a bit, so keep that in mind if you are tracking closely. For me, this is the perfect fuel for a cozy evening after tackling a big project!
Share Your Dishicious Creations
So, you’ve successfully executed the project! You’ve wrapped the pan, managed the water bath, and let it cool slowly—that takes discipline! Now that you have this incredible, utterly indulgent tower of creamy, spiced goodness, I want to see it. This is where the Dishicious community comes alive.
We built this recipe—this beautiful caramel apple cheesecake—to be reliable, not just something you pin and forget. So, after you’ve sliced into it and added that final drizzle of caramel, snap a picture! I love seeing how everyone’s kitchen project turns out. You can tag us on social media or just drop a comment right here on the post.
And please, please leave a star rating if you successfully made this. Did it cure your craving for the best fall dessert? Let me know if you tried any of the variations we talked about, like adding a streusel topping or using a different type of apple. Every review helps me optimize the next project for all of us.
If you had any hiccups, or maybe you want to share a genius modification you discovered along the way, don’t hesitate to use the contact form to reach out directly. Or, if you just want to check out how another baker approached a similar treat, take a peek at this beautiful recipe for inspiration. Happy baking, everyone!
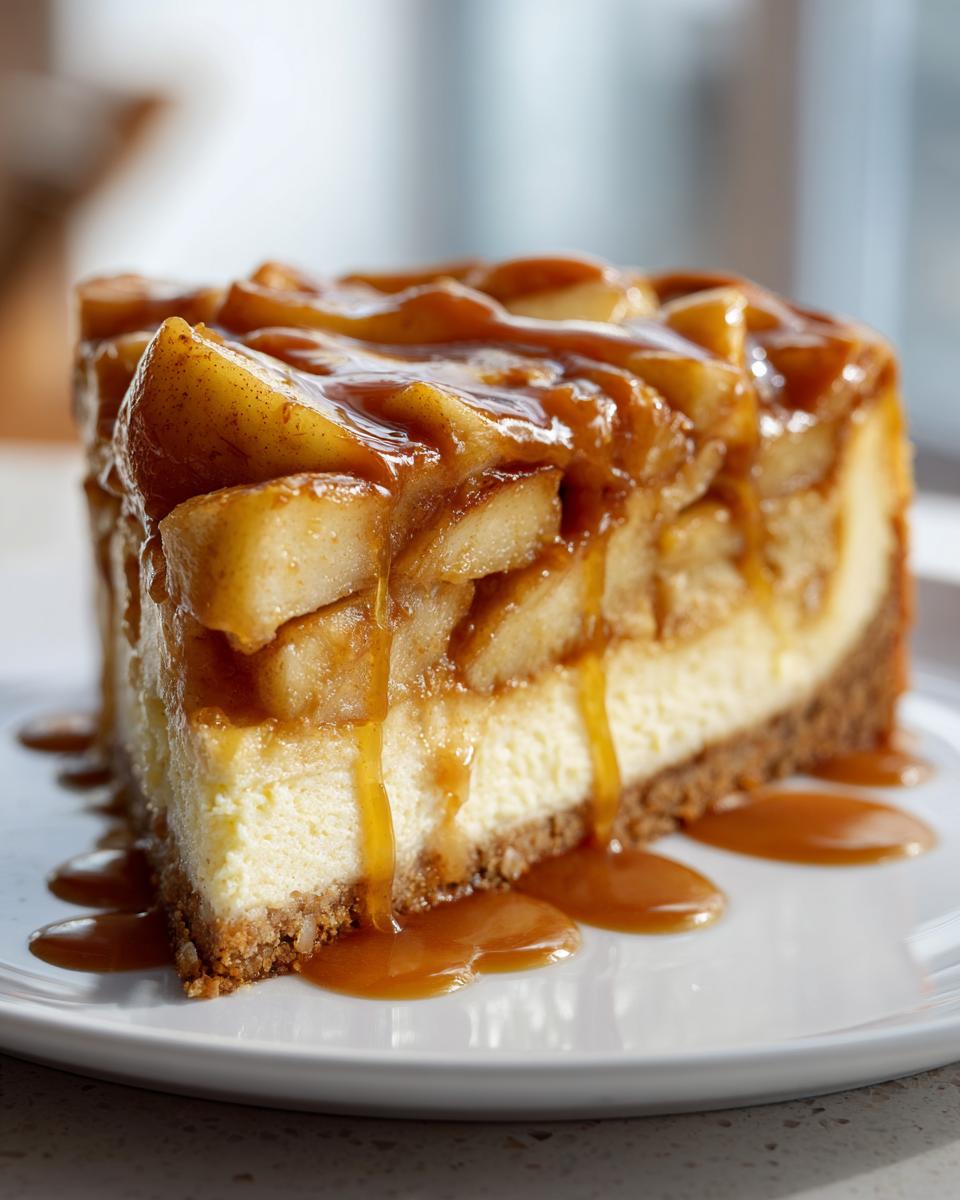
PrintCreamy Caramel Apple Cheesecake Recipe

Make this showstopper fall dessert featuring a buttery graham cracker crust, creamy spiced filling, and a warm cinnamon apple topping drizzled with homemade caramel sauce. This recipe is designed for a smooth, reliable bake.
- Prep Time: 30 min
- Cook Time: 75 min
- Total Time: 105 min
- Yield: 12 servings 1x
- Category: Dessert
- Method: Baking
- Cuisine: American
- Diet: Vegetarian
Ingredients
- 1 1/2 cups graham cracker crumbs
- 1/4 cup granulated sugar (for crust)
- 6 tablespoons unsalted butter, melted
- 3 (8 ounce) packages cream cheese, softened
- 1 1/2 cups granulated sugar (for filling)
- 1 teaspoon vanilla extract
- 1/4 teaspoon salt
- 3 large eggs
- 4 medium apples (like Honeycrisp or Granny Smith), peeled, cored, and diced
- 1/4 cup brown sugar (for apples)
- 1 teaspoon ground cinnamon (for apples)
- 1/4 cup water (for apples)
- 1 cup prepared homemade caramel sauce
Instructions
- Preheat your oven to 325 degrees Fahrenheit. Wrap the outside of a 9-inch springform pan tightly with heavy-duty aluminum foil to prepare for a water bath.
- Prepare the crust: Combine graham cracker crumbs, 1/4 cup sugar, and melted butter. Press the mixture firmly into the bottom of the prepared springform pan. Bake for 10 minutes. Let cool slightly.
- Prepare the cheesecake filling: Beat the softened cream cheese with 1 1/2 cups sugar, vanilla extract, and salt until smooth. Beat in the eggs one at a time, mixing just until combined after each addition. Do not overmix.
- Pour the cream cheese mixture over the cooled crust.
- Prepare the apple topping: In a saucepan, combine the diced apples, brown sugar, cinnamon, and water. Cook over medium heat, stirring occasionally, until the apples are tender but still hold their shape, about 8 to 10 minutes. Let cool slightly.
- Spoon the cooled apple mixture evenly over the cheesecake batter.
- Place the foil-wrapped springform pan into a larger roasting pan. Carefully pour hot water into the roasting pan until the water reaches halfway up the sides of the springform pan. This water bath helps prevent cracking.
- Bake for 60 to 75 minutes, or until the edges are set and the center has a slight jiggle.
- Turn off the oven, crack the door open slightly, and let the cheesecake cool inside the oven for 1 hour. This gradual cooling prevents cracking.
- Remove the cheesecake from the water bath and let it cool completely on a wire rack. Once cool, chill in the refrigerator for at least 6 hours, or preferably overnight.
- Before serving, carefully remove the springform side. Drizzle generously with homemade caramel sauce. Serve cold.
Notes
- For the smoothest texture, ensure your cream cheese is fully softened to room temperature before mixing.
- If you do not want to use a water bath, bake at 325 degrees Fahrenheit for 50-60 minutes and cool slowly in the turned-off oven.
- Use a high-quality, thick caramel sauce for the best visual appeal and flavor contrast.
Nutrition
- Serving Size: 1 slice
- Calories: 450
- Sugar: 38g
- Sodium: 280mg
- Fat: 28g
- Saturated Fat: 17g
- Unsaturated Fat: 11g
- Trans Fat: 0.5g
- Carbohydrates: 45g
- Fiber: 1g
- Protein: 7g
- Cholesterol: 110mg