
If your lunch planning feels more like a complex logistical nightmare than anything enjoyable, I totally get it. That’s exactly where the Dishicious method—my project manager approach to the kitchen—shines brightest. We cut the complexity and maximize the payoff. Today, we’re tackling one of the biggest trends in high-protein, low-carb eating: the incredible cottage cheese wrap. Forget searching endlessly for decent Low Carb Tortillas; you’re about to make the base for these Ultra High Protein Wraps right here, right now. It’s genuinely an easy 2 ingredient wrap base that requires almost zero effort but delivers huge results for your weekly meal prep.
- Why This Viral cottage cheese wrap is Your New Favorite Healthy Lunch Idea
- Essential Ingredients for Your cottage cheese wrap Base
- How to Prepare the cottage cheese wrap Base: Step-by-Step Instructions
- Texture Control: Achieving Crispy Cottage Cheese Flatbread or Soft Wraps
- Filling Ideas for Your High Protein Wraps
- Tips for Success Making the cottage cheese wrap
- Storage and Reheating Instructions for Your cottage cheese wrap Base
- Frequently Asked Questions About the cottage cheese wrap
- Nutritional Snapshot for the cottage cheese wrap Base
Why This Viral cottage cheese wrap is Your New Favorite Healthy Lunch Idea
If you’ve been scrolling online, you’ve seen these everywhere—the Viral TikTok Wraps that seem too good to be true. Trust me, they aren’t! This base recipe is the simplest sandwich alternative I’ve engineered yet for maximum nutrition with minimal effort. It’s why I’m genuinely excited to share it.

- It’s genuinely ready in about 30 minutes total, making it perfect for Healthy Lunch Ideas when time is tight.
- It delivers bulk without the bloat that traditional flour tortillas cause.
Protein Packed Meal Powerhouse
This isn’t just a wrap; it’s a serious boost for your macros. Just the base itself packs about 30 grams of pure protein! If you are hitting fitness goals or just need something around lunchtime that actually keeps you feeling full until dinner, this is it. Seriously high-powered stuff.
Keto Friendly Wraps and Low Calorie Wraps
For everyone running a low-carb lifestyle, listen up: this is your new go-to. Considered one of the best Low Carb Tortillas replacements out there, it keeps net carbs way down. Plus, at just 220 calories for the whole base, these Low Calorie Wraps make bulking up your meal with healthy fillings totally guilt-free.
Essential Ingredients for Your cottage cheese wrap Base
From a project management perspective, we need minimal inputs for maximum output. That’s the beauty of this! You only need one cup of low-fat cottage cheese and two large eggs to form the backbone of this Egg and Cottage Cheese Wrap. That’s your core structure right there.
To elevate the flavor just a bit—since we aren’t adding much else—I always toss in about one teaspoon of Italian seasoning and a touch of garlic powder. Seriously, don’t skip those if you have them! This simple addition takes it from plain base to a flavorful component ready for any filling. If you’re experimenting with other Cottage Cheese Recipes, remember that consistency is key here.
How to Prepare the cottage cheese wrap Base: Step-by-Step Instructions
Alright, let’s optimize this process. We’re treating this like a simple, one-stage build. First on our checklist: Get that oven preheated to 350°F (175°C) and make sure you’ve got parchment paper ready on your baking sheet. Do not skip the parchment; you don’t want this sticking!
Next, gather your ingredients—the blendable stuff—and drop them right into the blender. This is where a little finesse comes in, even for a ‘simple’ recipe. We need everything completely homogenous for those Flexible Homemade Wraps.
Blending for Ultimate Smoothness
You need to blend this until it looks like creamy, pale yogurt—no lumps allowed! If you see even a tiny cottage cheese chunk when you pour the batter, your wrap won’t fold nicely later; it’ll tear. If you don’t have a blender, don’t panic. Use an immersion blender right in the bowl, or whisk it like you mean it until it’s perfectly smooth. It takes dedication, but zero grains means maximum flexibility.
Baking Cues for Flexible Homemade Wraps
Once blended, pour that beautiful batter onto your lined sheet. Here’s my project manager tip: use the back of a spatula or an offset knife to spread it super thin and even, aiming for about 1/8th of an inch everywhere. Thin means flexible! Bake this for 20 to 25 minutes. You’re looking for the edges to look totally set and the center to feel firm when you gently tap it—not wet AT ALL.
Pull it out, then pause for five minutes before you try to peel it. That small cooling window is critical for an easy release.
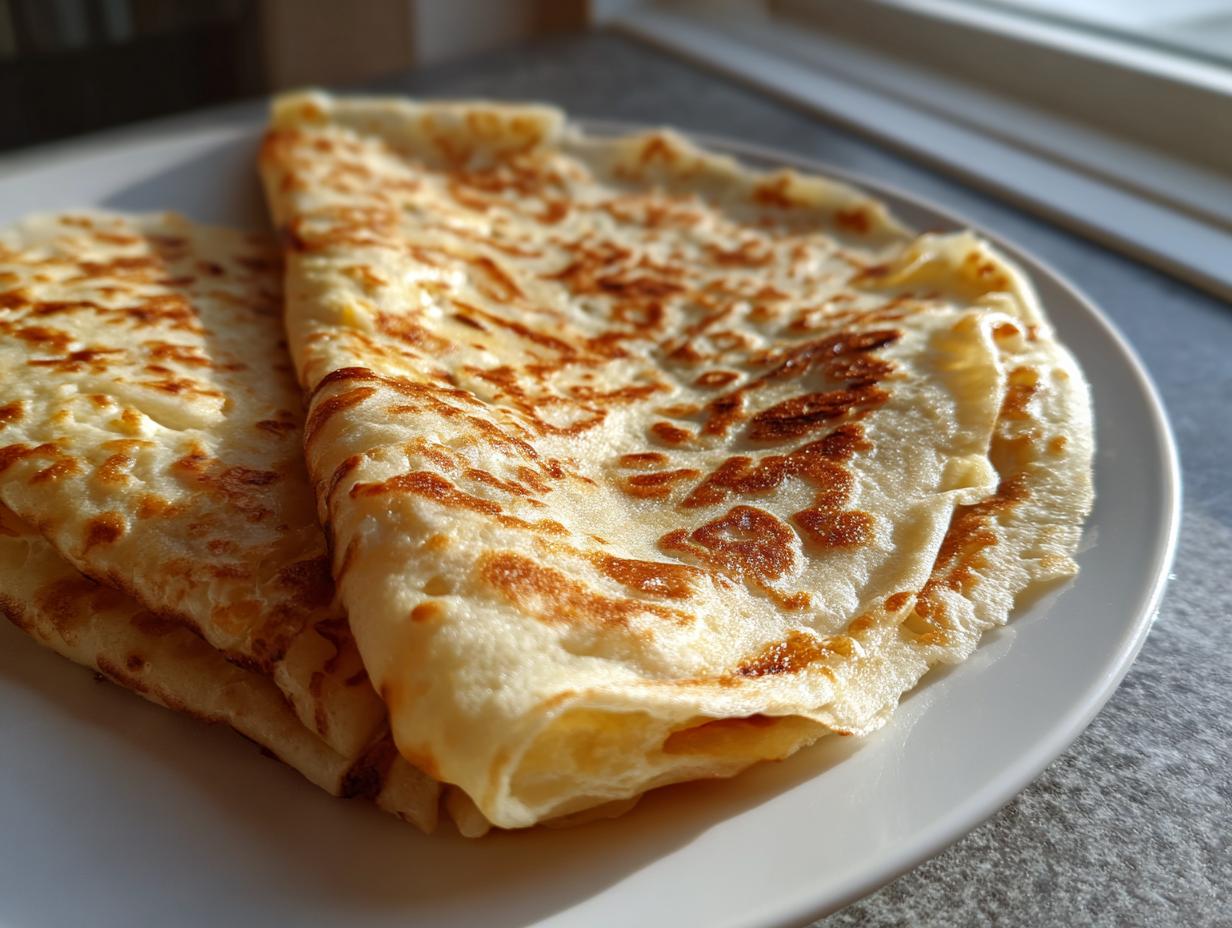
Texture Control: Achieving Crispy Cottage Cheese Flatbread or Soft Wraps
This is where the fun really begins, because this one simple base gives you two completely different culinary experiences depending on how you treat it right out of the oven. Nobody wants to be stuck with a texture they didn’t intend, especially when you’re looking for a quick meal prep solution.
If you were hoping for a pliable, soft shell—perfect for rolling up like a traditional tortilla—you need to move fast. While the wrap is still warm, right after that critical five-minute rest period, fold it immediately, or roll it around a filling. The residual heat keeps it flexible. If you let it cool flat, it sets up firm!
However, maybe you’re leaning into the texture of a Crispy Cottage Cheese Flatbread, which is fantastic for dipping or a really hearty, open-faced meal. To get that result, you must let the wrap cool down *completely* on the wire rack before you touch it. Once it’s room temp, it firms up beautifully. If you want it extra crunchy, go ahead and toast the finished, cooled flatbread in a dry skillet over medium heat for about a minute per side. It crisps up like a cracker!
I always reference these structural tests when I teach people how to bake successfully—it’s all about understanding the material you’re working with. For more inspiration on achieving great crispness in your cooking, check out my thoughts on baking cheese goods. Just remember: warm means soft, cool means crunchy. It’s that simple!
If you want to see the initial viral version that got everyone talking, you can check out the original method over at Clean Food Crush, but I promise you, our blending refinement makes ours so much more reliable!
Filling Ideas for Your High Protein Wraps
So, you’ve nailed the base—that brilliant, slightly savory canvas that promises a Protein Packed Meal. Now, the real fun starts: what goes inside? My main goal when filling these is always macro balance. If the wrap is mostly protein and fat, I try to sneak in some volume with fresh veggies, but sometimes you just need pure fuel. Here are three reliable build options that I keep stocked for quick assembly.
If we’re talking speed and high protein, layering is the key here. Don’t overthink it; just make sure the components work together thermally and texturally. Remember, since the wrap itself is so neutral, your filling dictates whether it reads as lunch, an afternoon snack, or even a light dinner.
The Ultimate High Protein Chicken Filling
When I need serious staying power, chicken is the answer. But who has time to cook chicken breast? Not me! My trick is simple: I keep pre-cooked, seasoned grilled chicken strips stocked in the fridge, or I shred leftover rotisserie chicken. Mix that shredded chicken with just a tablespoon or two of Greek yogurt (oops, I know, but a little goes a long way for creaminess!) and a dash of mustard. Then, skip the heavy mayo altogether. Layer that mixture down, add some crunchy lettuce leaves—that’s your volume builder—and roll it up tight. It’s super clean, and you can check out how I treat chicken in my cottage cheese chicken salad for flavor inspiration here!
Low Carb & Keto Friendly Lunch Ideas
When I’m specifically targeting maximum fat/protein and keeping carbs almost non-existent, I lean into deli favorites and healthy fats. Think high-quality turkey or ham slices, maybe a layer of provolone or Swiss cheese that melts slightly when you close the wrap. A few slices of avocado are mandatory here—they add that buttery texture that makes low-carb meals feel luxurious. If you like a bit of spice, a thin swipe of sugar-free peanut sauce or a high-quality, spicy mustard works wonders. If you want to explore more complex, low-carb layered meals that still hit the flavor mark, take a look at my Keto Chicken Parmesan concept for flavor ideas.
This is where you can really appreciate the versatility of the base. For those wanting the softest experience, use the warm wrap technique right away! For a sturdier bite, use the Crispy Cottage Cheese Flatbread version, which holds up better to wetter fillings. If you’re curious about other folks’ takes on keeping this healthy, I saw a great assembly idea over at Protein Prepper that focuses on keeping the fillings very lean.
Tips for Success Making the cottage cheese wrap
Even though this recipe is engineered for simplicity—that’s my signature move, right?—there are three main project checkpoints where home cooks can stumble. If you nail these steps, you’ll get perfect, rollable bases every single time. Let’s review the non-negotiables for this Gluten Free Wraps Recipe.
First and foremost: the blender work. I cannot stress this enough: if you don’t blend it until it is silk, you will end up with tears. Those little curds in the cottage cheese act like weak points in the structure of the baked sheet. Make sure you blend until you see no separation between the egg and the cheese; it should look like a slightly thick, homogenous liquid batter. Don’t rush the blending step!
Second, handling post-bake. This wrap is incredibly delicate when it comes off the tray. Patience for those five minutes of resting is crucial. If you try to peel it off too soon, it will stretch and tear as the structure hasn’t fully set its shape yet. Think of it like waiting for a newly painted wall to dry—you can look, but don’t touch yet!
And finally, for flavor longevity, I usually add a pinch of onion powder along with the salt if I plan to eat these later in the week. It keeps the flavor profile interesting even when eaten cold. If you’re looking for other foolproof methods for easy baking where texture is crucial, my guide on no-bake recipes covers some similar structural principles! For more fantastic cues on recognizing when the baking is complete—especially the visual signs—check out the detailed tips over at Taste to Rate; they have great visuals on the setting point!
Storage and Reheating Instructions for Your cottage cheese wrap Base
Because these bases are inherently high in moisture, we have to be smart about storage if we want them to maintain their integrity after baking. If you’re meal prepping, the good news is this base keeps well. You can store the cooled, baked wraps layered between sheets of wax paper in an airtight container in the fridge for up to four days. I often bake a double batch on Sunday for my Quick and Easy Dinners roster!
When it comes time to reheat, you want to avoid steam, which equals sogginess. If you made a soft wrap, pop it briefly in a dry, warm skillet for about 30 seconds a side. If you made the crispy flatbread version, a minute in the toaster oven brings back that crunch perfectly. Never use the microwave if you value texture!
Frequently Asked Questions About the cottage cheese wrap
When you engineer a recipe this streamlined, people naturally have questions about deviations and best practices. I’ve compiled the common issues I see popping up so you can troubleshoot instantly and keep your meal prep running smoothly. Remember, mastering the base is the most important part of making any of these Easy 2 Ingredient Wraps work!
Can I use Greek Yogurt instead of cottage cheese in this cottage cheese wrap recipe?
This is a tricky one! While Greek Yogurt is also high in protein, it has a completely different fat and moisture structure than blended cottage cheese. If you substitute it 1:1, the resulting flatbread tends to be significantly runnier when poured onto the sheet, and it often doesn’t set up with the same satisfying density. You might end up with something closer to a thin crepe that’s harder to handle. Stick to the cottage cheese for the best structural results on this specific recipe, especially if you’re aiming for those High Protein Wraps that hold up well!
How do I prevent my cottage cheese wrap from tearing when filling it?
Tearing almost always comes down to two things, as I learned when testing these prototypes. First, you didn’t blend enough, and you have hard little curds acting as stress points. Go back and blend until it’s impossibly smooth! Second, you took it out of the oven too early or you’re trying to roll a wrap that has already cooled completely flat. If you want flexibility, you MUST fold it while it’s still warm; the warmth keeps those protein bonds pliable. If you let it cool flat, it locks into that crisp, non-folding state.
Is this recipe suitable as a Breakfast Tortilla Alternative?
Absolutely, yes! This is one of my favorite uses, stepping in perfectly as a Breakfast Tortilla Alternative. It’s quick enough for a weekday morning rush, and it handles breakfast fillings beautifully. I highly recommend using the soft-wrap method for breakfast. Fill it immediately after baking with some scrambled egg whites, a handful of fresh spinach, maybe a sprinkle of low-fat cheddar, and roll it up. It makes a savory, protein-stacked start to the day that keeps you full until lunch without reaching for heavy carbs.
Nutritional Snapshot for the cottage cheese wrap Base
As a kitchen engineer, I believe in full transparency—you need to know what you are fueling your body with, especially when you are trying to optimize for macros. Since my focus is always on providing that best-in-class High Protein Wraps experience, here is the breakdown of what you get from just the base recipe (one whole wrap). This is truly an impressive stat line!
It’s important to remember these numbers are for the base only—one cup of low-fat cottage cheese and two eggs—before you add fillings. The final caloric count of your actual meal will depend heavily on your toppings, so keep that in mind when constructing your perfect Healthy Diet Food.
- Serving Size: 1 wrap base
- Calories: 220
- Protein: 30 grams (See? I told you it was stacked!)
- Carbohydrates: 8 grams
- Fat: 8 grams
- Fiber: 1 gram
We kept the sugar low at just 5 grams because we aren’t making dessert here; we’re making efficiency fuel. If you are looking for another convenient way to get a protein punch into a baked good, you should check out the formula I used for my easy blueberry protein muffins. But for light, savory meals, this wrap base is unbeatable for speed and structure!
PrintViral High Protein Cottage Cheese Wrap Recipe

Make the viral cottage cheese wrap base using just two ingredients. This recipe delivers a high protein, low carb tortilla alternative perfect for quick lunches or keto friendly meals.
- Prep Time: 5 min
- Cook Time: 25 min
- Total Time: 30 min
- Yield: 1 large wrap 1x
- Category: Lunch
- Method: Baking
- Cuisine: American
- Diet: Low Fat
Ingredients
- 1 cup low fat cottage cheese
- 2 large eggs
- 1 teaspoon dried Italian seasoning (optional)
- 1/4 teaspoon garlic powder (optional)
- Pinch of salt
Instructions
- Preheat your oven to 350°F (175°C). Line a baking sheet with parchment paper.
- Place the cottage cheese, eggs, Italian seasoning, garlic powder, and salt into a blender. Blend until the mixture is completely smooth and creamy. This step is key for a flexible wrap.
- Pour the batter onto the prepared baking sheet. Use an offset spatula to spread the mixture into a thin, even circle or rectangle, aiming for about 1/8 inch thickness.
- Bake for 20 to 25 minutes, or until the edges are set and the center is firm to the touch. The wrap should look dry, not wet.
- Carefully remove the sheet from the oven. Let the wrap cool on the pan for 5 minutes.
- Gently peel the wrap off the parchment paper. If you want a softer wrap, fold it immediately while still warm. For a crispier flatbread texture, let it cool completely before filling.
- Fill with your choice of ingredients and roll up.
Notes
- For a crispier flatbread, bake for an additional 5 minutes or briefly toast the finished wrap in a dry skillet.
- If you do not have a blender, use an immersion blender or vigorously whisk the ingredients until no lumps remain.
- This recipe is naturally gluten free.
- Use this base for low calorie wraps or keto friendly wraps.
Nutrition
- Serving Size: 1 wrap base
- Calories: 220
- Sugar: 5
- Sodium: 350
- Fat: 8
- Saturated Fat: 4
- Unsaturated Fat: 4
- Trans Fat: 0
- Carbohydrates: 8
- Fiber: 1
- Protein: 30
- Cholesterol: 250