
You know those days when only the perfect crunch of a shortbread cookie, followed by gooey caramel, and then that smooth chocolate snap can fix things? I get it. That’s why, as someone who approaches cooking like a project manager—always looking to streamline—I obsessed over optimizing the classic candy bar formula. The result? These **Homemade Twix** Bars. Trust me when I say these are easier to nail than you think, and frankly, they blow the store-bought version out of the water on flavor. Forget hunting for obscure ingredients; we are engineering delicious simplicity here.
- Why This Homemade Twix Bar Recipe Works (The Dishicious Method)
- Essential Ingredients for Perfect Twix Cookie Recipe
- Step-by-Step Instructions: Making Your Twix Bars From Scratch
- Tips for the Best Homemade twix Experience
- Storage and Make-Ahead for Your twix Candy Bar Dessert
- Variations on the Classic twix Flavor Desserts
- Frequently Asked Questions About Making twix
- Estimated Nutrition for Your twix Dessert
- Share Your Homemade twix Creations
- Estimated Nutrition for Your twix Dessert
- Share Your Homemade twix Creations
Why This Homemade Twix Bar Recipe Works (The Dishicious Method)
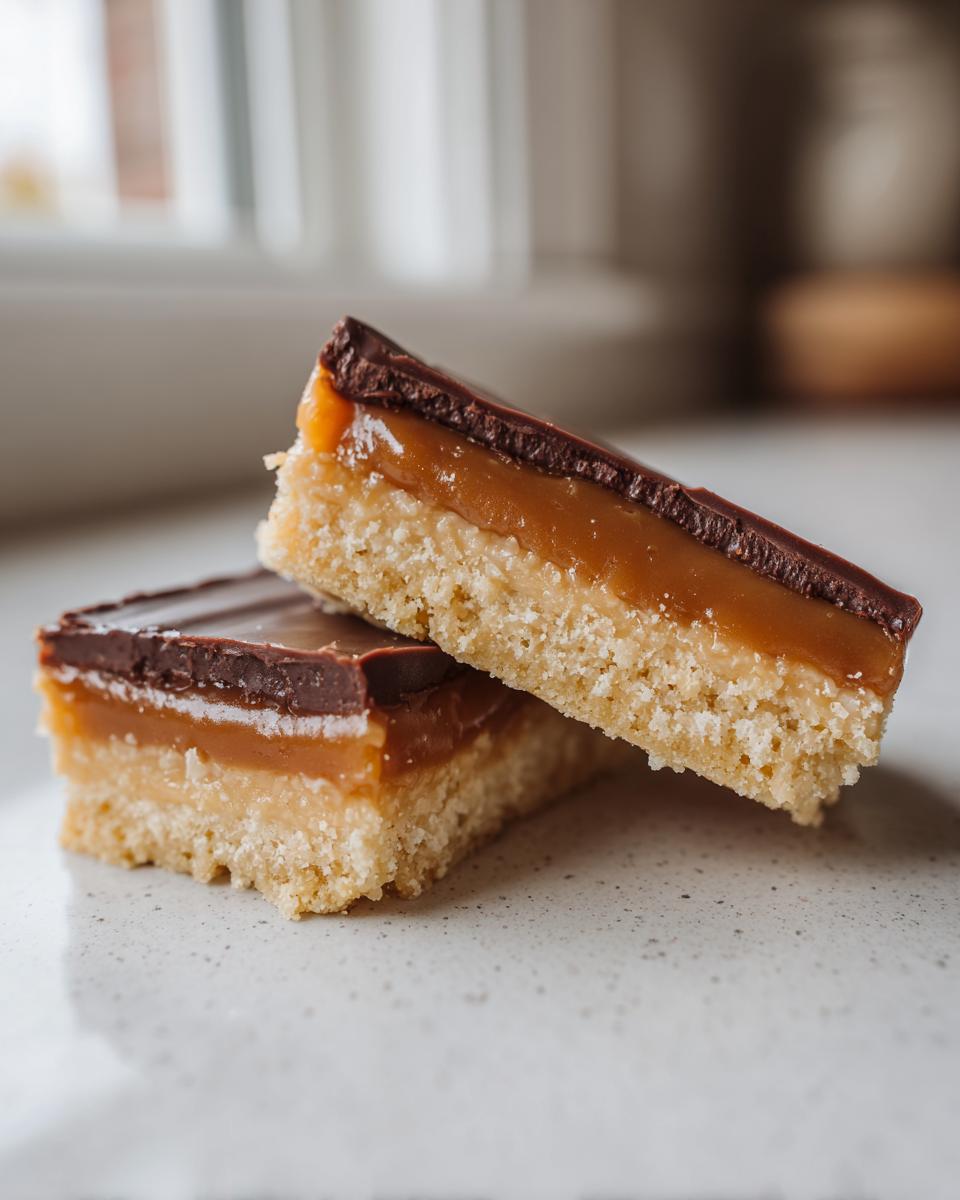
The reason this **copycat Twix recipe** tastes so authentic boils down entirely to structure and timing. We aren’t just throwing ingredients together; we are building something sturdy. The foundation has to be that dense, perfectly crisp, **buttery shortbread caramel** base. That shortbread layer is baked first to give us a solid platform. If you skip that initial bake, the caramel soaks in, and you get a soggy mess—we are aiming for candy bar integrity here!
Then comes the caramel. We cook it slightly on the stovetop before baking it briefly *again* on top of the shortbread. That double-bake sets the caramel just enough so it doesn’t run everywhere when we add the chocolate. This methodology is what separates a true **homemade Twix bar** from just a standard layered cookie. If you want to see how others have tried optimizing things, check out this guide on other versions of homemade Twix bars. For me, this systematic process ensures every layer provides that satisfying snap and chew.
Quick Overview: Prep Time and Yield for Your Twix Style Cookies
I know you’re busy, so here is the project scope upfront. You’ll find this approach truly efficient:
- Prep Time: 20 minutes
- Cook Time: 35 minutes
- Total Time: 55 minutes (plus chilling time, which is hands-off!)
- Yield: 16 perfect bars
If I’m making something special like this, I occasionally use the simplified techniques I worked out for easy maple fudge to keep the overall kitchen workflow smooth.
Essential Ingredients for Perfect Twix Cookie Recipe
When you are engineering something this classic, you need reliable components. I’ve broken down the list to match our three distinct layers. The quality of your butter here is non-negotiable—that’s what makes or breaks the richness of that **buttery shortbread caramel** layer. Don’t skimp! We are using sweetened condensed milk in the caramel because, frankly, who has time to boil down cream and sugar for thirty minutes? This is efficiency in action.
For the Buttery Shortbread Base
- 1 cup (that’s 2 full sticks) unsalted butter, softened completely
- 1/2 cup granulated sugar
- 2 cups all-purpose flour
- 1/4 teaspoon salt
For the Gooey Caramel Layer
This is where the magic thickens up. Remember to stir constantly on the stove!
- 1 (14 ounce) can sweetened condensed milk
- 1/2 cup packed light brown sugar
- 1/4 cup (1/2 stick) unsalted butter
- 1 teaspoon pure vanilla extract
For the Chocolate Topping on Your Twix Bars
We add one crucial ingredient here to make sure the chocolate melts perfectly smooth and sets up nicely over the caramel. That slight bit of oil prevents the chocolate from cracking too much when you cut into those **layered caramel cookies**.
- 1 1/2 cups semi-sweet chocolate chips
- 1 tablespoon coconut oil (or vegetable shortening if you prefer)
Step-by-Step Instructions: Making Your Twix Bars From Scratch
Okay, now we move into the execution phase. As a project manager, I need clear processes, and these **caramel shortbread chocolate bars** are built in three clear stages. Follow these steps precisely, and you’ll have that perfect layered texture we talked about. Don’t rush the cooling stages—that chilling time is crucial for a successful result! If you are looking for other deeply satisfying layered desserts, I’ve worked out some great systems for things like my hot fudge brownie bread too.
Phase 1: Preparing and Baking the Shortbread Base
First things first: get that oven dialed in to 350°F (175°C). Grab your 8×8 inch pan and line it with parchment paper, making sure you leave some overhang on opposite sides—that’s your built-in handle for lifting the whole thing out later. Cream your butter and sugar until they look light, then work in the flour and salt until it just forms a stiff dough. Press that dough evenly into the bottom of your prepared pan. It needs 15 to 18 minutes to get those edges just starting to turn golden. Pull it out and let it hang out while you focus on the caramel.
Phase 2: Creating the Cooked Caramel Filling for Your Twix
Time to cook the caramel, and this requires your full attention for about 5 to 7 minutes. In a saucepan, combine the condensed milk, brown sugar, and that extra 1/4 cup of butter. You must stir constantly over medium heat. We are looking for it to thicken and darken a bit—don’t let it scorch! Once it hits that perfect stage, kill the heat and stir in the vanilla. Pour this hot caramel right over that slightly warm shortbread layer. Pop the whole thing back in the oven for 8 to 10 more minutes until you see the caramel bubbling happily. Now, this needs a serious cool-down. Let it sit completely at room temperature, then chill it in the fridge for at least one hour until the caramel is firm. Need more bar inspiration? Check out these great notes on Twix Cookie Bars.
Phase 3: Chilling and Applying the Final Chocolate Coating
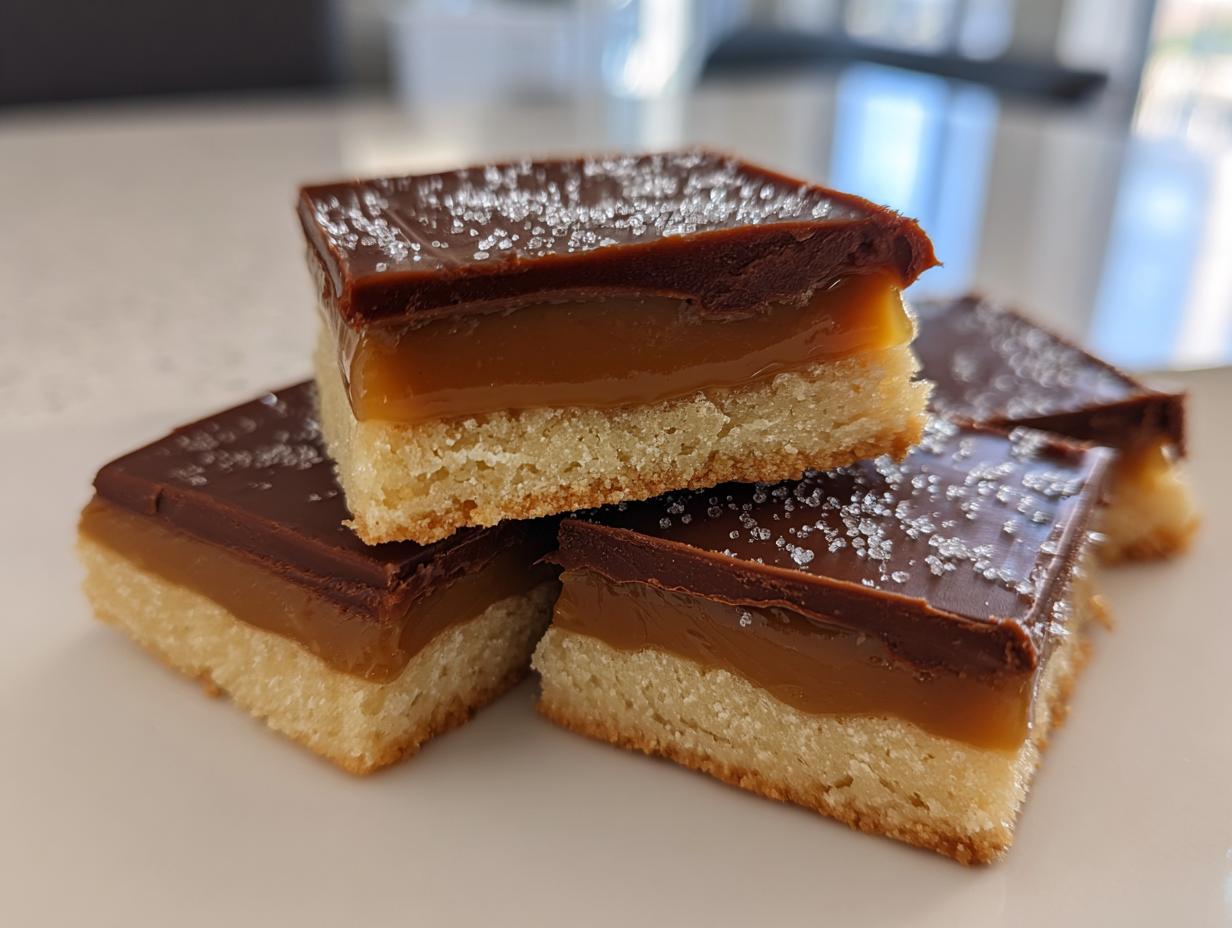
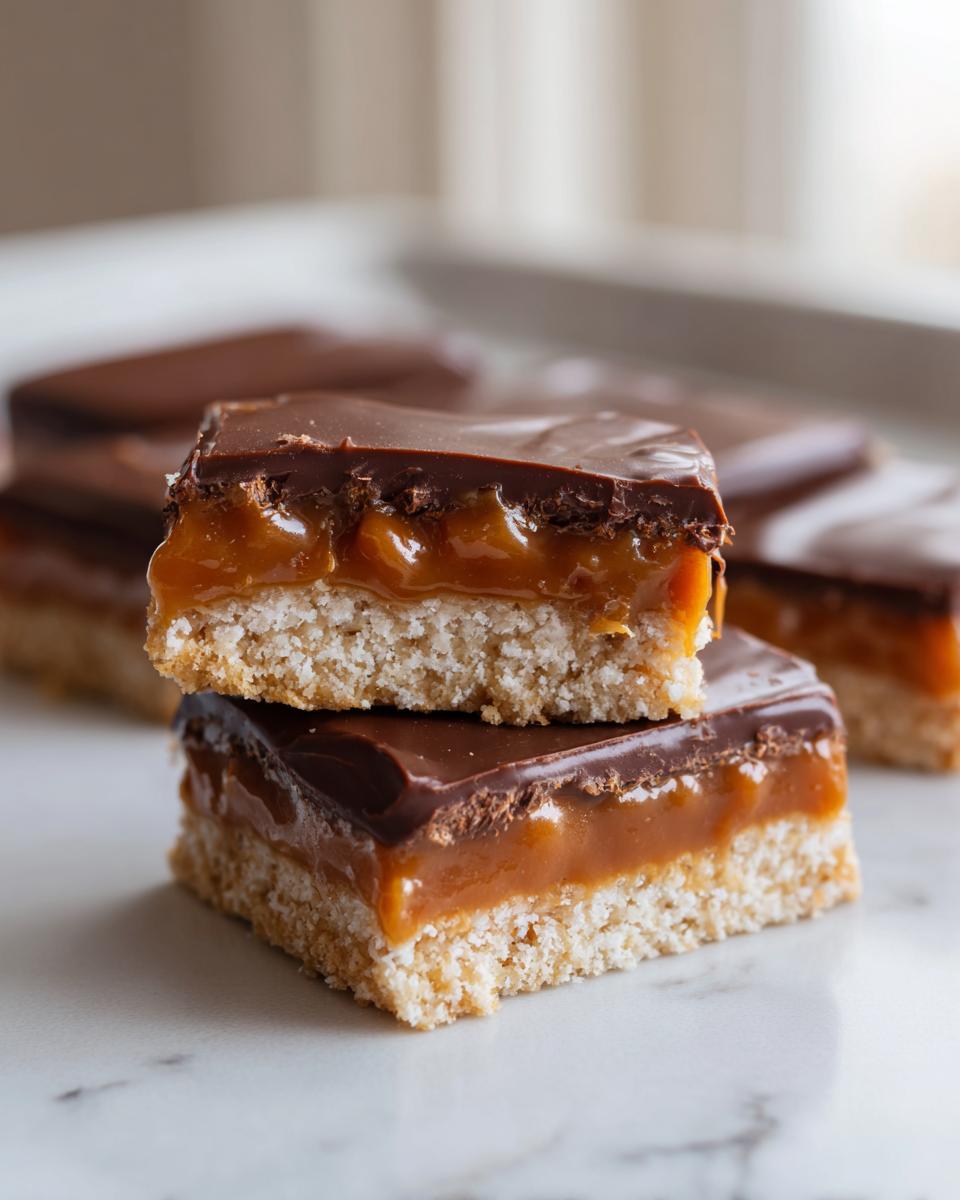
Once the caramel layer is solid (seriously, poke it—it shouldn’t wiggle too much), you can prepare the final layer. Melt your chocolate chips and coconut oil together. I do this in the microwave in 30-second bursts, stirring well each time, until it’s glossy and smooth. Pour that melted chocolate over the chilled caramel layer and spread it gently to cover everything. Back into the fridge it goes for another 30 minutes to let that chocolate top set hard. Once it’s completely firm, use those parchment paper handles you left to lift the whole block out. If you want clean slice lines—which I always do—run a large, sharp knife under hot water, wipe it dry, and then make your cut. Wipe the knife again before every next slice. It makes a huge difference when you cut up these amazing **caramel shortbread chocolate bars**!
Tips for the Best Homemade twix Experience
Getting these **layered caramel cookies** perfect is all about managing the details, which is where my project management brain always kicks in—small tweaks make a massive quality difference in the end product. We’re aiming for the very **best homemade twix**, right? Don’t panic if you are worried about the mess; mastering the cut and getting that caramel just right are the two final checks we need to polish.
Achieving Clean Cuts on Your twix Style Cookies
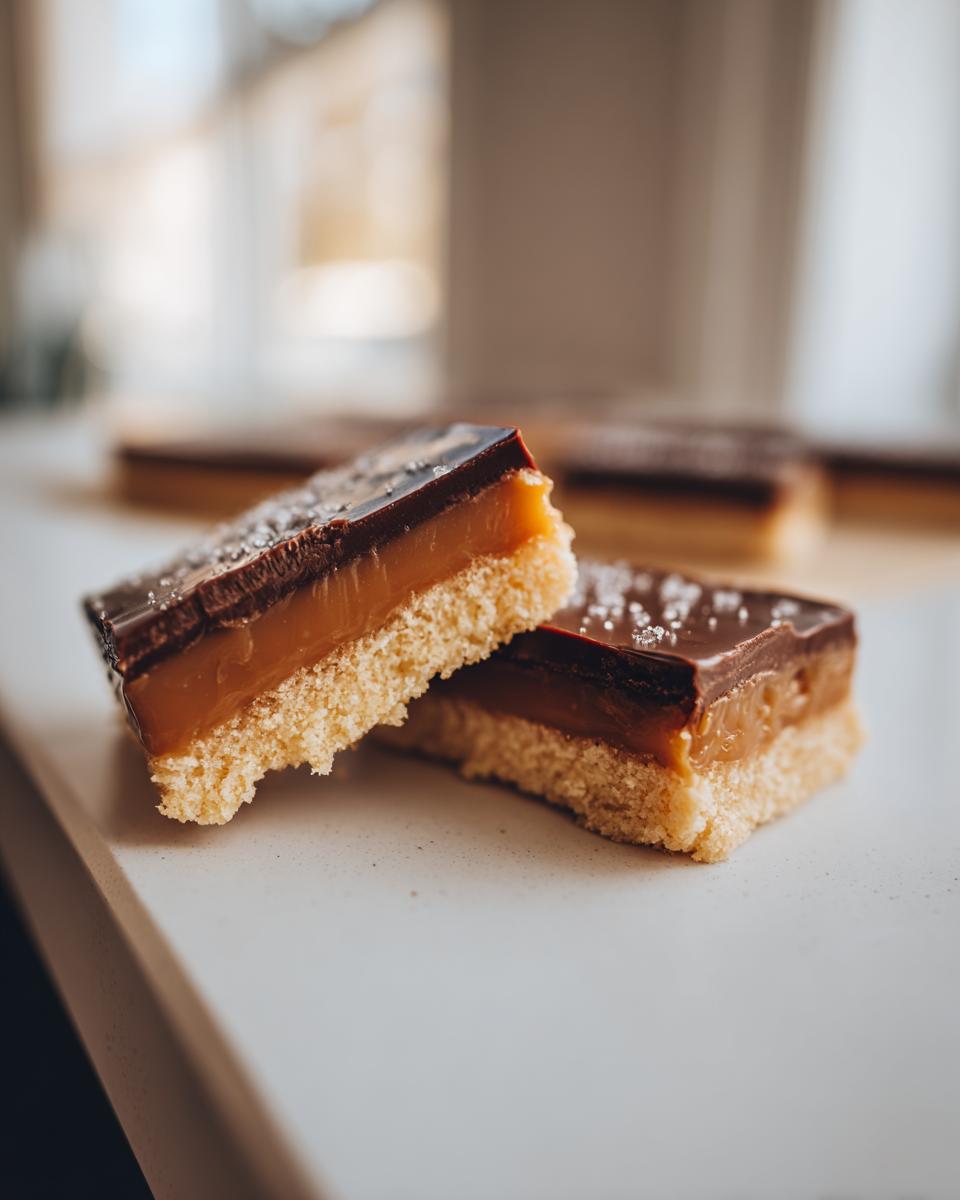
This is one of those simple kitchen hacks that immediately elevates anything you make in a bar form. When the chocolate is totally set, using a standard knife can drag the cold layers and make a mess—you end up destroying that beautiful hard chocolate shell. My trick, which works every time, is to briefly dip a large, sharp chef’s knife into hot water and then wipe the blade bone-dry before making *one* cut. Wipe it clean, re-hot the blade, and slice again. It’s so satisfying! We want clean presentation for these amazing treats.
Adjusting Caramel Texture in Your twix Dessert
Everyone has a different preference for chewiness, right? If you like that super soft, almost pourable caramel that just oozes out, you should pull the saucepan off the heat about a minute sooner than my official time. Remember, sugar continues to cook off-heat for a tiny bit, so if you watch it closely while it bubbles, stopping the cook just as it starts hinting at a deeper color will keep it much softer. On the flip side, if you want it stiffer, cook it for that full 7 minutes. Having options like this makes this recipe incredibly flexible for your sweet tooth!
If you’re looking for other streamlined sweets, you should take a look at how I manage the workflow for easy homemade copycat Olive Garden breadsticks—similar efficiency, different flavor profile! And for quick versions of layered candy, I always point people toward this great guide on making homemade Twix bites.
Storage and Make-Ahead for Your twix Candy Bar Dessert
Because these **twix** bars are layered and contain cooked caramel, they really are best stored cold. This isn’t like a brownie you can leave on the counter for days; that caramel layer gets soft, and the chocolate topping might try to slide off if your kitchen is warm. So, my efficiency tip here is simple: plan for leftovers to go into the fridge.
Once they are completely set and cut, you want to place your bars into an airtight container. I usually layer them between sheets of parchment paper. This prevents the layers from sticking back together, which can happen quickly when everything is cold and firm. Stored correctly in the refrigerator, these bars stay absolutely fantastic for about a week. Honestly, they usually don’t last that long in my house!
This recipe also makes a fantastic make-ahead project, which I love. You can complete the entire process through step 10 (the final chocolate set) a day or two before you plan to serve them. In fact, letting them chill overnight really helps the caramel and shortbread layers bond perfectly. Then, the day you need them, just lift them out, slice them up using the hot-knife trick we discussed, and serve them chilled. It’s a structured win for hosting! If you’re looking for other make-ahead desserts that shine when served cool, you might want to check out my method for bread pudding with old-fashioned vanilla sauce—it’s another one that tastes great the next day.
Variations on the Classic twix Flavor Desserts
One of the things I love about taking a classic concept, like the structure of a **twix** bar, is that you can make small tweaks and get a totally different, yet equally satisfying, result. We built this recipe on a really stable foundation—the shortbread, the cooked caramel, the chocolate topping—so it holds up beautifully to experimentation. We are sticking to simple swaps here to keep things fast, aligning perfectly with our philosophy of efficient cooking.
If you’re looking to mix things up without adding hours to the project time, here are a few little changes that make a big difference in your **twix flavor desserts**.
First, let’s talk chocolate. If you usually stick to semi-sweet chips, try swapping them out for high-quality dark chocolate chips. The slight bitterness of the dark chocolate pairs incredibly well with the super sweet caramel. It cuts through the richness in a way that feels really sophisticated. Alternatively, if you want something sweeter, milk chocolate chips are always a comfort win. You can also drizzle a thin layer of that melted chocolate over the top instead of covering the whole thing—that makes them slice easier and is great for sharing!
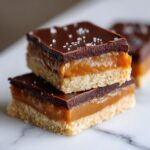
Another simple upgrade is texture. After you pour the melted chocolate over the chilled caramel layer in Step 11, but *before* you put it back in the fridge, sprinkle just a tiny pinch of flaky sea salt over the top. That slight burst of salt just elevates the whole experience. It’s a tiny addition that makes these **layered caramel cookies** taste like they came from a fancy bakery.

Finally, if you truly want to dive into the world of **easy twix bites**, you don’t even need to cut bars at all! Instead of pressing the dough into a square pan, press the shortbread thin in a large cookie sheet. Once baked and cooled, use a small round cookie cutter (about 1.5 inches) to cut out circles. Layer the caramel and chocolate on top of those circles like little thumbprints. For even quicker versions, I send people over to check out the genius of these homemade Twix bites, which use wafer cookies instead of baking a base. If you prefer the cake route, I even have a whole method for an ultimate moist chocolate fudge cake recipe that you could adapt with caramel swirl if you’re feeling ambitious later!
Frequently Asked Questions About Making twix
When you nail a recipe like this, people always have follow-up questions about adjustments, storage, or variations. Since my goal here is always efficiency and reliability, let’s tackle the most common things I hear about these **homemade Twix** bars. Think of this as the troubleshooting phase of our dessert project!
Can I make these twix bars without baking the shortbread first?
That’s a great question, especially when you are aiming for speed. Unfortunately, the answer is usually no if you want the authentic texture! Remember, we need that shortbread layer to be solid and slightly crisp before we attempt to pour the hot, liquid caramel over it. If the base isn’t set, the caramel just blends right in, and you lose that essential layer definition required for a true **twix** bar experience. If you’re truly looking for a **no bake twix** dessert, you’d need a different base entirely, maybe using crushed cookies mixed with melted butter, but that changes the flavor profile entirely.
How do I turn these into easy twix bites?
I love downsizing treats, especially for parties! There are a couple of easy ways to get **easy twix bites** from this recipe. The simplest method is waiting until after the chocolate is fully set (Step 12). Once it’s firm, grab that hot, wiped knife and just cut the whole slab into small, one-inch squares. That way, you get all three layers perfectly proportioned in every bite. If you want them even *more* bite-sized, you can line a mini muffin tin with paper liners *before* you start. Press a small amount of the shortbread dough into the bottom of each cup, bake as directed, and then layer the caramel and top with chocolate. Chilling them between each step is even more important when working in tiny tins!
What is the best chocolate to use for the topping on my copycat twix recipe?
For the recipe as written, I specified semi-sweet chocolate chips combined with that little bit of coconut oil. This combination melts beautifully and provides a nice, slightly dark contrast to the super-sweet caramel layer—it’s a balanced flavor profile. However, feel free to adjust based on your preference! If you like things sweeter, use milk chocolate chips instead. If you prefer a deeper, richer flavor that cuts through the sweetness even more, use high-quality dark chocolate chips. The key is making sure you melt it thoroughly using the microwave method we discussed so it goes on smoothly over that cold caramel.
If you are looking for other simple approaches to making sweets from scratch, my guide on easy homemade candy has a few other foolproof options!
Estimated Nutrition for Your twix Dessert
As a home cook focused on efficiency, I know that people want to keep track of what they are eating. Please remember that these figures are estimates based on the ingredients listed above and the cutting method we used (16 bars). Commercial candy bars often use different emulsifiers and coatings, so your homemade version might be slightly different in texture, but the nutritional breakdown gives you a good snapshot.
- Serving Size: 1 bar
- Calories: 350
- Sugar: 35g
- Sodium: 120mg
- Fat: 21g
- Saturated Fat: 13g
- Carbohydrates: 38g
- Protein: 4g
Share Your Homemade twix Creations
When you run a kitchen strategy like this, results are what really count! I always get a huge kick out of seeing how my streamlined processes translated into delicious desserts in your kitchens. I really hope these **homemade Twix bars** became a new staple for you. This recipe relies on a simple structure, but the payoff is huge!
If you followed along and everything came together perfectly—that shortbread snappy and the caramel gooey—please take a minute to give this recipe a solid 5 stars right below this section! And if you experimented, maybe you added sea salt or tried the dark chocolate? Drop a comment below and let me know how your version of this **chocolate caramel shortbread** turned out. I love hearing about your own kitchen optimizations!
Estimated Nutrition for Your twix Dessert
When you run a kitchen strategy like this, results are what really count! I always get a huge kick out of seeing how my streamlined processes translated into delicious desserts in your kitchens. I really hope these **homemade Twix bars** became a new staple for you. This recipe relies on a simple structure, but the payoff is huge!
As a home cook focused on efficiency, I know that people want to keep track of what they are eating. Please remember that these figures are estimates based on the ingredients listed above and the cutting method we used (16 bars). Commercial candy bars often use different emulsifiers and coatings, so your homemade version might be slightly different in texture, but the nutritional breakdown gives you a good snapshot.
- Serving Size: 1 bar
- Calories: 350
- Sugar: 35g
- Sodium: 120mg
- Fat: 21g
- Saturated Fat: 13g
- Carbohydrates: 38g
- Protein: 4g
Share Your Homemade twix Creations
When you run a kitchen strategy like this, results are what really count! I always get a huge kick out of seeing how my streamlined processes translated into delicious desserts in your kitchens. I really hope these **homemade Twix bars** became a new staple for you. This recipe relies on a simple structure, but the payoff is huge!
If you followed along and everything came together perfectly—that shortbread snappy and the caramel gooey—please take a minute to give this recipe a solid 5 stars right below this section! And if you experimented, maybe you added sea salt or tried the dark chocolate? Drop a comment below and let me know how your version of this **chocolate caramel shortbread** turned out. I love hearing about your own kitchen optimizations!
Seriously, if you made these, snap a picture and tag me on social media. Seeing your success just validates the whole system we put together here to conquer that candy bar craving efficiently. If you want more tested, reliable recipes that fit right into a busy schedule, check out my collection of best lemon cookies. Happy baking!
PrintHomemade Twix Bars
Make decadent, layered caramel shortbread chocolate bars at home that taste just like the store-bought candy. This recipe focuses on simplicity for a reliable result.
- Prep Time: 20 min
- Cook Time: 35 min
- Total Time: 55 min
- Yield: 16 bars 1x
- Category: Dessert
- Method: Baking
- Cuisine: American
- Diet: Vegetarian
Ingredients
- 1 cup (2 sticks) unsalted butter, softened
- 1/2 cup granulated sugar
- 2 cups all-purpose flour
- 1/4 teaspoon salt
- 1 (14 ounce) can sweetened condensed milk
- 1/2 cup packed light brown sugar
- 1/4 cup (1/2 stick) unsalted butter
- 1 teaspoon vanilla extract
- 1 1/2 cups semi-sweet chocolate chips
- 1 tablespoon coconut oil (or shortening)
Instructions
- Prepare the shortbread base: Preheat your oven to 350°F (175°C). Line an 8×8 inch baking pan with parchment paper, leaving an overhang on two sides for easy removal.
- In a large bowl, cream together the 1 cup softened butter and 1/2 cup granulated sugar until light and fluffy.
- Mix in the flour and salt until just combined to form a stiff dough. Press the dough evenly into the bottom of the prepared pan.
- Bake the shortbread for 15 to 18 minutes, or until the edges are lightly golden. Remove from the oven and let it cool slightly while you prepare the caramel.
- Make the caramel layer: In a medium saucepan, combine the sweetened condensed milk, brown sugar, and 1/4 cup butter.
- Cook over medium heat, stirring constantly, for about 5 to 7 minutes. The mixture will thicken and turn a deeper amber color. Do not let it burn.
- Remove the caramel from the heat and stir in the vanilla extract. Pour the hot caramel evenly over the warm shortbread base.
- Return the pan to the oven and bake for another 8 to 10 minutes, until the caramel is bubbly. Let the bars cool completely at room temperature, then chill in the refrigerator for at least 1 hour until the caramel is firm.
- Prepare the chocolate topping: In a microwave-safe bowl, combine the chocolate chips and coconut oil. Microwave in 30-second intervals, stirring well after each, until the chocolate is smooth and fully melted.
- Pour the melted chocolate over the chilled caramel layer. Spread evenly.
- Return the pan to the refrigerator for another 30 minutes, or until the chocolate is set.
- Lift the bars out of the pan using the parchment paper overhang. Cut into desired bar or bite-sized pieces.
Notes
- For cleaner cuts, use a large, sharp knife and wipe the blade clean between slices.
- If you prefer a softer caramel, reduce the cooking time for the caramel layer by about one minute.
- Store leftover bars in an airtight container in the refrigerator.
Nutrition
- Serving Size: 1 bar
- Calories: 350
- Sugar: 35
- Sodium: 120
- Fat: 21
- Saturated Fat: 13
- Unsaturated Fat: 8
- Trans Fat: 0
- Carbohydrates: 38
- Fiber: 1
- Protein: 4
- Cholesterol: 45