
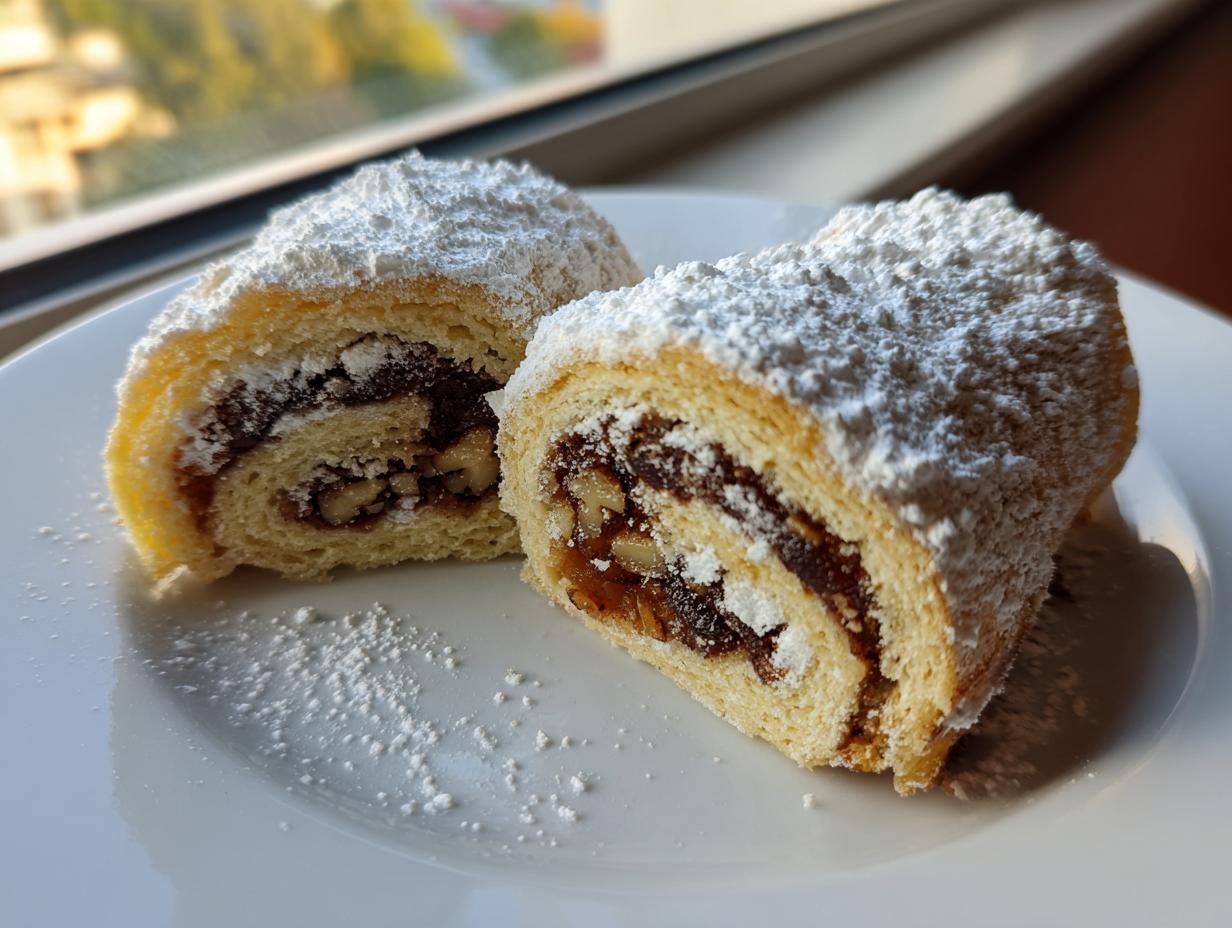
When the holidays roll around, or really anytime I want a cookie that feels special, I always come back to these italian nut roll cookies. Forget those complicated, fussy pastries that take all day! When I first tackled traditional Italian pastries, I realized they didn’t need to be a huge production. As a home cook who treats recipes like projects needing streamlining, I engineered this version to be foolproof. You get that intense, authentic flavor—that tender, buttery dough wrapped around a sweet spice nut filling—but optimized for a busy schedule. Trust me, this is the tried-and-true method that gets big flavor without all the wasted motion.
- Why This is the Best Italian Nut Roll Cookies Recipe You Will Make
- Gathering Ingredients for Authentic Italian Nut Roll Cookies
- Step-by-Step Instructions for Perfect Italian Nut Roll Cookies
- Tips for Success When Making Italian Nut Roll Cookies
- Storage and Make-Ahead Tips for Italian Nut Roll Cookies
- Serving Suggestions for This Traditional Italian Baked Goods Recipe
- Frequently Asked Questions About Italian Nut Roll Cookies
- Estimated Nutritional Data for Italian Nut Roll Cookies
- Share Your Homemade Italian Nut Roll Cookies Creations
Why This is the Best Italian Nut Roll Cookies Recipe You Will Make
Look, there are a ton of complex recipes out there for holiday cookie recipes, but this one—this recipe for italian nut roll cookies—is the one that actually works when you need it to. I designed this to be reliable. You spend less time fussing and more time enjoying that rich, nutty flavor profile. It’s proof that the best things don’t have to be the hardest.
Here’s what makes this recipe the one you’ll bookmark for next year:
- The structure holds up perfectly. No sad, squashed rolls here!
- You get incredible flavor density from the **sweet nut filling recipe** without being too heavy.
- It streamlines the mixing process so you can have these buttery pastry cookies ready for the freezer faster.
If you’re looking for an impressive treat that aligns with efficient baking, you’ve found your winner. I even shared how grinding walnuts affects the outcome, like when I make my cranberry walnut bread; precision matters!
Tender Pastry Dough Secrets
The absolute secret weapon that transforms these from good to great is the sour cream. Seriously, don’t skip it! That cup of sour cream is what keeps the dough incredibly soft and pliable, giving you those true buttery pastry cookies that almost melt in your mouth. It works with the softened butter to give structure without toughness.
But here’s the project manager note for the dough: Mix only until the flour streaks finally disappear. The minute you start feeling like you need to work it to “make it smooth,” you’ve gone too far. Overmixing this dough is guaranteed to make your rolls tough, and we absolutely do not want tough cookies.
The Sweet Nut Filling Recipe for Italian Nut Roll Cookies
This is where the authenticity really shines through. While some recipes use jam, the classic flavor comes from walnuts spiced just right. We aren’t trying to mask the nut flavor; we are enhancing it!
This simple **Sweet Nut Filling Recipe** balances the slightly bitter crunch of the walnuts with just enough granulated sugar and that essential warm cinnamon kick. It spreads like a dream when it’s combined with the melted butter, ensuring you get even coverage in every single roll. It’s the perfect ratio of sweet to savory filling to tender dough. Big flavor, minimal fuss.
Gathering Ingredients for Authentic Italian Nut Roll Cookies
Okay, let’s talk inventory. Baking is exactly like project management—if your supplies aren’t prepped and measured correctly, the whole build slows down! For these Italian Nut Roll Cookies, we have three distinct components, and I need you to pay attention to the details, especially for the dough, because that’s where we build the softness. Gather everything before you ever turn the mixer on. Trust me on this organizational step; it saves headaches later when you’re working quickly with the chilled dough.
For the Buttery Pastry Cookies Dough
The dough ingredients are straightforward, but technique matters here. Make sure that butter is actually soft, not melted—we need creaminess, not grease!
- 2 ½ cups all-purpose flour
- 1 cup (2 sticks) unsalted butter, ensure it is fully softened to room temperature
- 1 cup sour cream
- 1 egg yolk
- ½ teaspoon salt
- 1 tablespoon sugar
For the Walnut Filled Cookies Center
This filling is where that rich, nutty flavor really pops. The key word here is *finely ground*. If your walnuts are chunky, your rolls won’t spread or slice nicely, which ruins the entire point of a neat rolled cookies dessert.
- 1 ½ cups finely ground walnuts
- ½ cup granulated sugar
- 1 teaspoon ground cinnamon
- 1 tablespoon melted butter
For Finishing the Italian Nut Roll Cookies
These two ingredients create the classic look. The egg wash gives us that subtle golden sheen, and the powdered sugar dusting after cooling is non-negotiable for that traditional aesthetic. You need volume on the sugar because you’re going to be generous with it!
- 1 beaten egg (for the egg wash)
- Powdered sugar (for generous dusting after cooling)
Step-by-Step Instructions for Perfect Italian Nut Roll Cookies
Alright, we’ve got our ingredients organized, and now it’s time for the assembly line! This is the part where the project management mindset really pays off. We need a consistent routine so we don’t end up with dough that’s too warm or a filling that’s spread unevenly. Follow these steps precisely for the best results in your italian nut roll cookies, and remember, baking them right leads to that fantastic, tender bite later on.
Making and Chilling the Dough for Rolled Cookies Dessert
First things first: the dough. Get your flour, softened butter, sour cream, egg yolk, salt, and the smallest bit of sugar into your bowl. Mix this up. I mean it—mix it *just* until it comes together into a soft, manageable ball. If you keep mixing because it doesn’t look completely uniform, you are developing gluten, and that’s how you sabotage those gorgeous buttery pastry cookies we want!
Once it’s barely combined, wrap the whole thing up tight in plastic wrap—no excuses here! This dough needs a minimum rest period. It absolutely must chill for two hours in the refrigerator, but honestly? If you can swing overnight, do it. That long chill firms up the butter so the dough rolls out thin and crisp, and it makes handling it so much easier later. Don’t try to rush this resting phase; it’s critical for a successful rolled cookies dessert.
Assembling the Sweet Nut Filling Recipe
While the dough is getting nice and cold (it needs that time!), switch gears to the filling. This is quick work. Just toss your finely ground walnuts, the granulated sugar, the cinnamon, and that tablespoon of melted butter into another bowl. You don’t need a mixer for this; a sturdy fork works just fine.
Mix it around until everything looks incorporated. You want the nuts coated evenly, almost like damp sand. It shouldn’t be sloppy, but it should easily clump together when you squeeze a bit in your hand. If you’re adding that optional jam or zest, stir it in now until you have a cohesive, fragrant sweet nut filling spread ready to go.
Rolling, Filling, and Slicing Your Italian Nut Roll Cookies
Pull that chilled dough out—it should feel firm. Preheat your oven to 350°F (175°C) right now, and line a couple of baking sheets with parchment paper. This parchment paper is non-negotiable for easy cleanup later! You can compare methods on other bakers’ sites, like this guide on Italian Nut Roll Cookies Recipe, to see how others manage their pans.
Divide the dough into four equal sections. Work with one piece at a time, keeping the others tucked back into the fridge. On a lightly floured surface, you need to roll this section out thin—aim for about 1/8 inch thick and make a rectangle shape, please. Spread about a quarter of your **Sweet Nut Filling Recipe** evenly over the dough. Make sure you leave a tiny border—maybe half an inch—on one long edge; that’s the seam glue that keeps everything tucked in.
Now for the rolling! Start rolling tightly from the long edge *opposite* the empty border. Roll it securely, like you’re rolling a very important, delicate scroll. Once you get to the end, pinch that seam closed really well. If it pops open in the oven, your cookie will flatten. After sealing, brush the entire outside surface with your egg wash. Use a sharp knife to slice the log into neat 1-inch thick pieces. Place them cut-side up on your parchment-lined sheets. Repeat, repeat, repeat!

Baking and Finishing the Tender Filled Cookies
Time for the heat! Those logs go into your preheated oven and bake for 15 to 18 minutes. You are looking for the edges to just start turning golden brown—we don’t want them dark. If you overbake these tender filled cookies, they lose that melt-in-your-mouth quality we worked so hard to achieve.
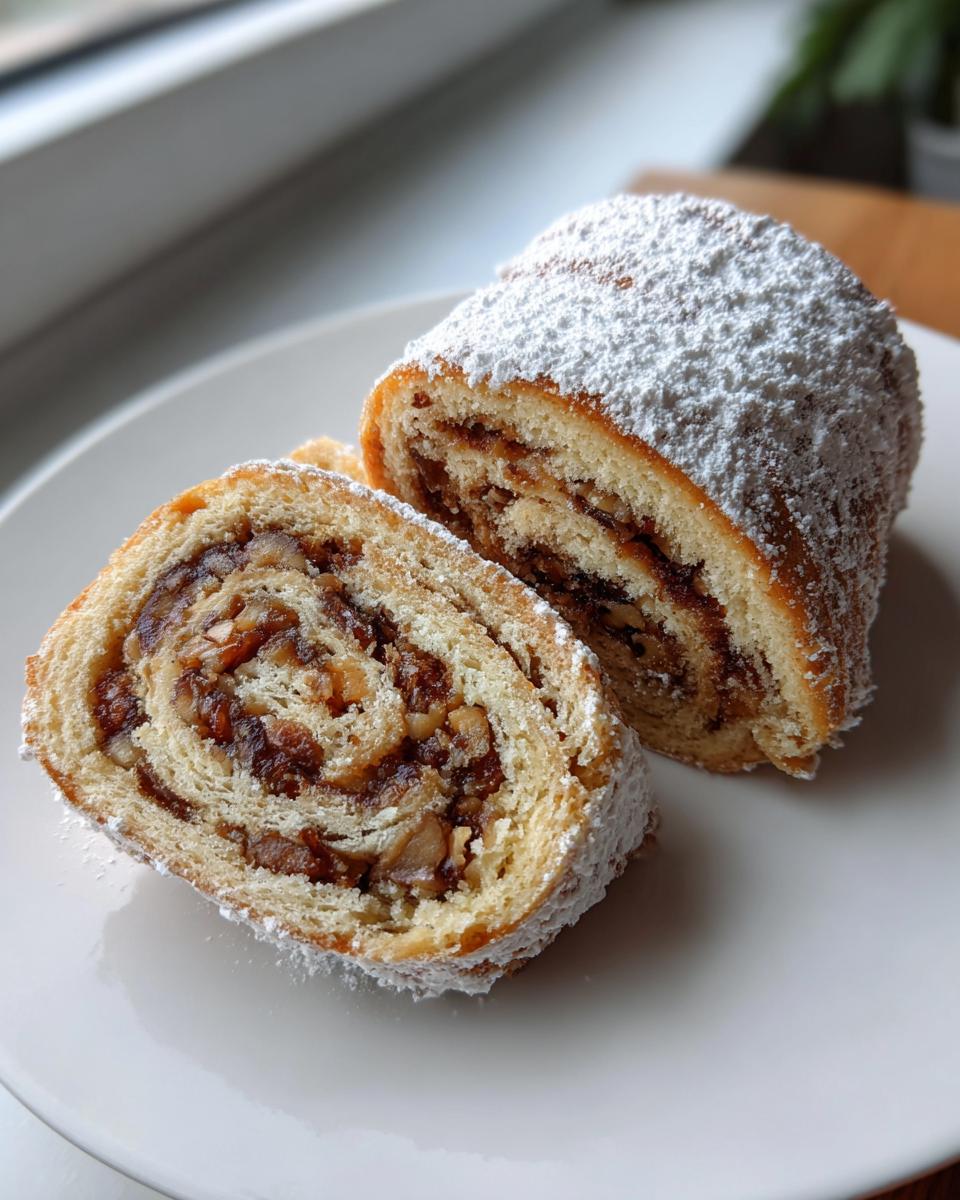
Once they come out, let them hang out on the hot baking sheet for about five minutes. This lets them set up slightly before you move them. Because they are delicate right out of the oven, gently transfer them to a wire rack to cool completely. And here is the finale: Once they are totally cooled down—and I mean *totally* cool, or the sugar will melt into goo—dust them generously, I mean really generously, with powdered sugar. That classic look is what makes these Italian Nut Roll Cookies instantly recognizable!
Don’t forget to check out my guide on easy sugar cookie bars if you need another reliable holiday staple baked up while these are cooling!
Tips for Success When Making Italian Nut Roll Cookies
If you’ve followed my steps so far, you should be on track for amazing, authentic flavor. But even with a streamlined process, sometimes little things trip us up. Since I approach baking like troubleshooting a project, I’ve gathered the crucial points that guarantee your Italian Nut Roll Cookies turn out perfect every single time. These aren’t just suggestions; these are the checkpoints I run through before I even send my dough to the fridge!
Achieving the Right Texture in Your Italian Cookies Recipe
Texture is my favorite part of these buttery pastry cookies, so this is where you pay attention. Remember how I stressed that the butter needs to be soft? If your butter is too warm—liquidy—the sour cream and butter will mix too smoothly without incorporating the air pockets we rely on. That means you get dense, heavy cookies instead of that tender crumb.
Conversely, if you overworked the dough while mixing, it’s already too tight. Do not try to knead it or roll it aggressively when chilled! Treat that chilled dough gently. If it snaps back right away when you roll it, let it sit on the counter for five minutes before continuing. A little patience here prevents a workout and ensures those flaky layers.

Customizing Your Rolled Cookies Dessert
While I swear by the classic walnut and cinnamon filling for authenticity, these rolled cookies dessert are surprisingly forgiving if you want to play around a little. The key is to maintain the same general volume and moisture level in the filling.
- Nut Swap: Pecans are a wonderful substitute for walnuts if you prefer a slightly sweeter nut. You can also mix them, perhaps 1 cup walnuts and ½ cup pecans.
- Flavor Boost: If you want to lean into that festive feeling, definitely add a little orange zest into the filling mixture, just like some of the best bakers do. It brightens up the whole cookie!
- A Little Bit of Jam: Remember how some heritage bakers add a little depth? If you want a surprise of tartness, stir in about 2 tablespoons of seedless raspberry jam right into your nut mixture. Just make sure it’s well incorporated so it doesn’t ooze out while baking.
If you want more ideas for tweaking sweet doughs, check out my guide on my cranberry orange cookies—it gives you a feel for balancing intense flavors!
Storage and Make-Ahead Tips for Italian Nut Roll Cookies
One of the best things about these italian nut roll cookies, especially when scaling up for big holiday cookie recipes, is that they handle make-ahead storage like pros. Nobody wants to be mixing dough the day before the party, right? My goal is always to maximize flavor delivery while minimizing day-of kitchen stress.
So, here’s the great news: you can actually make the dough days ahead of time! Wrap that buttery dough tightly, and it will keep cheerfully in the fridge for up to three days. Since it’s such a tender pastry, keeping it cold makes it firm, which is actually beneficial when you roll it out later, provided you let it warm up just slightly before handling.
But the real game-changer—and the move I use every year—is freezing them before baking. This is how you get that massive production schedule running smoothly! Once you have your logs rolled and sliced into individual cookies, you arrange them on a sheet tray. Stick that whole tray (uncovered) into the freezer until the little rolls are rock solid. Once they’re frozen solid, you transfer them into a heavy-duty freezer bag. They keep beautifully like this for up to three months.
When you need them? Pull out what you want the day before, set them on the counter for about 30 minutes, and then they are ready for egg wash and the oven. It’s like instant fresh-from-the-oven scent!
For already baked cookies, keep them stored in an airtight container at room temperature. Since this dough has sour cream, they stay moist longer than standard shortbread cookies. I find they are even better on day two! If you want inspiration for another freezer-friendly treat, check out my recipe for easy no-bake peanut butter bars; these nut rolls take up the oven space, but the bars don’t!
Serving Suggestions for This Traditional Italian Baked Goods Recipe
So, you’ve got these gorgeous, snowy-dusted italian nut roll cookies cooling perfectly. Now comes the best part: pairing them! These aren’t just any cookie; they are part of the rich tradition of Traditional Italian Baked Goods, and they deserve the right stage presence. My project is never truly complete until the serving suggestion is finalized, because presentation equals enjoyment, right?
These cookies are surprisingly versatile. Because the pastry is buttery and the filling is robust, they pair wonderfully with simple beverages. Forget super sweet sodas; these need something to cut through that richness.
Here are my favorite ways to enjoy these:
- Elevated Coffee Break: A strong, dark roast coffee is the perfect foil for the sweetness of the filling and the richness of the pastry. It’s my go-to afternoon treat.
- After Dinner Delight: Serve them alongside Italian style coffee, like a perfectly made espresso or a cappuccino. The contrast between the hot drink and the cool, crumbly cookie is just fantastic.
- The Holiday Platter: These cookies look amazing piled high next to something lighter, like fresh biscotti or a simple fruit tart. They stand up well on a platter and don’t collapse under the weight of other treats.
If you’re looking for a larger Italian dessert to anchor the table, consider making my Italian Love Cake alongside these cookies. It’s a different flavor profile, but it keeps that beautiful, authentic Italian theme running through your whole dessert spread. Honestly, once you bake these, they become a permanent fixture for any celebration!
Frequently Asked Questions About Italian Nut Roll Cookies
I know you might have a few leftover questions after running through the process. When you’re aiming for that perfect, reliable result, asking the right questions matters! This is where we iron out the final details to make sure your italian nut roll cookies are the best batch yet. Think of this as our final quality check before we deem the project complete. If you’ve mastered these concepts, you know you’ve got a solid foundation, just like when tackling something deep-fried and delicious like my apple fritter recipe.
Can I use pecans or almonds instead of walnuts for the filling?
Yes, absolutely! While the classic filling calls for walnuts, this is where you customize to your taste. Pecans will give you a slightly sweeter, softer nut flavor, making it a fantastic variation for an easy nut roll recipe. Almonds work well too, but they tend to be a bit harder, so make sure you grind them finely, just like we talked about for the walnuts. The key is maintaining that dry-ish, spreadable consistency when mixed with the sugar and cinnamon.
My rolled cookies spread too much while baking. What went wrong?
That’s usually a temperature or handling issue, and it drives me crazy when it happens! If your tender filled cookies spread out flat, it almost always means one of two things. First, your butter in the dough was too warm when you mixed it, which prevents the structure from setting during the chill time. Second, you might not have chilled the dough long enough, or maybe you let the rolled logs sit at room temperature for too long before they hit the oven. A solid two-hour chill, minimum, keeps everything tight. If you follow my steps exactly, you should end up with perfectly upright cookies, which is what you want in the best nut roll recipe.
Do I really need to use an egg wash? Can I skip it?
You can technically skip it, but I wouldn’t recommend it if you want that beautiful presentation we are aiming for in traditional Italian baked goods. The purpose of the egg wash (just one egg beaten lightly) is purely visual; it gives the top crust that signature golden sheen and helps the final dusting of powdered sugar adhere nicely. If you are in a huge rush and can’t spare the minute, you can dust them with powdered sugar immediately after they come out of the oven to help anchor the sugar, but the finish isn’t quite the same.
How do I make sure the filling stays inside the roll?
This is a classic concern for any rolled dessert! The main thing is that border you leave on one side when spreading the filling—I specified about half an inch. That border is your seal. After you roll the dough tightly, you need to really pinch that seam together firmly. Don’t be shy! If you are worried about it holding during baking, you can gently roll the seam side down onto the floured board for a second to really seal it before slicing. For a detailed look at the rolling technique, you can check out this reference about Italian Nut Roll Cookies.
If you didn’t chill the dough long enough, the filling might squeeze out the ends when you slice, since the dough is too soft. That chilling process is your failsafe against leakage!
Can I use this recipe to make full-sized nut rolls instead of cookies?
That’s a great question for using these flavors in a larger format! You absolutely could adapt the concept. If you roll the dough out much larger, perhaps into two long rectangles instead of dividing it into four small ones, you’ll get a true Nut Roll loaf. You’ll need proportionally more filling, of course. Just remember that baking time will drastically increase—we are baking cookies for 18 minutes, but a full loaf might take an hour or more at 350°F. Keep that in mind if you try to scale this Buttery Pastry Cookies method up into a full loaf!
Estimated Nutritional Data for Italian Nut Roll Cookies
As someone who approaches recipes using a precise, project-manager mindset, I always include the estimated nutritional breakdown. It’s about transparency, right? We need to know what we’re dealing with when baking these incredibly moreish italian nut roll cookies. Keep in mind, these figures are estimates derived from the core ingredients listed, assuming standard measurements of flour, butter, and sugar. If you switch to pecans or add a jam swirl, your totals will shift!
This data is calculated assuming the yield divides evenly into about 36 cookies, making each one a perfect, manageable bite of tradition.
- Serving Size: 1 cookie
- Calories: 180
- Sugar: 10g
- Fat: 12g (6g Saturated Fat)
- Carbohydrates: 16g
- Protein: 3g
- Cholesterol: 30mg
This is why they taste so rich—hello, butter content! But because we are making these at home, we control exactly what goes in, unlike many store-bought classic Italian desserts. If you’re looking to reduce the sugar slightly, you can try reducing the sugar in the filling by a tablespoon or two, but be careful not to alter the structure too much. Enjoy them responsibly!
Share Your Homemade Italian Nut Roll Cookies Creations
Now that you’ve gone through the process—from sourcing the best walnuts to making sure that dough was perfectly chilled—it’s time for the reveal! I truly believe that when you follow a streamlined process for italian nut roll cookies like this, the results are spectacular. That tender, buttery pastry wrapping around that spiced filling is seriously something to brag about.
I want to know how this system worked for you! Did you find that chilling the dough made rolling so much easier? Did you customize your filling or stick to the classic walnut? Don’t keep that delicious genius all to yourself!
Please take a moment to rate this recipe using the five-star system right below if you enjoyed making these Classic Italian Desserts. Your feedback helps me fine-tune the project flow for everyone else looking for a reliable baking plan.
And if you took photos—and you absolutely should have!—tag me on social media! Seeing your perfectly dusted, rolled, and sliced cookies is the best reward for all this planning. If you loved the ease of this recipe, you might also want to give my guide to the chocolate cinnamon rolls a look; it’s another sweet project gone right!
PrintAuthentic Italian Nut Roll Cookies

Make classic Italian nut roll cookies featuring a tender, buttery pastry wrapped around a sweet, spiced walnut filling. This recipe is straightforward for reliable, delicious holiday baking.
- Prep Time: 45 min
- Cook Time: 18 min
- Total Time: 63 min
- Yield: About 3 dozen cookies 1x
- Category: Dessert
- Method: Baking
- Cuisine: Italian
- Diet: Vegetarian
Ingredients
- 2 ½ cups all-purpose flour
- 1 cup (2 sticks) unsalted butter, softened
- 1 cup sour cream
- 1 egg yolk
- ½ teaspoon salt
- 1 tablespoon sugar
- 1 ½ cups finely ground walnuts
- ½ cup granulated sugar (for filling)
- 1 teaspoon ground cinnamon
- 1 tablespoon melted butter (for filling)
- 1 beaten egg (for egg wash)
- Powdered sugar (for dusting)
Instructions
- Prepare the dough: Combine flour, softened butter, sour cream, egg yolk, salt, and 1 tablespoon of sugar in a bowl. Mix until a soft dough forms. Do not overmix.
- Wrap the dough in plastic and chill in the refrigerator for at least 2 hours.
- Prepare the sweet nut filling: Mix the ground walnuts, ½ cup granulated sugar, cinnamon, and 1 tablespoon melted butter until combined.
- Preheat your oven to 350°F (175°C). Line baking sheets with parchment paper.
- Divide the chilled dough into four equal parts. Work with one part at a time, keeping the rest refrigerated.
- On a lightly floured surface, roll one dough portion into a thin rectangle, about 1/8 inch thick.
- Spread one-quarter of the nut filling evenly over the rolled dough, leaving a small border on one long edge.
- Starting from the long edge opposite the border, tightly roll the dough into a log. Pinch the seam closed.
- Brush the outside of the log lightly with the beaten egg wash.
- Slice the log into 1-inch thick pieces to form the individual cookies. Place them cut-side up on the prepared baking sheets.
- Repeat the rolling and slicing process with the remaining dough and filling.
- Bake for 15 to 18 minutes, or until the edges are lightly golden.
- Remove cookies from the oven and let them cool slightly on the baking sheet before transferring them to a wire rack to cool completely.
- Once cool, dust generously with powdered sugar.
Notes
- Use finely ground walnuts for the best texture in the sweet nut filling.
- For a festive look, you can add a small amount of raspberry jam to the filling mixture.
- These buttery pastry cookies freeze well before baking; place them on a tray, freeze until solid, then transfer to a freezer bag.
Nutrition
- Serving Size: 1 cookie
- Calories: 180
- Sugar: 10
- Sodium: 55
- Fat: 12
- Saturated Fat: 6
- Unsaturated Fat: 6
- Trans Fat: 0
- Carbohydrates: 16
- Fiber: 1
- Protein: 3
- Cholesterol: 30