
If you’ve been scrolling through dessert trends lately, you know one thing is taking over: the dramatic, rustic look of the Basque Burnt Cheesecake. It looks intimidating, right? Like something only a fancy Spanish pastry chef could pull off. Well, I’m Leo Grant, and that’s exactly the kind of complexity I erase from my projects. I engineered this approach because, frankly, no one has time for fussy water baths and tedious shortbread crusts on a Tuesday night.
Trust me when I say this is *the* Basque Burnt Cheesecake Recipe you need. We are skipping the crust entirely, ditching the scary water bath setup, and focusing only on the core ingredients that give you that incredible, luxurious, velvety center and that deeply caramelized top. This is smart baking: maximum flavor payoff for minimum kitchen stress. You absolutely can create this stunning dessert without dedicating your whole afternoon to it.
- Why This Basque Burnt Cheesecake Recipe Works for Busy Cooks
- Gathering Ingredients for Your Basque Burnt Cheesecake
- The Easy Burnt Cheesecake Tutorial: Step-by-Step Instructions
- Achieving the Perfect Velvety Cheesecake Center: Cooling and Chilling
- Tips and Tricks for Rustic Cheesecake Baking Success
- Serving Suggestions for Your Impressive Dessert Ideas
- Storage and Reheating Instructions for Basque Burnt Cheesecake
- Frequently Asked Questions About Crustless Cheesecake Baking
- Sharing Your Basque Burnt Cheesecake Creations
Why This Basque Burnt Cheesecake Recipe Works for Busy Cooks
For me, a good recipe is an optimized one. This Basque Burnt Cheesecake Recipe strips away every unnecessary step, making it perfect for the busy home cook who wants an impressive result without the fuss. We’re cutting corners that don’t affect the outcome, which is exactly the Dishicious philosophy in action.
Here’s why this method is reliable and efficient:
- No Crust Necessary: We eliminate the entire process of making and blind-baking a crust. That’s huge time savings right there!
- Zero Water Bath Drama: Forget carefully wrapping your pan in foil and balancing it over hot water. This recipe relies on high heat for that signature burn and relies on us to check for the wobble.
- Simple Ingredient Focus: The flavor profile comes from high-quality dairy and simple sugar ratios. No strange extracts or obscure Spanish spices needed.
- Trustworthy Results: Because we aren’t relying on fragile techniques, you get a consistently creamy cheesecake recipe result every time you bake it. Check out my sugar cookie bars—simple recipes are always the most rewarding.
Gathering Ingredients for Your Basque Burnt Cheesecake
Okay, for this version of the Basque Burnt Cheesecake, we keep the ingredient list lean, which is fantastic for speed. We are skipping the flour-heavy crust, which cleans up our ingredient prep immediately. However, the quality and temperature of your dairy are non-negotiable here. This is where the trust factor—the E-E-A-T—comes in. If your cream cheese is cold, you’ll end up with lumps, and we want smooth, decadent texture, not lumps!
Here is what you need on your counter:
- 900g cream cheese
- 225g mascarpone cheese
- 300g granulated sugar
- 5 large eggs plus 2 large egg yolks
- 500ml heavy cream
- 1 teaspoon vanilla extract
- 1/2 teaspoon fine sea salt
- 1 tablespoon all-purpose flour
If you’re not used to my methods, check out the tips for creaming butter in my brown butter cookie recipe; the principle for soft dairy is the same!
Ingredient Clarity and Preparation Notes
This needs to be emphasized: every single dairy item—the cream cheese, the mascarpone, and especially the five eggs and two yolks—must come fully to room temperature. I mean, pull them out a good two hours before you plan to mix. Room temperature dairy blends into a silky puddle, which is exactly what we want for this creamy cheesecake recipe.
While we aren’t mixing yet, make sure your parchment paper game is strong. We need two sheets overlapping in your springform pan, extending way up the sides. Trust me, this high rim is essential for letting the top burn correctly and creating that amazing, rustic, craggy edge while protecting the sides of your crustless cheesecake baking project.
The Easy Burnt Cheesecake Tutorial: Step-by-Step Instructions
Now we get to the fun part—the actual assembly of what I promise will be The Best Basque Cheesecake you’ve ever made. Since we stressed room temperature ingredients earlier, this whole process moves quickly. We are aiming for speed and smoothness here, not whipping air into the mixture like a traditional cheesecake. If you’ve mastered rolling out pastry, you’ll sail through this part; it’s easier than making my chocolate cinnamon rolls!
Preparing the Pan and Preheating
First, let’s get that oven roaring. Set it to 400°F (200°C). While it heats up, take those two sheets of parchment paper and press them into your 8-inch springform pan. They absolutely must overlap and stick up high over the edges—we want that tall, crinkly, rustic effect. This parchment is doing all the heavy lifting for us, so don’t be shy folding it in!
Mixing the Creamy Cheesecake Recipe Batter
Grab your electric mixer on medium speed. You want the room-temp cream cheese and mascarpone beaten together until they look smooth—stop and scrape down the sides. Add the sugar next, mixing just until that gritty texture disappears. Here’s the key for that velvety cheesecake center: add the five eggs and two yolks one by one, mixing only enough after each addition until it’s *just* incorporated. Then, slowly stream in the heavy cream, salt, flour, and vanilla. The batter will look shockingly thin. Seriously, don’t panic! This thinness is intentional for that gooey texture.
Baking for the Signature Caramelized Top Dessert
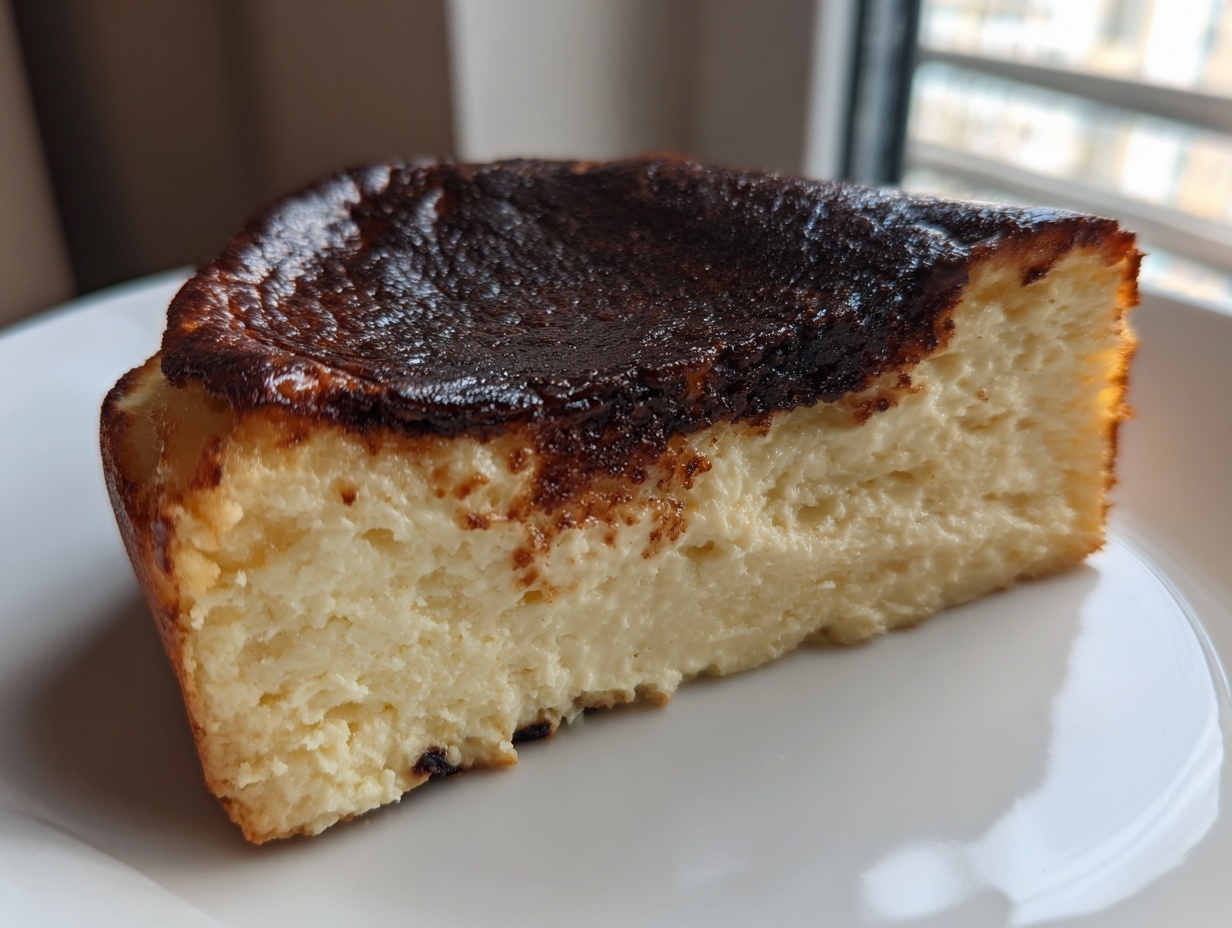
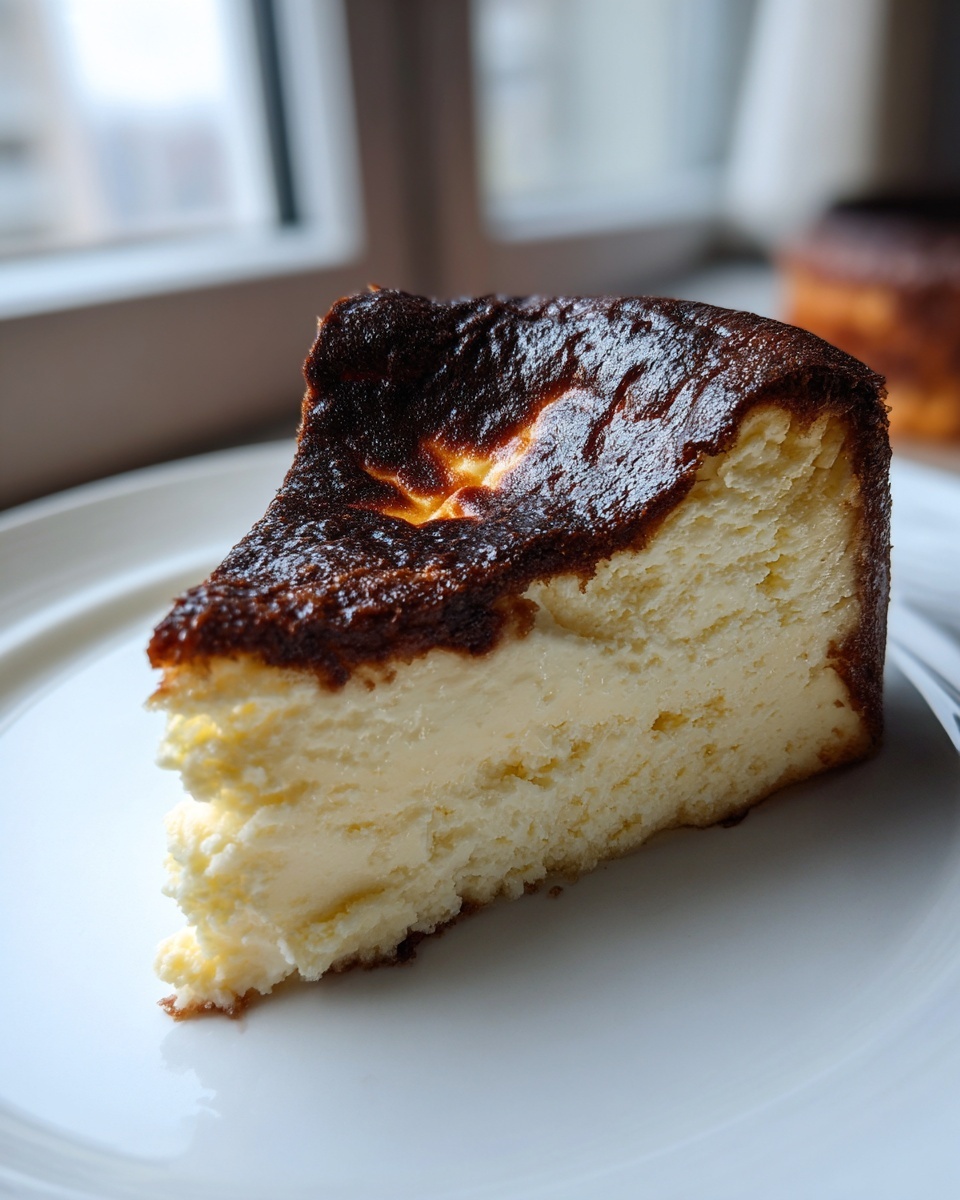
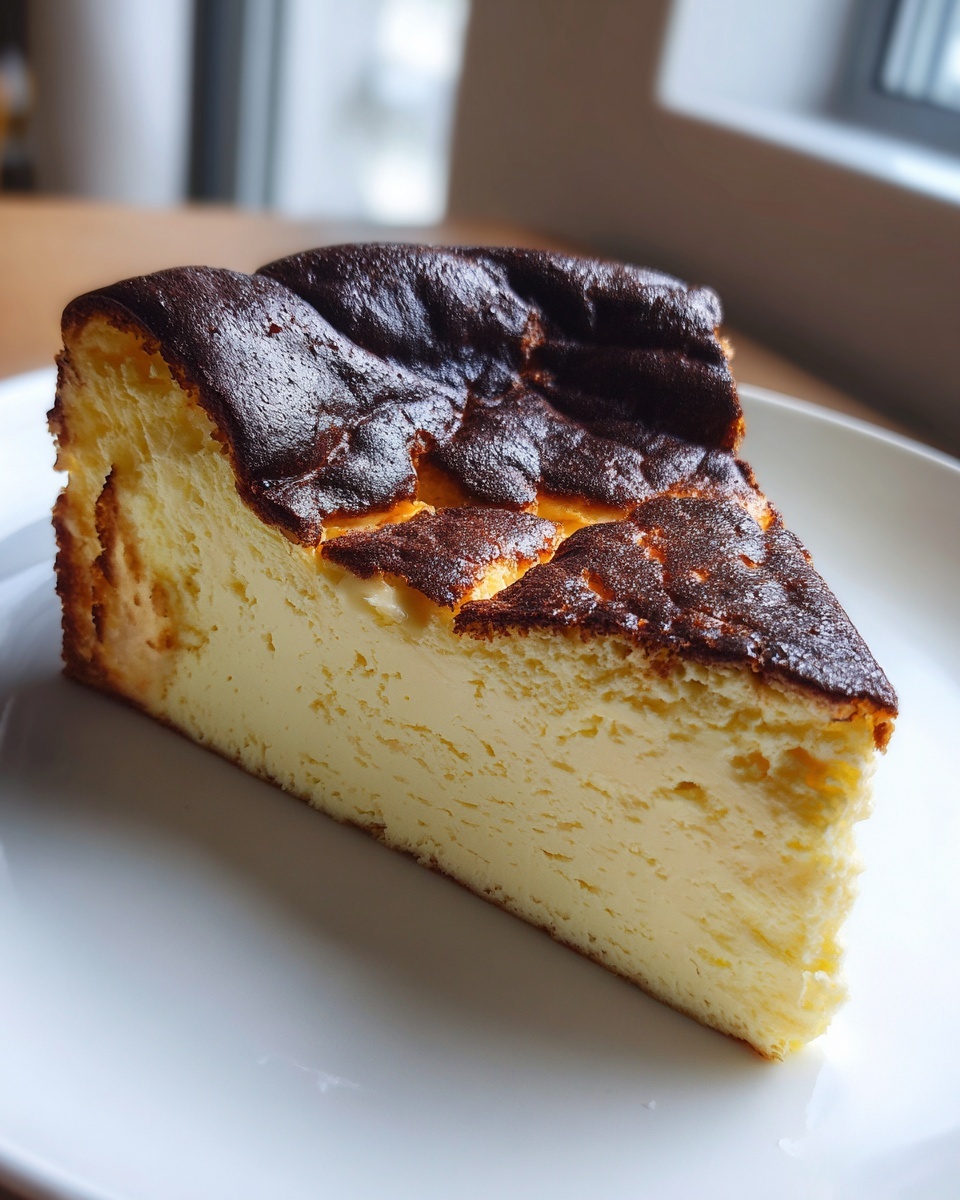
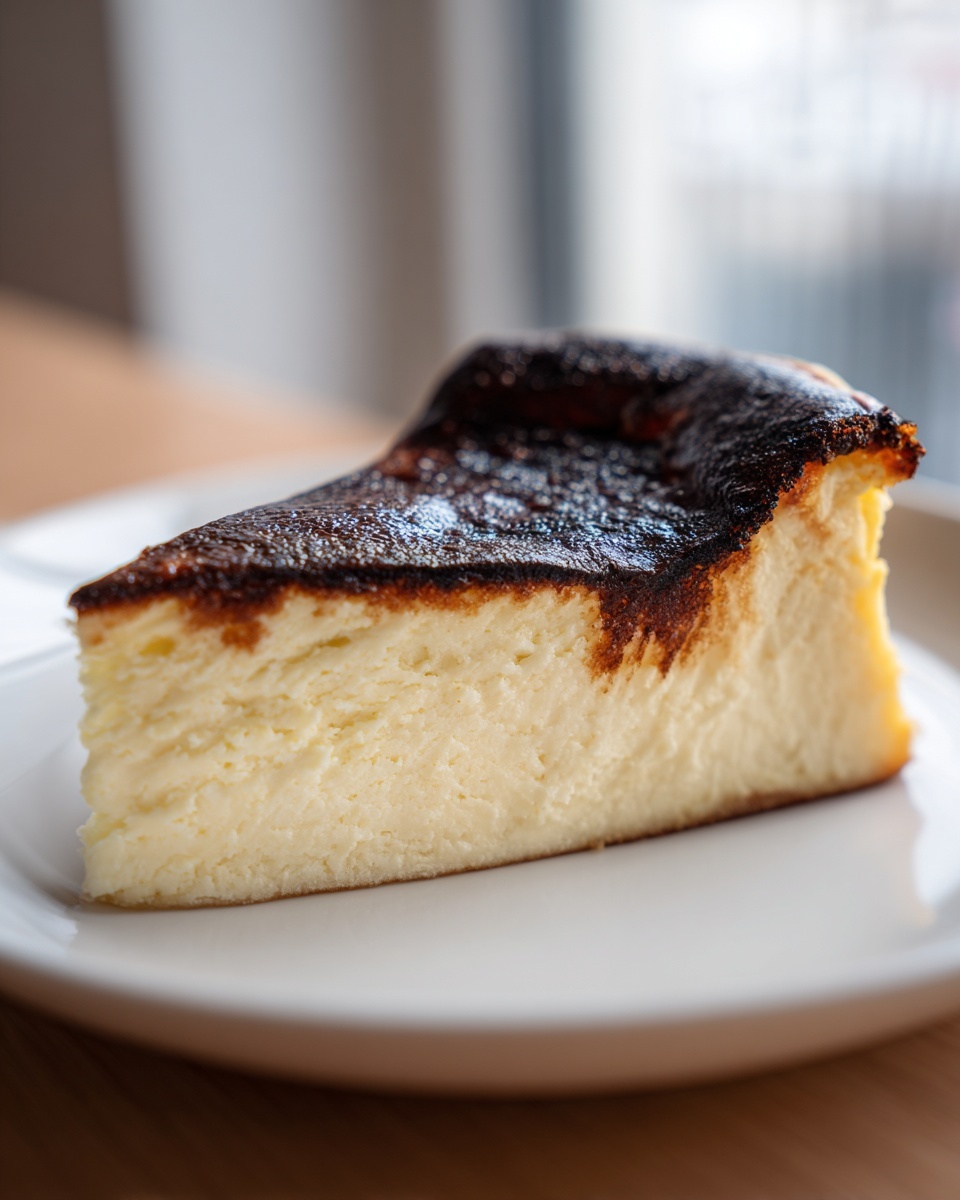
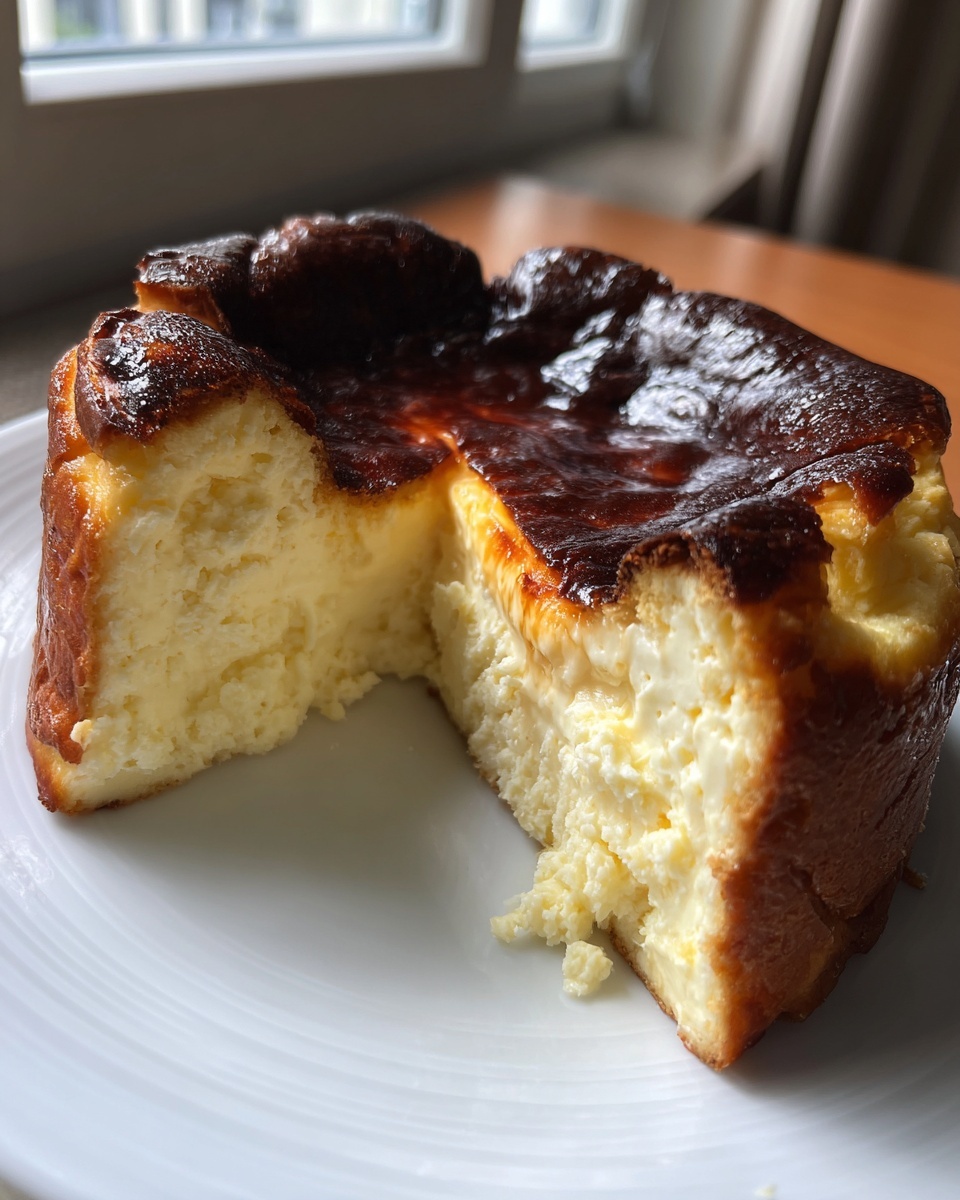
Pour that thin batter into your prepared pan. Now, it goes into the hot oven for about 50 to 60 minutes. You are aiming for major color here. I’m talking deeply caramelized, almost black in spots on the top—that’s the signature of a true Basque Burnt Cheesecake. The center must still have a significant wobble when you pull it out. A solid wobble means you nailed the high-heat bake for that perfect caramelized top dessert experience.
Achieving the Perfect Velvety Cheesecake Center: Cooling and Chilling
You pulled it out of the oven, it’s deeply scorched on top, and it’s wobbling like nobody’s business. Congratulations, you’ve created the visual feast that is a Basque Burnt Cheesecake! But here is where most new bakers mess up: they try to eat it immediately. We have to respect the setting process. This cooling stage is just as crucial as the high-heat bake for getting that creamy, almost custard-like interior.
Do not be tempted to touch it or move it to the fridge right away. We need a slow, gentle temperature transition. This slow cooling allows the internal structure, which looks liquid right now, to gradually solidify into that beautiful velvety cheesecake center we’re aiming for. If you shock it by putting it straight into the cold, the outside contracts too fast, and you can end up with a dense, rubbery texture instead of luscious cream.
Let it sit right on the wire rack at room temperature for a minimum of three hours. Seriously, set a timer. During this time, it will deflate in the middle—and that’s a good thing! That sinking is what separates a perfect Basque Burnt Cheesecake from a puffy cake that cracks everywhere.
Once it’s completely cool to the touch, this dessert needs a solid chill session. I insist on chilling it for at least six hours, but honestly, overnight is the magic number. This extended chill time firms up the texture beautifully. Think of it like aging fine cheese—it just gets better sitting there quietly in the cold. If you need a refresher on handling delicate textures, check out my custard pie guide; the patience required is similar.
When you’re ready to serve your crustless cheesecake baking success, pull it out of the fridge about 30 minutes before cutting. This allows the chill to soften just enough for maximum silkiness on the palate.
Tips and Tricks for Rustic Cheesecake Baking Success
You’ve mastered the main bake, but now let’s talk tweaks. That’s what separates a standard recipe from one that you bake again and again. Since we are aiming for that beautiful, unstructured, rustic cheesecake baking look, small adjustments make a big difference in the final bite. I’m not one for fussy garnishes, but I do have a couple of essential tricks up my sleeve for ensuring you get the exact texture you want from your Basque Burnt Cheesecake.
If you’re craving something that feels a bit fresher after sitting in the fridge, you have a simple option. For a texture that leans more toward a light, airy soufflé—very different from the dense, chilled version—let the cake sit out at room temperature for about 30 minutes before slicing. It warms up just slightly on the edges and the center loosens up wonderfully. It’s a totally different experience!
Baking the Basque Burnt Cheesecake in a Loaf Pan
I totally get it; sometimes you don’t have that 8-inch springform pan, or maybe you just want a smaller, more giftable dessert. Guess what? You can absolutely bake this recipe in a standard 9×5 inch loaf pan. This is one of those little hacks that makes baking flexible for busy life. You still need to line it thoroughly with parchment paper, making sure the paper sticks up high above the edges, just like we did for the round pan. We need that paper to create the structure of the sides!
The main difference here is timing. Because the loaf pan is deeper than the standard 8-inch springform, the heat takes a little longer to penetrate the very center of the batter. You might need to add an extra 5 to 10 minutes to the total bake time. Keep watching for that deep black burn on top and that still significant wobble in the middle. If you’re exploring this method, check out Claire’s excellent take on baking the Basque Burnt Cheesecake in a loaf pan for visual guidance on the parchment setup.
And hey, if you want something cool but totally different after all that rich dairy, try whipping up a batch of my five-ingredient banana ice cream!
Serving Suggestions for Your Impressive Dessert Ideas
Okay, you’ve successfully executed the Basque Burnt Cheesecake. It looks like a beautiful, scorched masterpiece, and the center is perfectly creamy—now what? Resist the urge to drown this flavor bomb in heavy toffee or complicated sauces. This Spanish cheesecake is already incredibly rich and decadent thanks to all that cream cheese and heavy cream. Overcomplicating the topping ruins the elegant simplicity that makes the burnt basque cheesecake so popular.
We want pairings that cut through that richness or simply let the flavor shine. Think of it as the perfect ending to a big dinner party.
For the absolute easiest, most elegant presentation, a simple dusting of powdered sugar right before serving is all you need. It gives a nice visual contrast against that dark, caramelized top. It’s simple, fast, and totally on brand for our streamlined approach.
If you want a little freshness to balance the intensity, berries are your best friend. A medley of fresh raspberries and perhaps a few sliced strawberries work wonders. Their slight tartness cleanses the palate after a rich bite. You could also consider a very light drizzle of something bright, like a homemade blueberry sauce, but keep it modest—maybe just spooning it onto the plate rather than over the whole cake. If you’re looking for other easy pairings that work with rich desserts, I’ve got a great one for scooping soup in my bread bowl recipe, but for this, we keep it delicate!
If you’re looking for visual inspiration on plating this up beautifully, you should see how folks present their versions over at Southern Rambles—they often keep the garnishes classic and focused, which is really inspiring for making this an impressive dessert idea.
Storage and Reheating Instructions for Basque Burnt Cheesecake
Since this Basque Burnt Cheesecake relies on maximizing that creamy texture, storage is all about patience and temperature control. Unlike a traditional, fussy cheesecake, this dessert actually gets better after a few days in the fridge, provided you store it correctly. But you can’t just slam it in there wrapped in plastic wrap and hope for the best!
Once you’ve cut into it, the open top is exposed to all the smells and drying air in your refrigerator. To manage this, I always cover the remaining cake loosely with plastic wrap only after it has chilled completely and perhaps sat for a day. If you wrap it tight immediately, you might trap moisture that softens the beautiful burnt exterior too much. Don’t worry too much about the top getting a little less dark during storage; that’s normal for any crustless cheesecake baking project.
This decadent dessert holds up really well in the refrigerator for about four to five days. It stays incredibly creamy. If you’re hosting a big party and made it a day ahead, that’s perfect timing, as it will be perfectly set and chilled. If you are storing leftovers, make sure you use parchment paper on the cut sides to keep them from drying out, kind of like how you’d wrap leftover oatmeal cookies to keep them soft.
Now, the big question: how do you serve it after it’s been chilled? Remember earlier when I told you to let it sit on the counter for 30 minutes? That rule still applies after storage! You never want to eat this straight from an overnight chill. Pull the remaining cheesecake out of the fridge at least 30 minutes before you plan to serve it. This allows the dairy fats to relax just slightly, bringing back that gorgeous, yielding, velvety cheesecake center we worked so hard to achieve. If you try to slice a rock-hard, fully chilled piece, it won’t deliver that melt-in-your-mouth experience.
Frequently Asked Questions About Crustless Cheesecake Baking
Look, I know you’ve followed the steps for this Basque Burnt Cheesecake Recipe, but sometimes questions pop up when you look at that wobbly center or that dark top. That’s totally normal! As a strategist in the kitchen, my job is to anticipate these points so you feel 100% confident. We want your crustless cheesecake baking project to result in perfection, every time.
Is it normal for the Basque Burnt Cheesecake to sink?
Yes, absolutely! If yours *doesn’t* sink, you might have actually overbaked it slightly, though it will still be delicious. That dramatic deflation right in the middle—going from puffed-up and wobbly out of the oven to a sunken center while cooling—is fundamental to this dessert. It’s how the rich interior settles into that dense, luxurious, almost molten velvety cheesecake center. Don’t try to prop it up or correct it; that sinking is the sign of a job well done, proving you achieved that high-heat caramelization without solidifying the middle too soon. It’s part of the charm of this gorgeous, rustic cheesecake baking style!
Can I use regular cream cheese instead of mascarpone in this Creamy Cheesecake Recipe?
That’s a great question about substitutions! The combination of both cream cheese and mascarpone is what gives this structure its unique richness because mascarpone is higher in fat. If you absolutely must skip the mascarpone, you can substitute it with more cream cheese. However, you’ll want to adjust the ratio slightly to maintain the batter’s overall consistency. Since we used 900g cream cheese and 225g mascarpone, if you replace the mascarpone entirely, go up to about 1100g or 1125g of cream cheese total. Keep the eggs and cream the same. Just be aware: going 100% cream cheese might make the final texture ever-so-slightly firmer when chilled, but it will still be a fantastic, decadent Spanish Cheesecake Recipe!
If you’re making other dairy swaps, remember to check out my approach to simplifying classics like keto chicken parm—simplification is key!
For a different take on cheesecake texture entirely, check out the authentic details on the San Sebastian style over at The Spanish Apron that might answer other questions you have about traditional preparations.
Sharing Your Basque Burnt Cheesecake Creations
This is it—you’ve reached the end of the line for this project, and I hope you’re standing back admiring that gorgeous, deeply burned, beautifully rustic dessert! That’s the magic of the Basque Burnt Cheesecake. You didn’t need a fancy setup or complex mastering skills; you needed good ingredients and a hot oven. See? Smarter, not harder, always wins.
Listen, as a home cook optimizing things, the final confirmation of success is seeing you all nailing it. When you finish up your big, beautiful, crustless dream cake, I absolutely want to see the results. Did you get that perfect caramelization? Is the center that luxurious, almost pudding-like texture we aimed for?
When you’ve sliced into it and served up those impressive dessert ideas, please jump back here and leave a rating for the recipe. It helps other busy people trust that they can achieve this too, the easy way. Your feedback really matters to me here at Dishicious.
If you’ve snapped a photo of your creation—especially if you tried serving it chilled versus at room temperature—share it out on social media and tag us! Seeing your success is what makes all this kitchen optimization worthwhile. It proves that something this decadent truly can be one of your simplest, most reliable recipes.
For another impressive but totally straightforward dinner ender, you’ve got to try my creamy chicken tortilla soup recipe next time you need something comforting that doesn’t require a whole weekend.
And if you’re still craving that Spanish flavor profile, you might want to see how the pros handle this dessert over at Dawiy’s site, where they have another great take on the core burnt basque cheesecake recipe, just for comparison!
PrintEasy Basque Burnt Cheesecake Recipe: Creamy Center, No Water Bath

Make the best Basque Burnt Cheesecake with this straightforward recipe. You get a rich, velvety interior and the signature caramelized top without needing a water bath or crust.
- Prep Time: 15 min
- Cook Time: 60 min
- Total Time: 7 hours 15 min
- Yield: 10 servings 1x
- Category: Dessert
- Method: Baking
- Cuisine: Spanish
- Diet: Vegetarian
Ingredients
- 900g cream cheese, room temperature
- 225g mascarpone cheese, room temperature
- 300g granulated sugar
- 5 large eggs, room temperature
- 2 large egg yolks, room temperature
- 500ml heavy cream
- 1 teaspoon vanilla extract
- 1/2 teaspoon fine sea salt
- 1 tablespoon all-purpose flour
Instructions
- Line an 8-inch springform pan with two overlapping sheets of parchment paper, allowing the paper to extend high above the rim. This protects the sides and helps create the rustic look.
- Preheat your oven to 400°F (200°C).
- In a large bowl, use an electric mixer on medium speed to beat the room-temperature cream cheese and mascarpone until smooth. Scrape down the sides.
- Add the sugar and mix until just combined and smooth. Do not overmix.
- Beat in the eggs one at a time, mixing only until each egg is incorporated before adding the next. Mix in the egg yolks.
- Slowly mix in the heavy cream, vanilla extract, salt, and flour until the batter is uniform. The batter will be thin.
- Pour the batter into the prepared pan.
- Bake at 400°F (200°C) for 50 to 60 minutes. The top should be deeply caramelized, almost black in spots, and the center should still wobble significantly.
- Remove the cheesecake from the oven. Let it cool completely on a wire rack at room temperature for at least 3 hours. The center will set as it cools.
- Chill the cheesecake in the refrigerator for at least 6 hours, or preferably overnight, before serving for the best texture.
Notes
- For a soufflé-like texture, serve the cheesecake slightly warmer, about 30 minutes after removing it from the refrigerator.
- If you want to bake this in a loaf pan, use a 9×5 inch loaf pan lined with parchment paper and reduce the baking time slightly.
- Ensure all dairy ingredients are at true room temperature to prevent lumps in your batter.
Nutrition
- Serving Size: 1 slice
- Calories: 450
- Sugar: 35g
- Sodium: 150mg
- Fat: 35g
- Saturated Fat: 22g
- Unsaturated Fat: 13g
- Trans Fat: 0g
- Carbohydrates: 28g
- Fiber: 0g
- Protein: 8g
- Cholesterol: 180mg